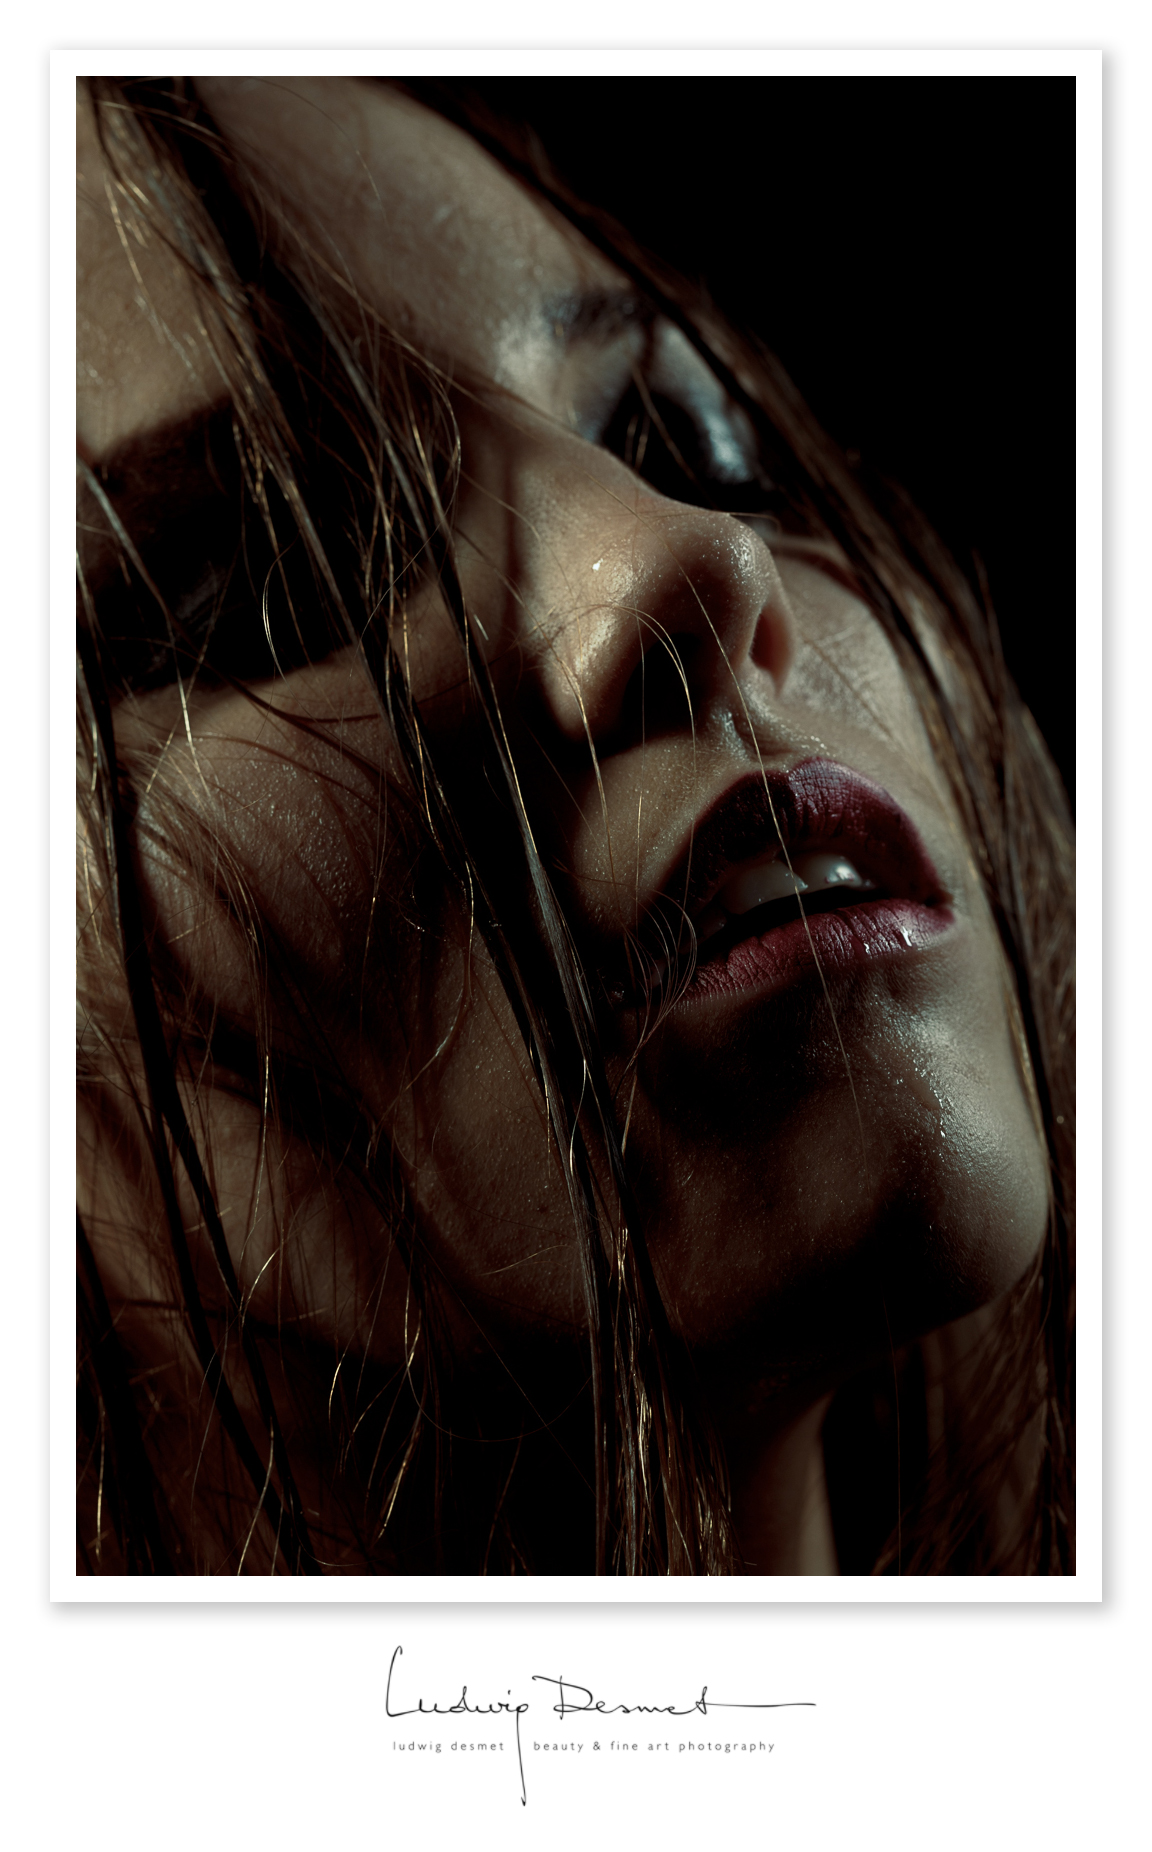
Studio Light setup

studio, studio light setup, Tips and Tricks, Uncategorized

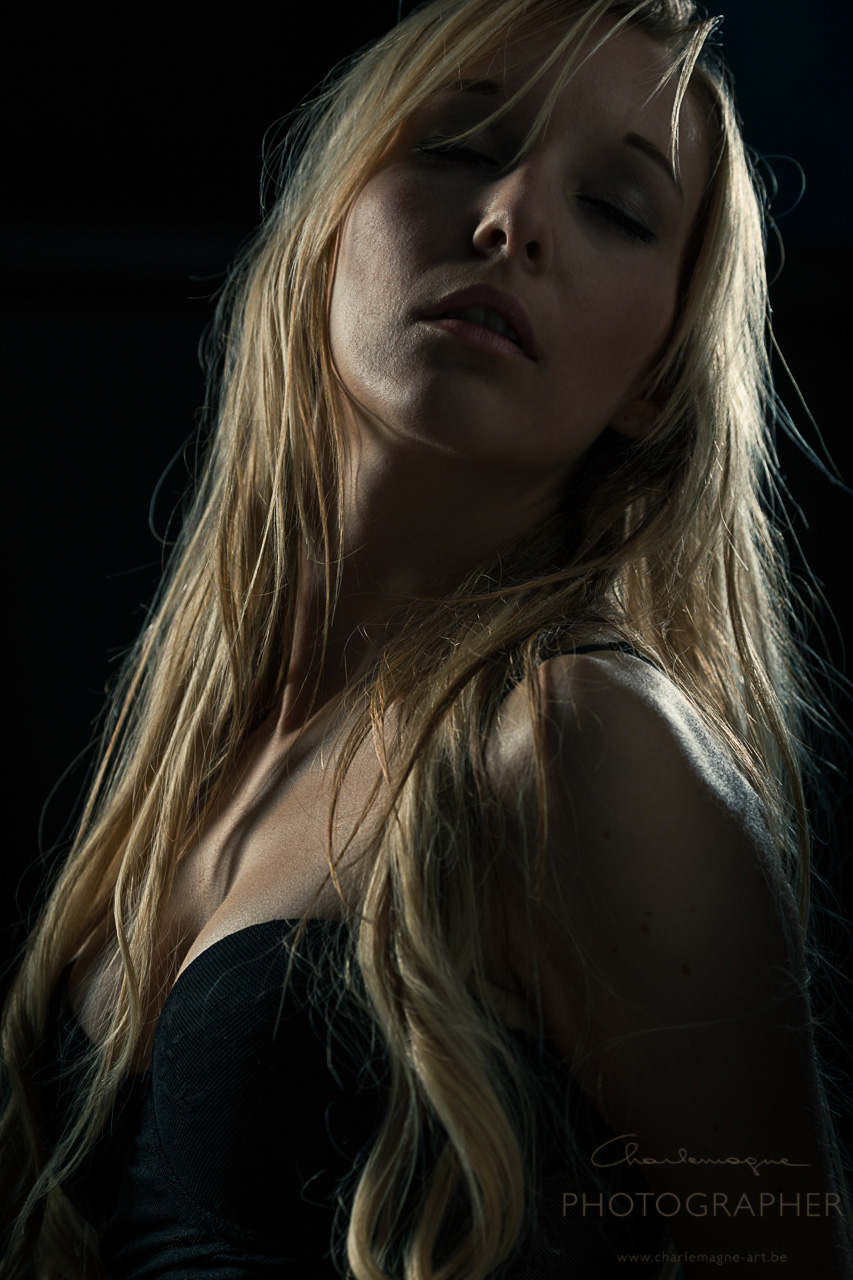
a long time ago I made some studio setup diagrams for this blog, … time to make a new one. First the image, it dates from a while ago, last fall I invited two friends to do some studio work. I rarely use my studio equipment for light, but in winter times it can be handy to have an alternative to available light sometimes.

the image:

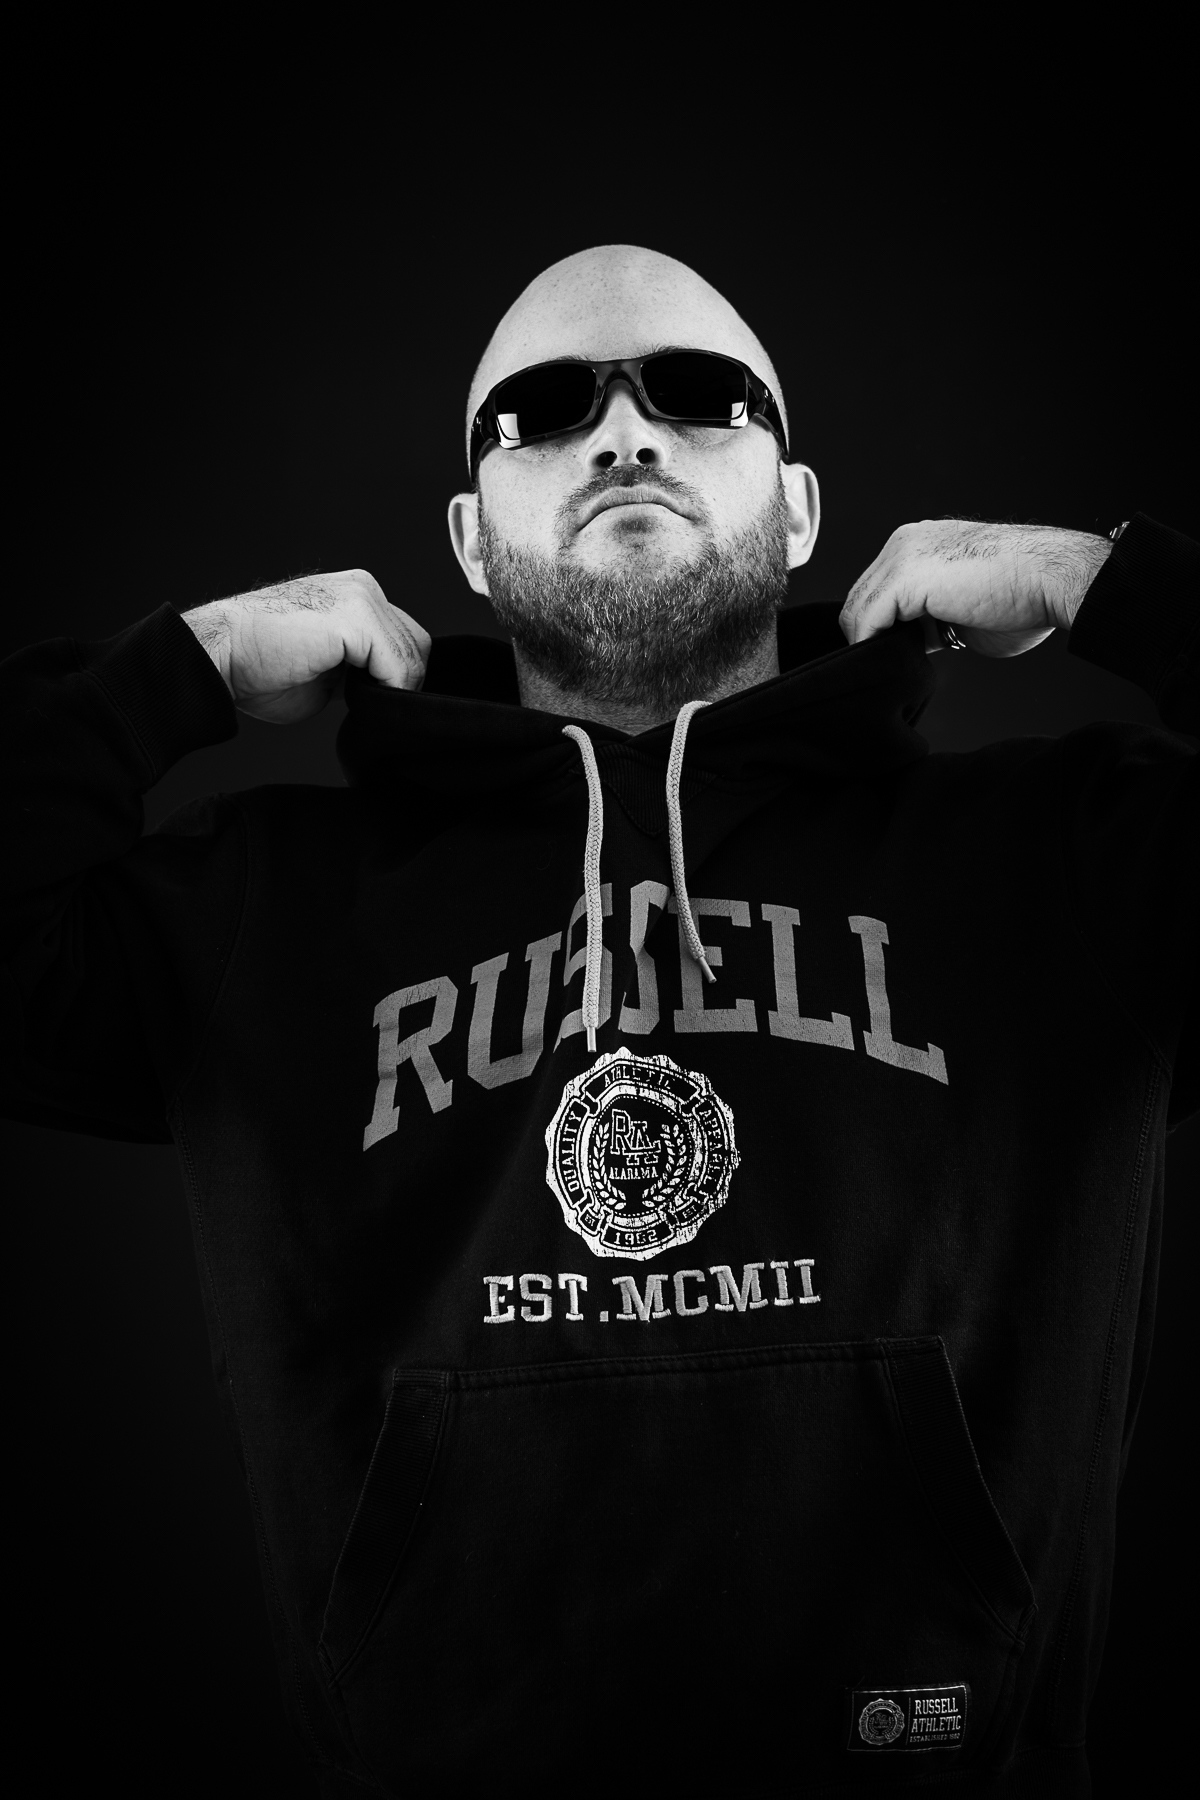
I wanted Steven to get some sort of gangster look, cool looking, hood, sunglasses …

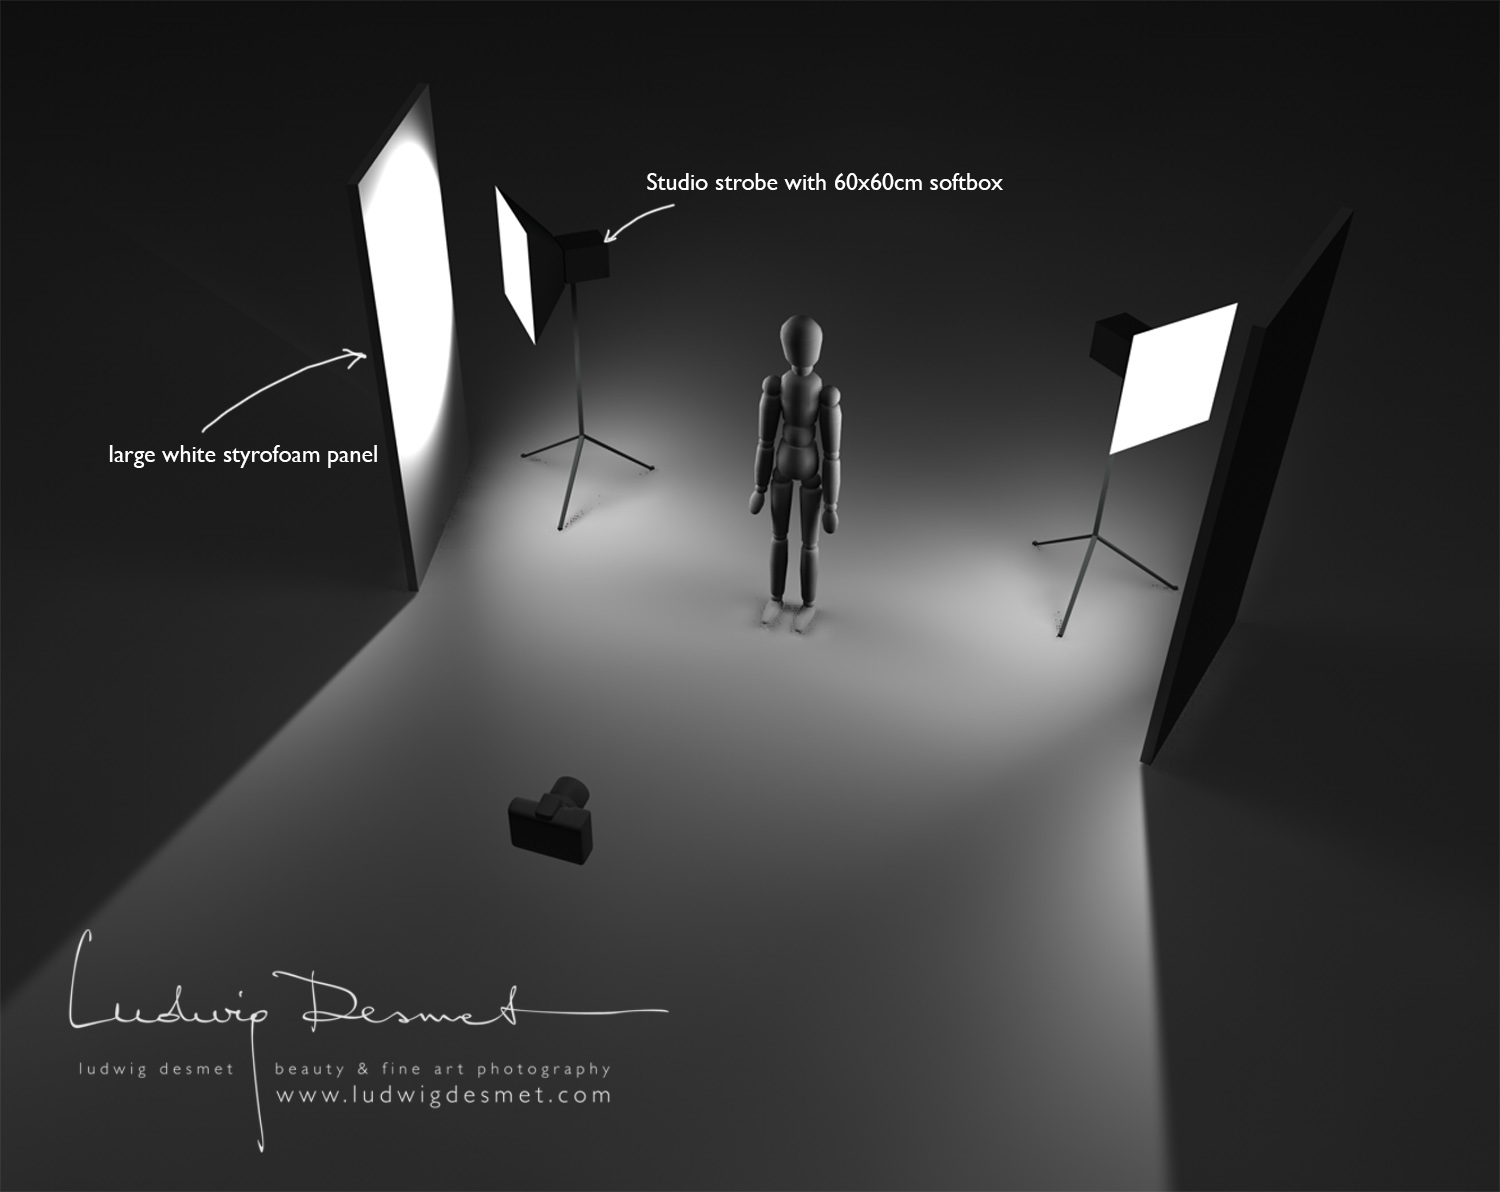
I wanted a soft light and deep shadows under the hood, so I went for some sort of symmetrical light setup, using two studio flashes with 60x60cm softboxes, and two large reflector panels to even enlarge the light source.

The setup:

it was only a matter of finding the good ‘depth’ position of the model, to create just enough light on the face, and keep the light only on the front.

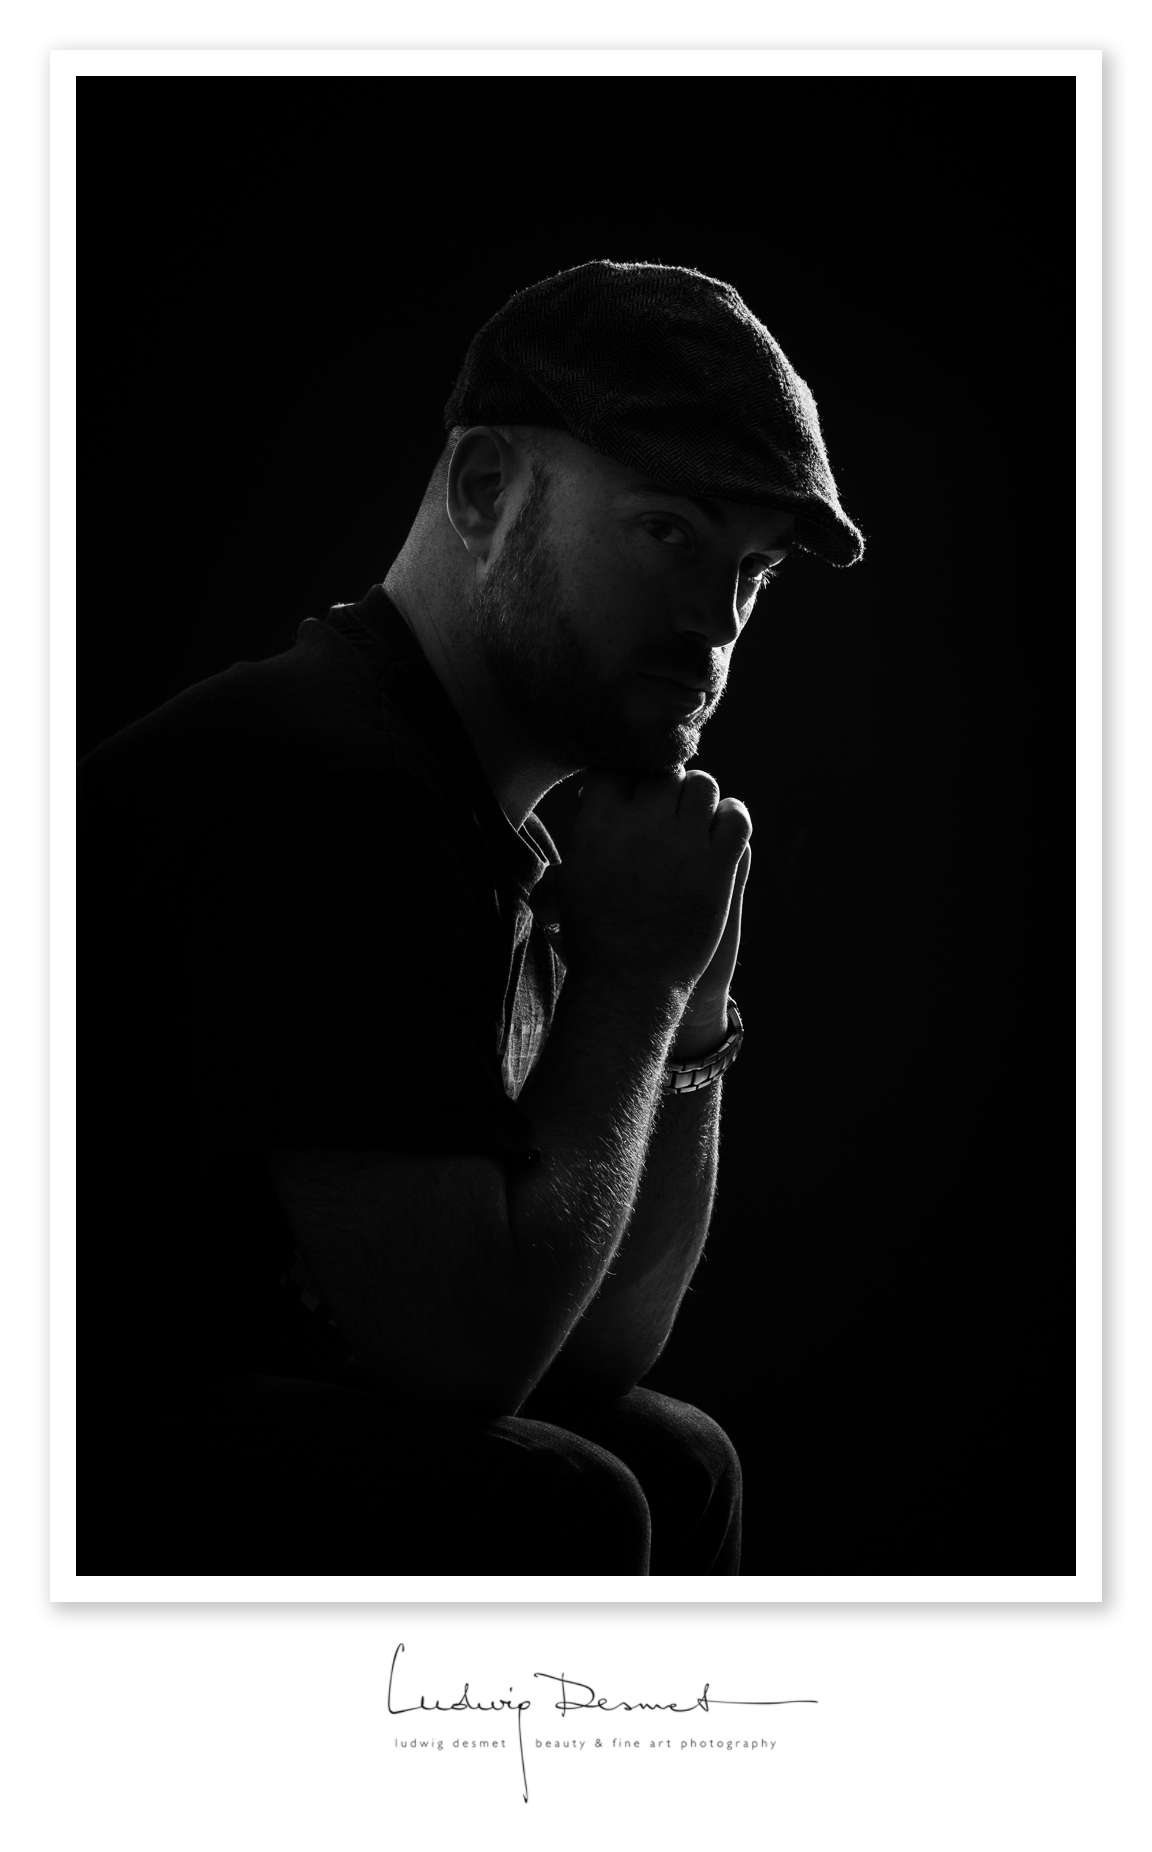
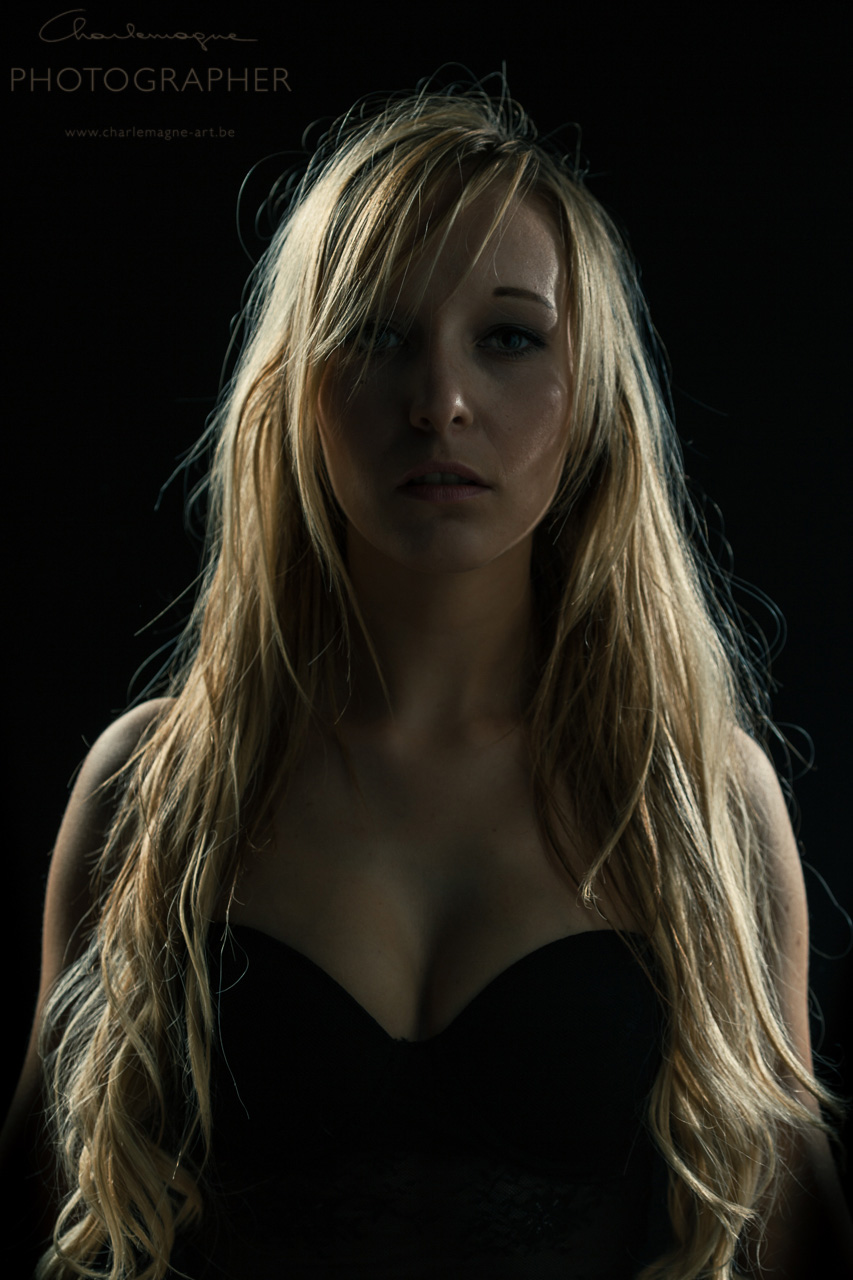
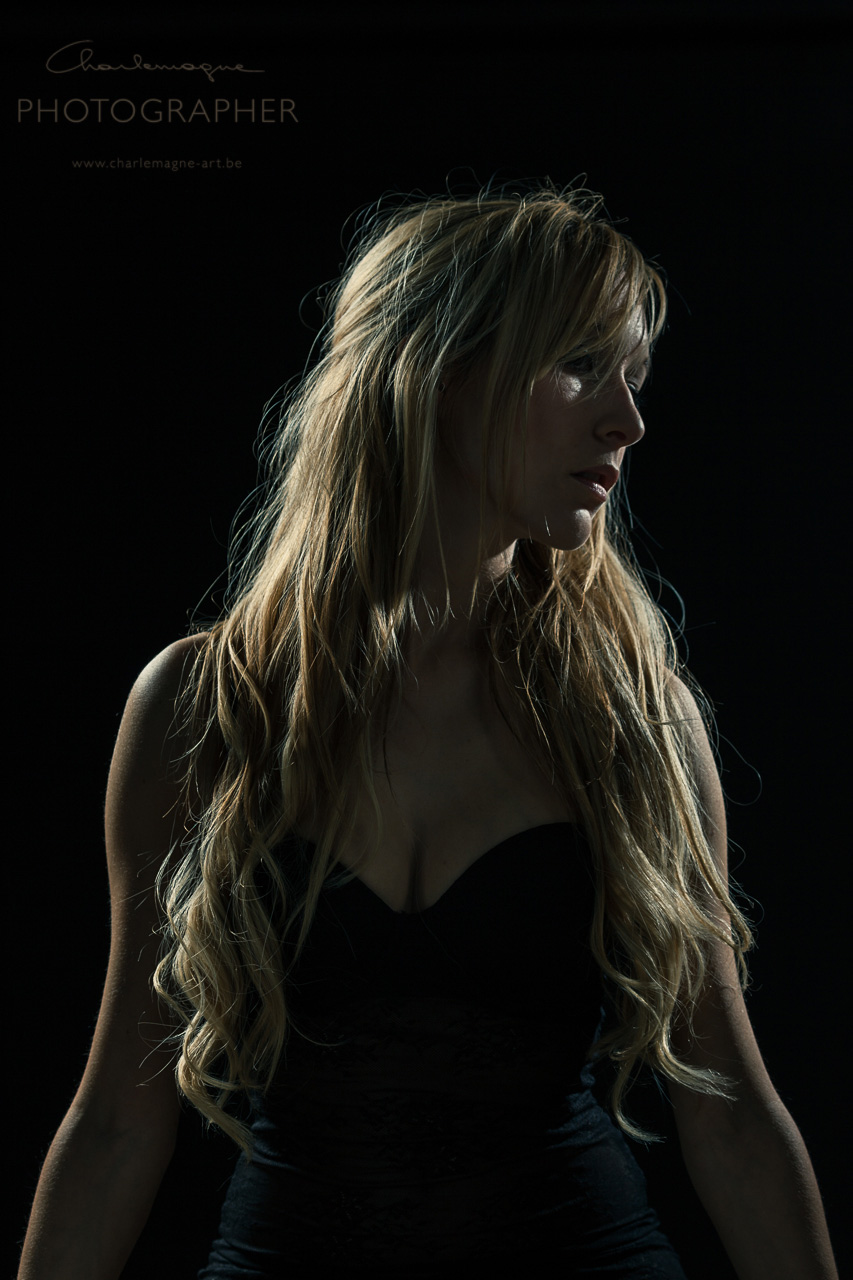
another one without the hood:


thanks for watching, come again soon,

Ludwig

freestyle shooting in the studio

erotic, Nude, studio light setup, Tips and Tricks

Two weeks ago I did a model call for a freestyle shooting session in the studio, just to try out some light setups and to not forget about working with studio strobes. Remember, 90% of my work is purely based on available light.

I had two models coming over, one male that I never worked with (lets call him Steven) , one female that I had regular cooperations with since about two years, lets call her Charisse 😉

Steven never modelled, he said the day before he came to me. Ok great, I told him, that’s cool, so we can find out if newbies can lead to great results. And he did, 200% he did. See for yourself:


the images above are all made with two studio strobes.

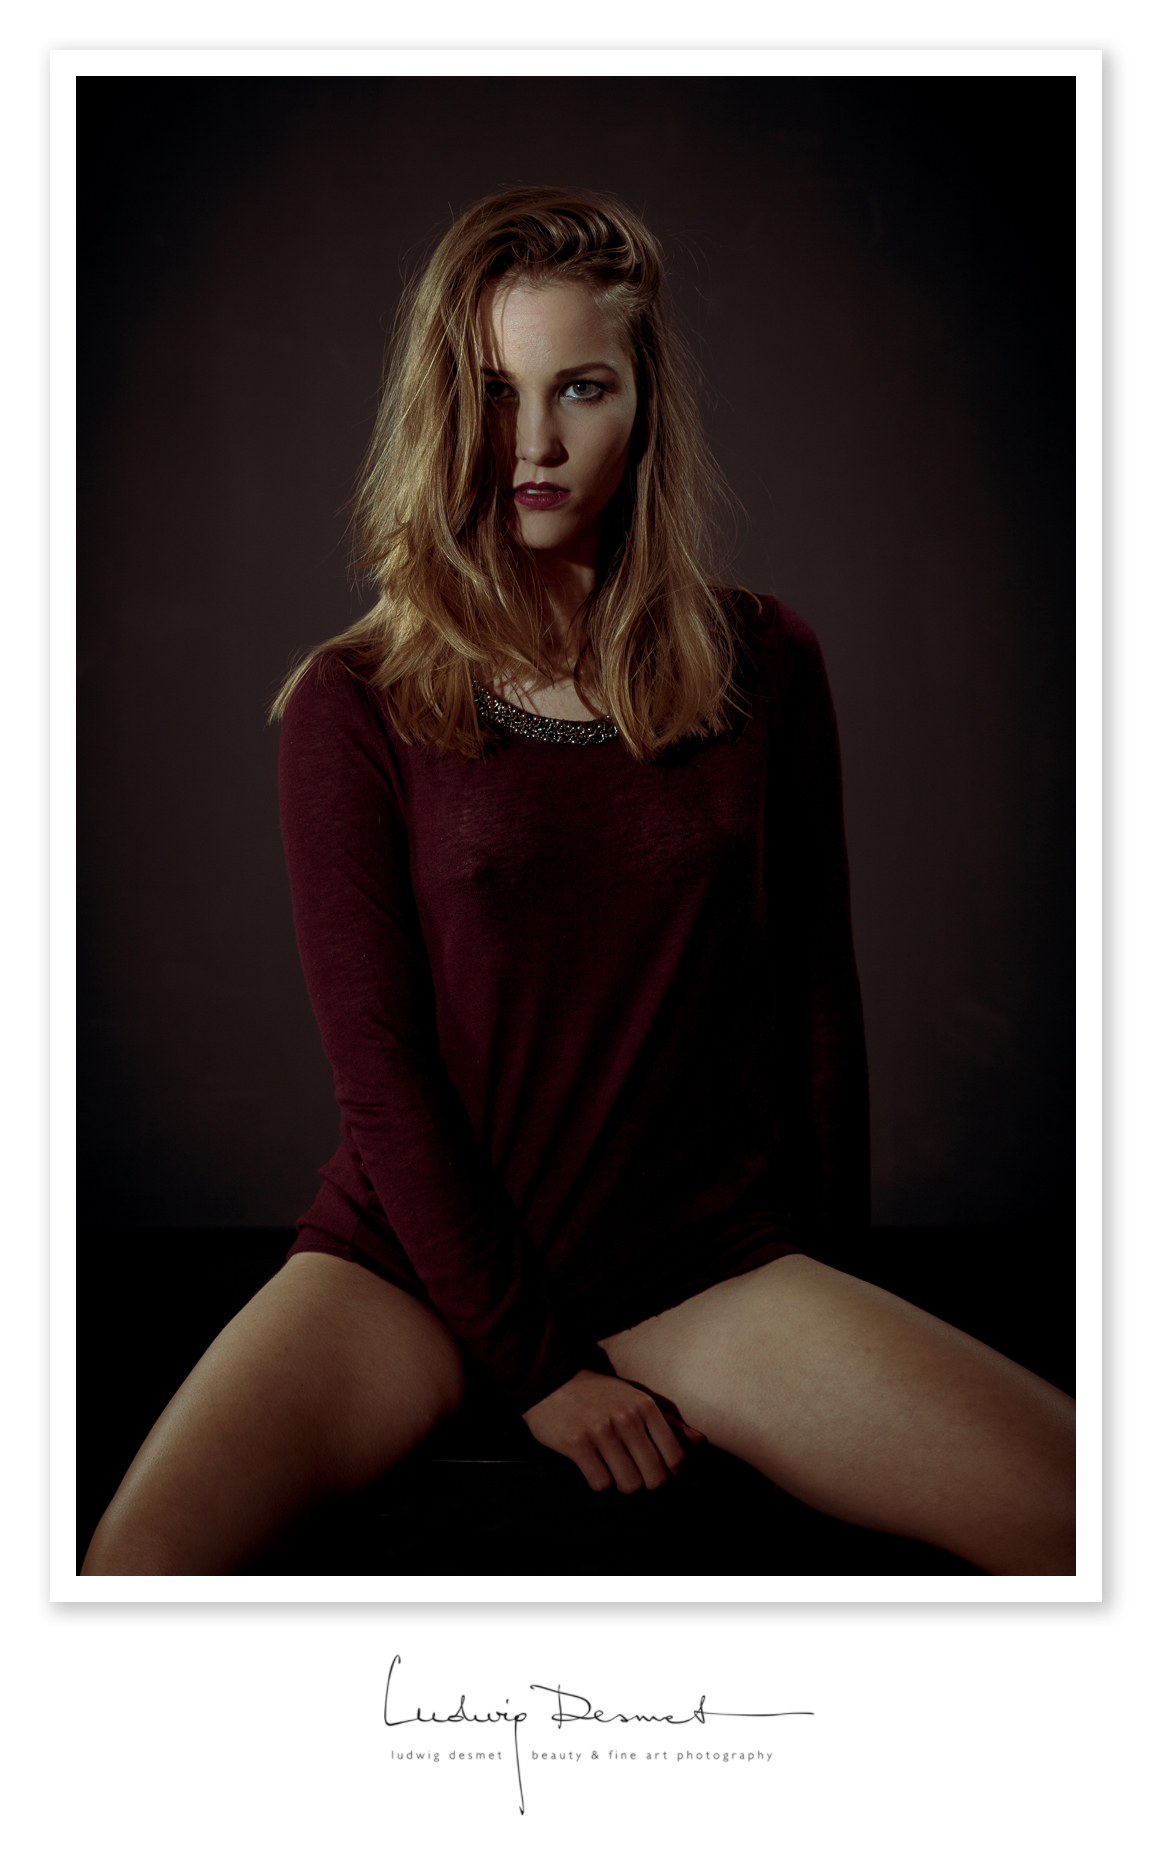
Then that same morning, after this first session I had Charisse arriving at the train station for pickup, and we started shooting early in the afternoon. A totally different setup, with both nude and non-nude work, of which I will show you only a small teaser for now. We did a lot of different things, with a lot of good results, so make sure you come back again soon.


thank you for stopping by, visitor of this blog. Consider subscribing if you like what you see. Come back again soon.

thank you Steven and Charisse, for being my interim models for the day, for your patience and your trust!!

Ludwig


ps. I: soon I will be on Patreon, where you can support my activities and get extra behind the scenes video’s, how to tips, and other benefits! Watch out!

ps. II: video: me cleaning the studio afterwards, here you can see more or less all I have in the studio. Limited stuff, a lot of creativity.

Charleston, for something a little different

beauty, location, personal tips & tricks, Tips and Tricks


it is always good to see that models bring their own ideas and clothing along on a shoot.

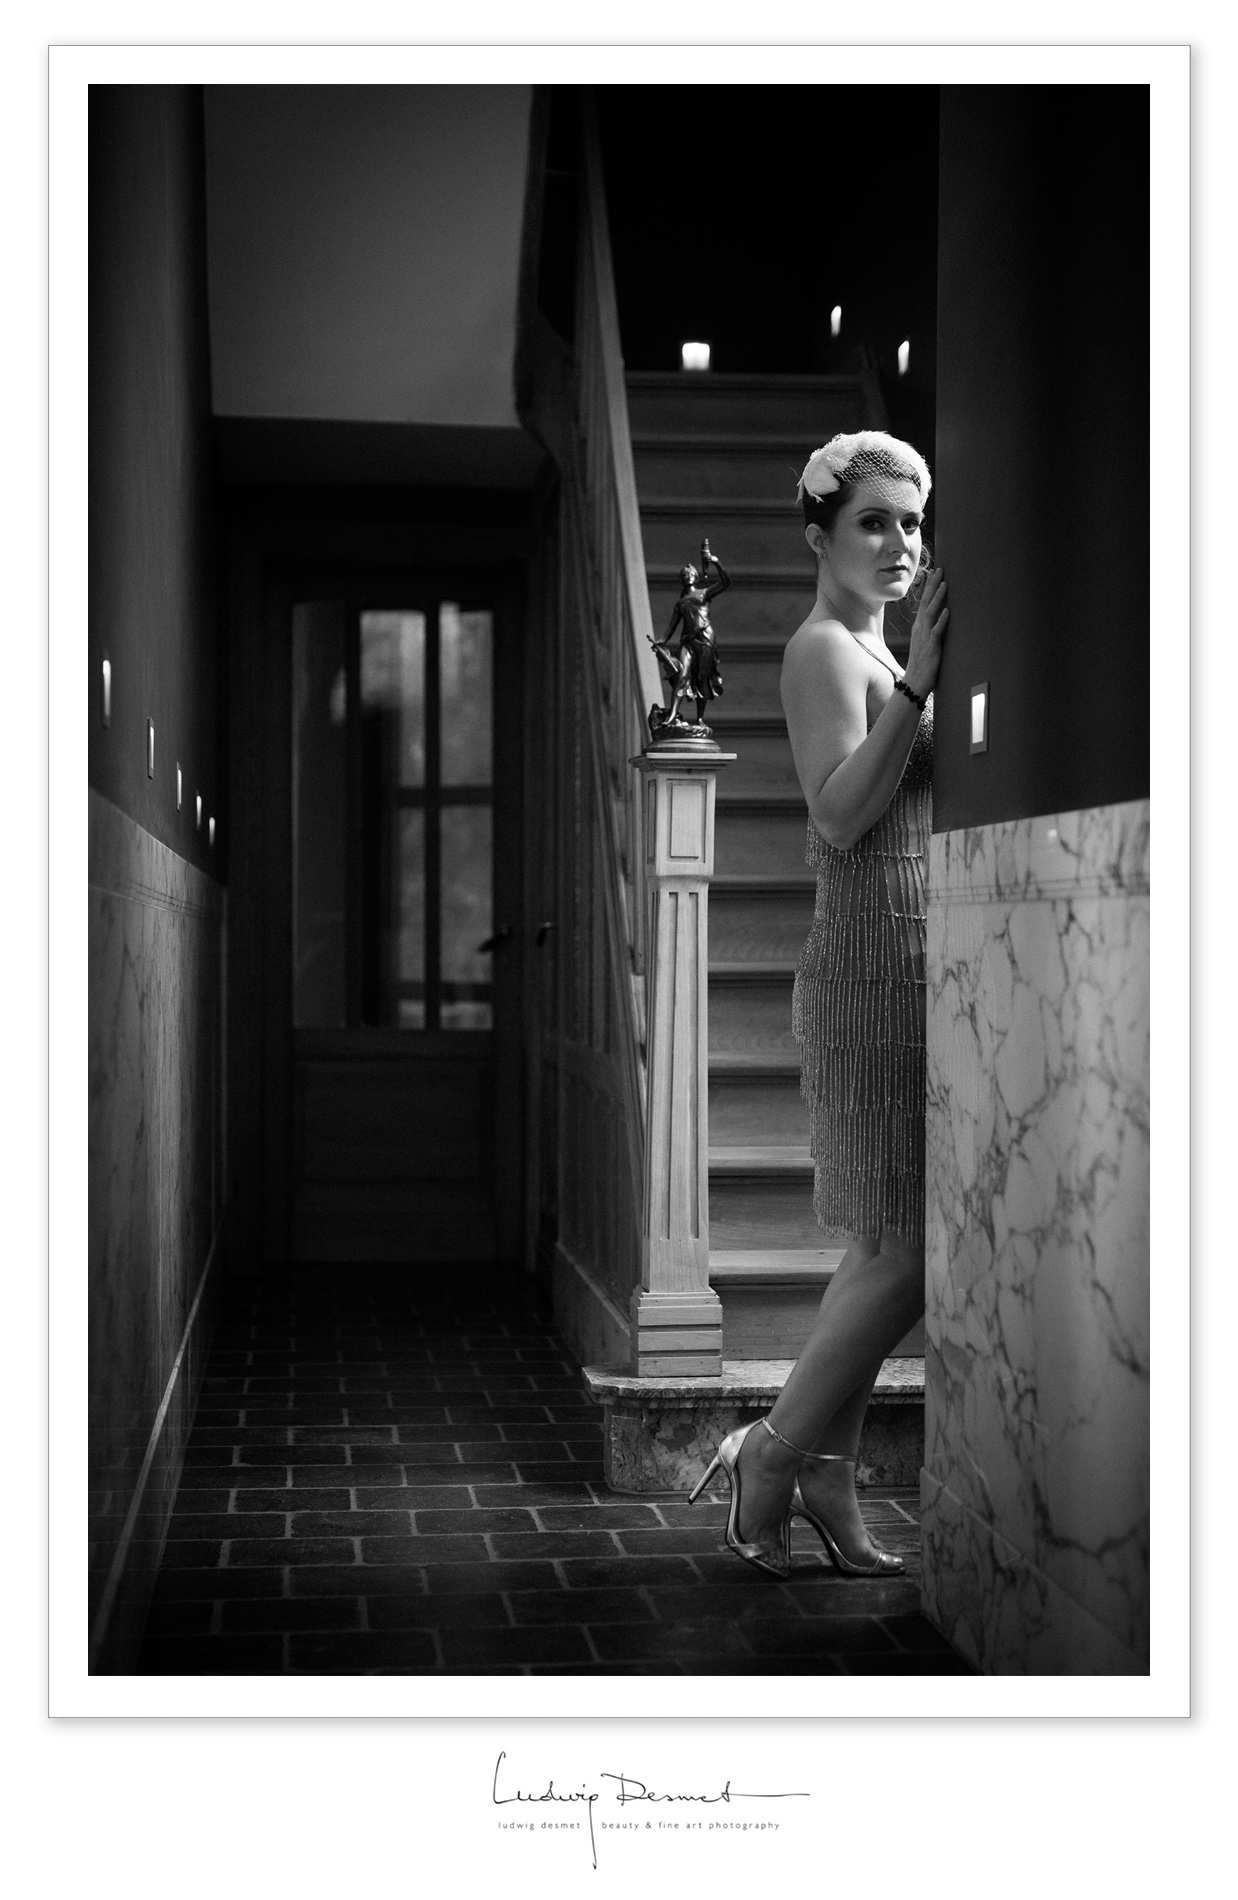
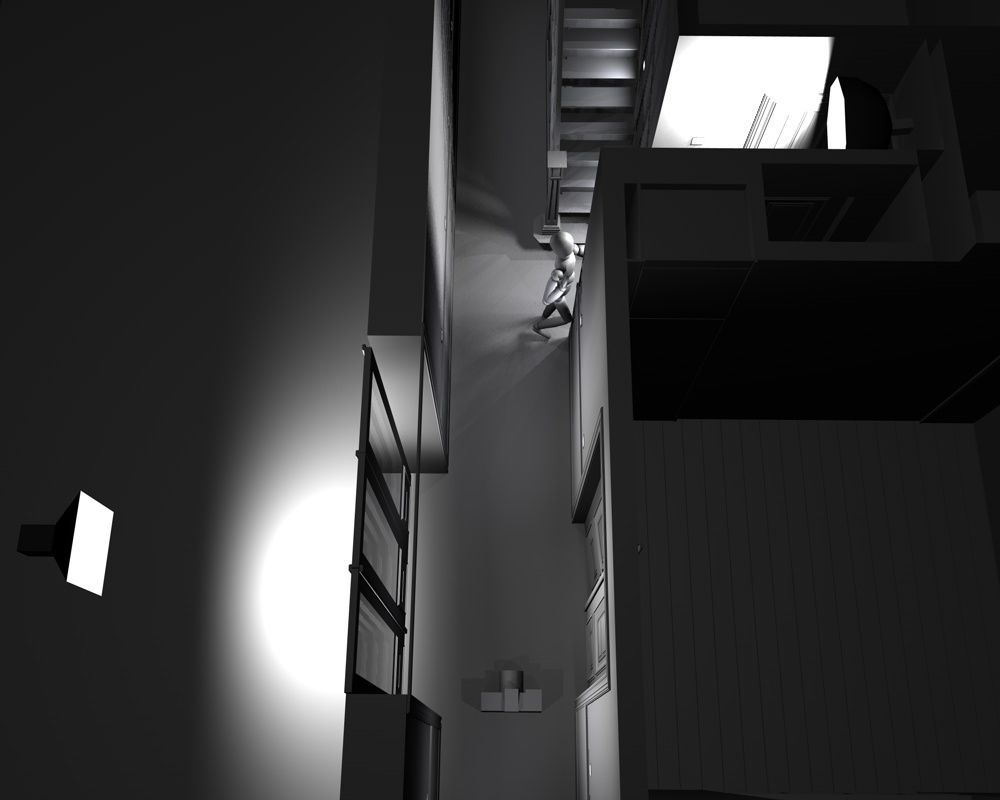
Next to being a source of variation and new ideas, it can also be a challenge do make something work that was not really in your mind-set when you started the shoot. We had shot early that afternoon in ‘the orphanage’, a huge former orphanage I guess, now rented as guesthouse for large groups. The weather was very dull and grey, and besides that it was raining and cold. Not really a nice environment to be in as a model. Rachel also brought some ‘Charleston inspired’ clothing and accessories, and we tried them out in my own home space. As there was very little light, and I wanted to create an evening atmosphere, I switched on the ambient lights in the hallway and staircase. These lights being very dim and not really at an ideal height for lighting a model. I rather not use flashes as they make the setup cumbersome and slow, but here I could not do otherwise, so I also installed two monobloc studioflashes. You clearly see the effect of one light (right of the model – 80cm octa) the other one is left of me, (60×60 softbox) in the room next to the hall way (there’s a triple entry door with glass inserts that filters the light softly into the hallway). The flashes are both at low power settings since I still wanted to use a rather wide aperture, for less depth of field. there’s a light setup at the bottom of this post.


the image is shot at 1/125s f2.0 ISO200. Canon 5Ds with Sigma 50mm Art. By using flashes I managed to dim the daylight even further, to an acceptable level that just keeps a small reminder of the structures in the window framework at the end of the hallway.


A big thank you to Rachel, for being my model on this day, and to Nathalie, my lovely assistant.


light setup:


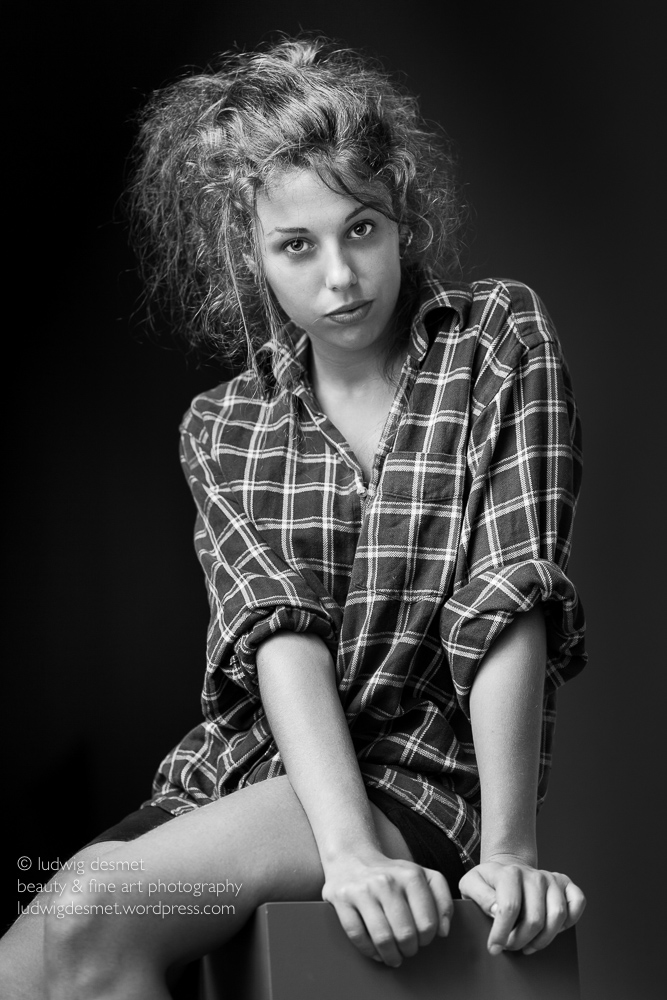
ANGRY – Natural light portrait – setup

beauty, people, personal tips & tricks, portrait

luckily this was only roleplay, she was not really angry with me, I would have feared for my life, if not certainly my camera gear. 😉

Ludwig Desmet EC-5

1/20s f2.8 ISO 400 – Canon EF 100mm f2.8 Macro L

setup:

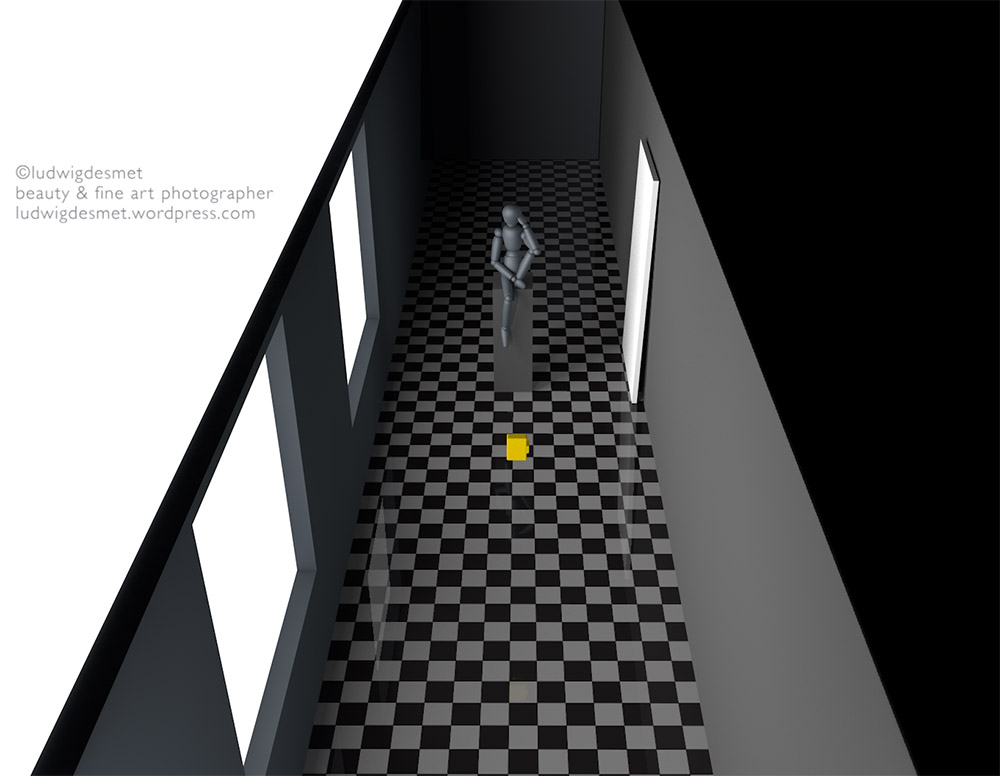
long hallway with big windows on the left side, first part of the hallway, no windows to the right.

Model just behind the last window.

Big styrofoam board to the right side of the model, filling in shadow parts. (120x240cm – about 50×100″)

That’s it, simple as anything, and a styrofoam board costs a couple of euro’s.

I had to darken the background a little at the right side, there was some light spill at the end wall of the hallway.

pinehouse gang 1

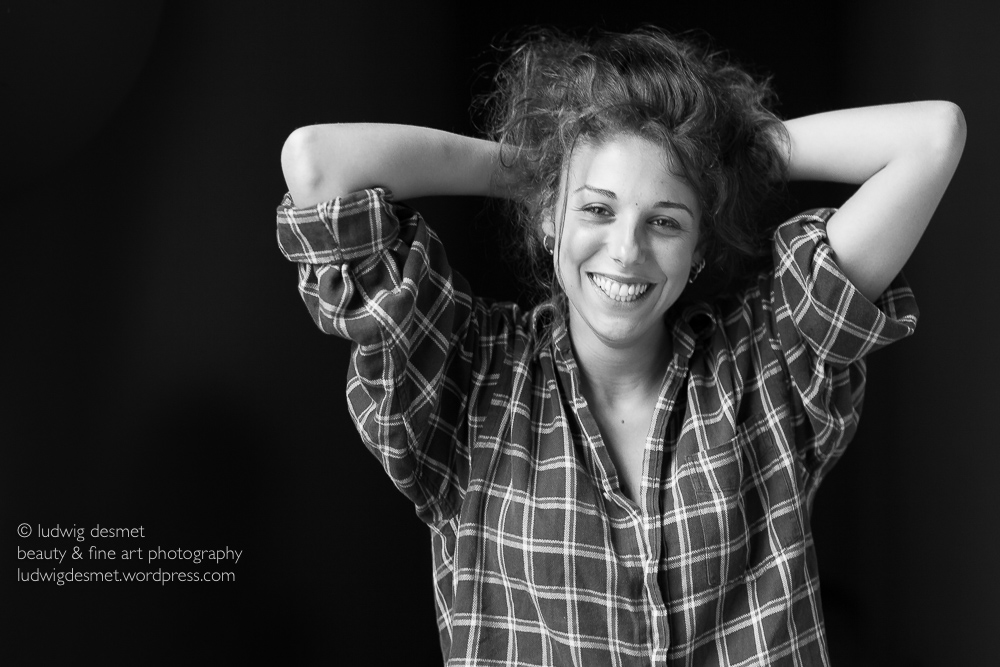
after the angry part, we did some more friendly images too.

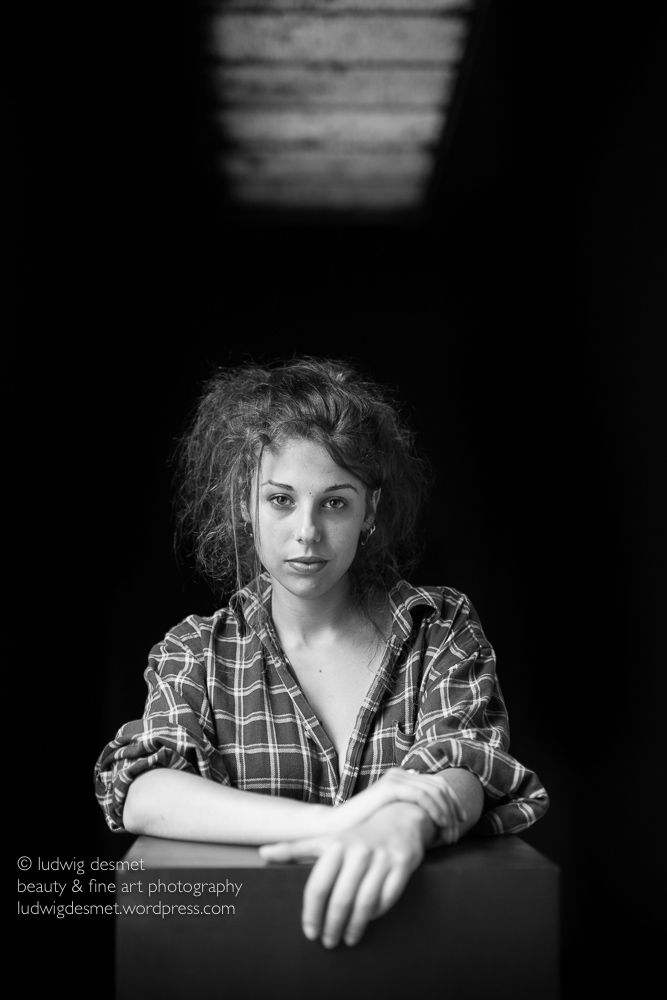
here I’m off to the left, so the right wall becomes visible and I don’t get completely black in the background.

Ludwig Desmet EC-2

below: 1/50 f1.6 ISO400 – Sigma 50 mm f1.4 DG Art

Frontal again, showing very dimly lit ceiling windows, not giving any effect on the subject.

Ludwig Desmet EC-3

Ludwig Desmet EC-4

thank you for watching.

Ludwig

Lisa at The Mansion – Part III – Lingerie

beauty, Personal Pictures, Uncategorized

I have a good relationship with the people behind the Belgian ‘passion shops’ called Tutti Passi.

They provide me with lingerie and accessories, I grant them the use of some of my images. Make sure to visit their website to see what they have available. Have fun 😉

Just one word about natural light photography and why I prefer working this way.

The idea of using natural (also called ‘available light’) light is double for me.

1. It allows me to work quickly and without the fuzz of getting my gear just right for every room I work in, every different position I put my model in, … Getting this light just right, and then another light, and then a reflector, and then I need some more extension cable …

Working quickly allows me to direct my model in all kinds of poses, make her take different positions within a room, if I don’t like the light I can switch to another room, so she tends to forget it’s all about posing, and I get more natural, relaxed poses AND I get to make a lot more variations in a given amount of time. All the images with Lisa from this, the previous and the the post before that one are taken in about three hours of time. I would never be able to get such a rich variety of images if I were to setup lights every time.

It allows me to walk all around, and just analyze the available light in the room, and shoot from whatever angle I want to. I never have a light stand or a cable that is in the way. I don’t need to bother about light intensities or distances from my multiple light sources, … I have just the available light, and depending on where my model stands I will certainly need to adapt my exposure settings, but I only need to do that on my camera, and I’m good to go again.

2. I just don’t like it to drag all those flash lights and stands and cables etc. … I suppose I must have some kind of laziness inside me :p

Lisa in the beautiful lingerie gown I could lend from Tutti Passi, by Felice Art Couture


I’ll call the first image ‘Für Elise’, after all, I was named after a certain Ludwig Von Beethoven …


IMG_0682

IMG_0663

IMG_1231

IMG_1217

IMG_1216

IMG_0652

IMG_0714

thank you for watching

don’t forget to click for a bigger version of the last image, it’s worth it!

see you soon for next chapter 🙂

Ludwig

Nude Studio Setup – 1 light

Personal Pictures, personal tips & tricks, Tips and Tricks, Uncategorized

Continuation of my series of ‘portfolio shoot images’ Behind the scene’s.

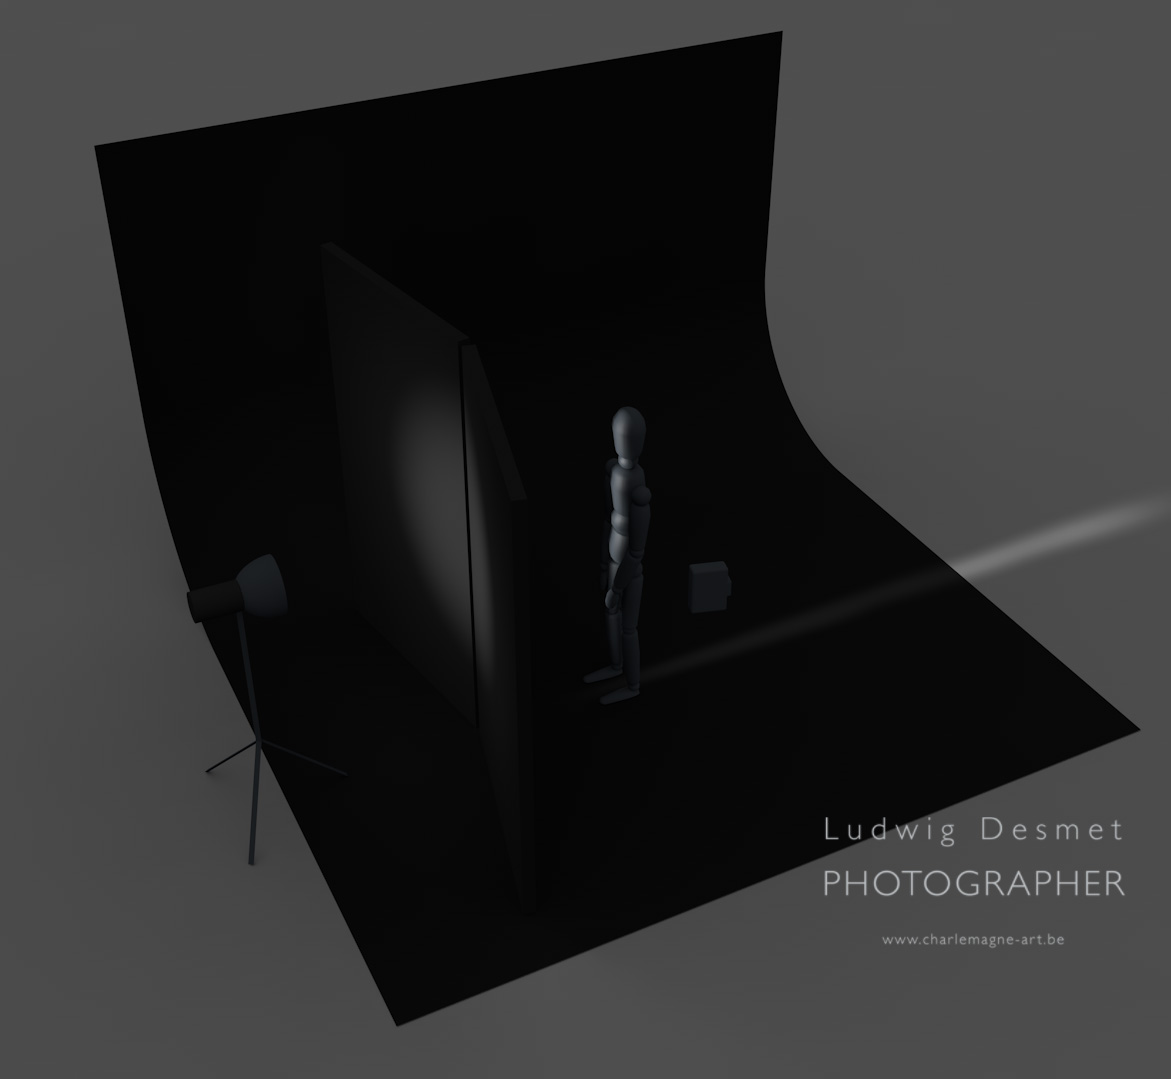
For this setup I used only one studio flash, with reflector.

In order to create a really small light bundle, you need to work with solid elements blocking the light.

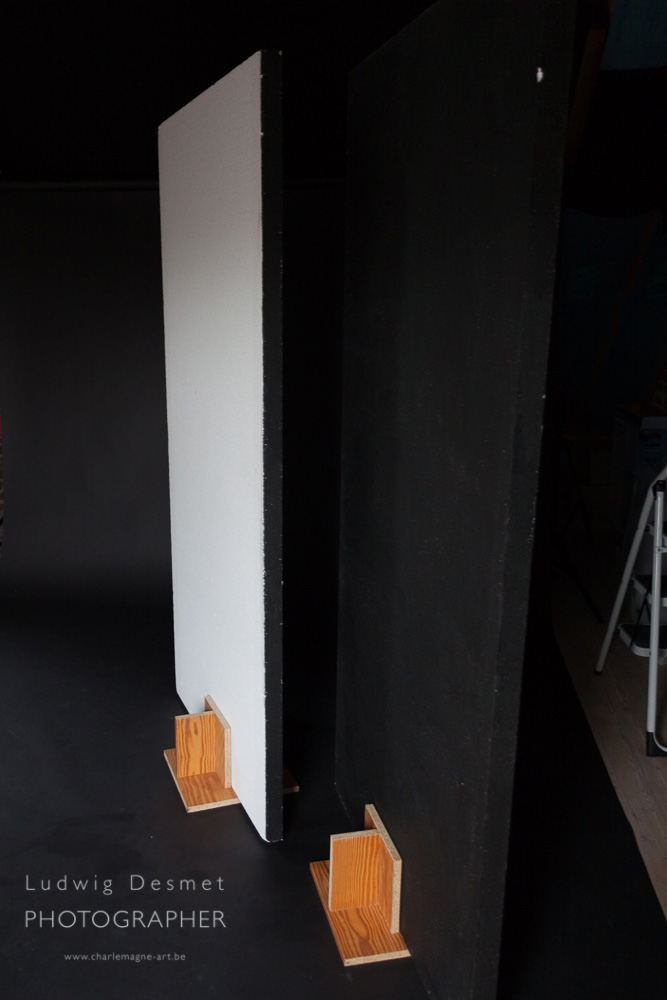
For this I use some of those huge styrofoam boards (they can be bought in the build supply shops, they are used for insulation, crappy for this purpose, but very handy in studio) of 120x220x6 cm. I paint them black on one side, and around the edges. I made some simple stands from fibre wood panels to hold them upright.

They weigh virtually nothing and are easily stowed away.

here you can see one white side front, one back side front (I pushed exposure a bit here, because they are really nicely black):

LudwigDesmet-studio-6597

So a very simple setup here:

one flashlight on the left, with standard reflector, two styrofoam panels, black side towards the flash (you don’t want light bouncing of the white side, don’t you?)

model standing right in the middle, a little further back. Because the reflector is a quite big light source, you’ll need to put your panels really close to eachother (2 cm apart for instance) and you’ll still have the light spreading out further away from the panels.

Portfolio studio setup2

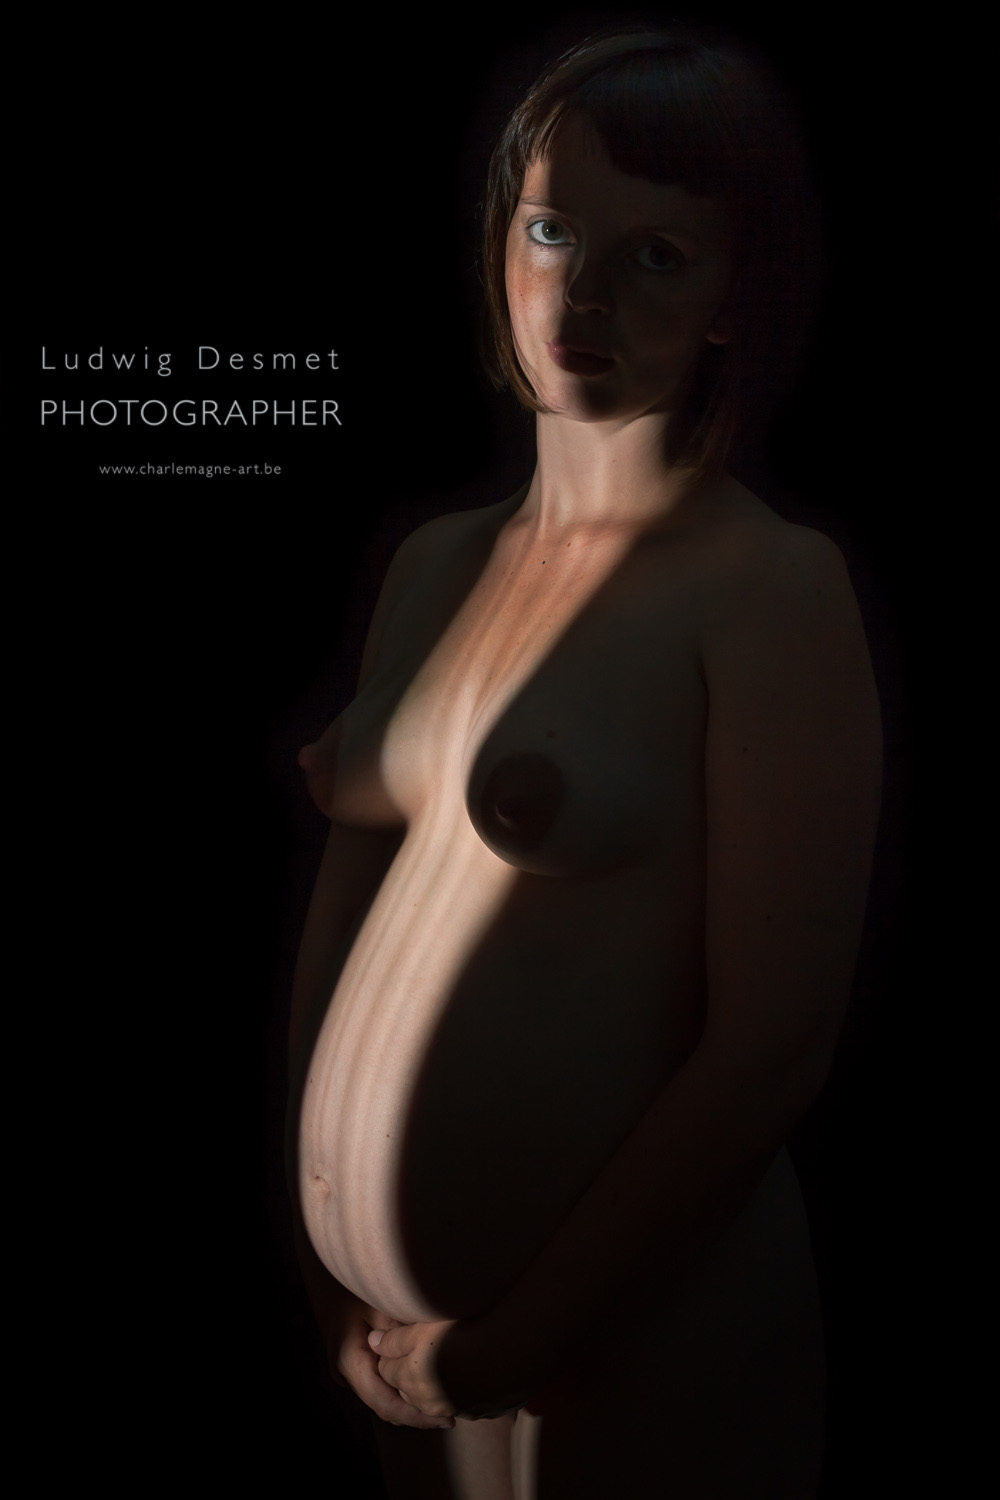
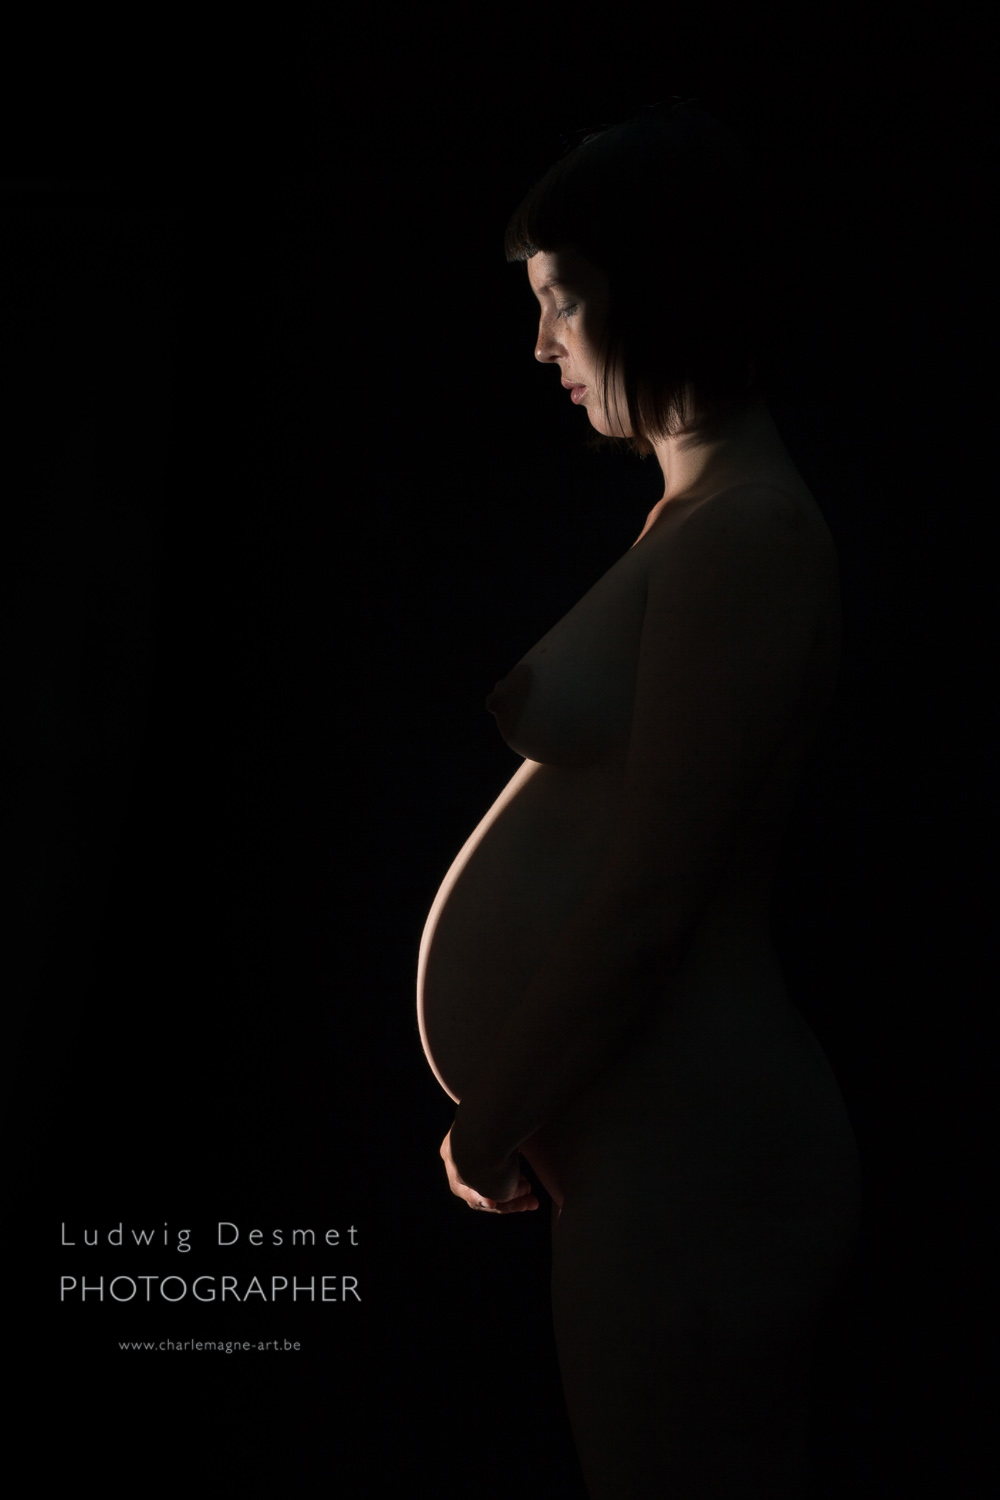
two images with this setup:

LudwigDesmet-studio-080

LudwigDesmet-studio-081

thank you for reading, see you soon for a new post.

Ludwig

Nude Studio Setup – 3 lights

beauty, Personal Pictures, personal tips & tricks, Tips and Tricks

Hi there,

I’m planning on a series of posts with some explanation of the studio setups I’ve used for my portfolio shoots.

Here’s te first one. The model has some massage oil on her body, just very slightly. A slightly colored setup.

Portfolio studio setup

A triple light setup for a body shape portrait.

Model is laying down on a black velvet cloth, which literally absorbs all light. It is positioned in a infinite floor to wall shape.

1. On the left, studio flash with reflector, gridded. Gridded to keep the light from spilling all over in the studio. Reflector for those nice highlights on the body.

2. On the right, studio flash with small softbox (60x60cm) partially covered with a red cloth, for a slight color shift. I discovered that the use thin colored cloth works in a similar way as gels, and it is easy to just move the cloth a little bit (a wooden clothespin works just fine) to have a stronger or weaker effect. I currently work with some kind of very thin colored cloth pieces, like a magician would use. This second flash not as strong as the first one and aimed a little more off the model

3. just next to the camera, I’ve put an additional flash (Speedlite 580), again with a colored cloth in front (blue-ish) to slightly fill in the shaded areas.

Camera is just above the floor (me lying down).

Setup:

Studio setup 1 - Ludwig Desmet

85mm – 1/125th – f3.2

I probably would have been better of aiming for a smaller aperture for larger depth of field, but this is the way it is 😉

hope you’ve found some inspiration here.

see you soon,

Ludwig

Nude (In)cognito – portfolio exhibit day

Personal Pictures, projects

Hi there,

today was an important day for my photography career.

I had to present my work Nude (In)cognito to the jury for final evaluation.

I’m still impressed with the arguments they brought, severe, focusing on details, questioning the approach, etc. …

I hope I will finally get the official degree of photographer next thursday – proclamation day.

Tomorrow the exhibit is open for everyone, I would be happy to welcome you all to see my work, and that of my fellow students. There’s really good work to be seen.

Adress: CC Meulestede, Meulesteedsesteenweg 515, Gent.

as an appetizer, one of the images I selected for the book. (not for the exhibit, those images remain secret till after the exhibit)

Ludwig Desmet portfolio-5822

see you soon,

Ludwig

Sharon low key studio test shoot

beauty, Personal Pictures

Hi,

I launched a call for models on my Facebook page last week, for some test shoots in my studio.

I’m not really fond of studio work, but that might probably be because I’m not familiar enough with it, so time to work on my skills.

I’m not really into white studio backgrounds, and brightly lit models, so I went for some kind of low key approach. I feel more like keeping some mystery in my images

Sharon was one of the models that volunteered, she’s from the same town I live in, so we can easily fix a render-vous (a get-together) whenever time allows.

I had worked with her in these shoots: Model Sharon – fall and model Sharon I think we both learned a lot since. I’ll leave that for you to judge.

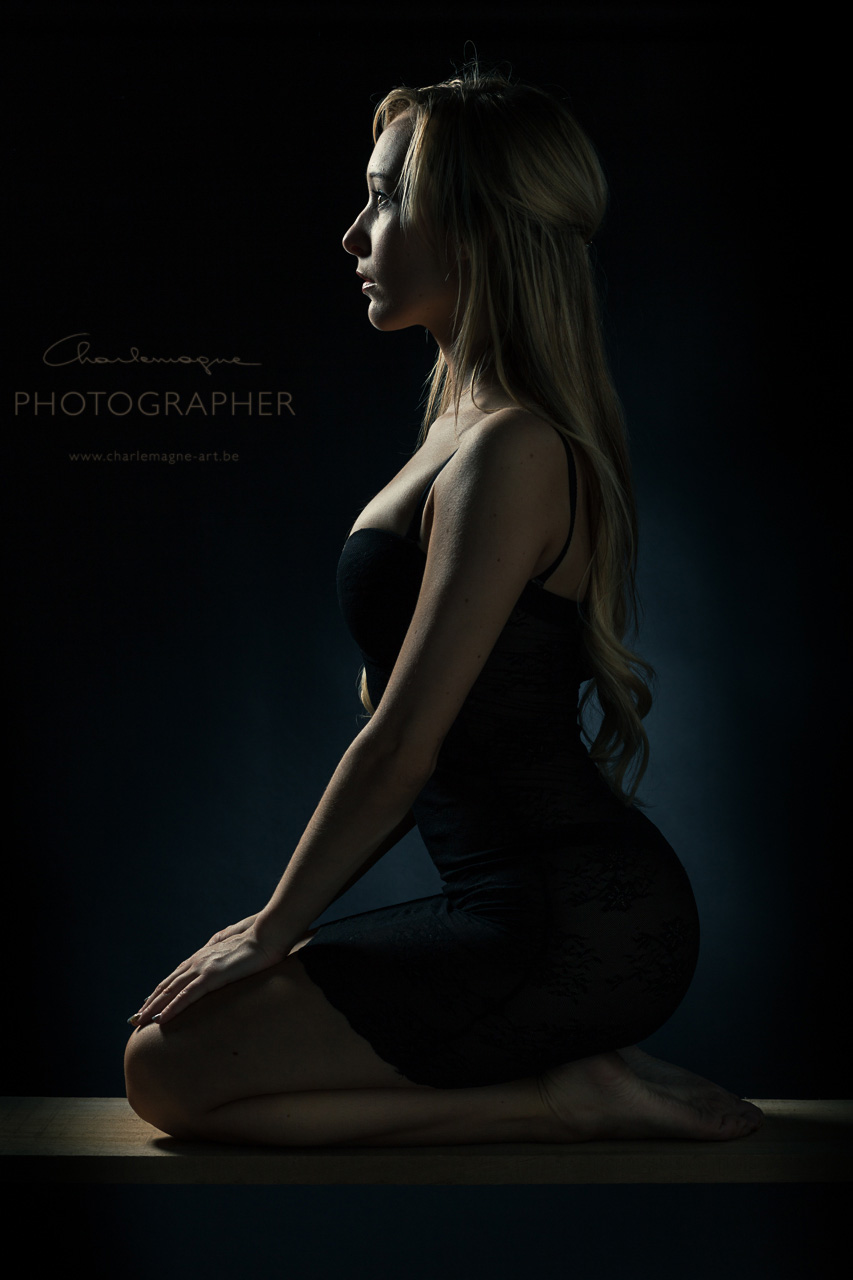
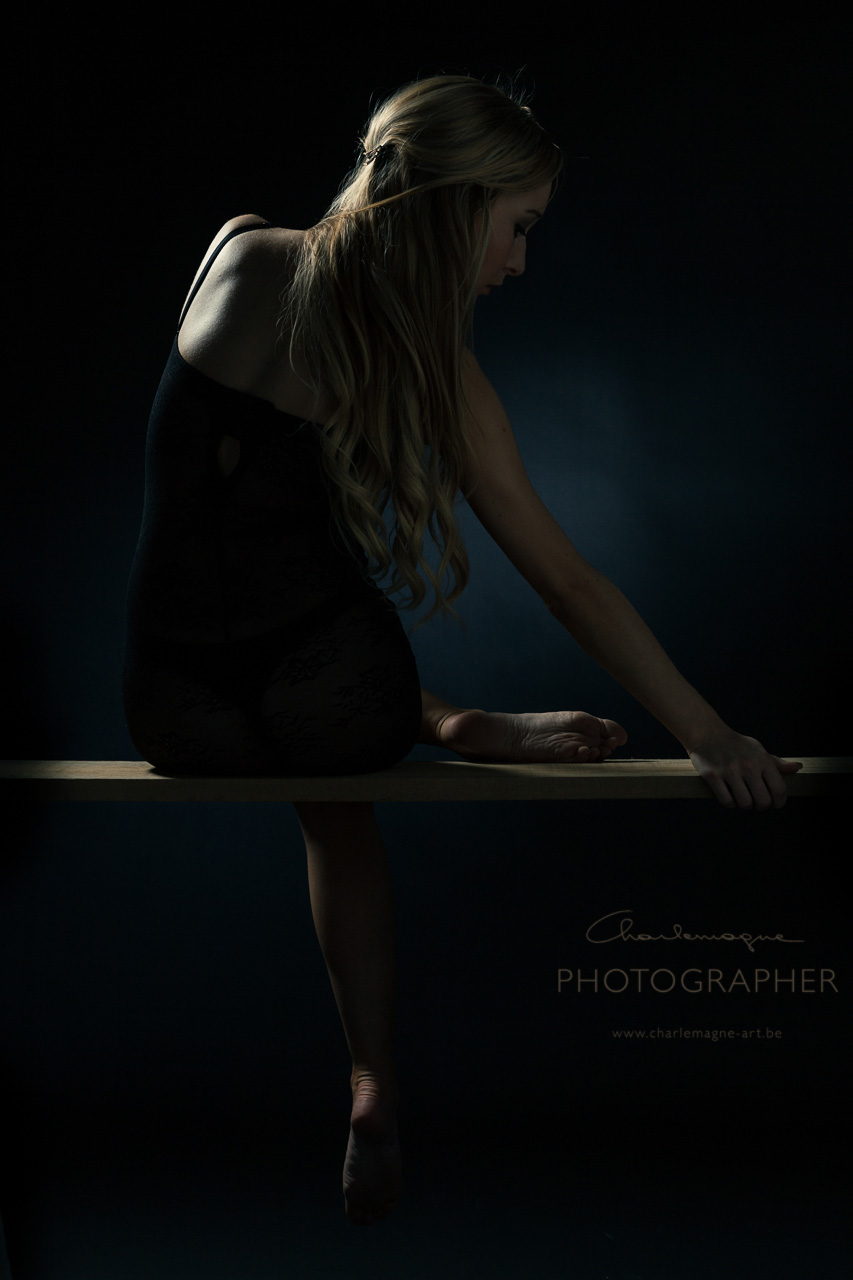
So Sharon was here last thursday afternoon. We worked some different settings, for about 2 and a half hours. I worked a lot with indirect light on the side facing the camera, and just some backlight directly on my model.

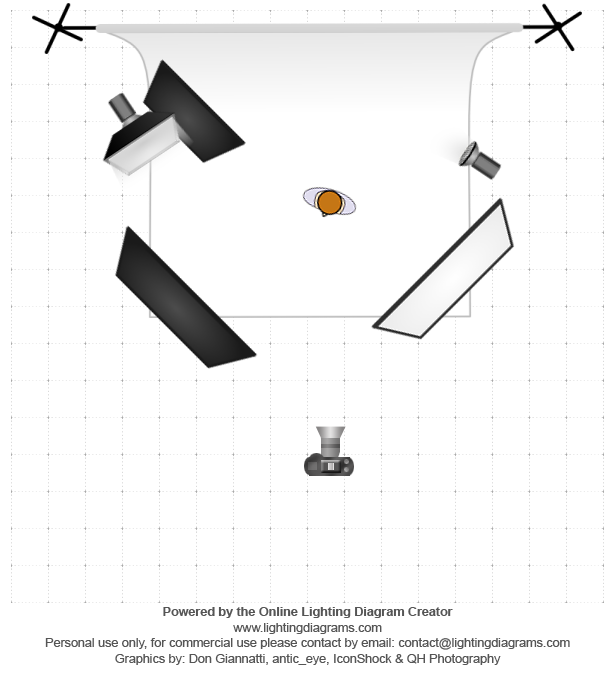
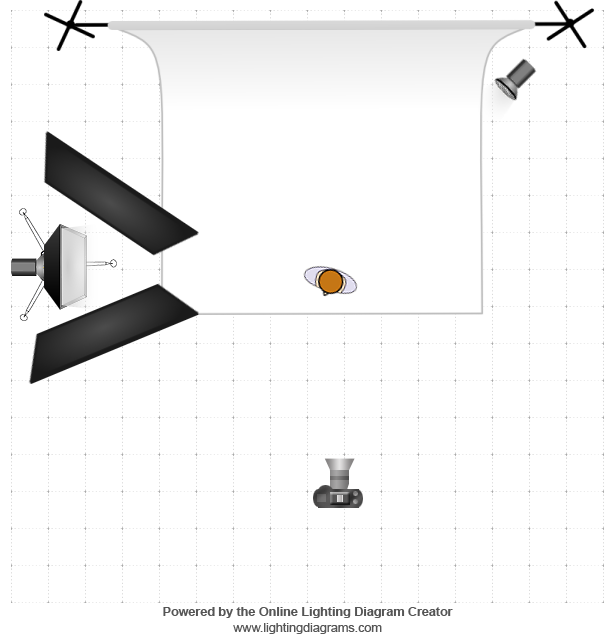
The light setup for the first 2 images looks as follows:

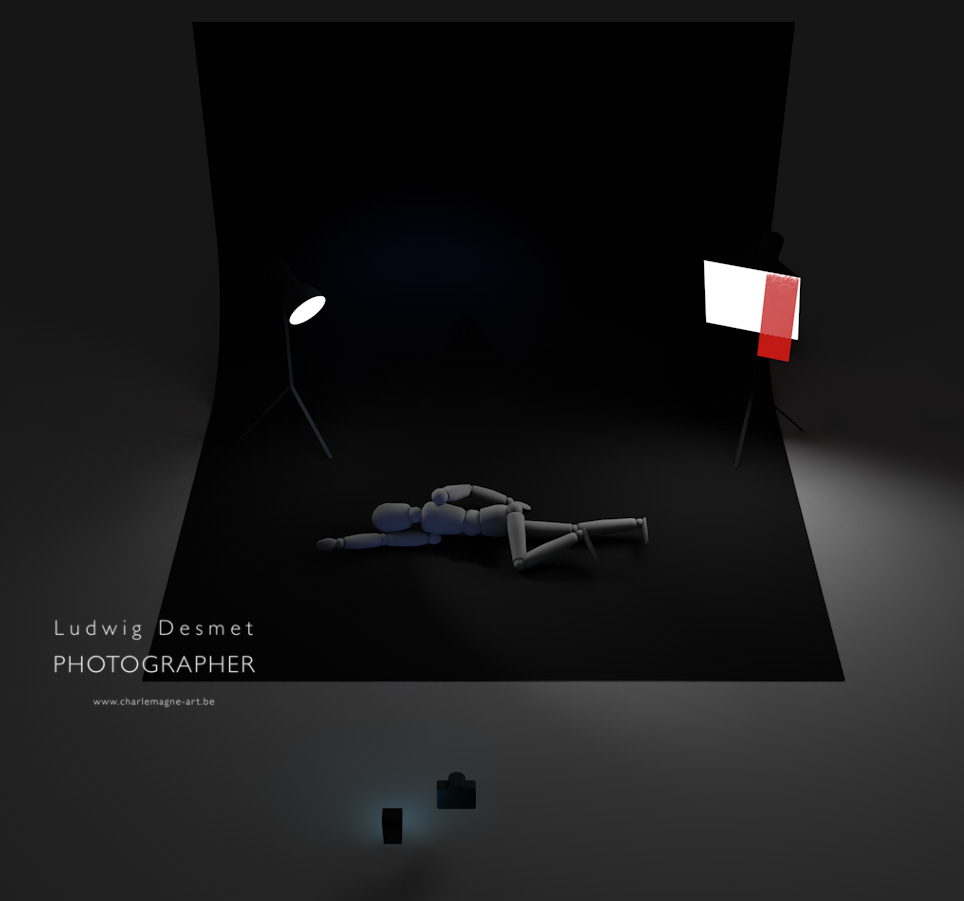
One softbox light left of my subject, as high as my light tripod goes, aimed towards the model and covered all around by a black cloth to prevent light spill on the background. The background is a black roll of paper, not white as indicated in the diagram

One big reflector panel at the right side of my model, simple styrofoam, aimed towards the model thus bouncing back light of the softbox.

Gridded and partially covered (with a cloth) torch to the right, aimed at the background, for the soft spot of light on the background.

Model is sitting on a wooden plank, suspended by two shelve racks I normally use to pile up my studio gear.

I used some additional black panels and black cloth to prevent too much light to bounce around in my small studio.

lighting-diagram-1372084207

The images were all taken with Canon EOS 5D II and 85mm, 135mm and 50mm Canon lenses. Settings vary.

Don’t forget, all images are clickable for a bigger version.

charlemagne-art_Sharon-9798

charlemagne-art_Sharon-9813

the other images are with different setups, all based on the same theme.

charlemagne-art_Sharon-9845

charlemagne-art_Sharon-9881

charlemagne-art_Sharon-9893

charlemagne-art_Sharon-9899

charlemagne-art_Sharon-9901

charlemagne-art_Sharon-9927

charlemagne-art_Sharon-9941

I will probably study this subject further, so models can always sign up for a studio session.

Take care, and come again soon,

Ludwig

Photographing the Harley

Personal Pictures, personal tips & tricks

As an end of study assignment for my studio/object module (photography courses at kips.be (Ghent Belgium) we had to propose an object to photograph.

amongst the possibilities were ‘perfume’ or ‘jewels’ …

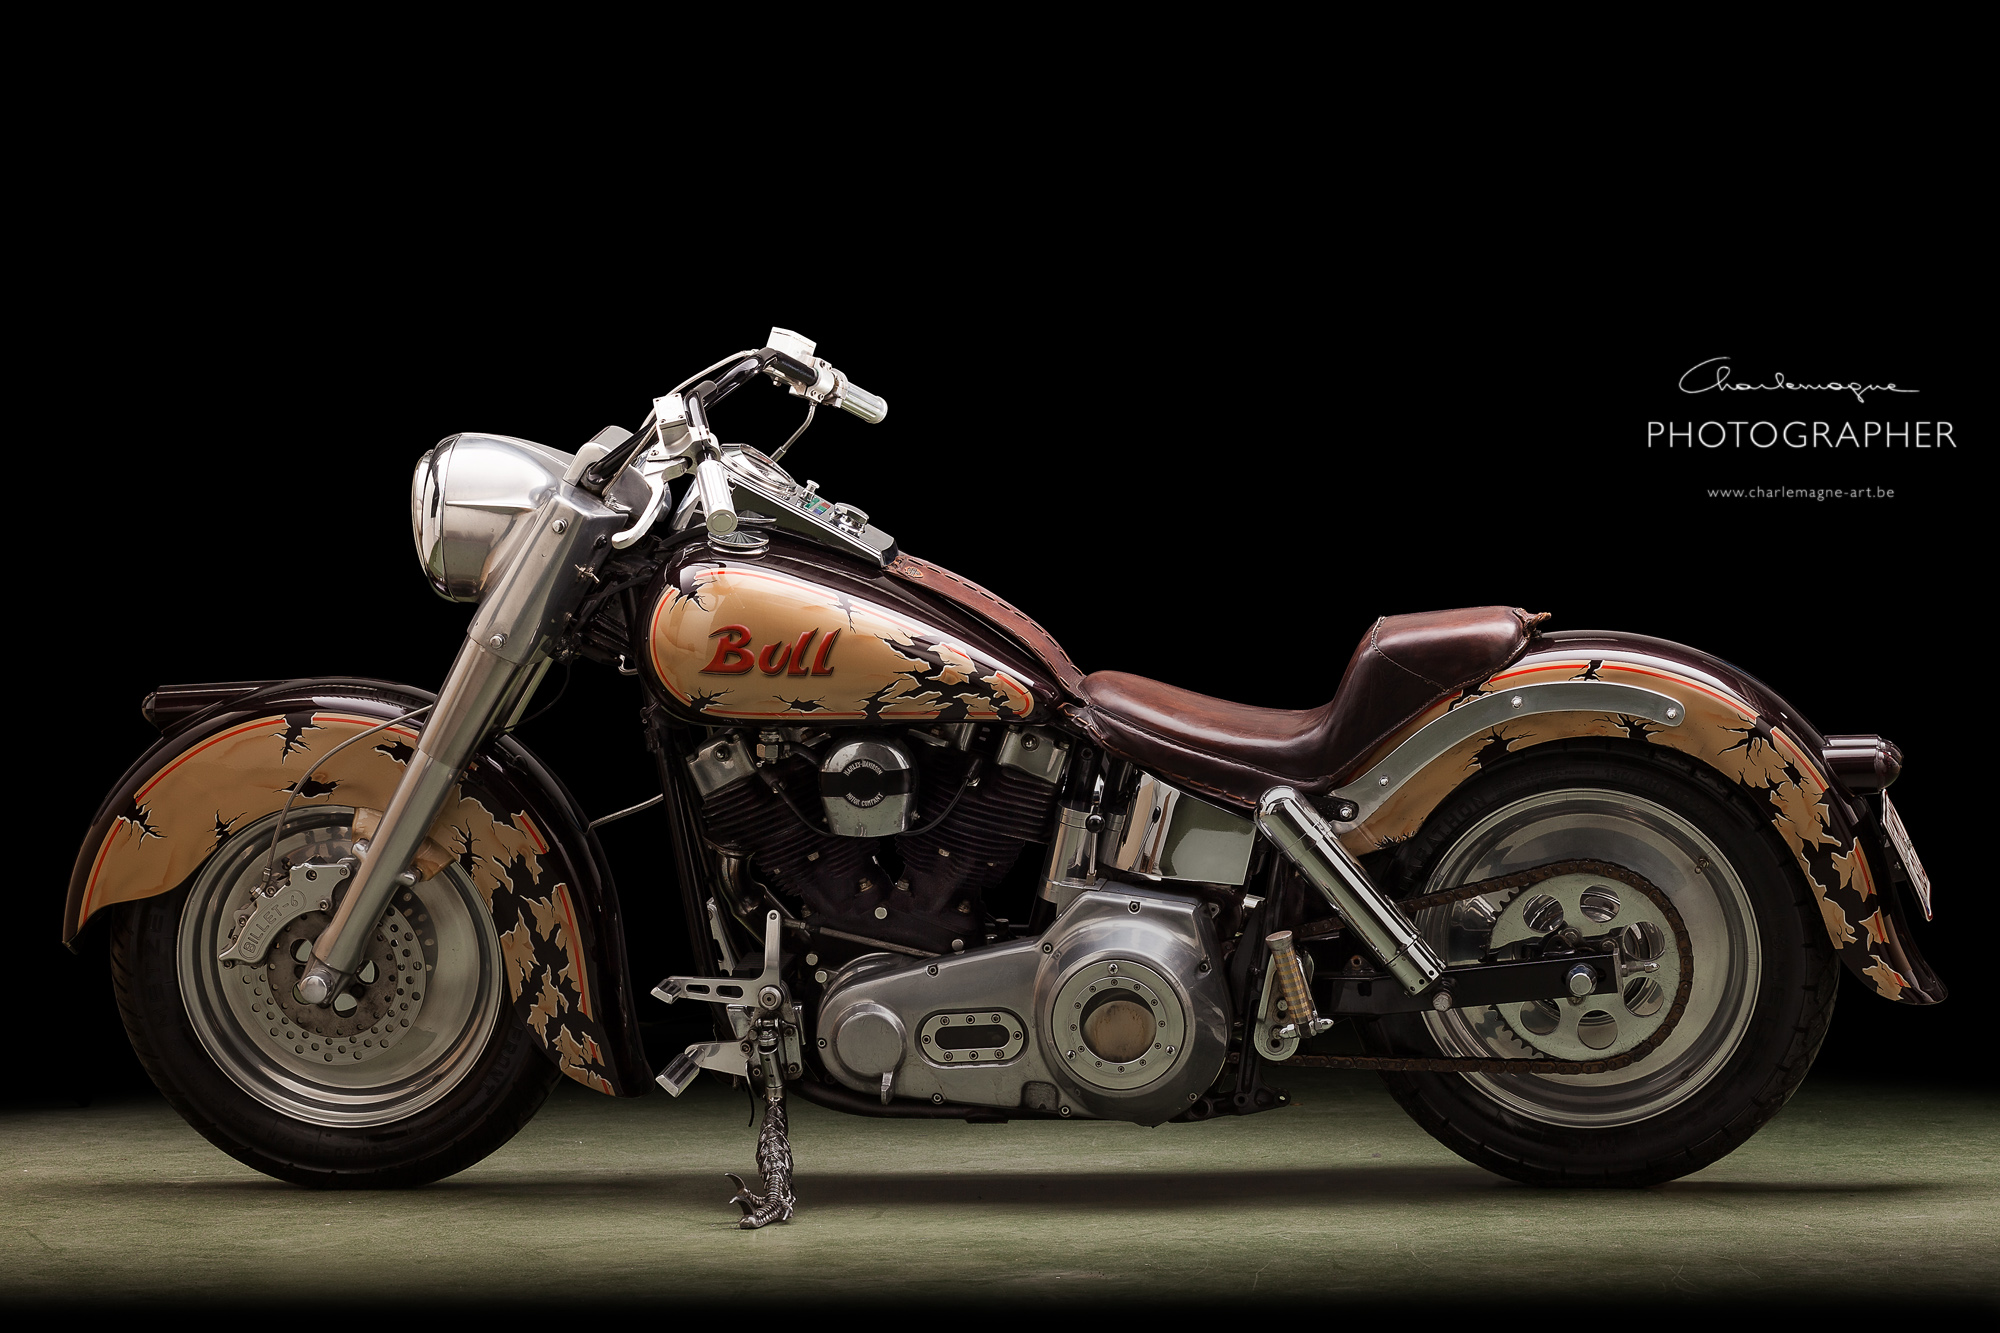
I wanted to do something more ‘tangible’ and proposed a Harley Davidson motorcycle. My mentor could choose if he categorized it as being a perfume or a jewel. I guess both of the categories apply.

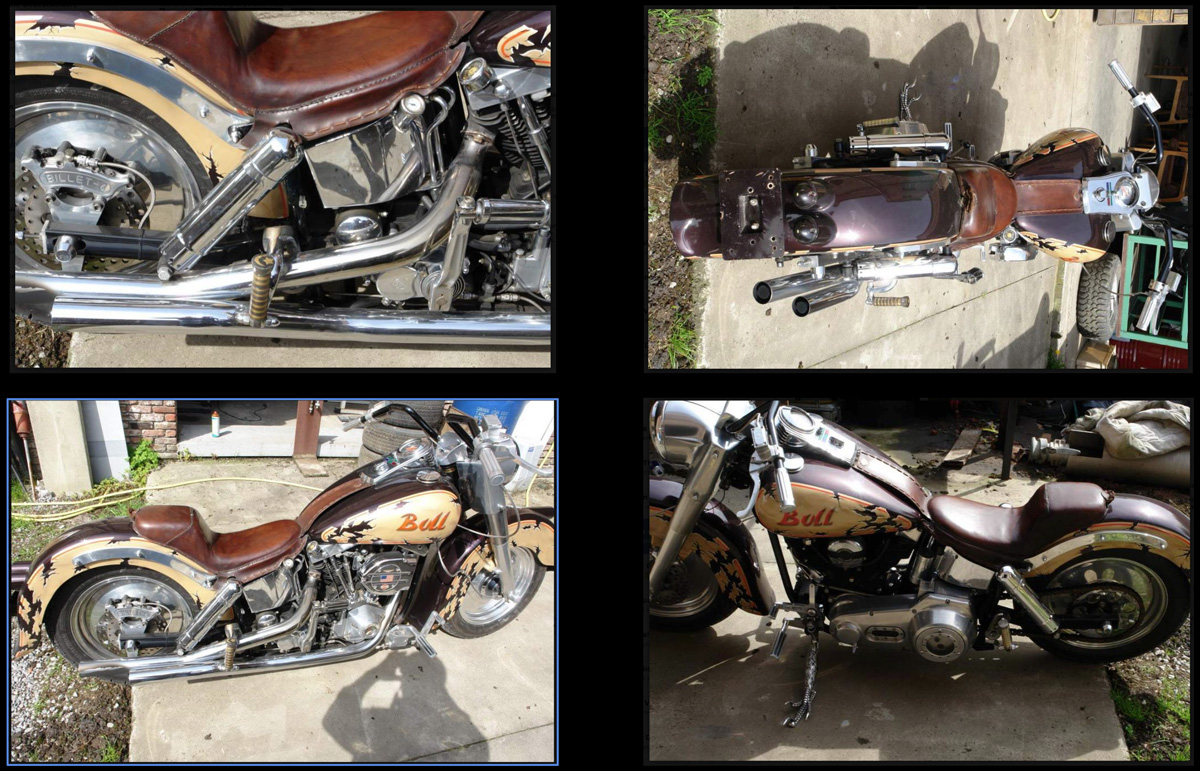
The Harley is not mine, its a customized 1981 Electra Glide from a friend of a friend, and hardly recognizable from the original. François is the owner of the bike.

the subject

I had surfed a bit for inspiration too. There’s not so many studio shots of motorbikes on the internet, here are a few:

inspiration

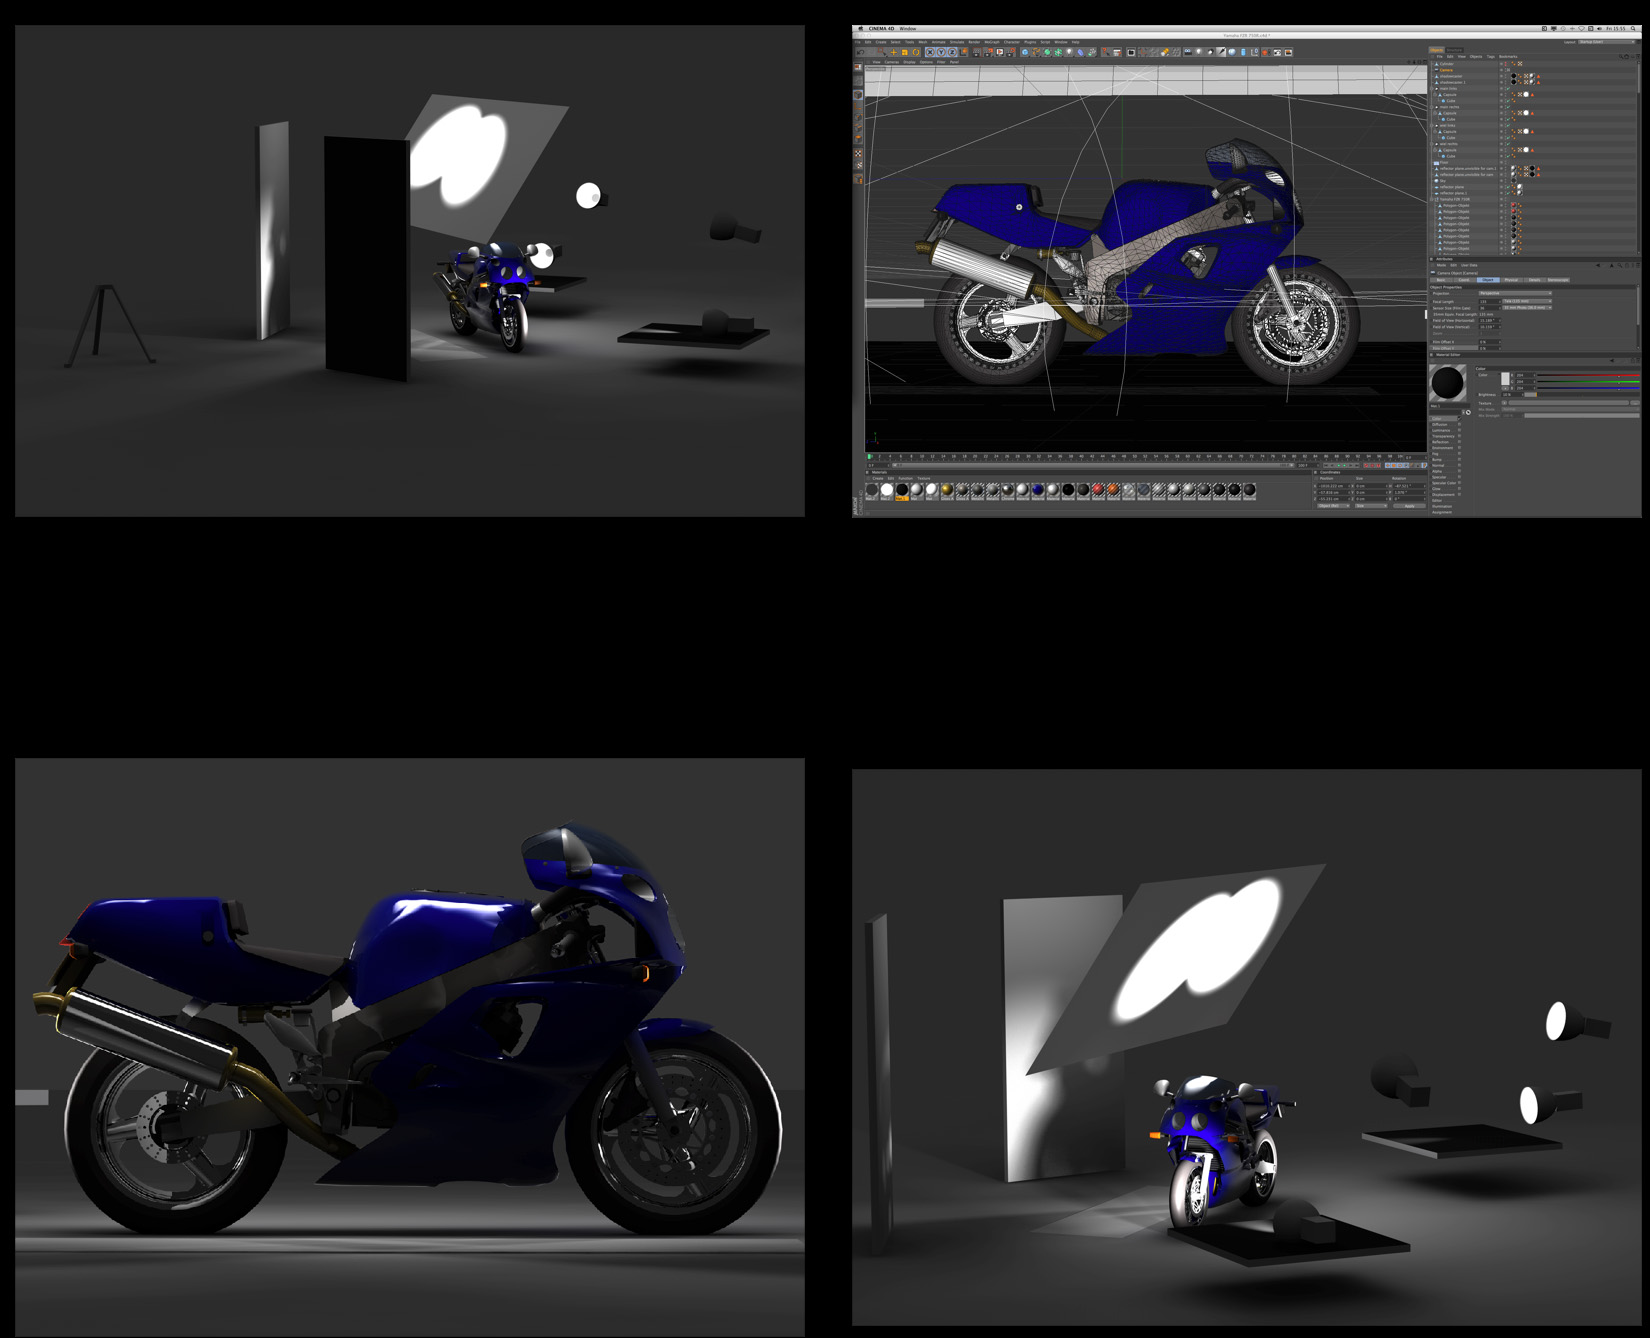
I had made some preliminary studies in 3D rendering (thats still my main job). I had discussed with my teacher that it would be best to lit the subject indirectly, with a large soft box from above. Since we don’t have softboxes that big at school, I had to come up with something else.

the virtual world

and then the ‘thing’ arrived.

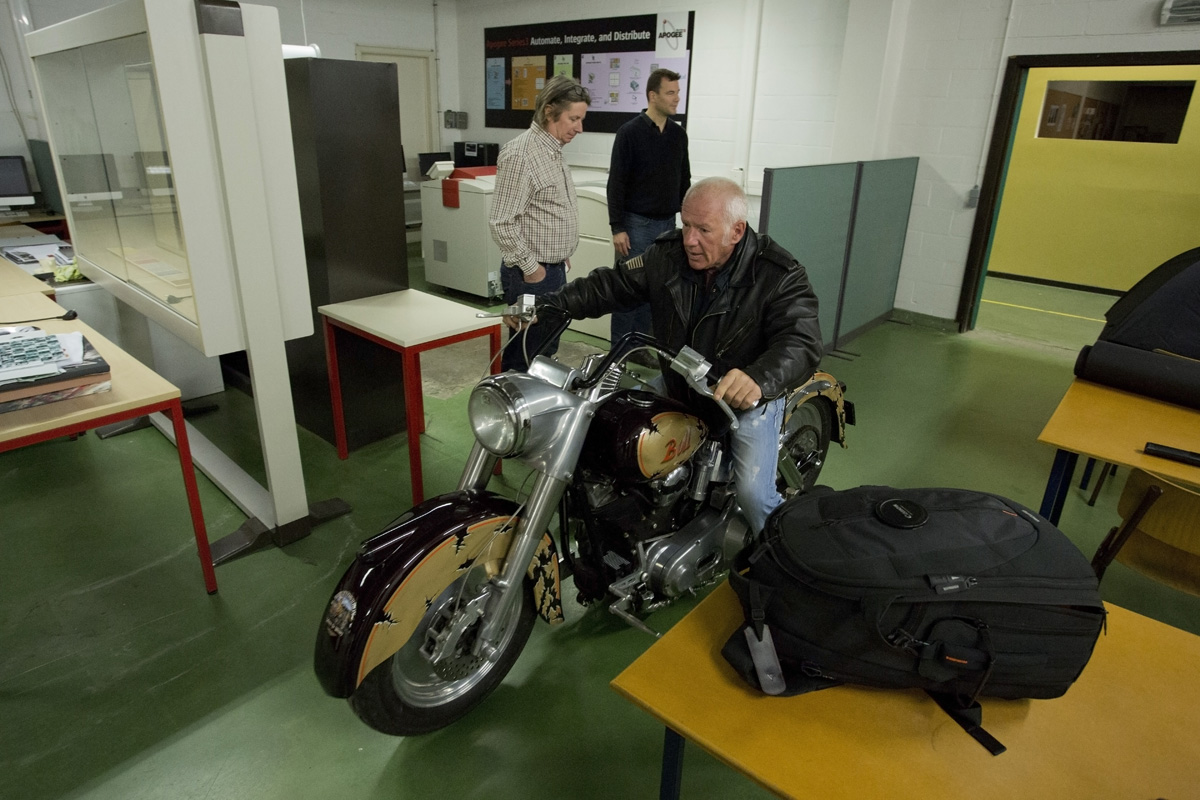
I had shown François where in the school we wanted to shoot the bike. (I had three other classmates doing their work in the proper school studio, so I had to move out to another class) And he just drove it trough the hallways of the school. All students were awake at once on this early saturday morning.

3R7A0589

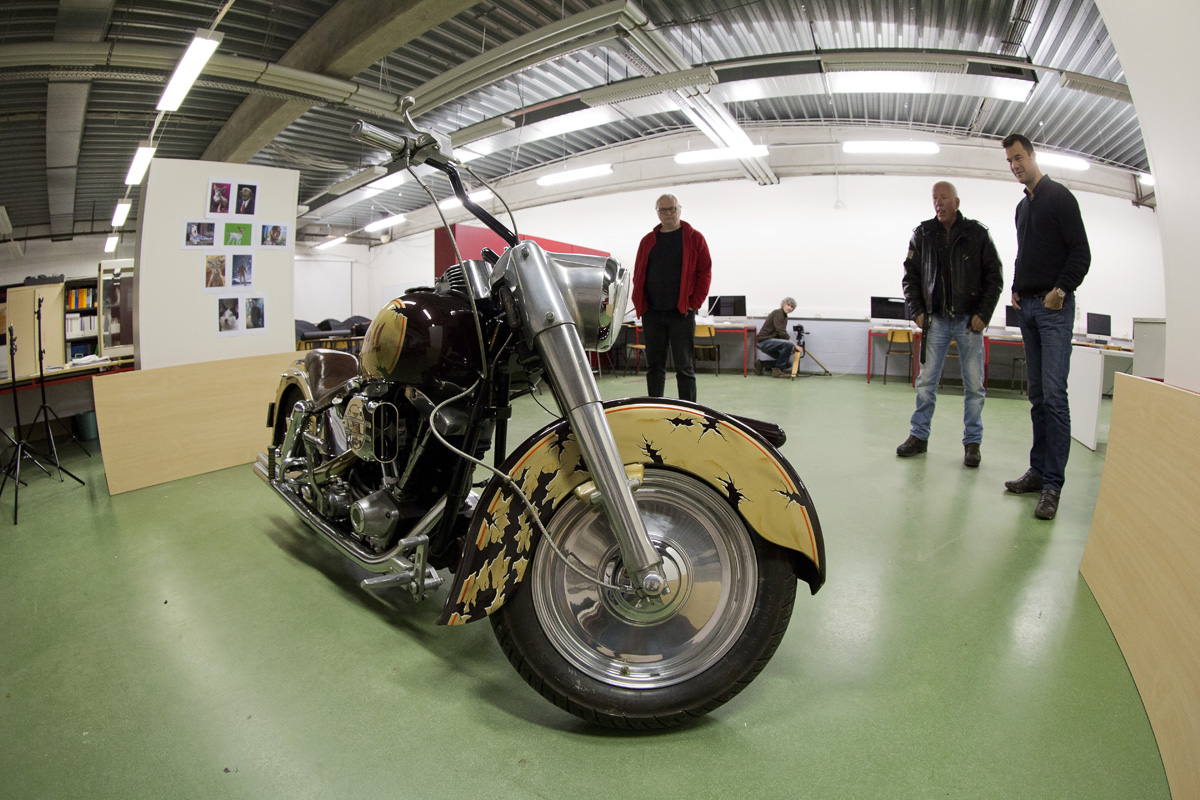
So, what’s next? You see me setting up the tripod and camera.

3R7A0596

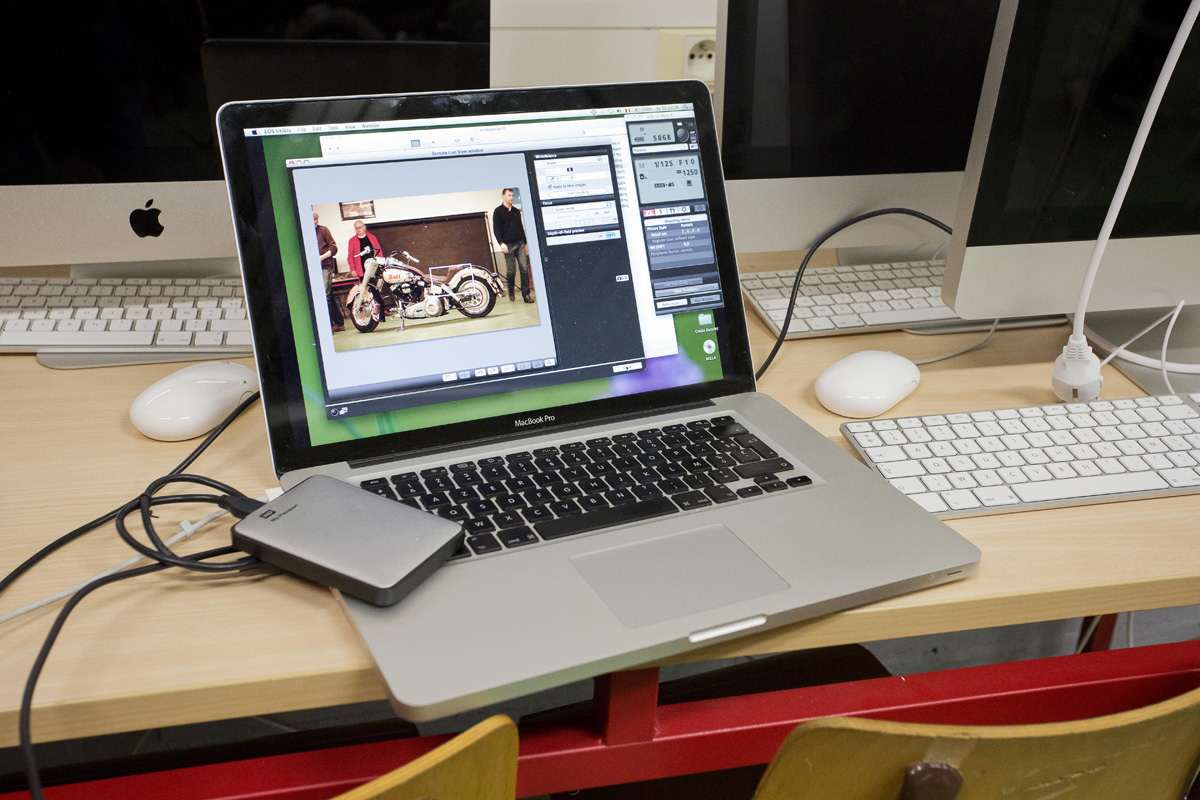
Checking on the framing, remote shooting with a portable mac, to be sure not to touch the camera in between shots. (I wanted to be sure I could compose different shots together in photoshop afterwards)

3R7A0600

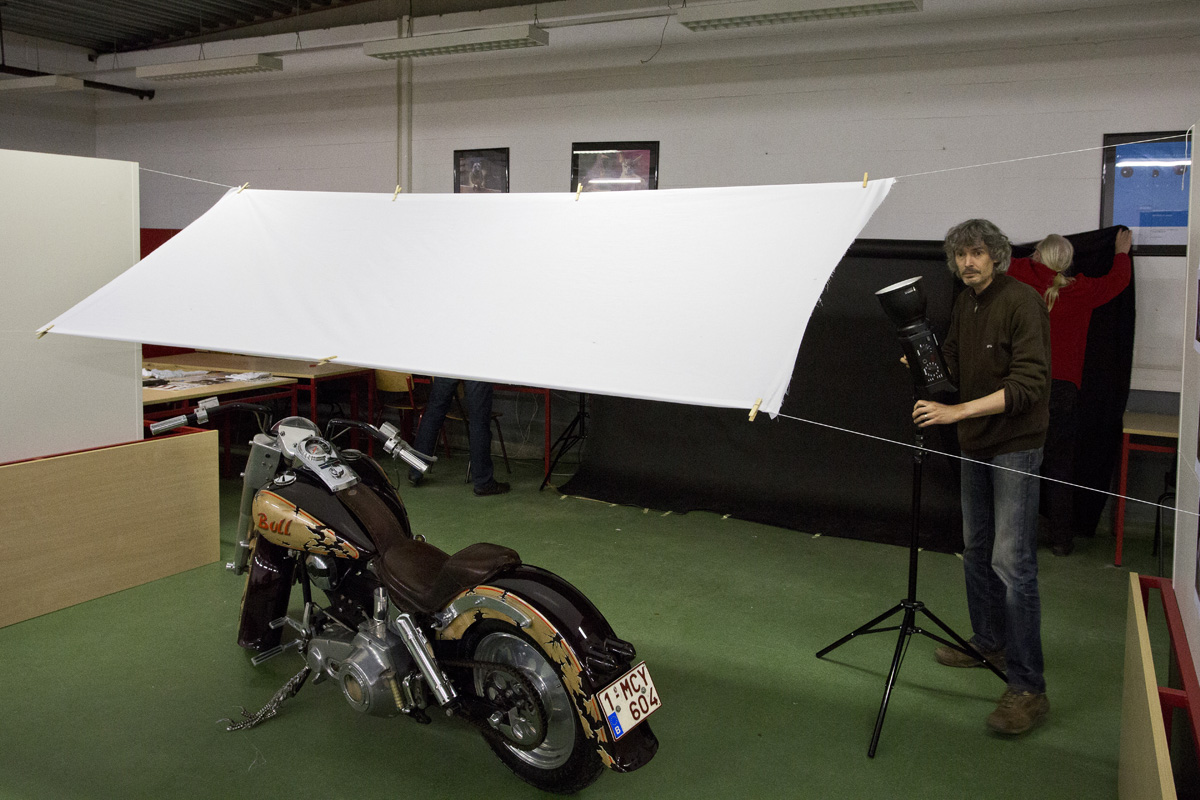
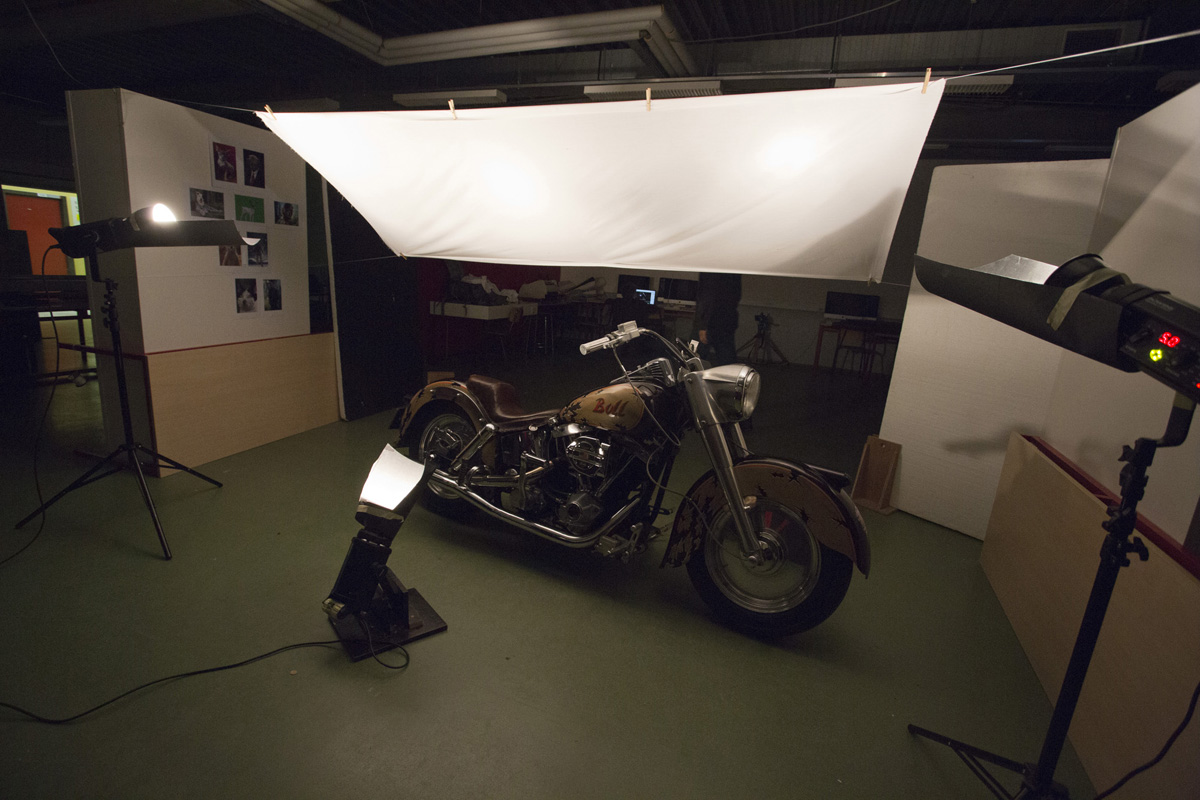
Me setting up a flash light for indirect flashing on the cloth. The cloth will serve as a huge soft box area.

3R7A0603

The setup, seen from the backside, you can see the tripod in the back:

3R7A0607lores

A big thank you to Serge (classmate) for these splendid behind the scenes pictures!!!

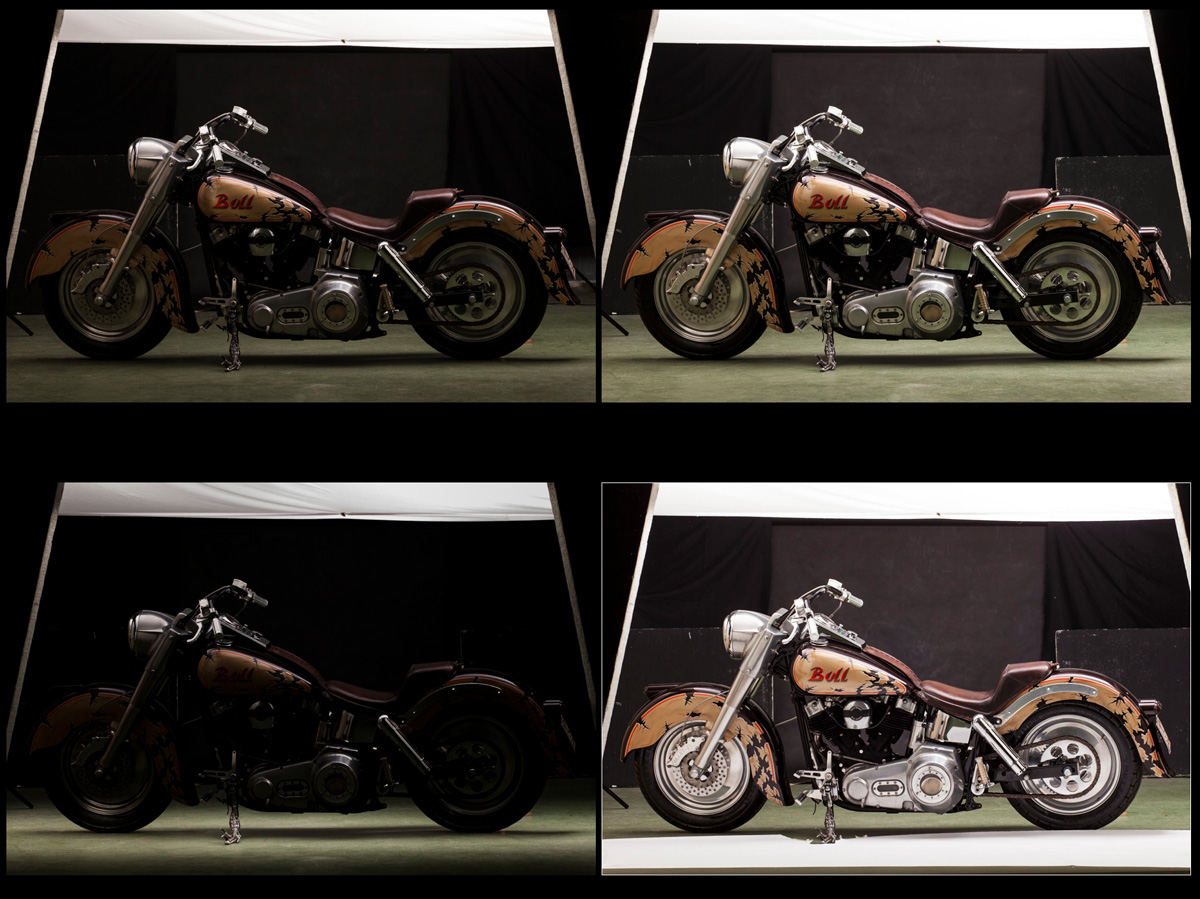
These are the original shots used for composing the final image. Note the shot with the white paper on the floor, for extra light from underneath.

For those interested, the shots were made with the Canon 85mm f1.8 at f10 shutter speed 1/125, ISO 100. Three 600Ws monoblocks at 3/6 upto 6/6 power, indirect on the cloth above.

originals

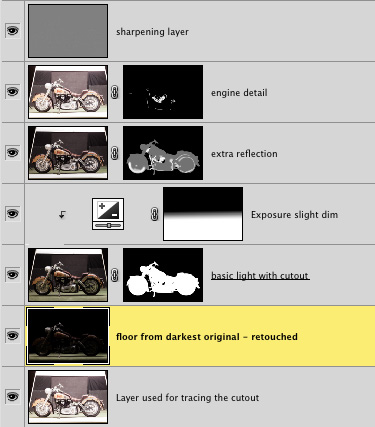
then the photoshop layered file for compositing. I named the layers in english, for your convenience (dutch is not really an understandable language)

photoshop compositing

and then at last, the finals, click to see them bigger:

charlemagne-art-Links final

charlemagne-art-Rechts final

A big thank you to Anita, for bringing me in contact with the owner of the bike,

a big thank you to my assistants of the day – classmates Stef, Serge and Geert,

a big thank you to the owner of the bike, François, for driving about 60 miles to the studio, on a cold morning.

hope you’ve learned something.

take care, and see you soon,

Ludwig

Nude Studio shoot – NSFW

beauty, Personal Pictures

Hi,

although I prefer natural light settings, I recently did a studio shoot. The one thing I love about studio is that you can create light exactly where you want, and omit light were it is not wanted.

Typical usage for this is when you want to obtain a low key effect. Only put the light where you want it, and keep everything in the darker tones except some highlighted details.

I’m not really experienced with this, but I love to experiment with it. Especially when I have a willing subject to experiment with.

I got a bit inspired to do this shoot when I saw the latest book from Andreas Bitesnich ‘more nudes’. He however, is really really experienced 😀

This shoot is done with two monobloc lights (Elinchrom 500 BRXi) and some simple styrofoam boards for directing the light, and a black paper background.

At the left a monobloc flashhead with small softbox (60x60cm) at the right a gridded monobloc flashlight, 50% covered with a simple black cloth, because it was too prominent and I couldn’t go to a lower setting. I still wanted some DOF play so I didn’t want to close down aperture too much either.

Two styrofoam boards keep the light within a small area, and prevent flashlight spill on my background.

nude studio setup

I hope you like the images!

charlemagne-art_nude-9572

charlemagne-art_nude-9600

charlemagne-art_nude-9606

charlemagne-art_nude-9614

charlemagne-art_nude-9652

take care, and come again soon!

ludwig

Developing beauty – LR4 – example.

beauty, Personal Pictures, personal tips & tricks, Tips and Tricks

Since september this year I started giving Lightroom 4 classes. I have a group of 18 students, and they manage quite well.

Although there’s quite a lot to learn, most people with a normal level of intelligence, and some motivation and a basic knowledge of computer usage must be able to learn all the techniques available for developing in Lightroom.

The biggest problem however is to get a feeling about what decisions to make when developing. Actually what steps to take to improve an image.

Without claiming that I can give you a perfect example of a perfectly developed image, I would like to show just an example of a image development I did just recently.

I chose to turn it into a black and white image, and used some tinted processing. This is all very individual, and you should always adapt to your personal choice. That’s why this is the most difficult thing to learn I guess. It’s by no means an exact science.

First of all maybe a small light setup diagram, to show you how this image was lit.

Left you see the light diagram. I have two monoblock heads with soft boxes headed straight at my model. (one octa and one smaller square box) They are about equally powered, both on the lowest setting to allow for a large aperture setting. EXIF: ISO 100 – Canon 85 mm f1.8 at f4.0, 1/125 sec. Canon 5D II.

You can see two behind the scene’s pictures from my friend Michel. In the middle You see me metering light at the approx spot where my model will be, and at the right you see me working with the model. -Click for bigger image-

Location light setup

I have fairly evenly lit images with this setup, with the white wall bouncing back a lot of light to the shadow side of my model.

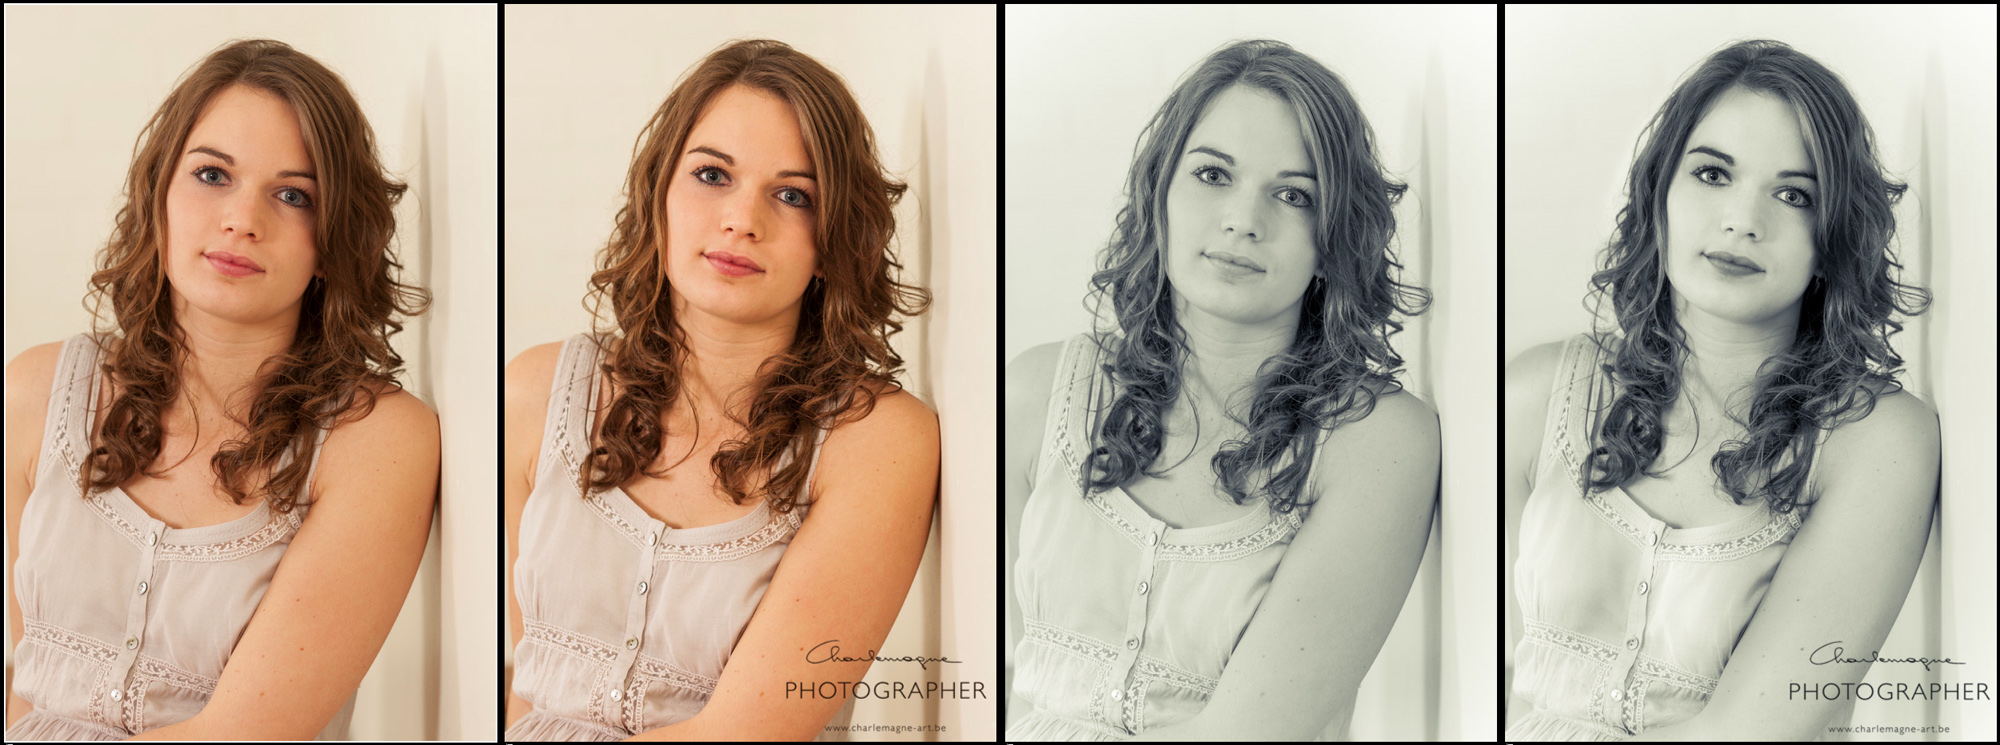
Next image shows the four stages of development:

Left: straight out of camera, no development settings applied in LR.

2nd: just some basic overall adjustments

3rd: Conversion to BW and split toning applied

last: final, local corrections applied

-Click for bigger image-
charlemagne-art LR4beauty developing process

Some more into the details:

2nd image corrections:

I adjusted white balance to 5500 (5D II chooses 5600 for flash)

Added some contrast +20 to give some more punch to the overall image

Shadows +26 to brighten up the shadow side of the model

Clarity +15 I feel like using clarity slightly makes the details stand out more

that’s all

3rd image corrections:

I rather bluntly converted this image to black and whit by dragging all saturation sliders in the HSL to 0.

Furthermore I experimented with the split toning colors and came to this setting: Highlights hue 67 – saturation 24 – balance 0 – Shadows hue 235 – saturation 19

This gave me a rather flat (for the skin) black and white – toned image.

The Split toning (or cross processing) is a good feature, but is often used to create a wow effect on an otherwise not so interesting image. Beware of it’s use!

About the black and white conversion, the image could have converted with some more lightness in the oranges, to lighten up the skin, but I did it afterwards with local brushing.

In between these, I applied some local retouches to the face, to remove some blemishes and imperfections. I worked around the eye and just under the lips. Far from correct, but just a quick edit.

Settings: Heal, with an opacity of 66
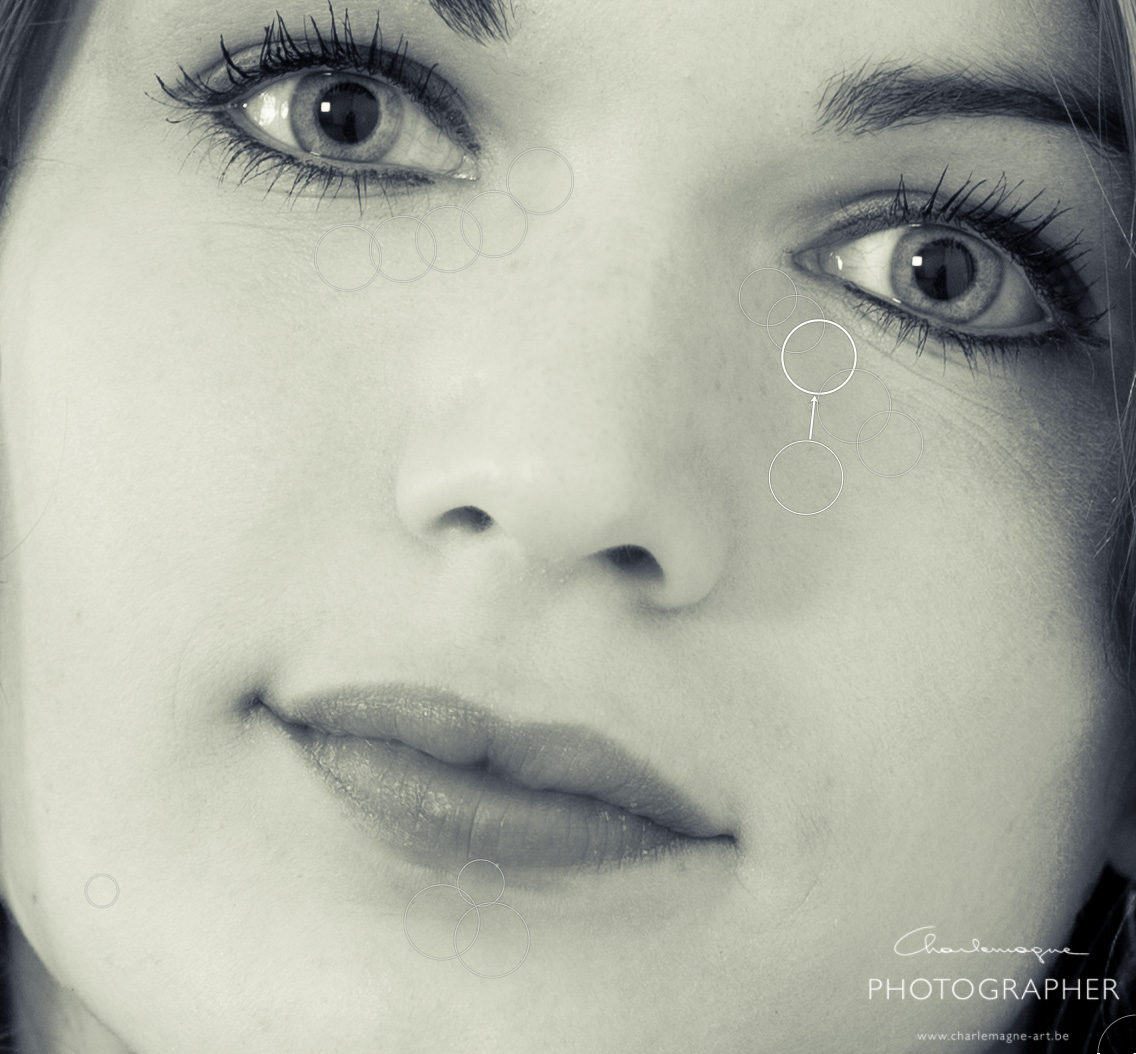
Charlemagne-art_developing_local blemishes

and then for the final corrections. I have used different brushes, and will show them all stripped apart. Here are the brushed images for each of the corrections. Sometimes I have to search for myself what is the best setting, so some brushes may undo some previous ones. Unfortunately you don’t see the image change, since I have all effects applied on every image. This is just to show you the different area each brush is applied to: -Click for bigger image-

charlemagne-art_processing_local_adjustments

then from left to right, what did I apply in my brushes (local adjustment tool):

1. Exposure 0,41 – Shadows -30 A rather bluntly applied overall skin enlightenment, also applied to the hair, but there I took some away again after.

2. Exposure -0,71 – Added some extra volume to the arms and face.

3. Exposure -0,27 – Contrast 54 to give some additional punch to the facial features. (eyebrows, eyelashes and lips)

4. Exposure -0,53 To accentuate some volume in the female shapes (I’m not into plastic surgery, but this is something I sometimes do)

5. Exposure 0,70 Idem

6. Exposure 0,26 To highlight the iris a little bit

7. Exposure 0,71 To soften the eye rings

8. Exposure 0,61 To clear up the eye whites a bit.

I’ll leave it up to you if this is a better image than the one I started with. Again, this is to each and everyones personal taste. Most of my images I don’t process that much, and this took me some 5 minutes all together.

Finally some more images from the same shoot, processed in the same way. -Click for bigger image-
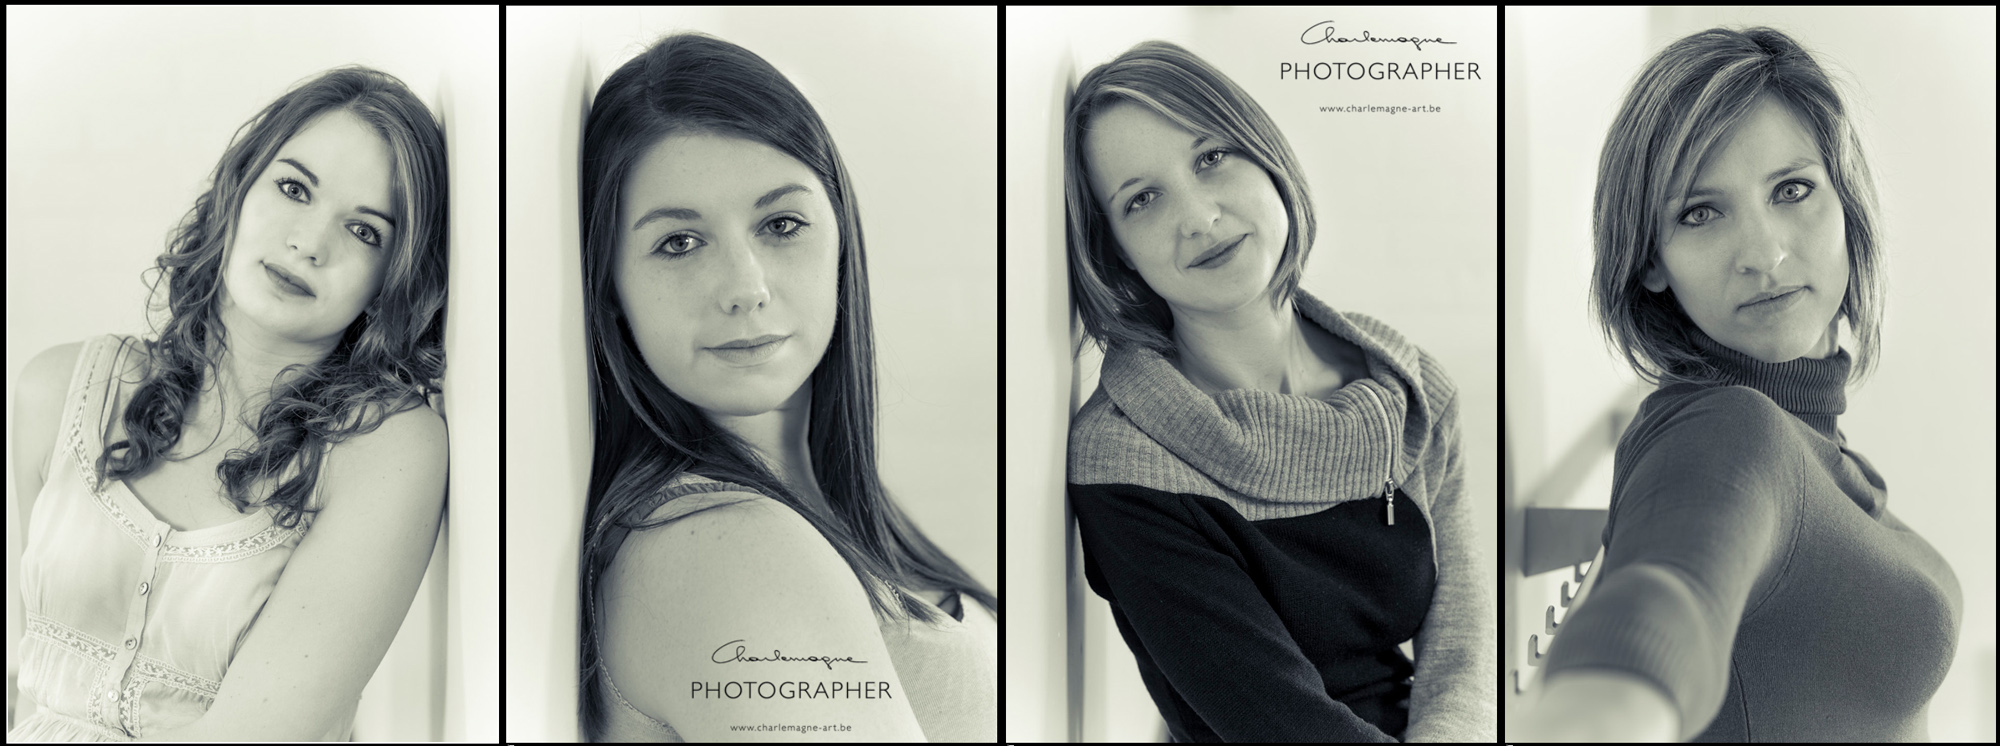
charlemagne-art_processing_beauty

Thank you for reading, come again soon!

Ludwig – alias Charlemagne –

Marcia studio shoot

people, Personal Pictures, Uncategorized

Marcia volunteered to be my model in this studio shoot.
She is unfamiliar with modeling work, so this was kinda’ new to her. She brought different clothing sets based on a small mood board I sent her to start with. It is a good thing to have a direction to work to. (I claim no credit for these images, this is just a selection of tumblr images.)


This was the narrowed down selection from the mood board, at least what direction we aimed at. Three different things, 1. is a three light setup, 2 is a single light setup (at least we reduced it to a single light setup) and 3 is also a single light setup.

Shots for number 1:
just some shots in the same tonalities as the moodboard shot. Don’t forget to click them for a bigger size!

Then Marcia started to feel a bit more comfortable and at ease, and we started doing some expressions, I made her untie her hair etc.

Sometimes I like to add some processing to create a different mood and atmosphere to the image. Just to show you what a quick edit can do:

All these images were shot with the same 3-light setup, two umbrella’s left and right behind the subject, pointing a little towards the camera, and a softbox just above Marcia’s head:

Then up to the second mood board image.
I wanted to recreate a window like shadow, with direct sun falling into it.
We have very limited gear in the school studio, so we had to ‘be creative’.
We used four large styrofoam reflector panels to create a window, and barn doors on the flash light. A 5th reflector panel just to the right of Marcia created some fill light at the shadow side. I had my assistant of the day (Gert) to hold a black light blocker next to the flash-head, because we got too much spill light into the studio otherwise.

Marcia loves sunglasses, so we used them. (I always please my models, or at least do what I can do to do so 😉 )

And for the results:

And then the number three from the moodboard.
(Actually we did this one second, and the sunglasses last, because we re-used the setup from 1, except without the umbrella flashes, so only the top softbox)
Marcia has too much hair to do something similar to the mood board, so we had to improvise. She did really well, she posed quite easily now, so we could try out different things quite quickly.

At last, don’t be afraid to do some post-processing. This one image I especially liked, and I processed it a bit like the mood board example, and then a second time I processed it to my likings. Look what difference this makes:

What have I learnt from this shoot:
You don’t have to be an experienced model to create great looking images, as long as both model and photographer feel comfortable in each others presence. Thank you Marcia for stepping forward on my request for a volunteer!
There’s a lot that can be done in only a short period of time, at least when you are a little bit prepared as to what are your targets. (mood board) This shoot took one and a half hour, from start of first setup back to a cleaned up studio room. Thanks again to my assistant of the day at Kisp, Gert.
Dare try some post-processing to change the mood of your images.

Next post will be a series of images I took from my wife Nathalie – EMOTIONS
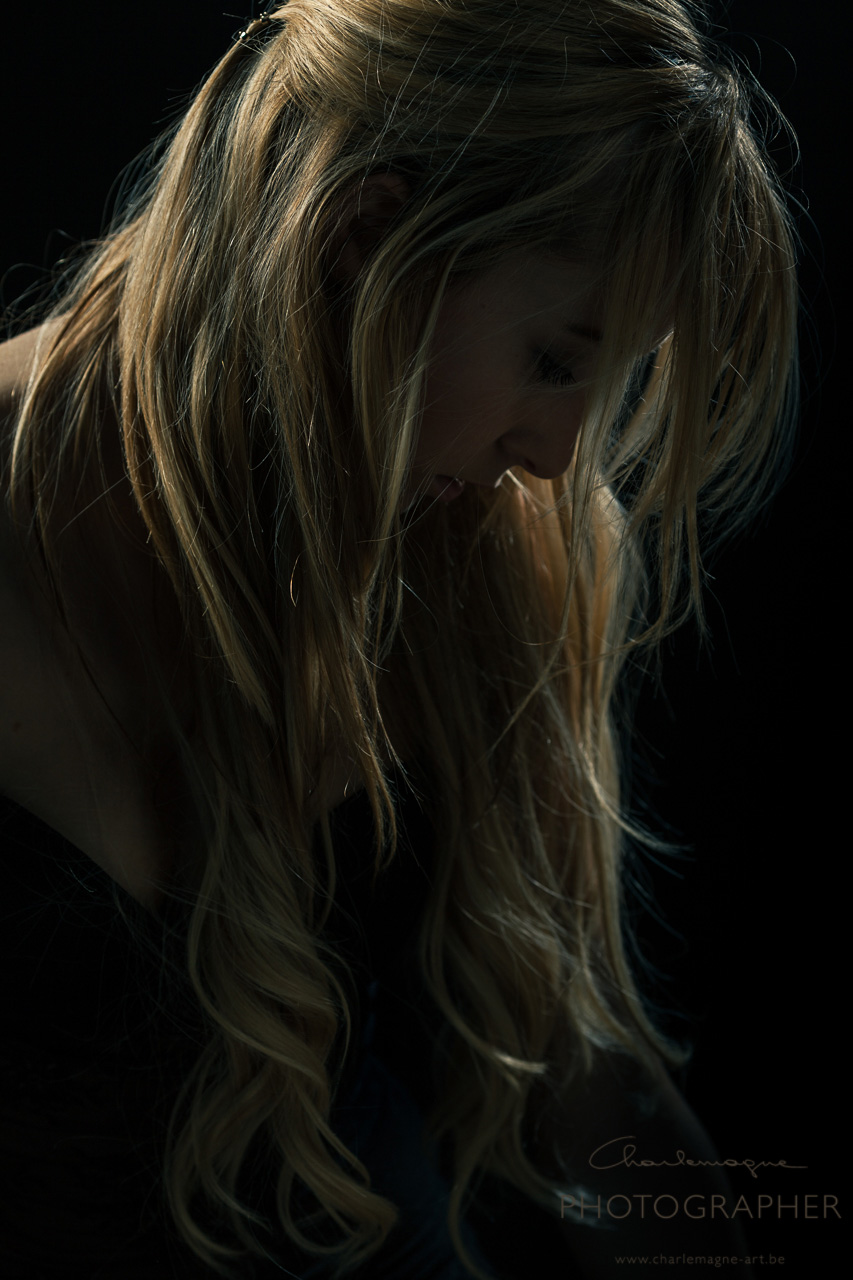
come again soon,
Ludwig

Simple setup for kids shoot

people, Personal Pictures, personal tips & tricks, Tips and Tricks

I did some kids shoots in the previous weeks and I wanted to share this simple setup for nice pictures.

I was asked to do some portraits for a cousin and then with the same setup I took some pictures with our two boys together. Setup is the same and is like this:

I have a simple black cloth as a backdrop, a flashgun EX 580 II with a small softbox on a stand as a main light, a large styrofoam board (220×120 cm) as a reflector panel and a second flashgun (snooted with a self made insulator foam snoot in the back) to provide some rim light.
The results look like this (not the outdoor shot, nothing to do with this setup):

After the ‘brothers’ shoot, we had some fun with a balloon. They threw it up before their heads, and I shot it when it just passed their face. (I admit, we had to repeat this several times) I had some fun in photoshop afterwards.

Hope you liked this post!
Ludwig

more professions – light setup
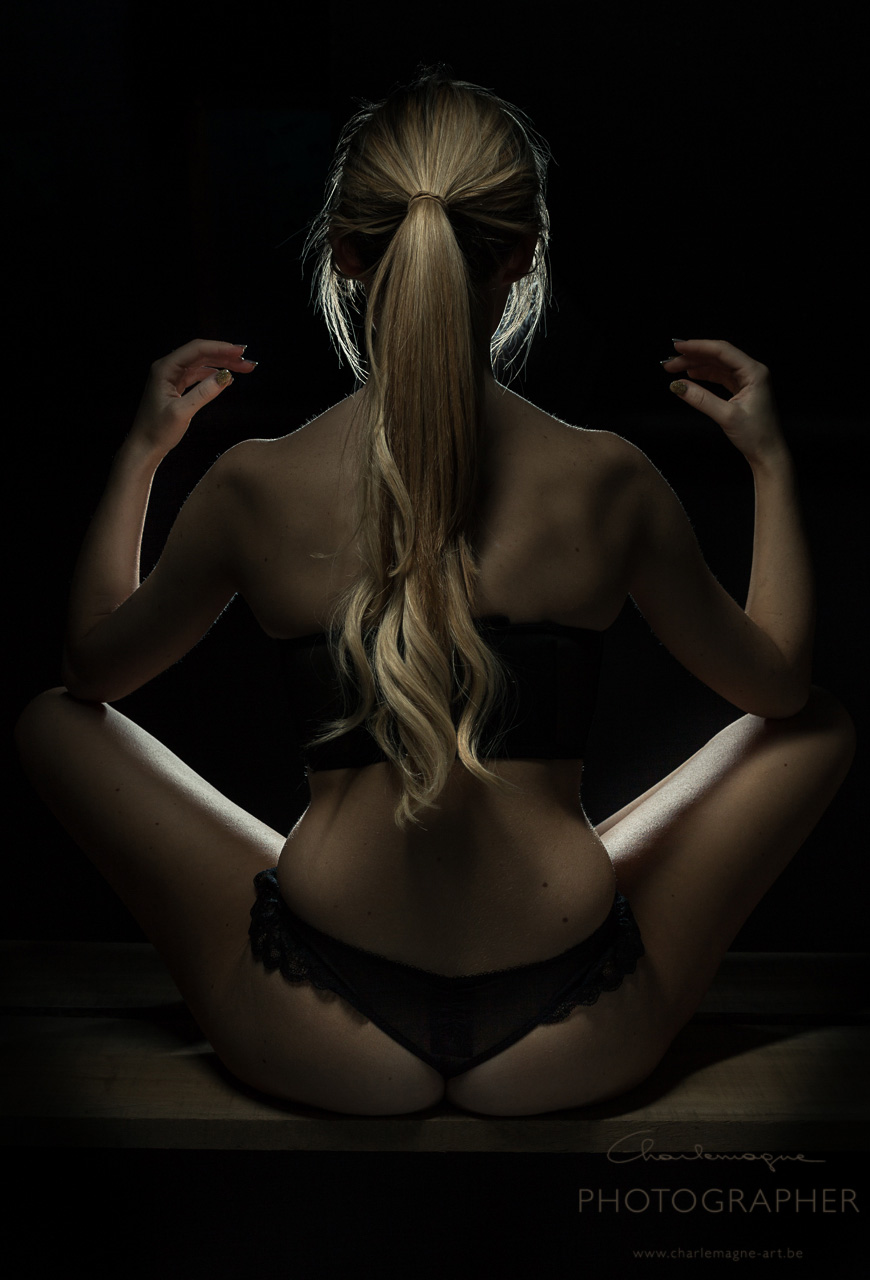
people, Personal Pictures, personal tips & tricks, photo gear, Tips and Tricks

And my project on profession portraits goes on.
I have quite some people spontaneously offering to pose for my series of professions. A classical portrait with a – small/not so small – glimpse of the job they do.
Below, you’ll see the library assistant, the plumber, the health coach and the actuaris. For you to find out who’s who, can’t be too hard I guess. – click on the images to view larger if you have difficulties finding out –

for my fellow photography enthusiasts, I’ll include a more detailed light setup, which is actually very simple:

1. I have a black cloth hanging up in the back of the room 3 to 4 meter behind my subject.
2. I have a reportage flash (Canon 580 EXII) in a 70×70 cm softbox from Lastolite on the right of my subject, which is my only light source. It is set at 1/4 +0.7 power and very close to the subject (maybe half a meter). I put it so close because this allows me to lit only my subject, and have the background almost black, thus reducing the post-processing. it is at the subjects head hight, slightly aiming down.
3. I have my large Lastolite tri-grip on the left side, on the ground + my diy reflector on a small stand, I had to use this extra reflector, because otherwise I don’t get enough light on the shadowside, and I recon my own reflector is just a bit more reflective than the trigrip, which is larger but softer.
4. I’m at about 3,5 meters distance from my subject, at about hip-height, to make my subject seem larger and fiercer, more ‘standing out’ I use my 85 mm 1.8 lens, at f8 on a full frame camera, to get a decent sharpness overall.
5. I have different subjects 🙂 They are all uncomfortable with posing, believe me! I ask them to turn their body slightly towards the main light, looking at me. Then we do about 15-25 shots, until I think we have a good shot, representing both the personality and a good pose.

The images are taken in colour, as raw files, and treated in LR afterwards. I use the standard BW settings, but have some minor local corrections with adding or removing exposure. I then remove the unwanted parts in the image (my background is not large enough for this distance, so I need to remove some ceiling that is not black, sometimes I need to move a small part of the reflector on the left.

I hope you like the pictures, if you are willing to pose for me, please give me a sign trough email or by reacting to this post. In return, you’ll get the chosen image in high resolution, free for personal use.
If you have any questions about the setup, ask it.