Hi there,
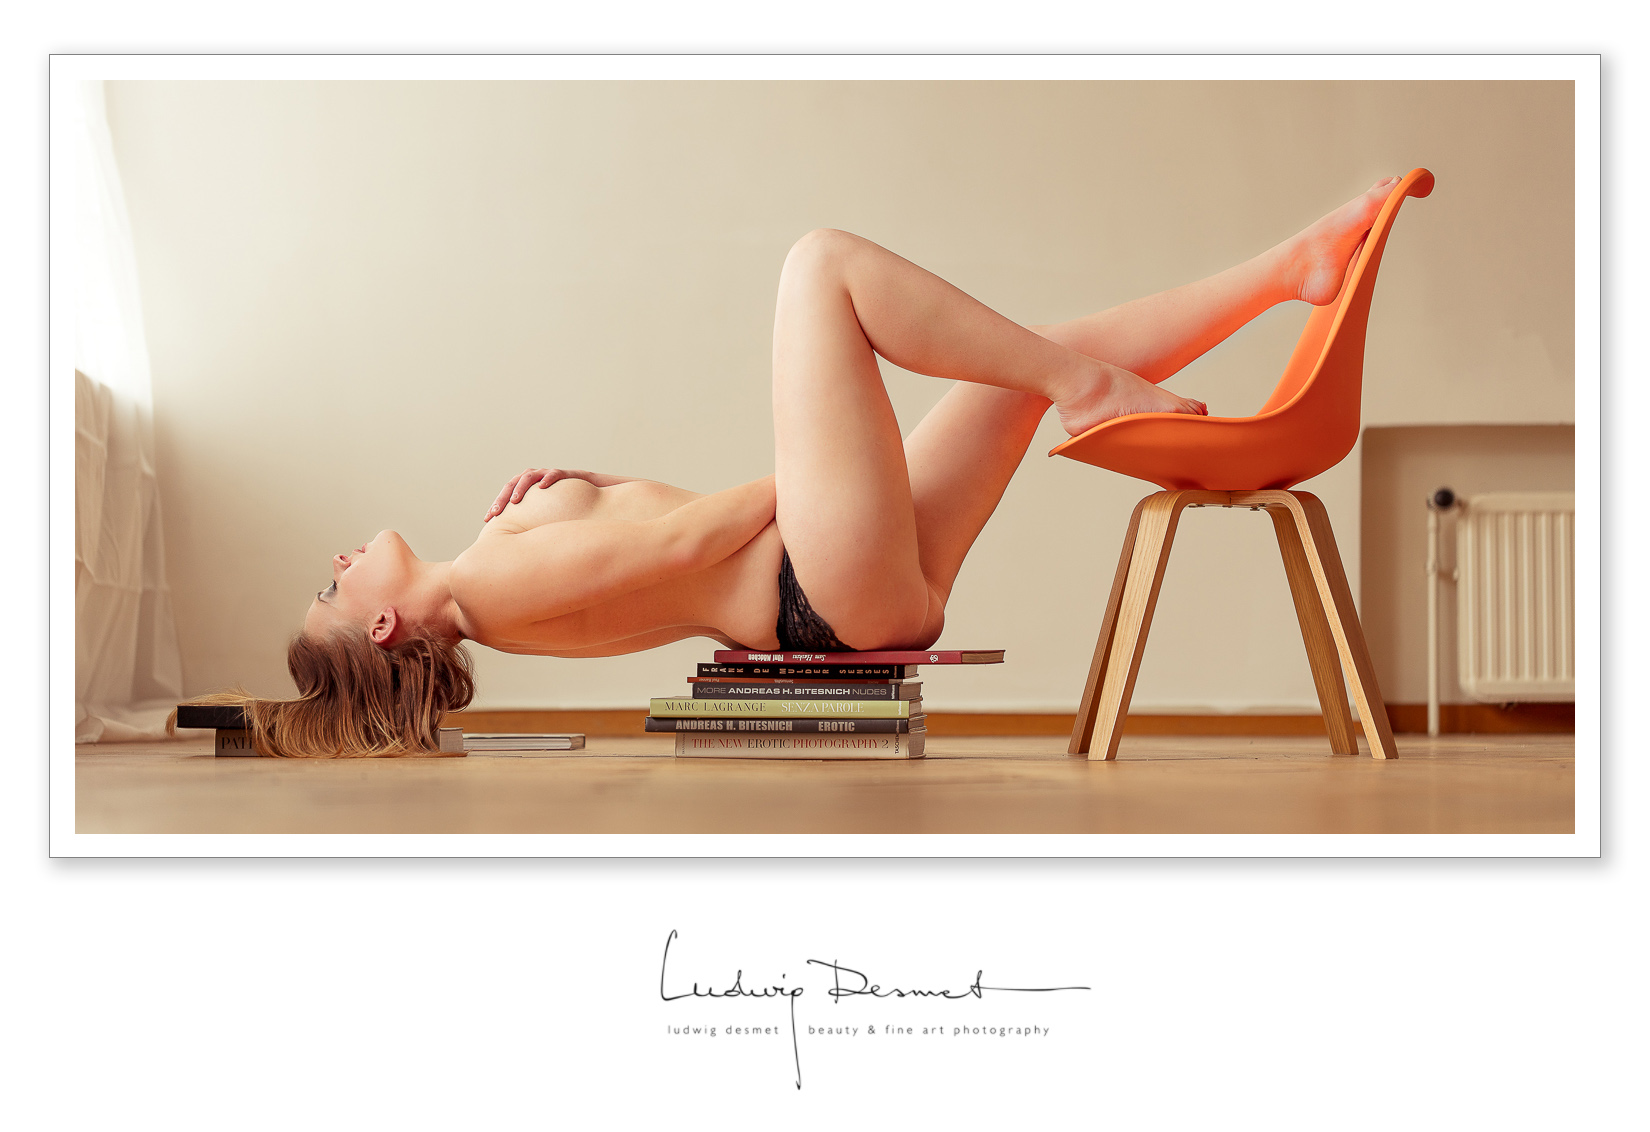
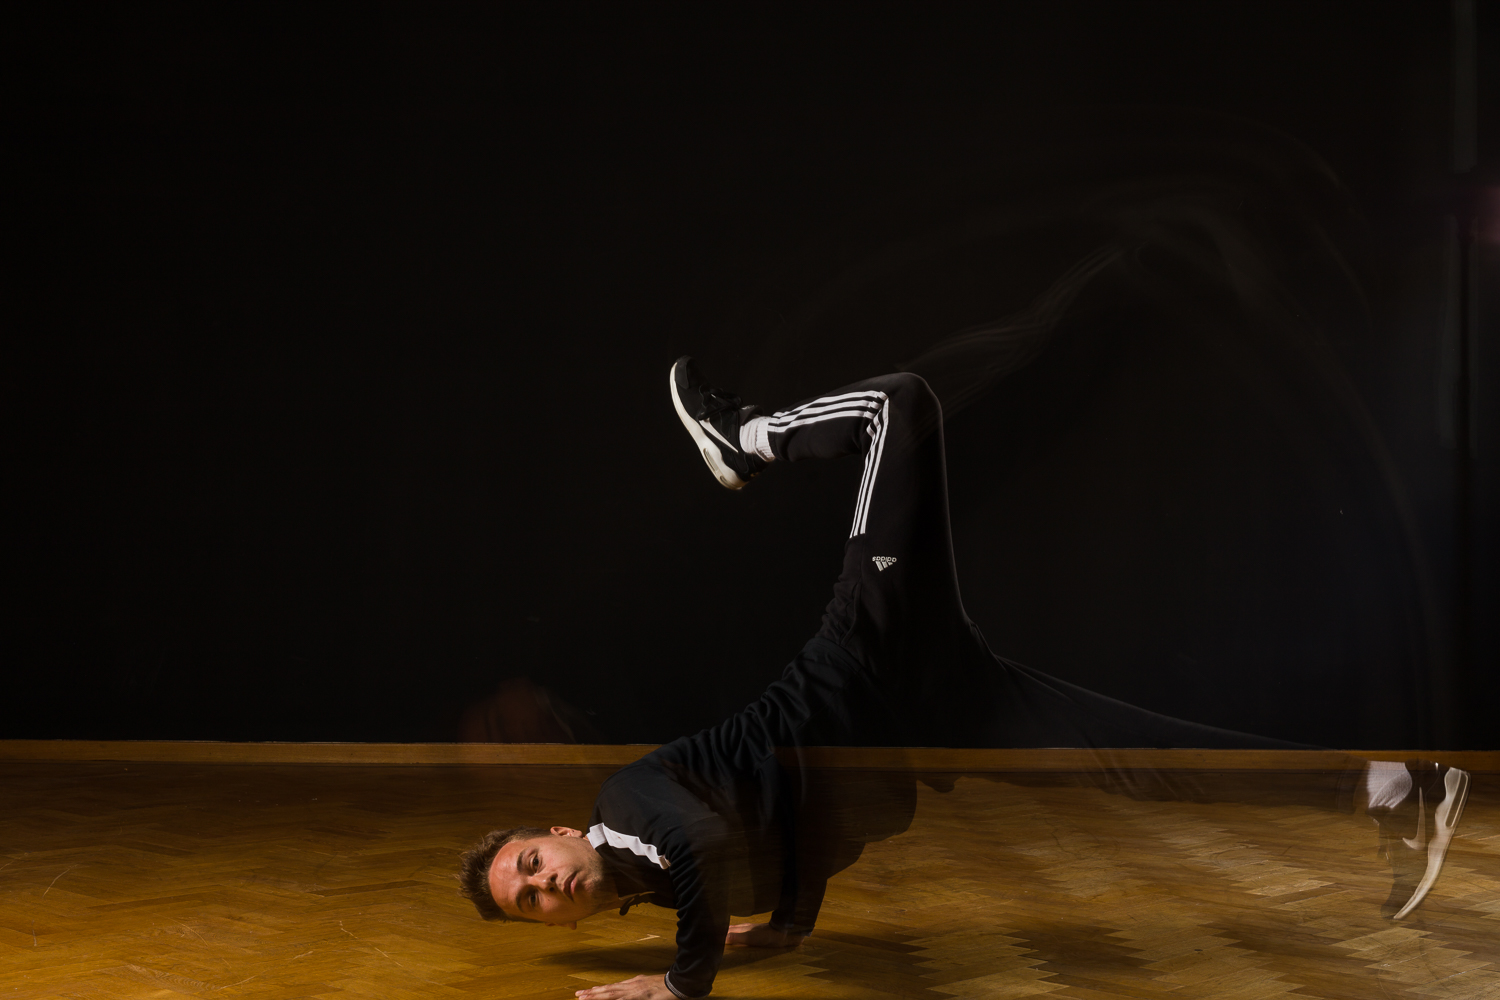
last weekend I had a meetup with Lisa and her friend, both dancers, she’s more into the classic dance, he’s more of a break-dancer.
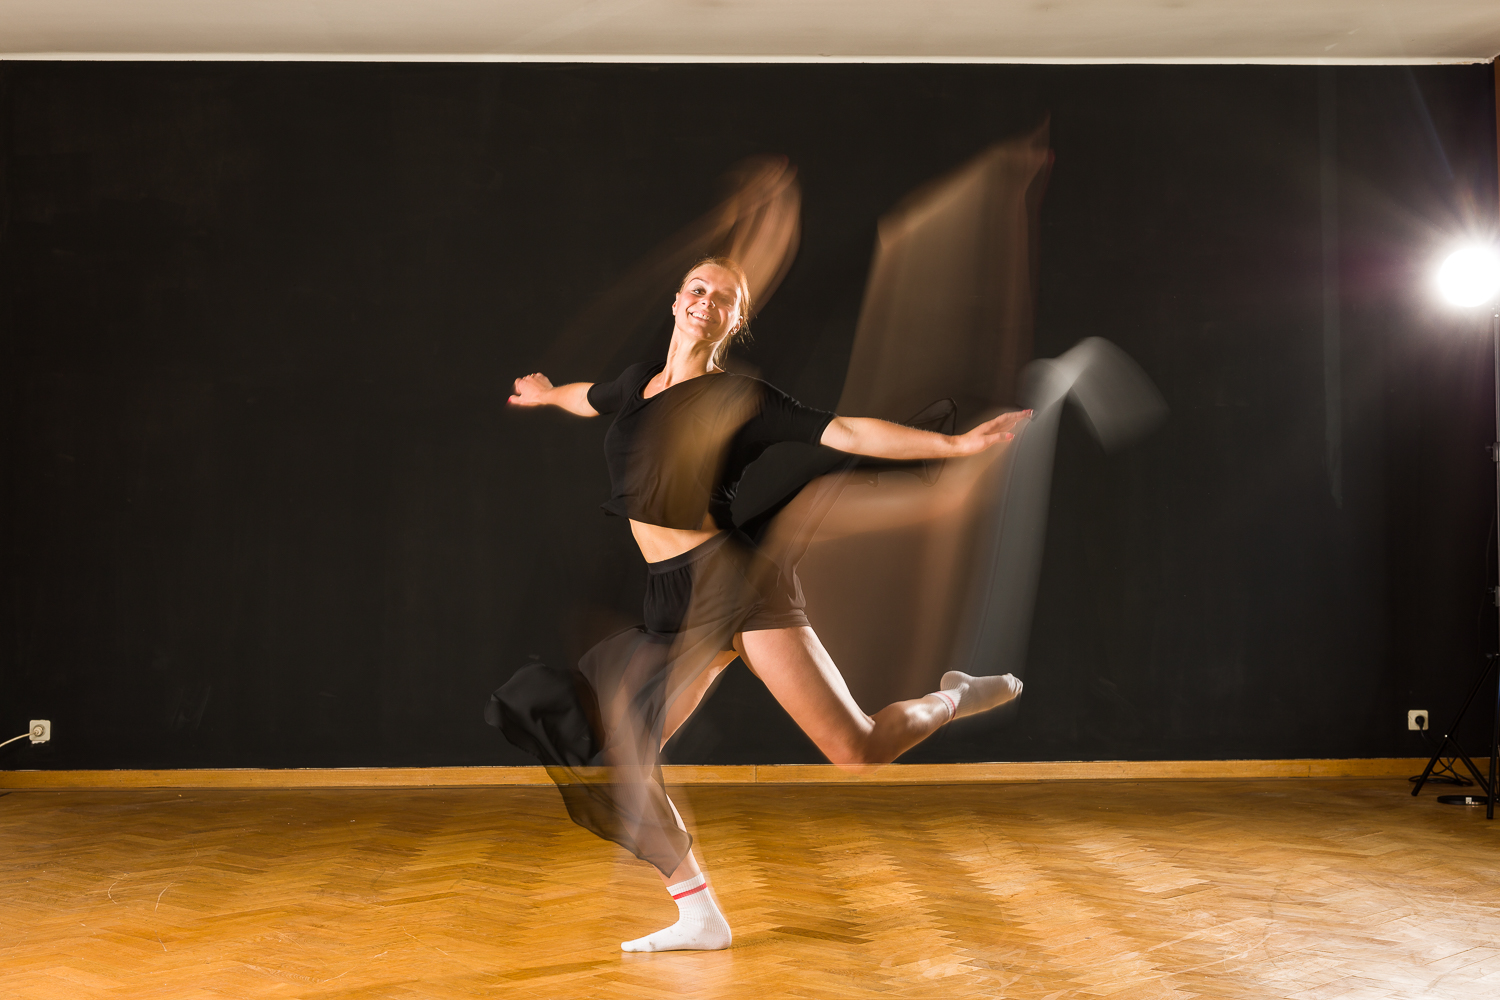
I will show you some images, but I would also love to talk about the technique that I used to get to these.
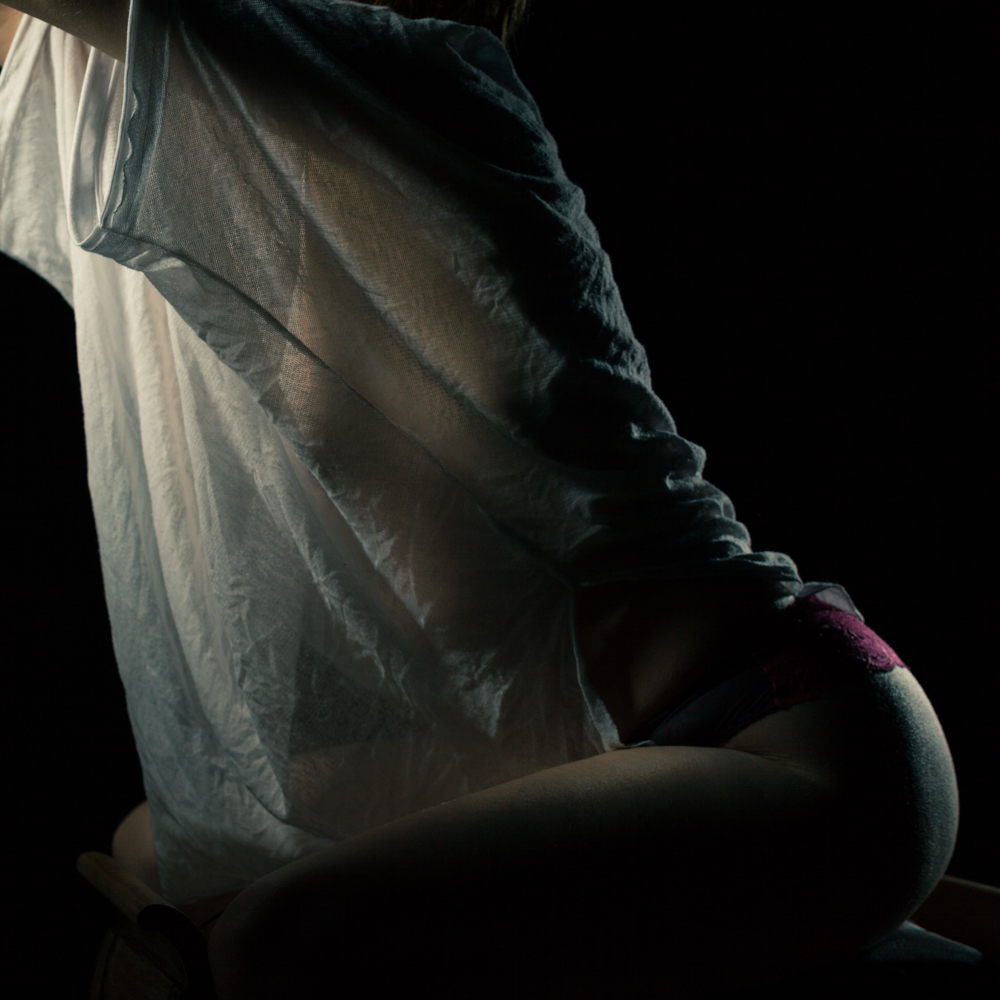
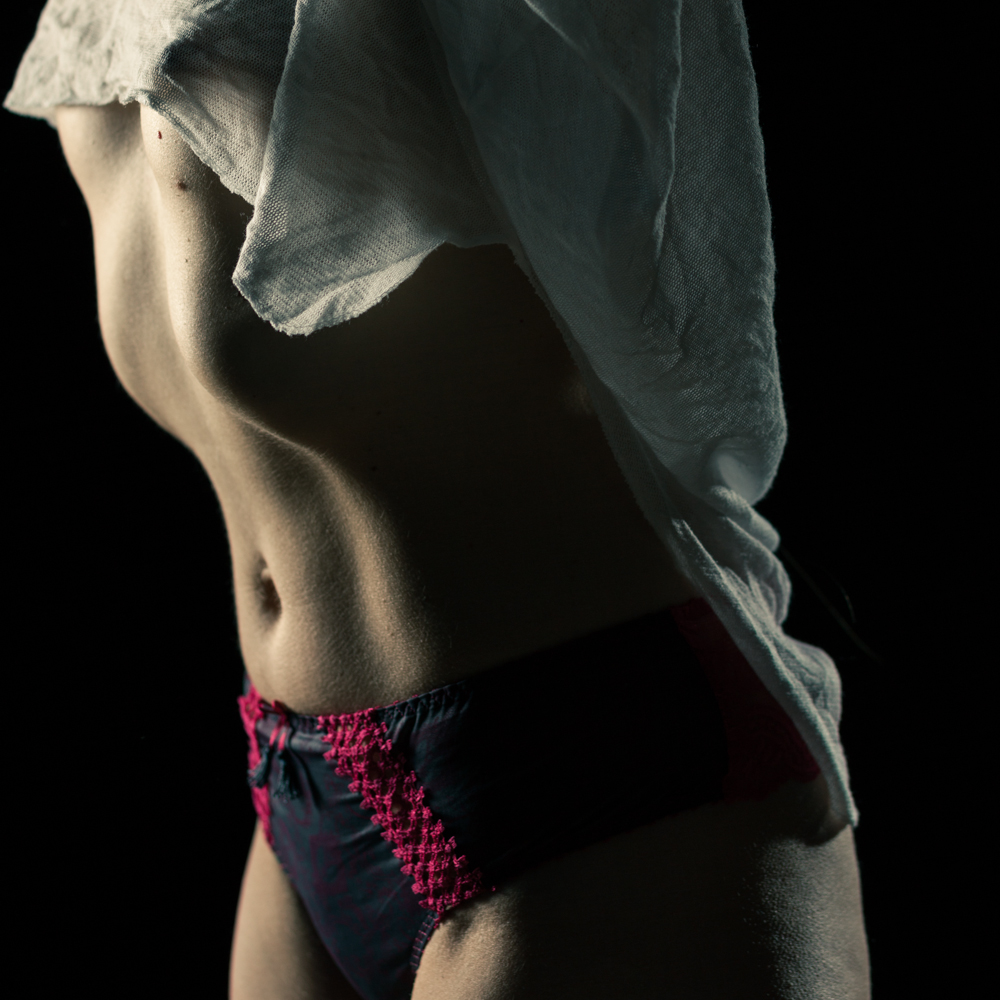
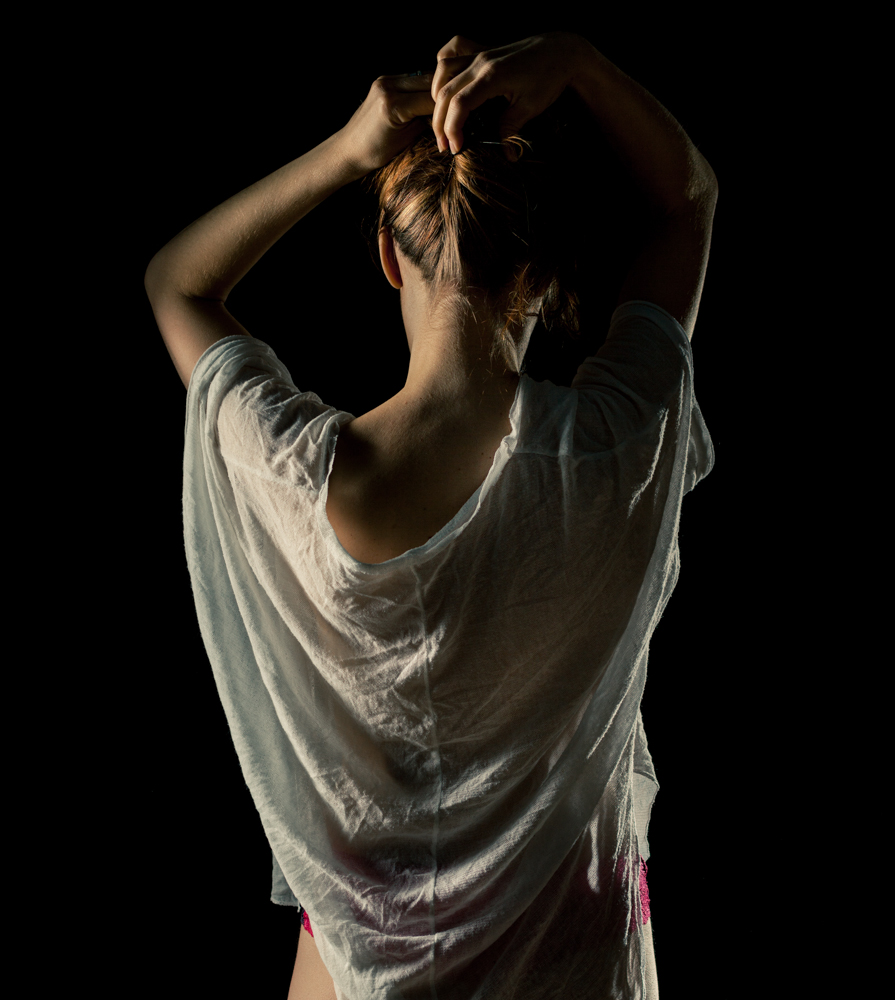
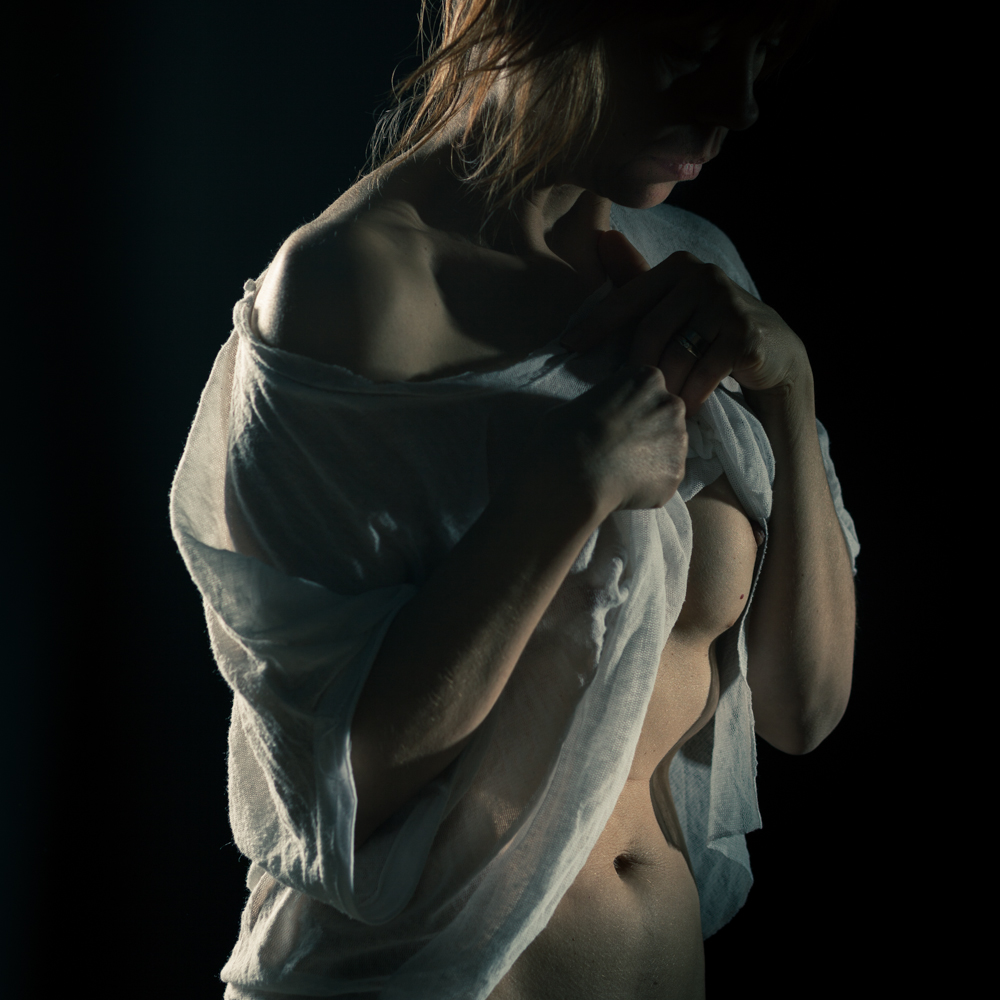
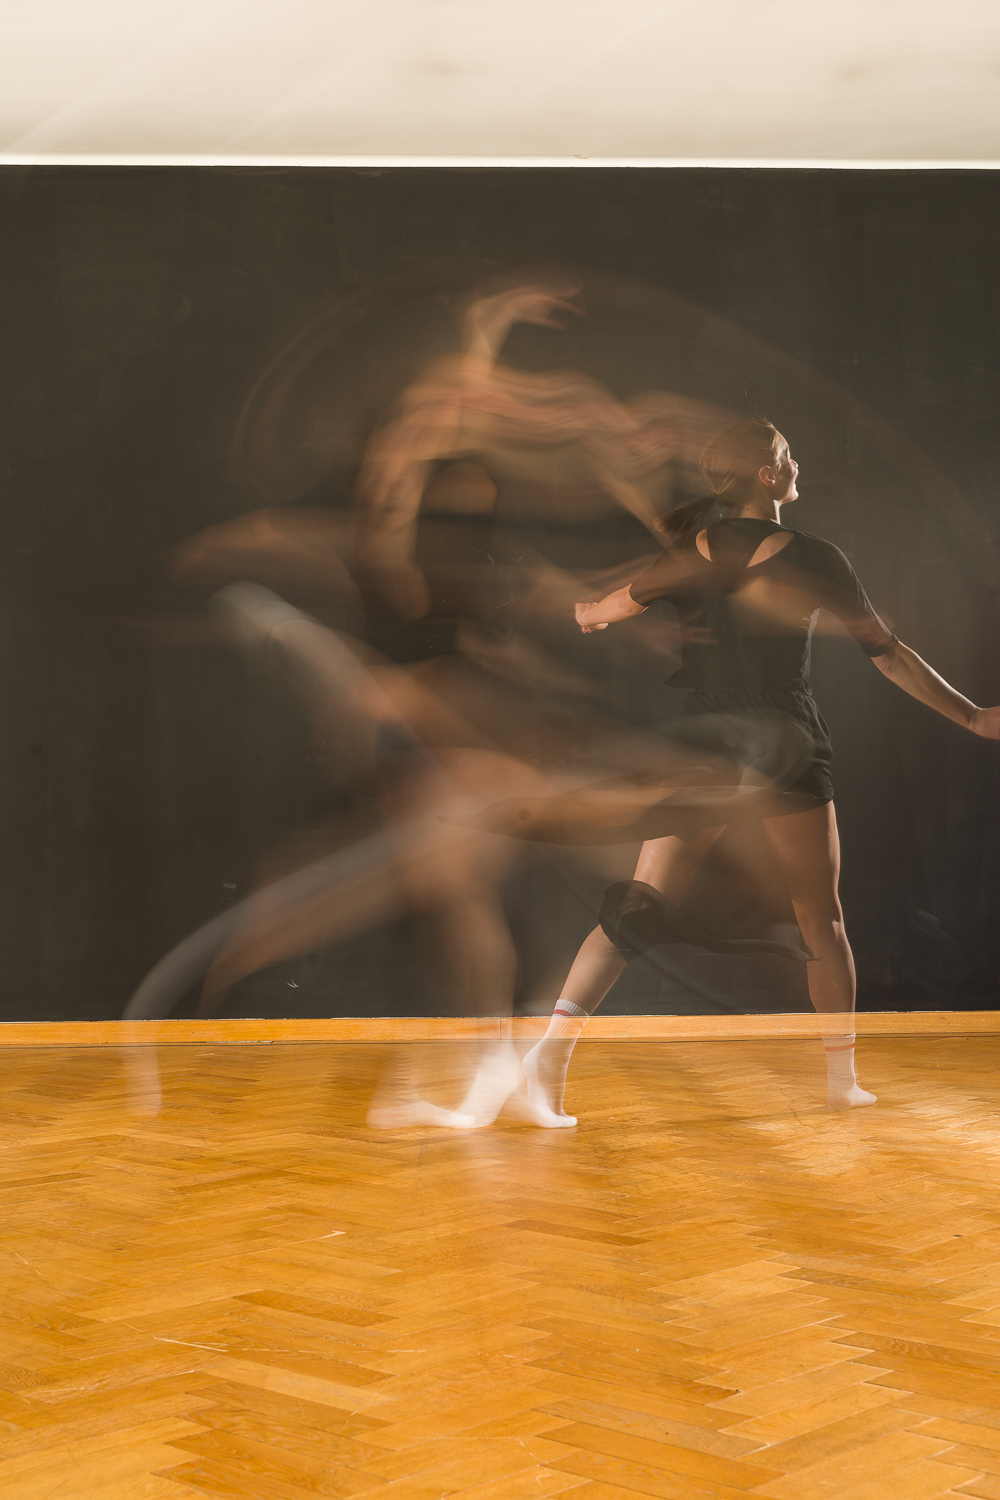
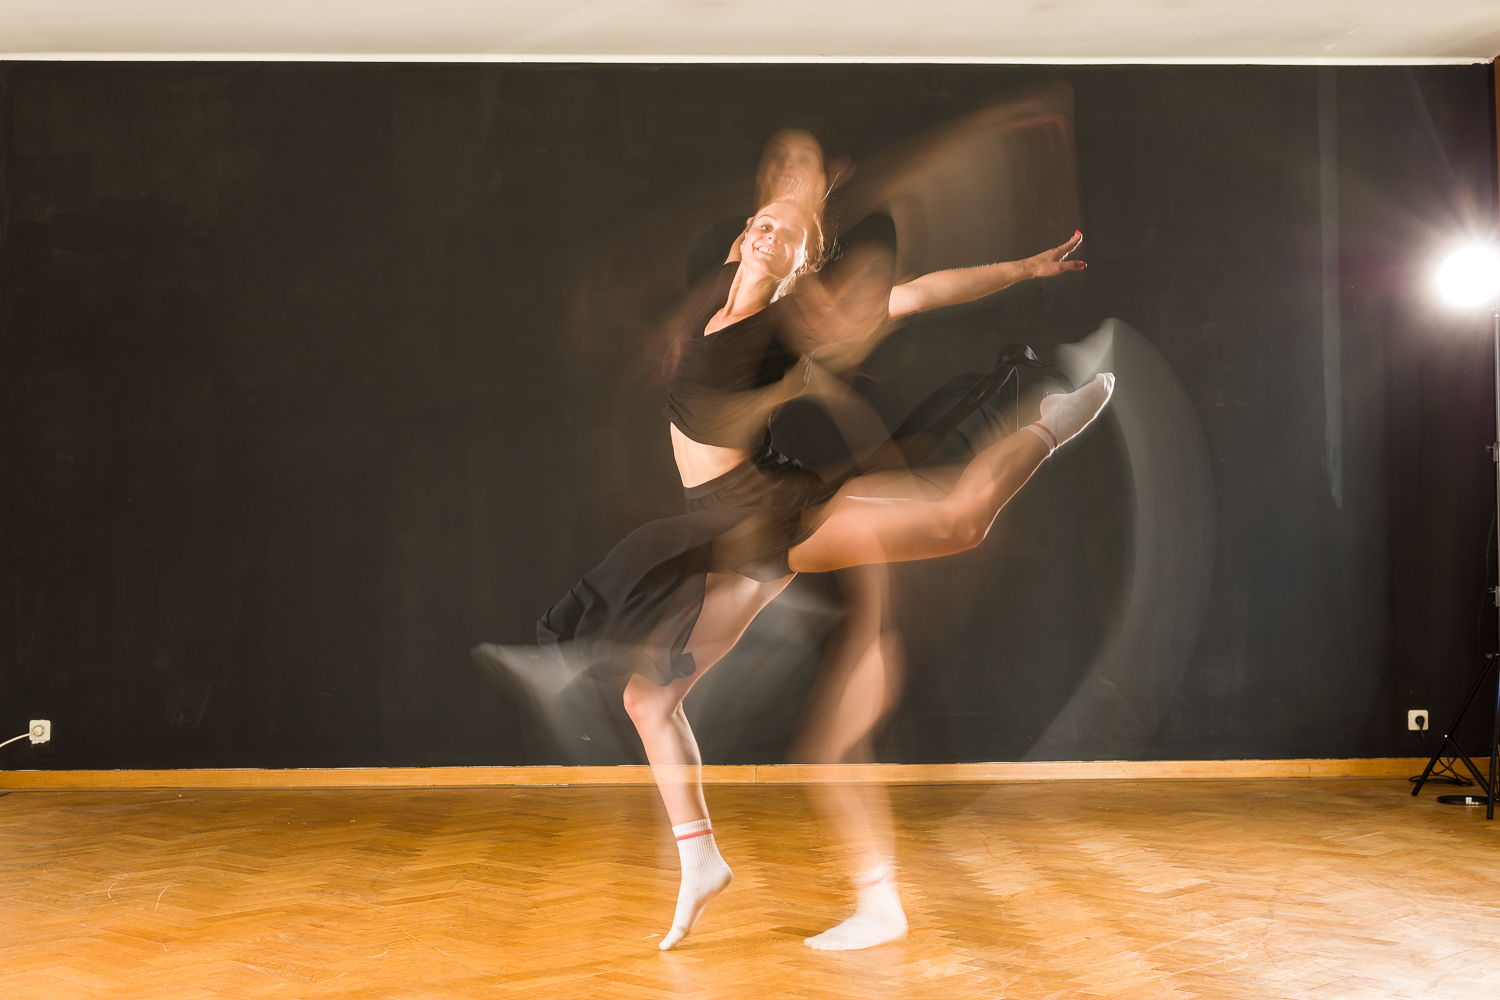
first some images:
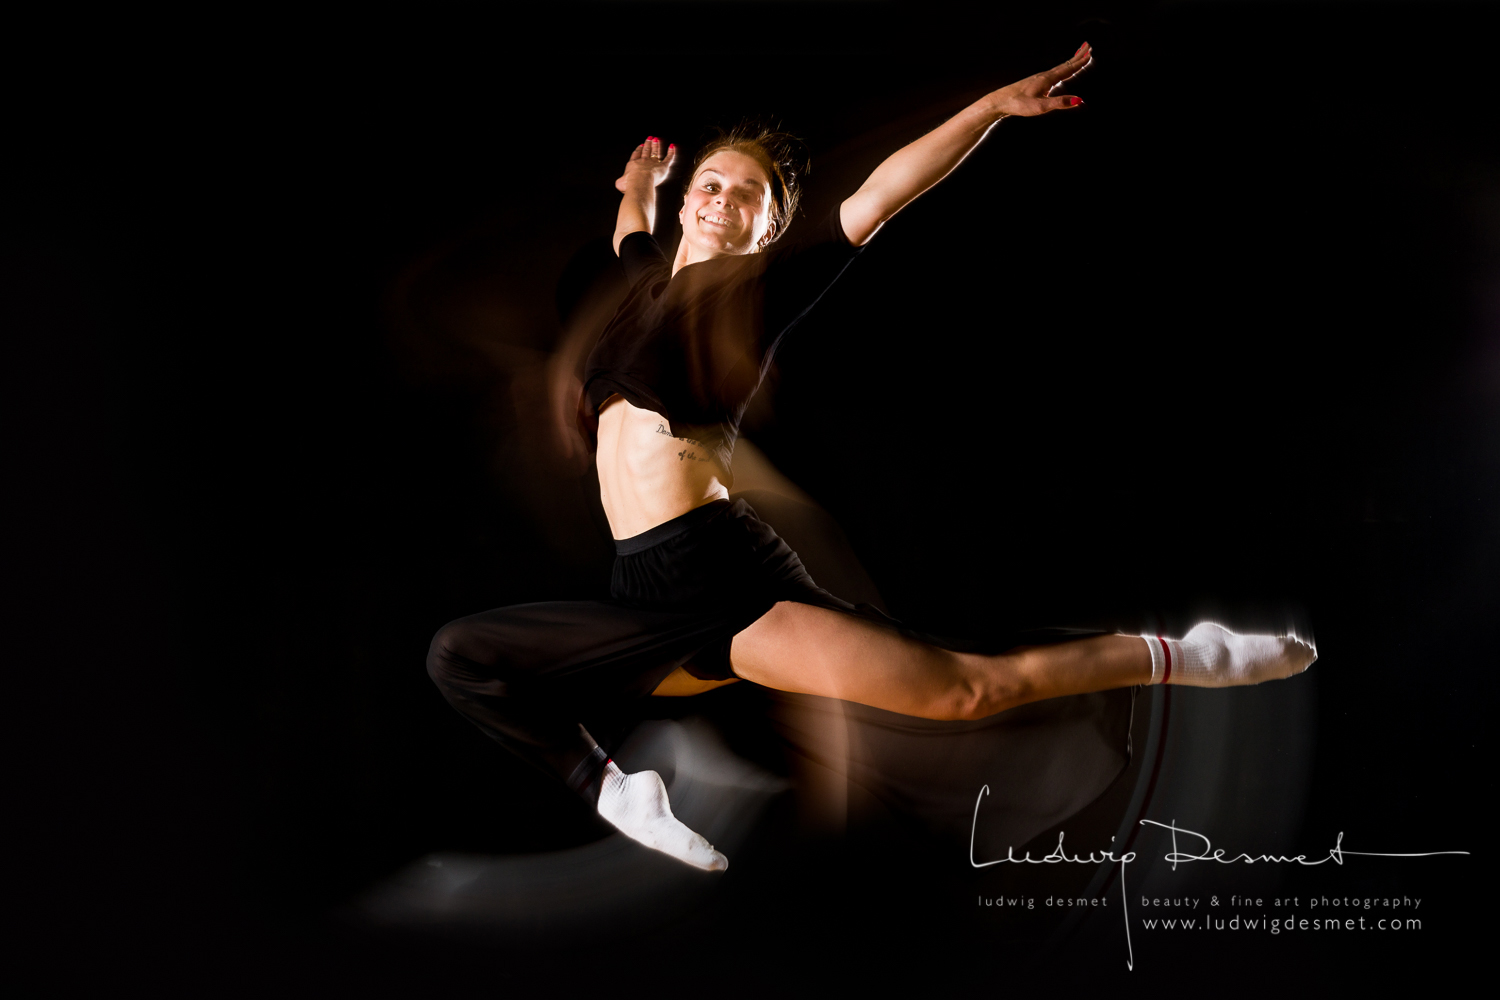

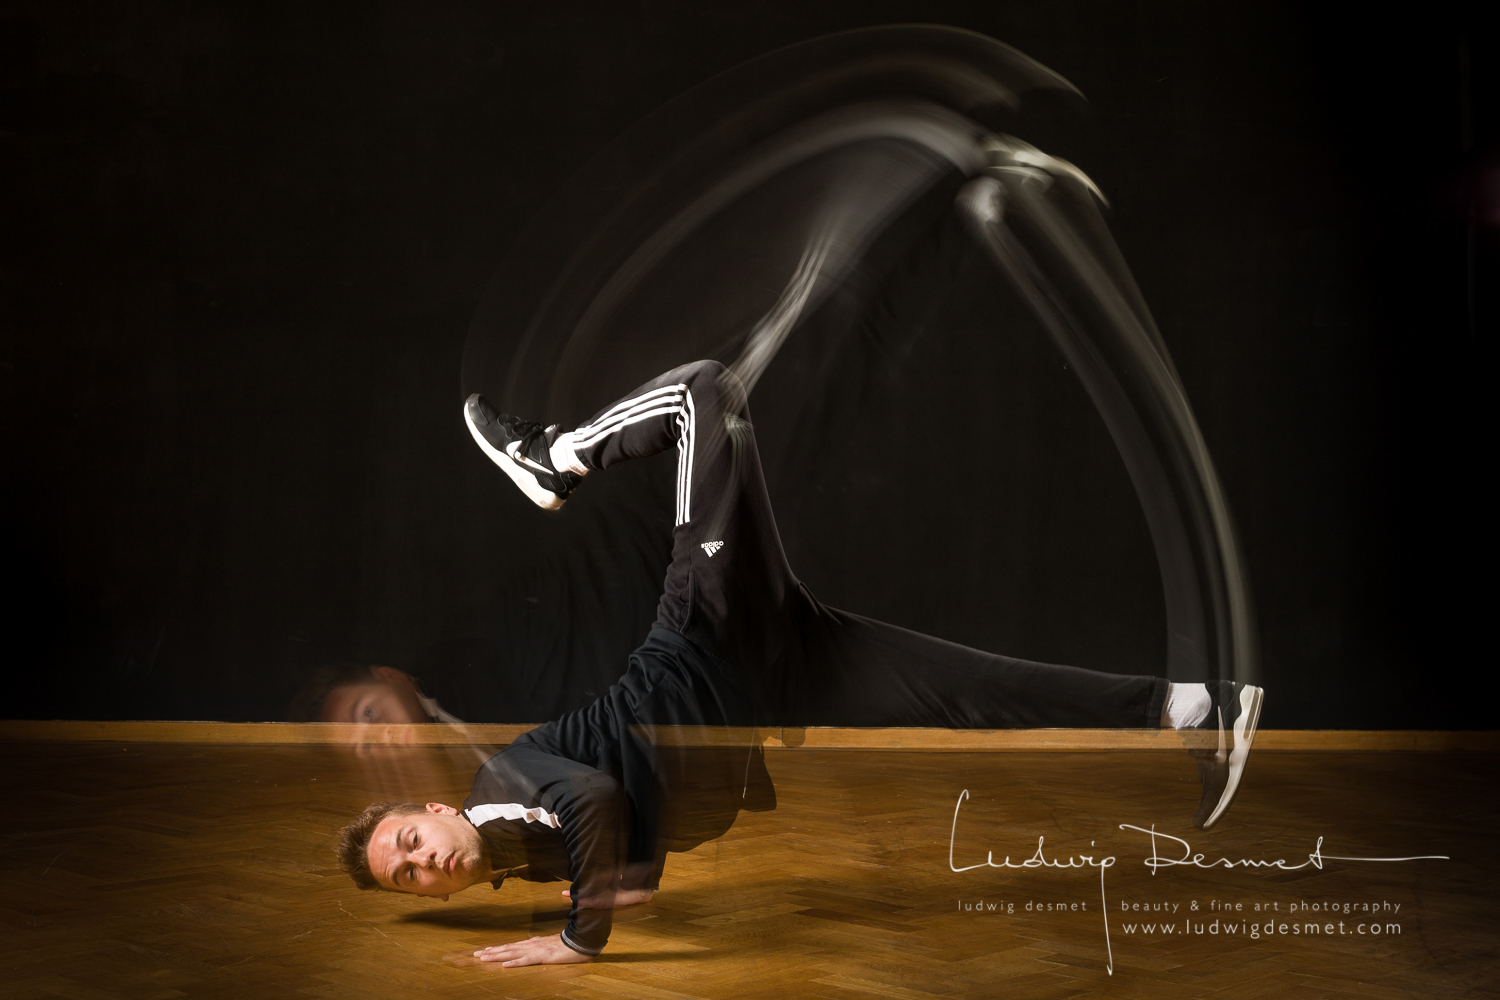

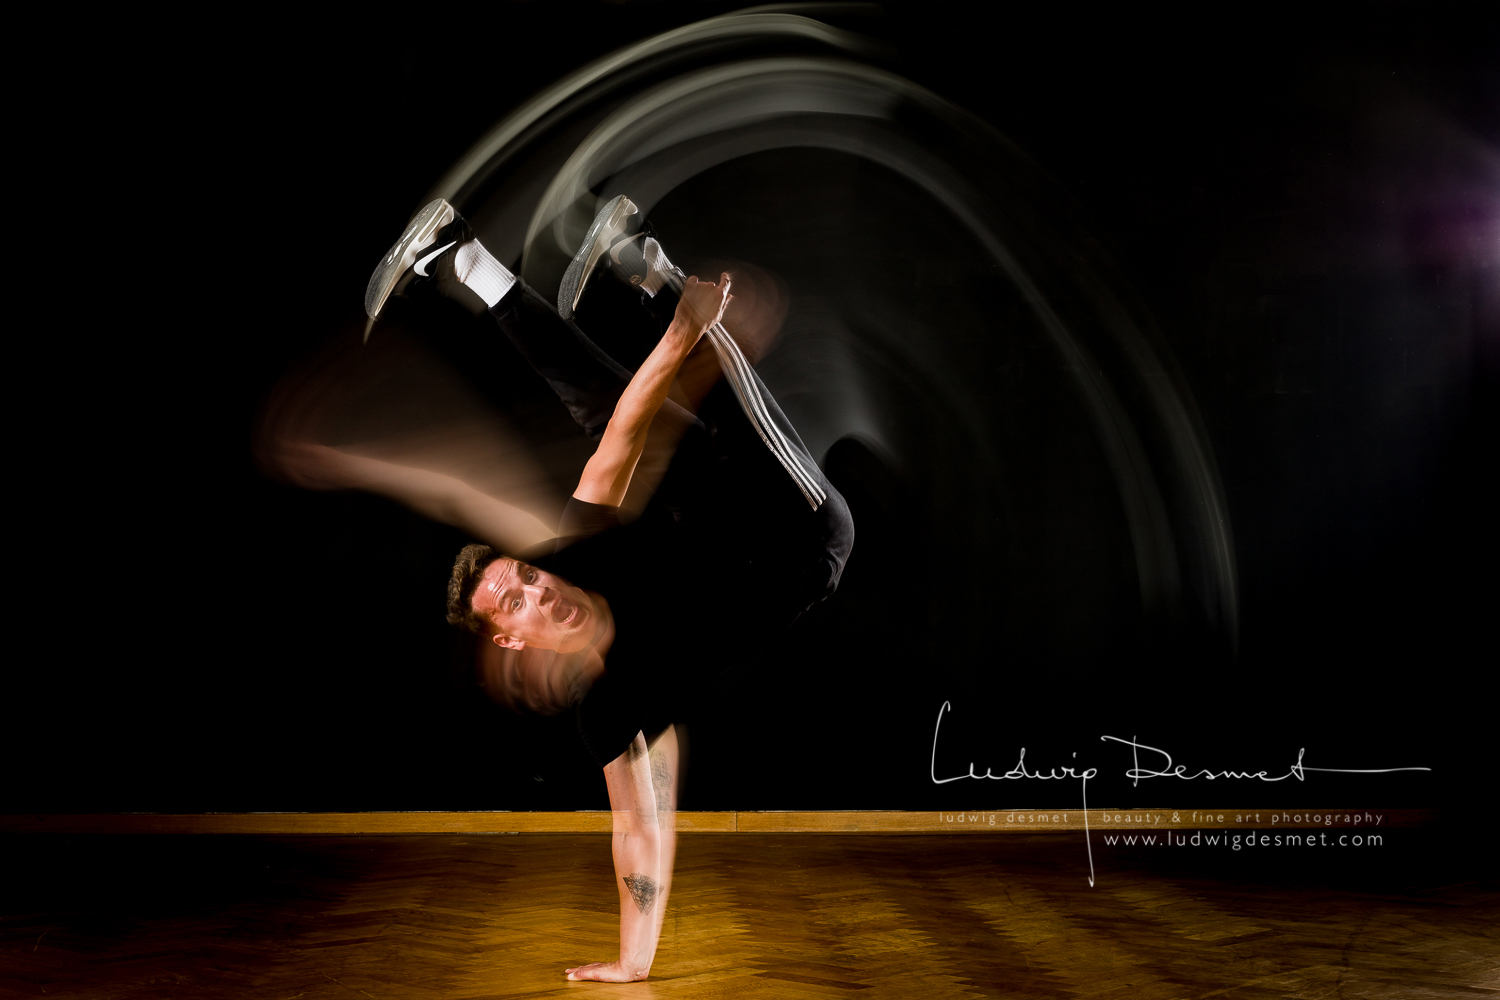


nice hey 🙂
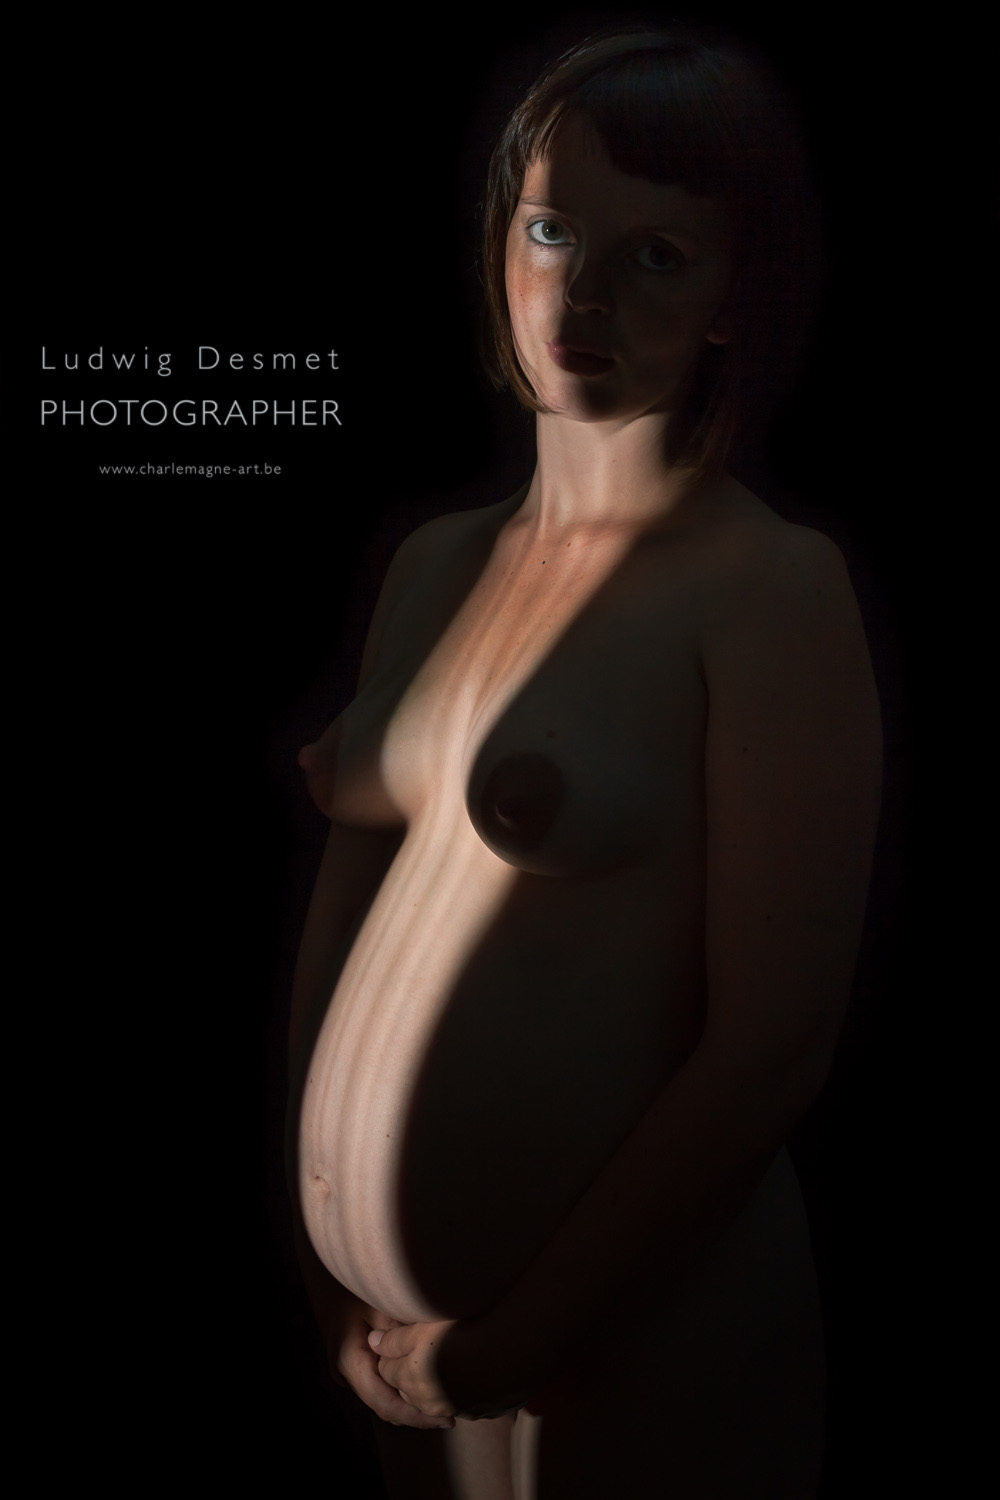
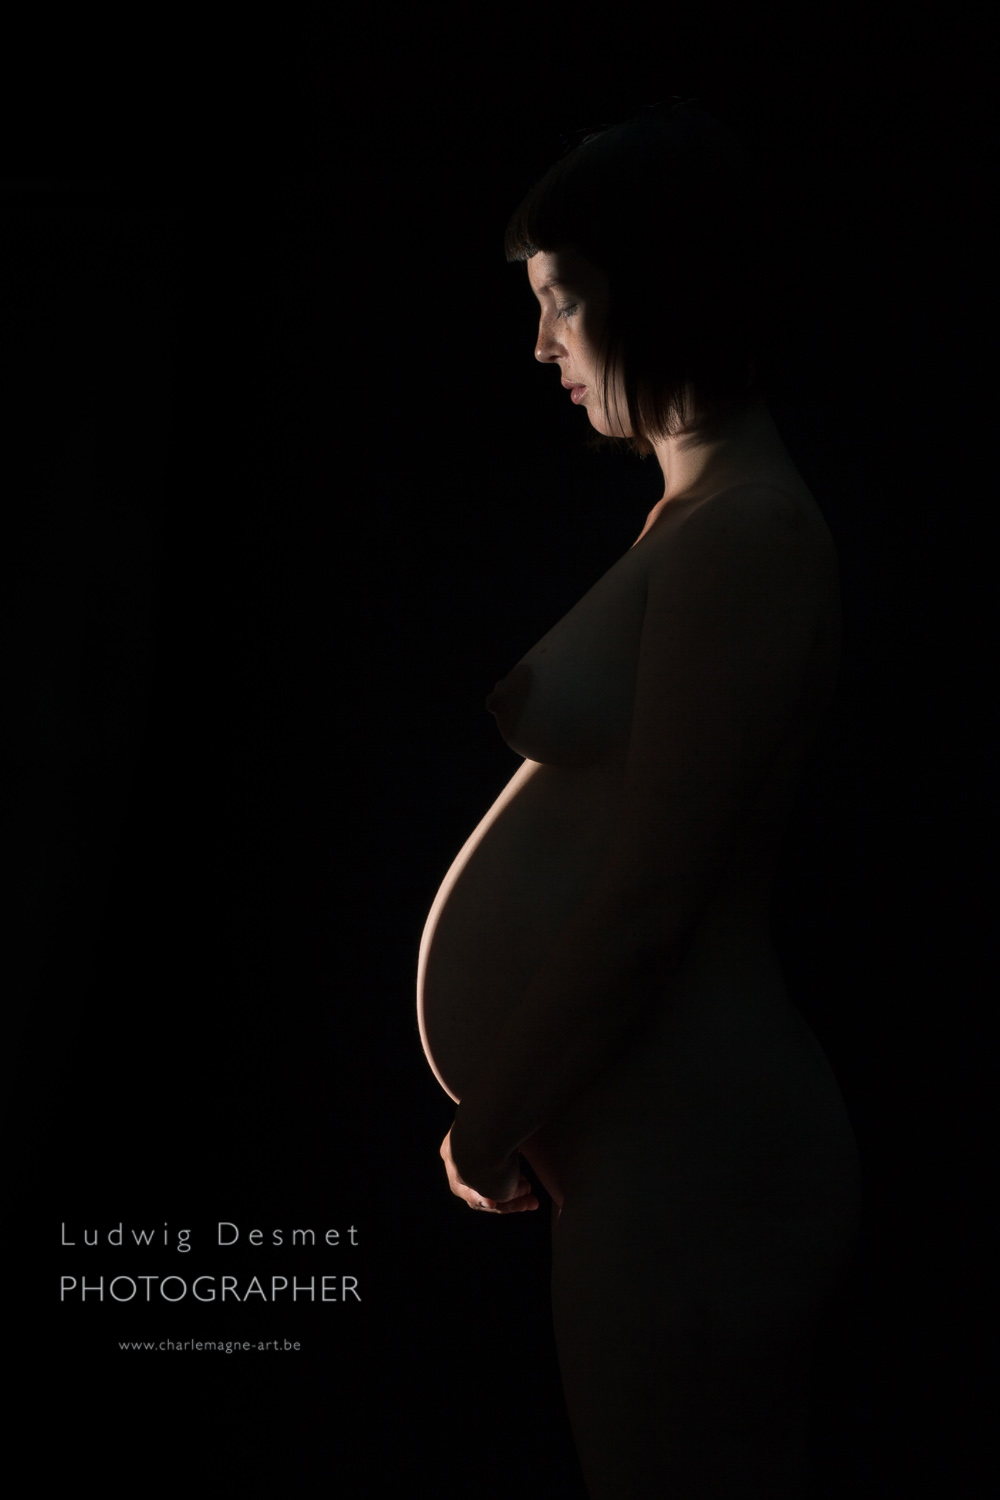
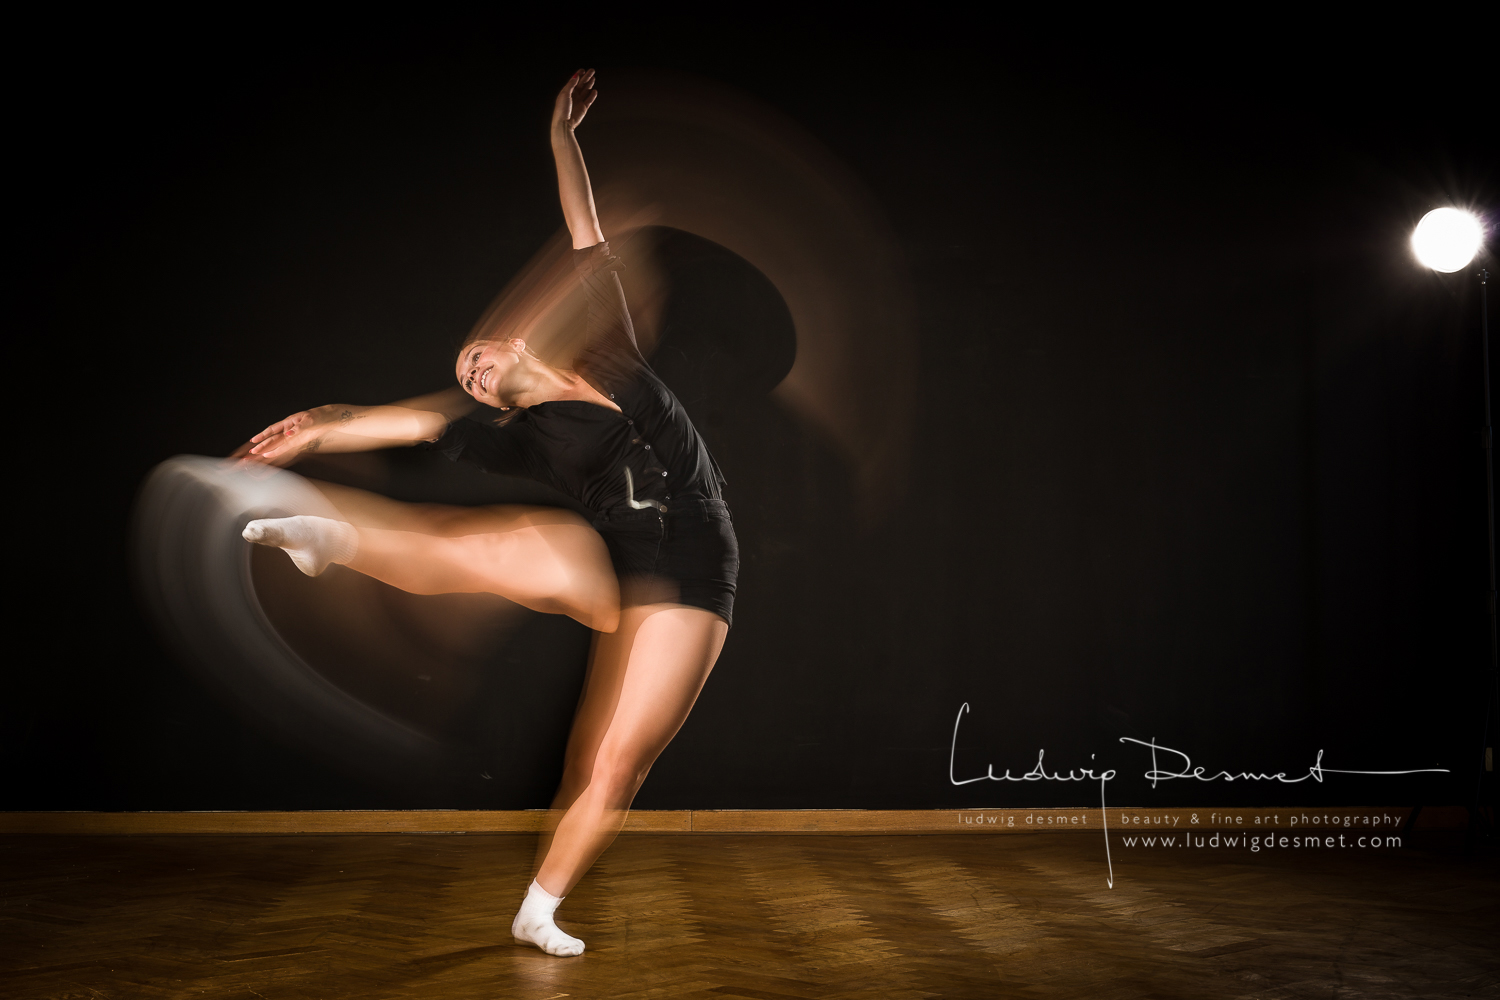
thanks to both athletes, they had a good exercise session.
How is it done?
We wanted both the movement, and a good image of the static phase. I rarely work with flash but here it is absolutely needed.
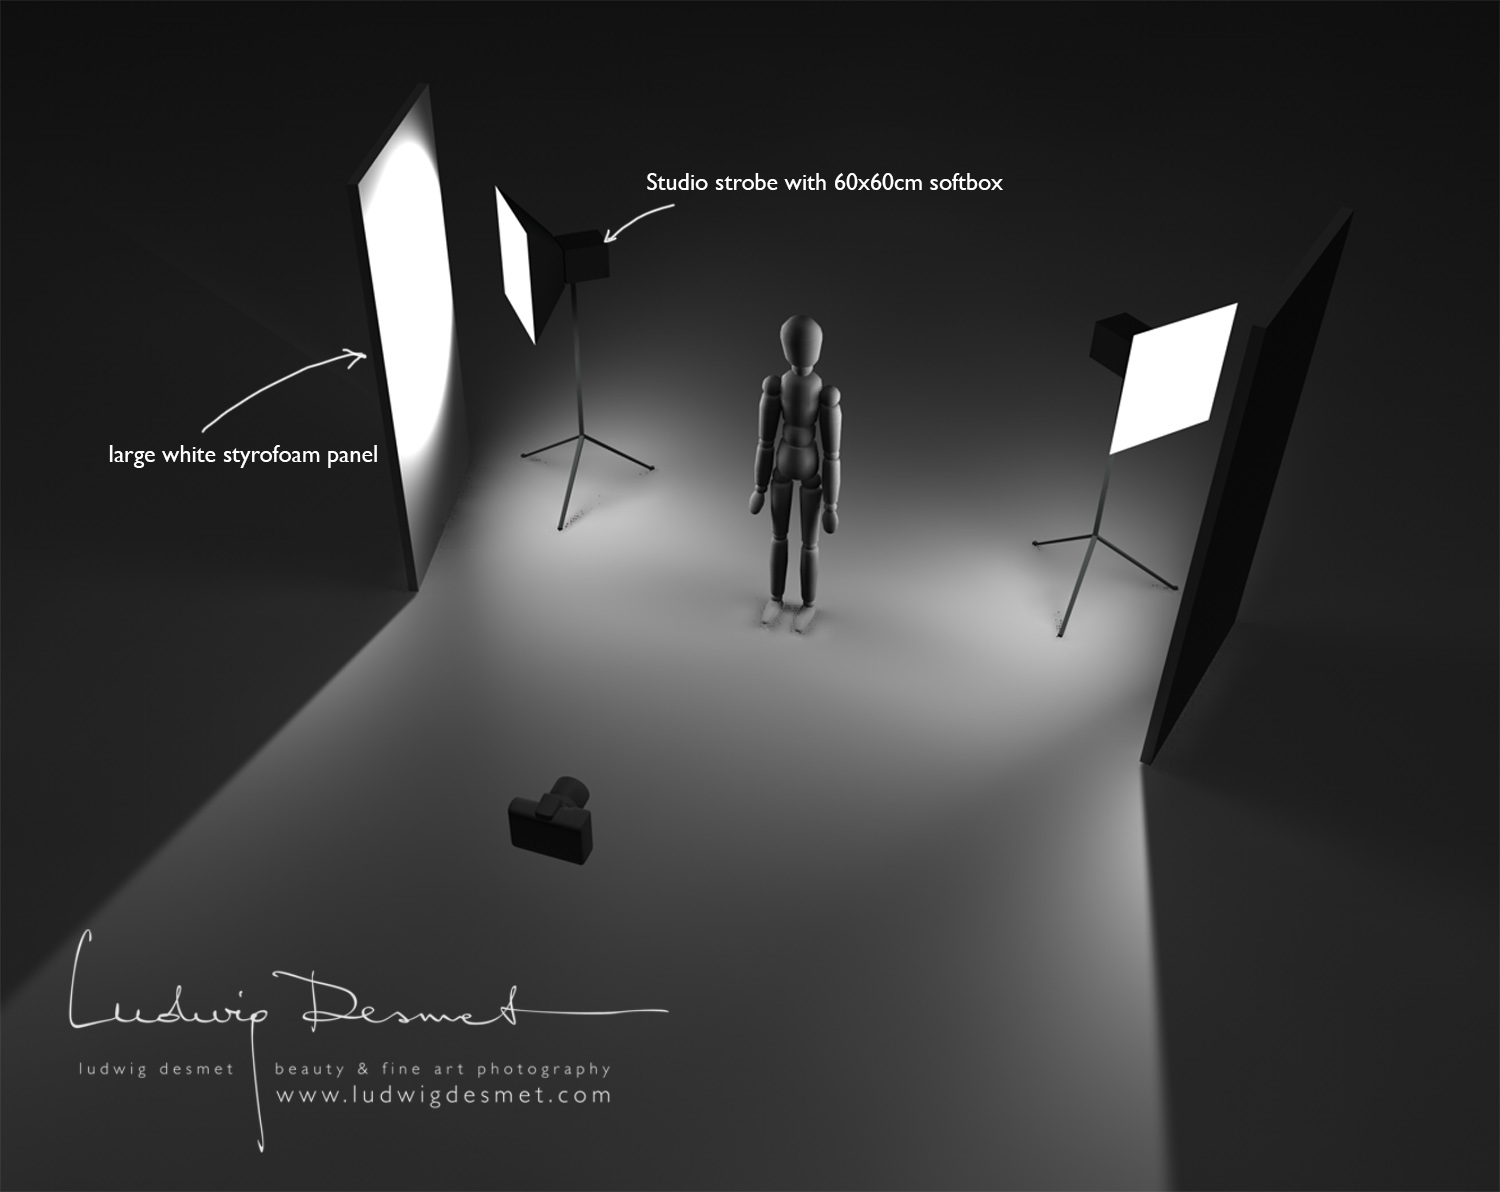
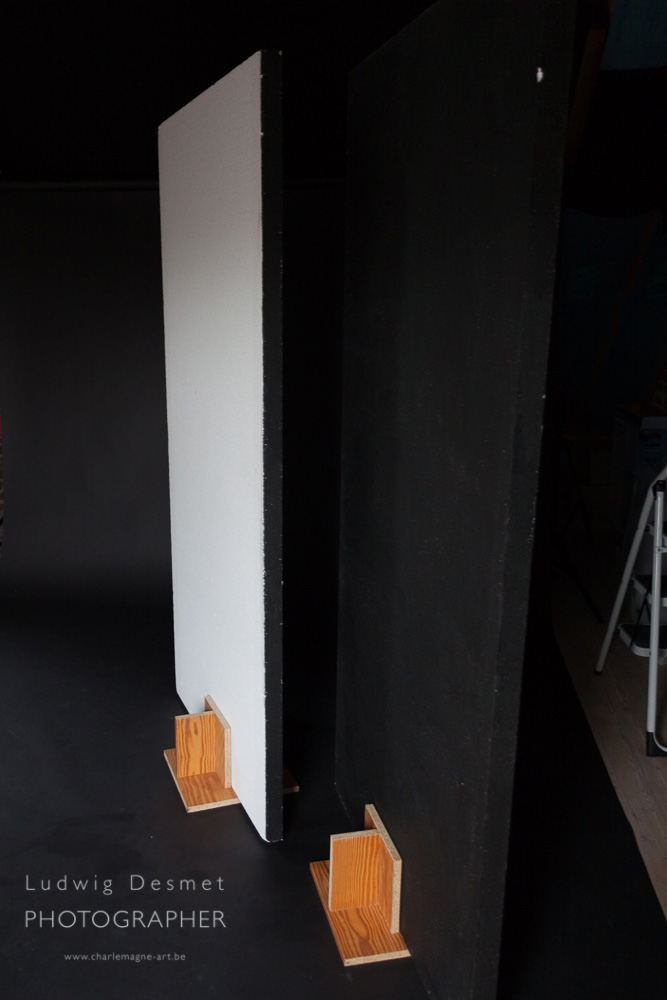
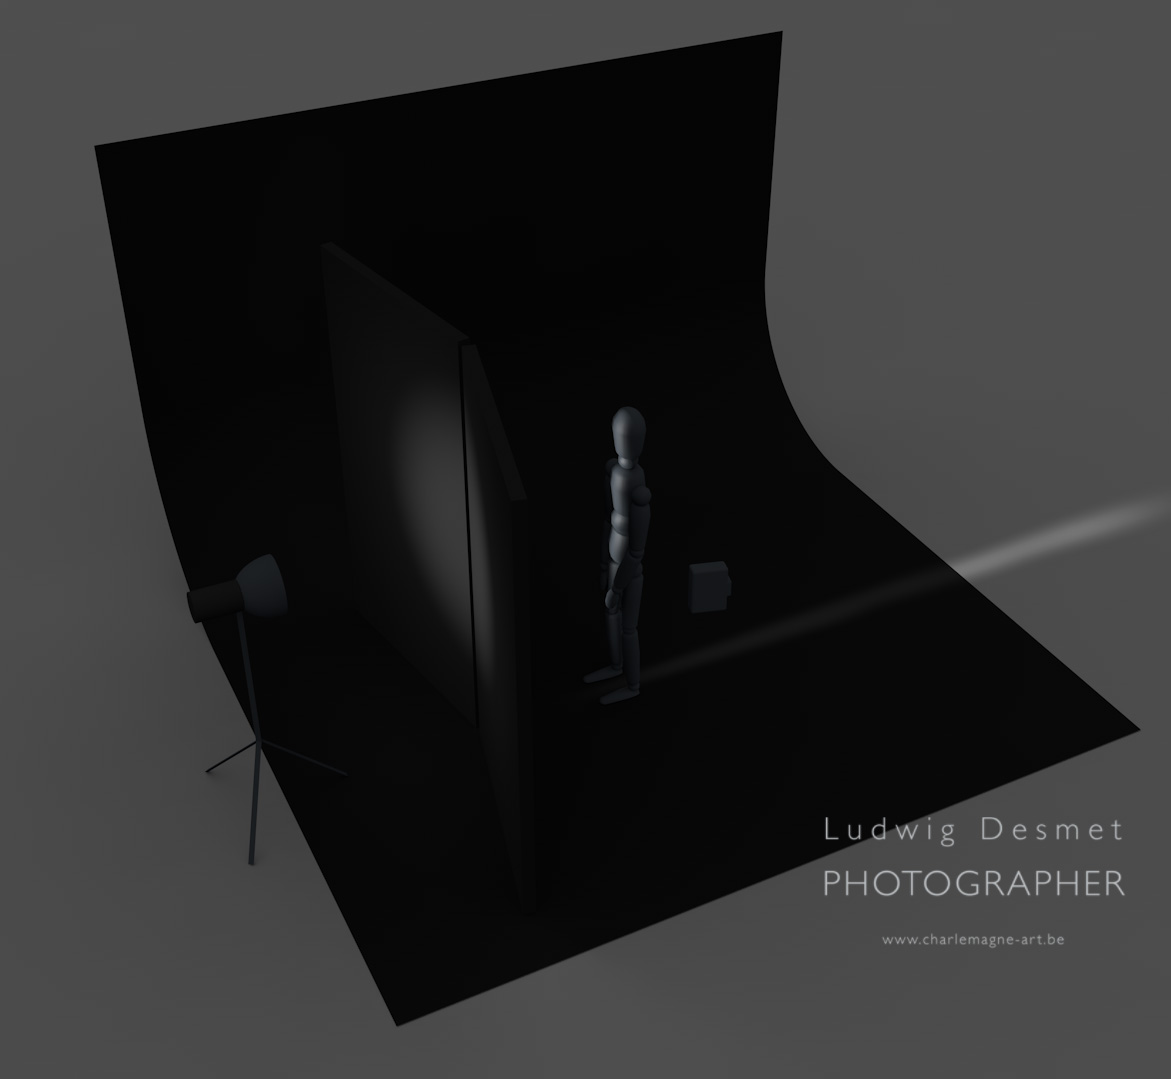
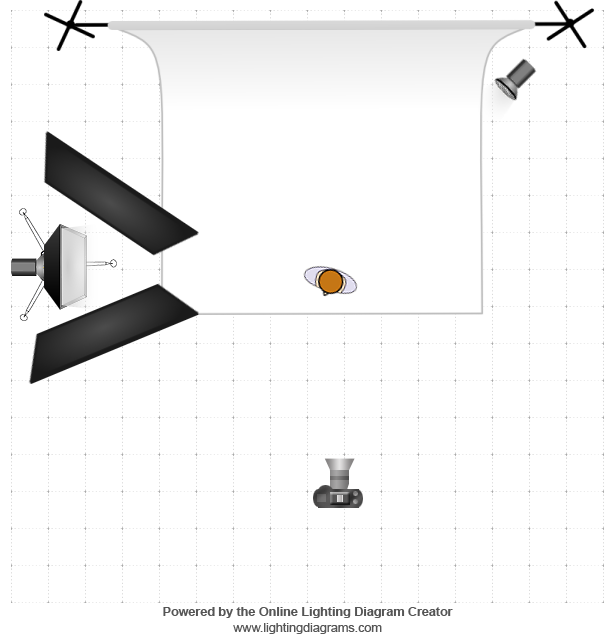
this is the setup: I have one studio flash with large softbox on the left of the scene, providing the main illumination of the stationary phase. (flash) I have a second studioflash at the right side of the scene, providing a rim light at the moment of flash. I have a third flash on the camera, Canon does not allow to fire remote flashes at the end of the shutter time without a dedicated Canon flash. This is a Canon 580EX II and is used in manual settings at 1/64th of full power. It is merely used as a ‘master’ or ‘trigger’ for the studio flashes, synchronising on the second curtain, this means just before the shutter closes. I have available light from the right side, just behind me. (outside light, strong enough to make the motion trails during shutter time, but not to strong to overly brighten the environment. This is actually better done with a strong continuous light like a 500W halogen spot, but I don’t have one.)

The camera is set to bulb, on a tripod, and with a cable release. This is all part of a relatively simple preparation phase. 😉
Now comes the tricky part, how to get just the good shot? Simple: You activate the shutter time by pressing and holding the shutter button, let the movement roll and close the shutter when the movement has finished. Simple? Yeah, think again. Some movements only take a blink of an eye before they are gone, finished, over and out. For some movements you need to have the flash triggered exactly at the end of the movement, and you have to be aware that there’s a little ‘delay’ between pressing the button and the actual start of the shutter time. My best images came with shutter times between 1/5th and 2/5th of a second!
to illustrate the process of the Bulb-shutter time:

Easy, isn’t it. Well, both dancers have at least 20 times repeated every move, before I could define the right starting moment, and the right moment to stop. Then 10 more times to get the one lucky shot we needed. Maybe I’m getting old, or slow in reactions. 🙂
Make sure to have your models wear dark clothing, otherwise you’ll get a lot of messy blotches from the movement phase. You want them to wear light coloured clothing at hand or feet, unfortunately they did not have white gloves. The brighter, the more visible the movement trail will be.
some mistakes:
no movement visible – too little continuous light, only the flash fixes the image
cable release gets stuck, way too long exposure
start too early, left foot clearly visible in starting point, stop also a little too late, left foot is coming down already.
start and stop too late, left foot is almost up at start, and way over the best position at stop.
thanks for reading, it was fun to do, and I learned a lot about dancing
cheers, come back again soon.
Ludwig