Hi there,
another small tutorial on how to make a HDR image, without the (in my opinion) ugly HDR look.
I will be using Adobe lightroom and Adobe Photoshop in this tutorial, but you might do the same entirely within Photoshop, or with Lightroom and another application that will let you merge bracketed images into one single 32 bit (high dynamic range) file.
Here’s the procedure:
Make sure to have a series of images, that will span the entire dynamic range of the scene. This means from detail in the brightest of highlights (the darkest image) to detail in the darkest shadows (the brightest image). Of course you will need a tripod to have exactly the same composition in each and every image. In this case, I have images taken over 5 stops exposure difference, going from 2,5 sec at f22 (brightest), up to 1/6th sec at f22 (darkest) making full stop intervals 2,5 – 1,3 – 0,6 – 0,3 – 1/6. Remember: never ever use aperture to make a bracketing series, since that will have a severe impact on the depth of field in your image. Shutter speed only changes the exposure, nothing else. (unless there’s moving objects in the scene, but that’s a different thing)
Original exposures: Click for bigger image.

Import the images in Lightroom (or any other RAW editor) and change nothing but: Lens corrections (deformations and color aberrations) and eventually your image crop (make sure to synchronize your edits on all images).
In Lightroom, with all your images selected, right click -> Edit in -> Merge to HDR Pro in Photoshop
(That is accessible from within photoshop under: File -> Automate -> Merge to HDR Pro … in case you do not start from Lightroom)
At that moment, Photoshop will mangle the image data from all images together, into one file with 32 bit information. All exposure data from the original 12 or 14 bit images is contained in this single
file. You will see that happen in a separate plug-in window in Photoshop.
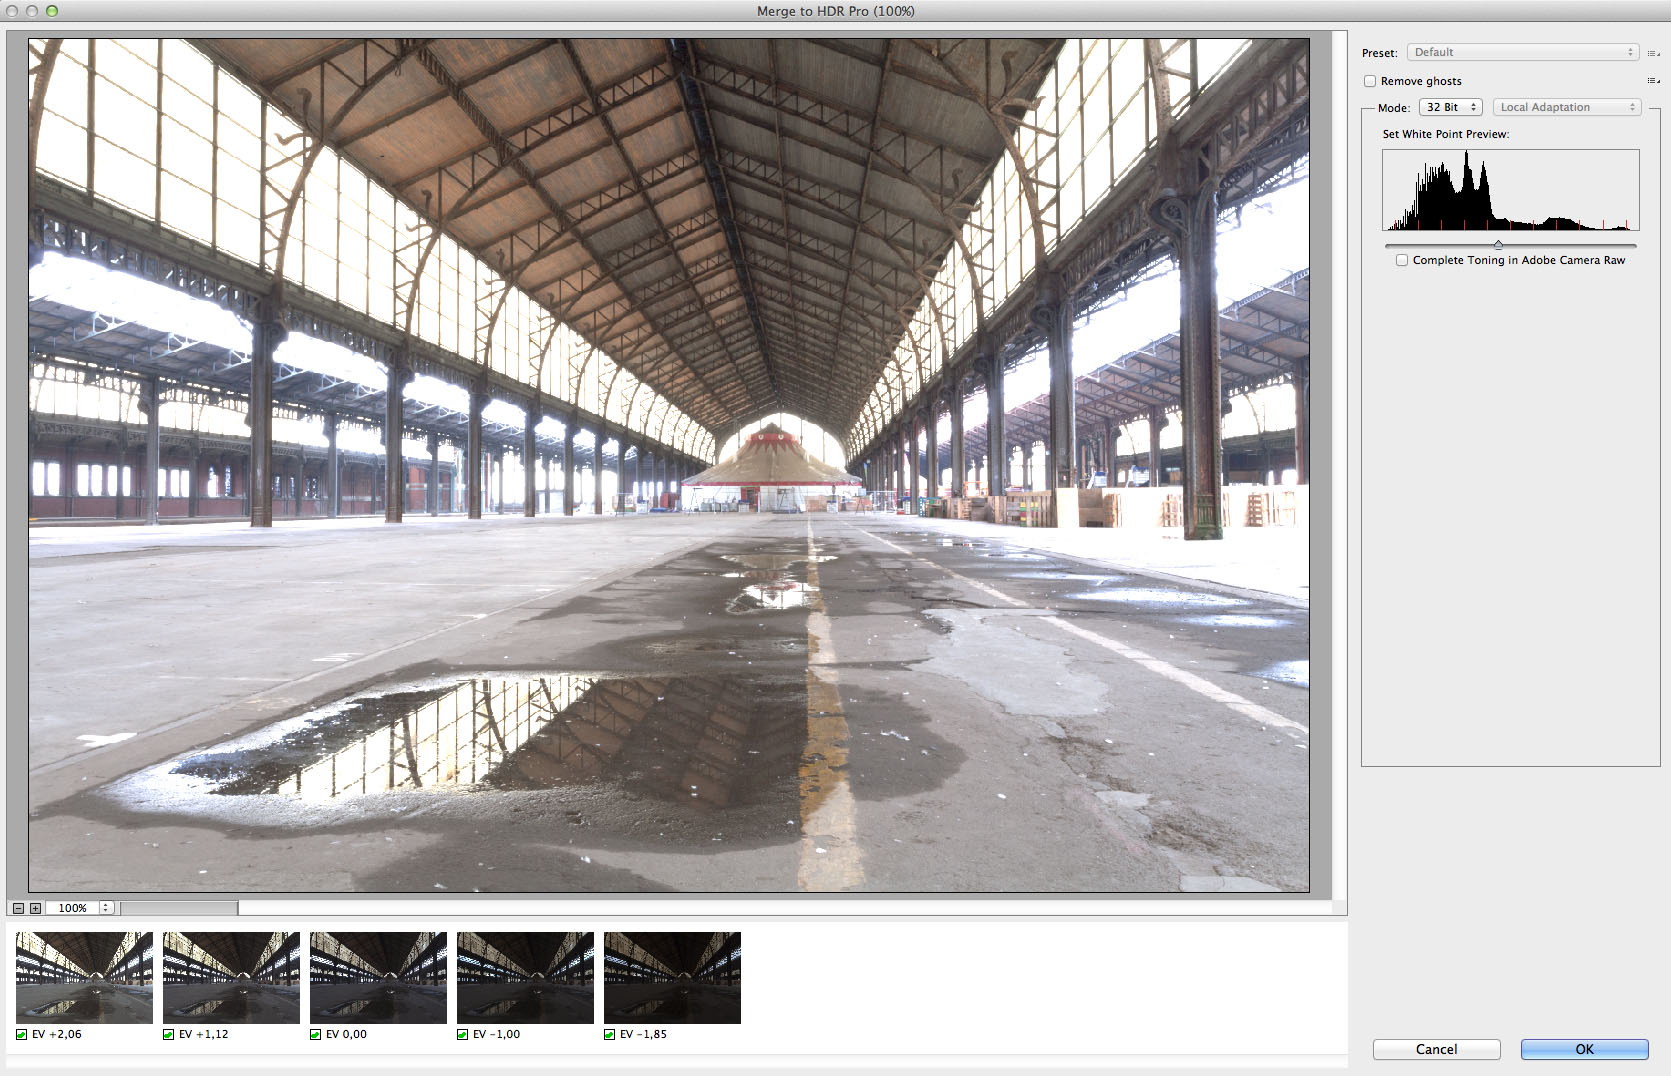
When Photoshop is done with this, you’ll have different options available on the right hand side. We’ll choose to work in 32 bit mode. (when you have moving elements in your scene, you might try to tick the ‘remove ghosts’ box.)
The position of the slider below the histogram has no impact on further development in Lightroom. (Complete toning in ACR is to be used when you do not have Lightroom, and you want to further edit this image in Adobe Camera Raw.)
Below on the left hand side, you can see the original exposures, and their respective exposure values.
Click ok, Photoshop will now quit this HDR Pro window, and show you the image in the standard editor.
Do nothing but save the image in its current state. It should save a tiff file in the same spot as where the original raw images were on your hard drive. When you get back to lightroom, you should have a new image available, this might show up at the end of your filmstrip.
You can now further develop this image in Lightroom the way you are used to, but there’s one important difference: in stead of having an exposure slider of -5 to +5 stops, you’ll now have a slider that has a range from -10 to +10 stops. You’ll probably not use it that far, but that indicates that you are working on a 32 bit image now.
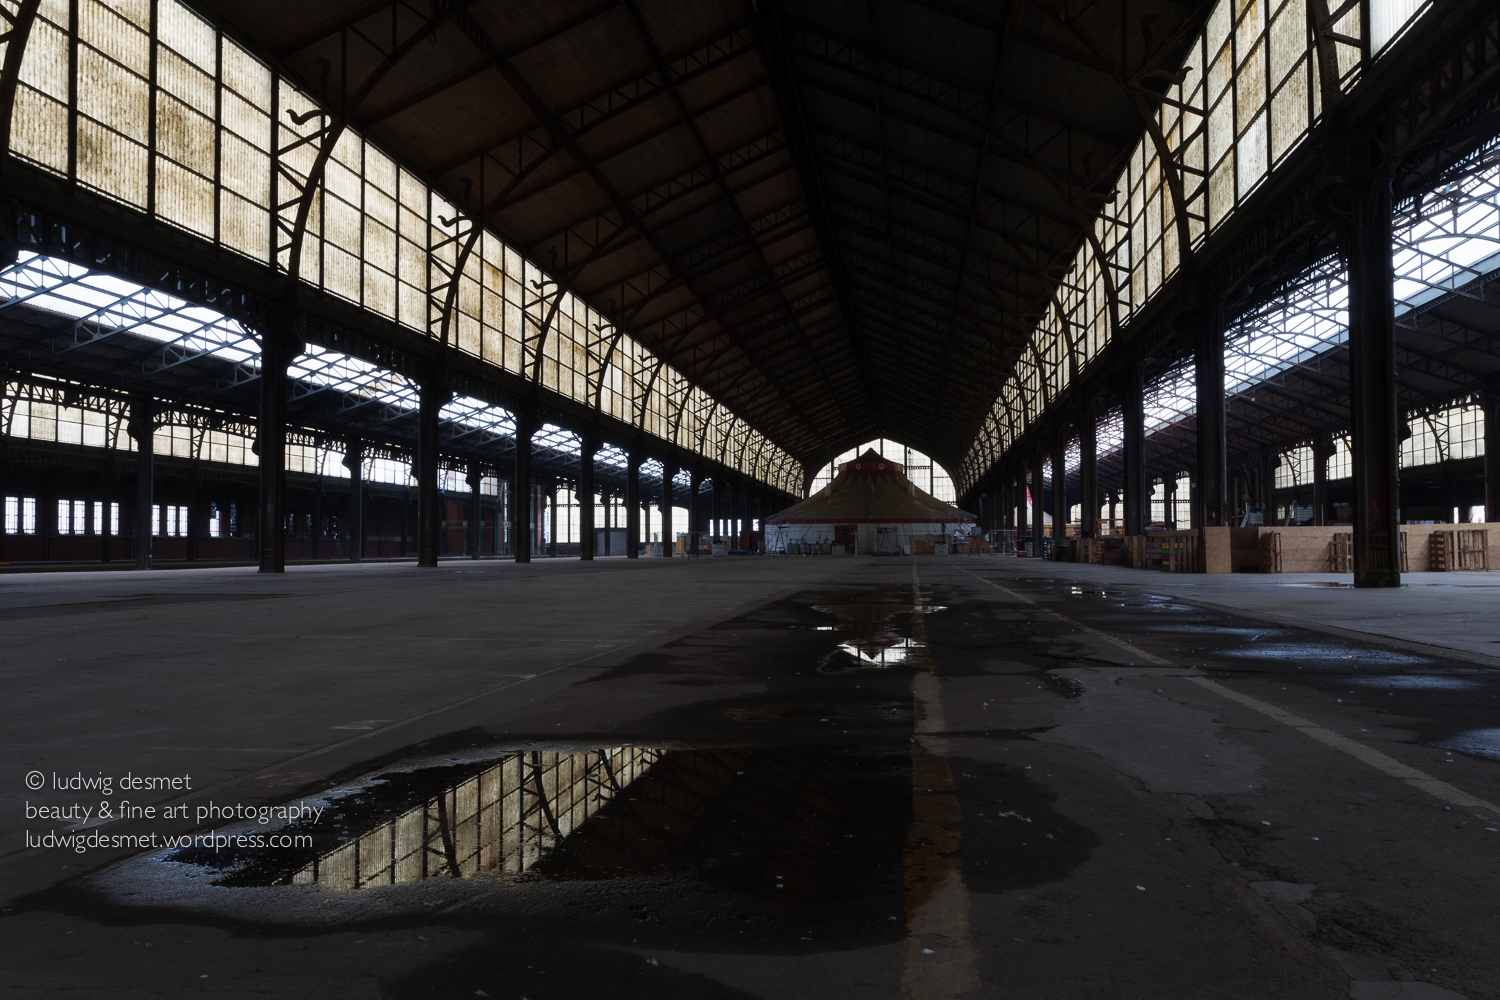
You’ll probably reduce the highlights a lot, to get back your detail in the highlight area, and consecutively you will probably up the shadows quite a bit, to get detail in your darker areas. Beware that to keep your results realistic, you should take care to keep some contrast in your image. In that understanding, it might be a good idea to locally paint in highlight and shadow detail, and not use the standard tab to its full extend. Look at how the circus tent get’s a lot more attention in the final image. This is done with the local adjustment brush, and delicately brushing more or less exposure/contrast/clarity in certain areas.
Final image: Click for bigger version.

About the image. This picture was taken during a school trip with my architectural photography students at Kisp. The image shows one of the main halls of the Tour and Taxis site in Brussels. In this hall, the Brussels school for circus artists is giving training sessions. The Tour and Taxis site was a former customs and warehouse building, for imported goods for the Brussels area.