Making a panoramic image in Photoshop is pretty simple, in the menu you go to file->automate->Photomerge, there you select your images, press enter and photoshop does it all for you, no hassle. You’ll just need to crop afterwards and your done.
Making a HDR image in Photoshop is pretty simple too, in the menu you go to file-> automate->Merge to HDR Pro, follow some easy steps, choose if you want to work 16 bit or 32 bit, choose wether you want to edit in Adobe Camera Raw or just save a 32 bit file, and further edit in ACR or Lightroom (since version 4)
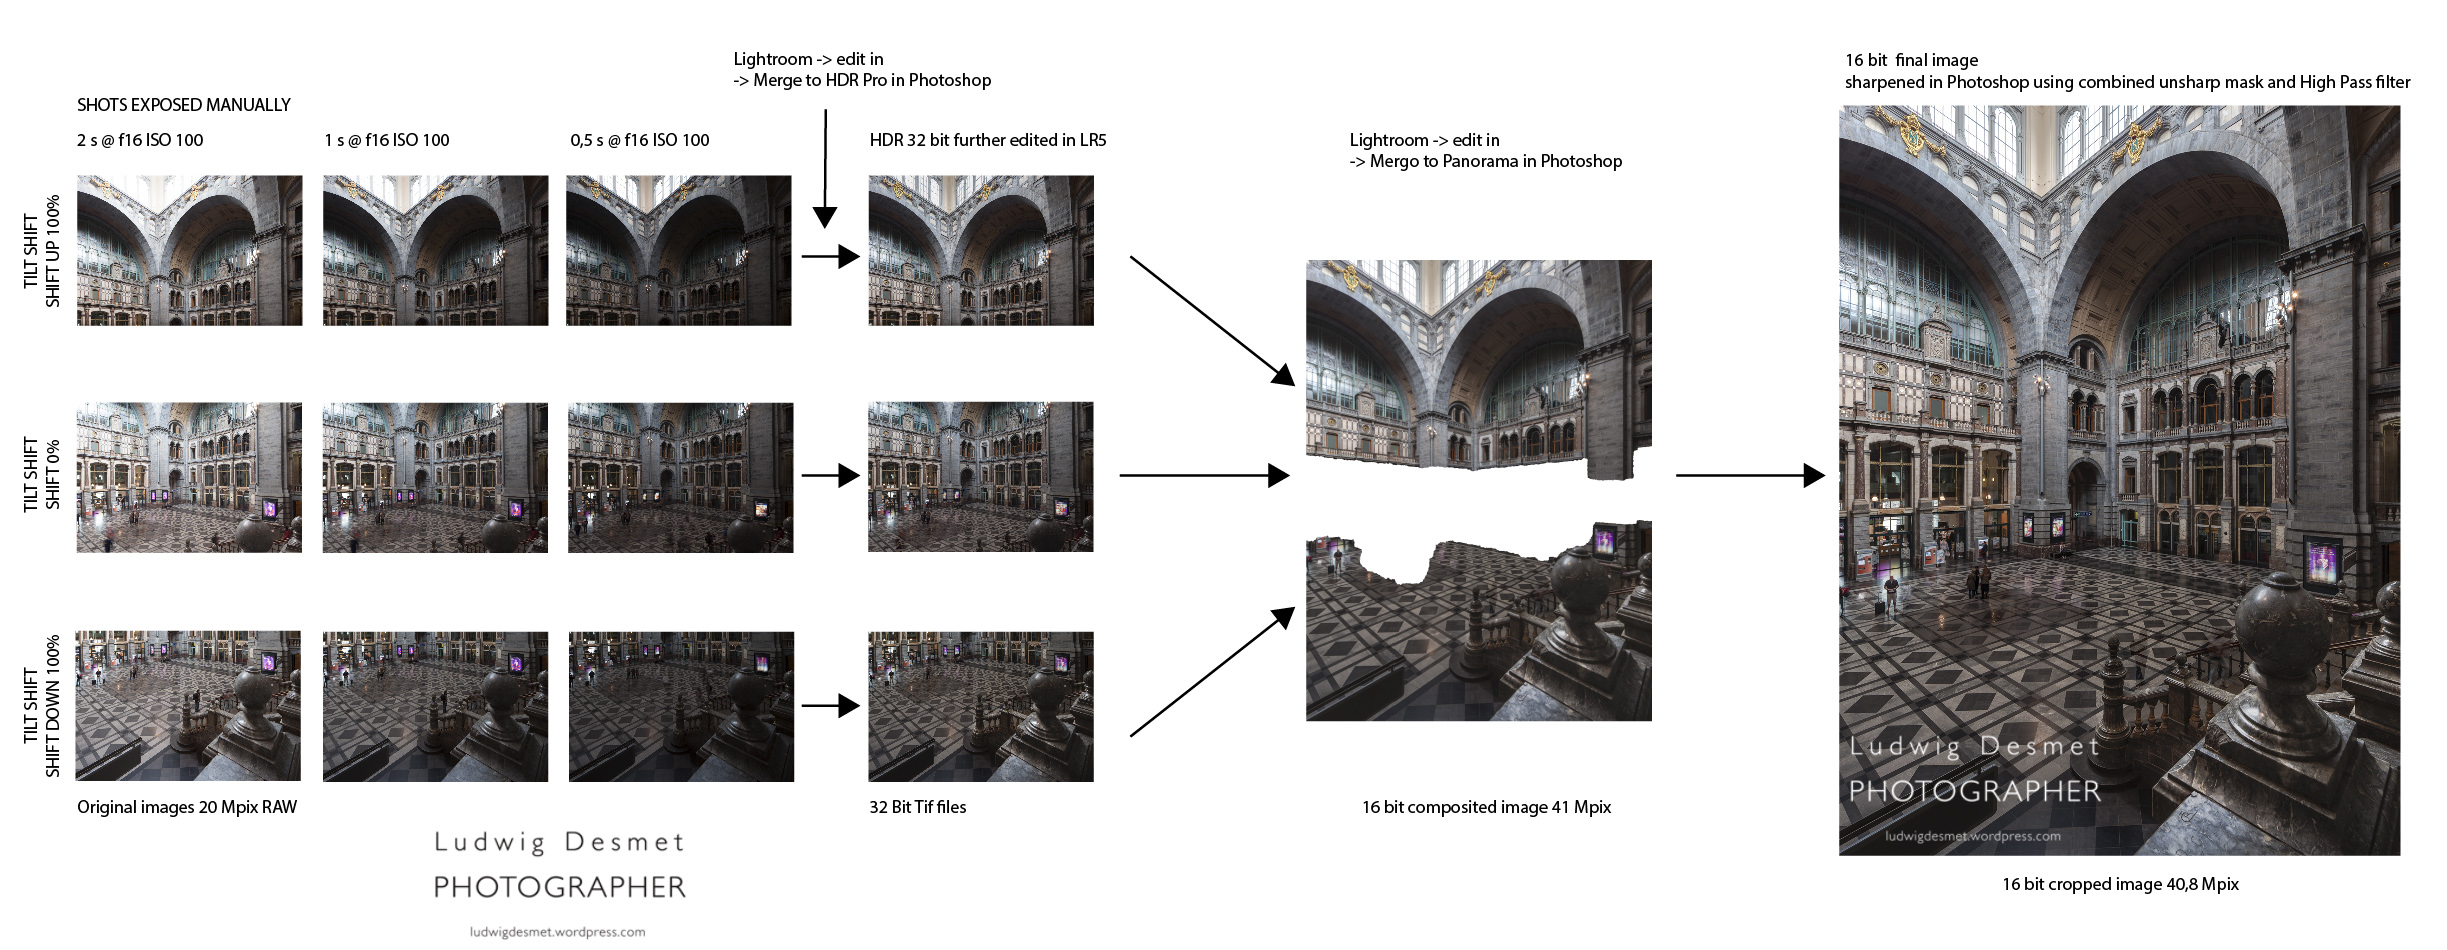
Now making a panoramic image that has been shot in exposure bracketing, is a little more complicated, although a logic iteration of the above two workflows.
Here’s what needs to be done (Lightroom/Photoshop workflow)
000. Work with your Autofocus off for your exposures, focus once, then leave your focus be, work manually, work on a tripod, with preferably a panoramic head, or, as in this case with a Tilt-Shift lens.
00. Make sure you get sufficient overlap in between images (1/3 of your image is a good average)
0. Make sure you get the same exposure bracketing series in all your images
1. Grab your first bracketing series in Lightroom, right click and Edit in -> Merge to HDR Pro in Photoshop.
2. Photoshop will run trough a series of actions, and will bring up the HDR pro interface.
3. Now you’ll choose 32 bit, remove ghosts if necessary (only available from 3 or more images, and good if you have moving elements in-between images.) and just click OK.
4. Your 32 bit tif file will appear awful in Photoshop, no panic, just click the save button. (not save as, as this might save your image in a different directory than the original one)
5. Back in Lightroom, you should be able to see your image as filename-edit.tif You can edit the image just the way you edit RAW files, except now you have 10 stops exposure range up and down. Work with exposure, highlights, shadows, blacks and whites to get your image correctly edited. It might be a good idea to do lenscorrections in at this stage. (lens deformations and chromatic aberration, no perspective corrections)
6. Do this for all your bracketing series, try to develop the different images the same way. Avoid too many local corrections, as you will not be able to synchronize them because they will need to be applied in a different spot in every different 32 bit image.
7. Now the final step is just to make a panoramic image from all our previously edited images: select all your edited 32 bit files and right click -> edit in -> Merge to Panorama in Photoshop
8. Photoshop will gather all images and nicely align them out, make layer masks according to the images content (actually it searches for places where there’s no geometrical difference in two consecutive layers, to make the transition at that spot. That may lead to awkward layer masks, but the result is generally good.
9. Crop the image to get rid of white edges (photoshop will do transformations to compensate for lens corrections, or to get the perspective in-between images working ok)
flatten and further edit if needed (sharpening, filters, …)
10. Sit back and enjoy your work.
Visual representation of the workflow (click for bigger):
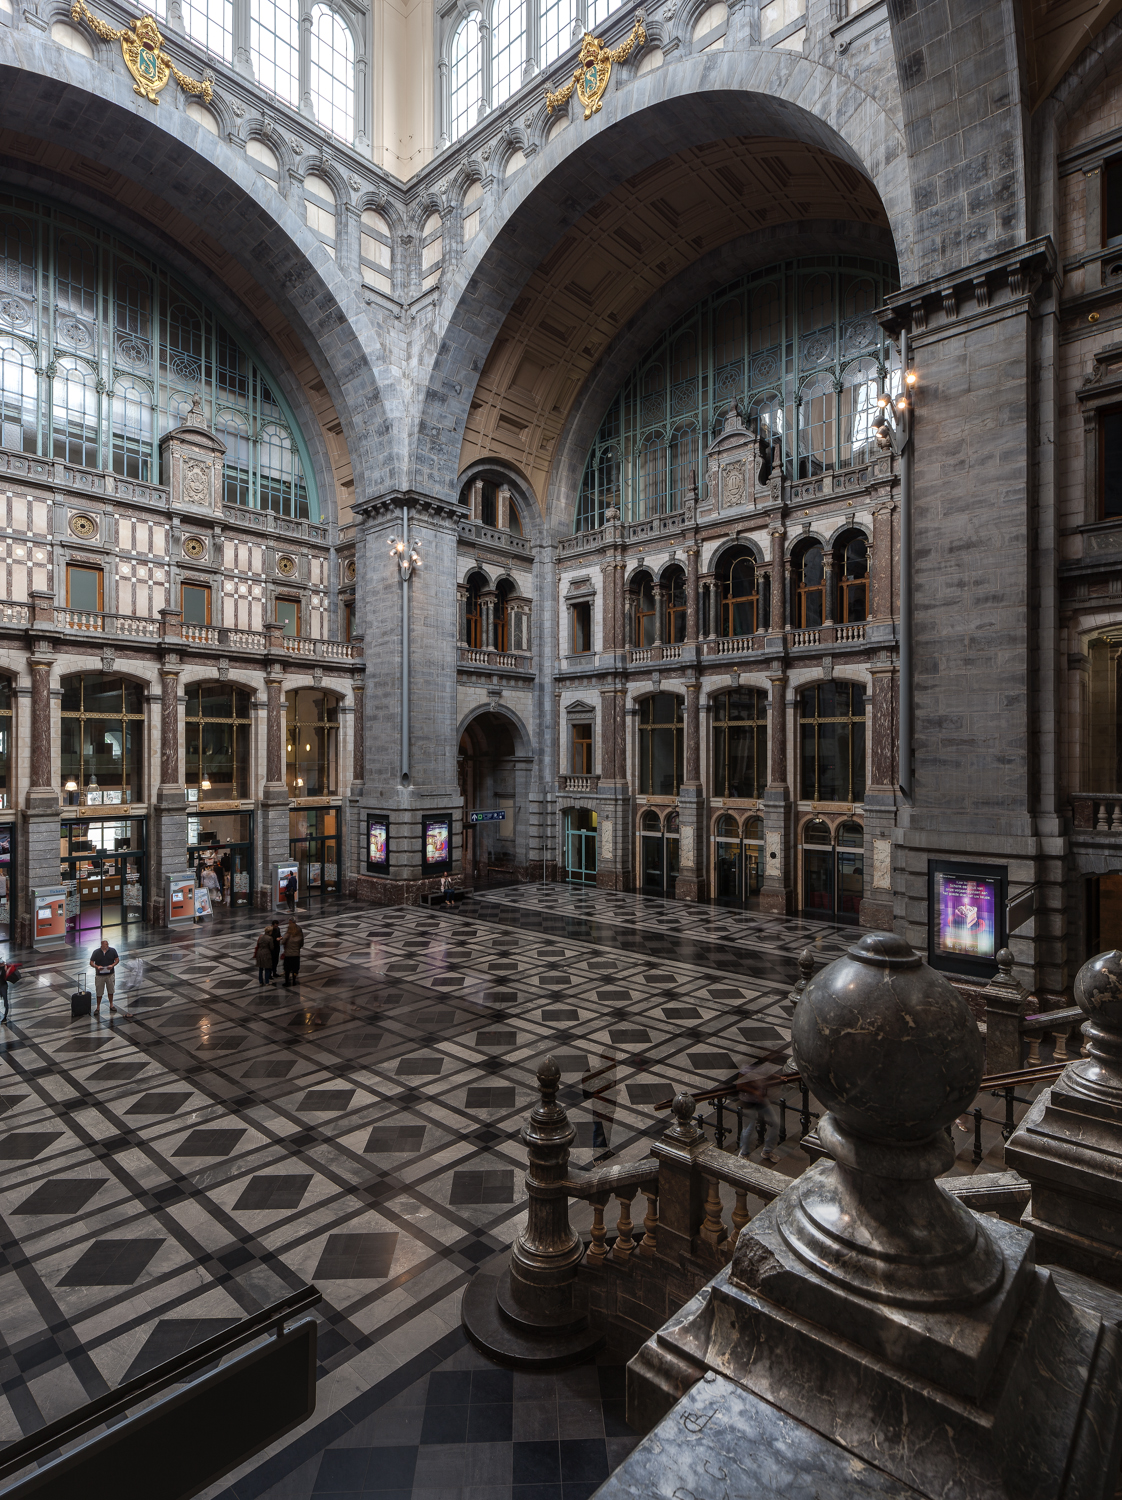
A small version of the final image.
This is the entrance hall of the Antwerpen Centraal train station:
Thank you for reading, you might as well follow my blog now you’re here :p
Ludwig