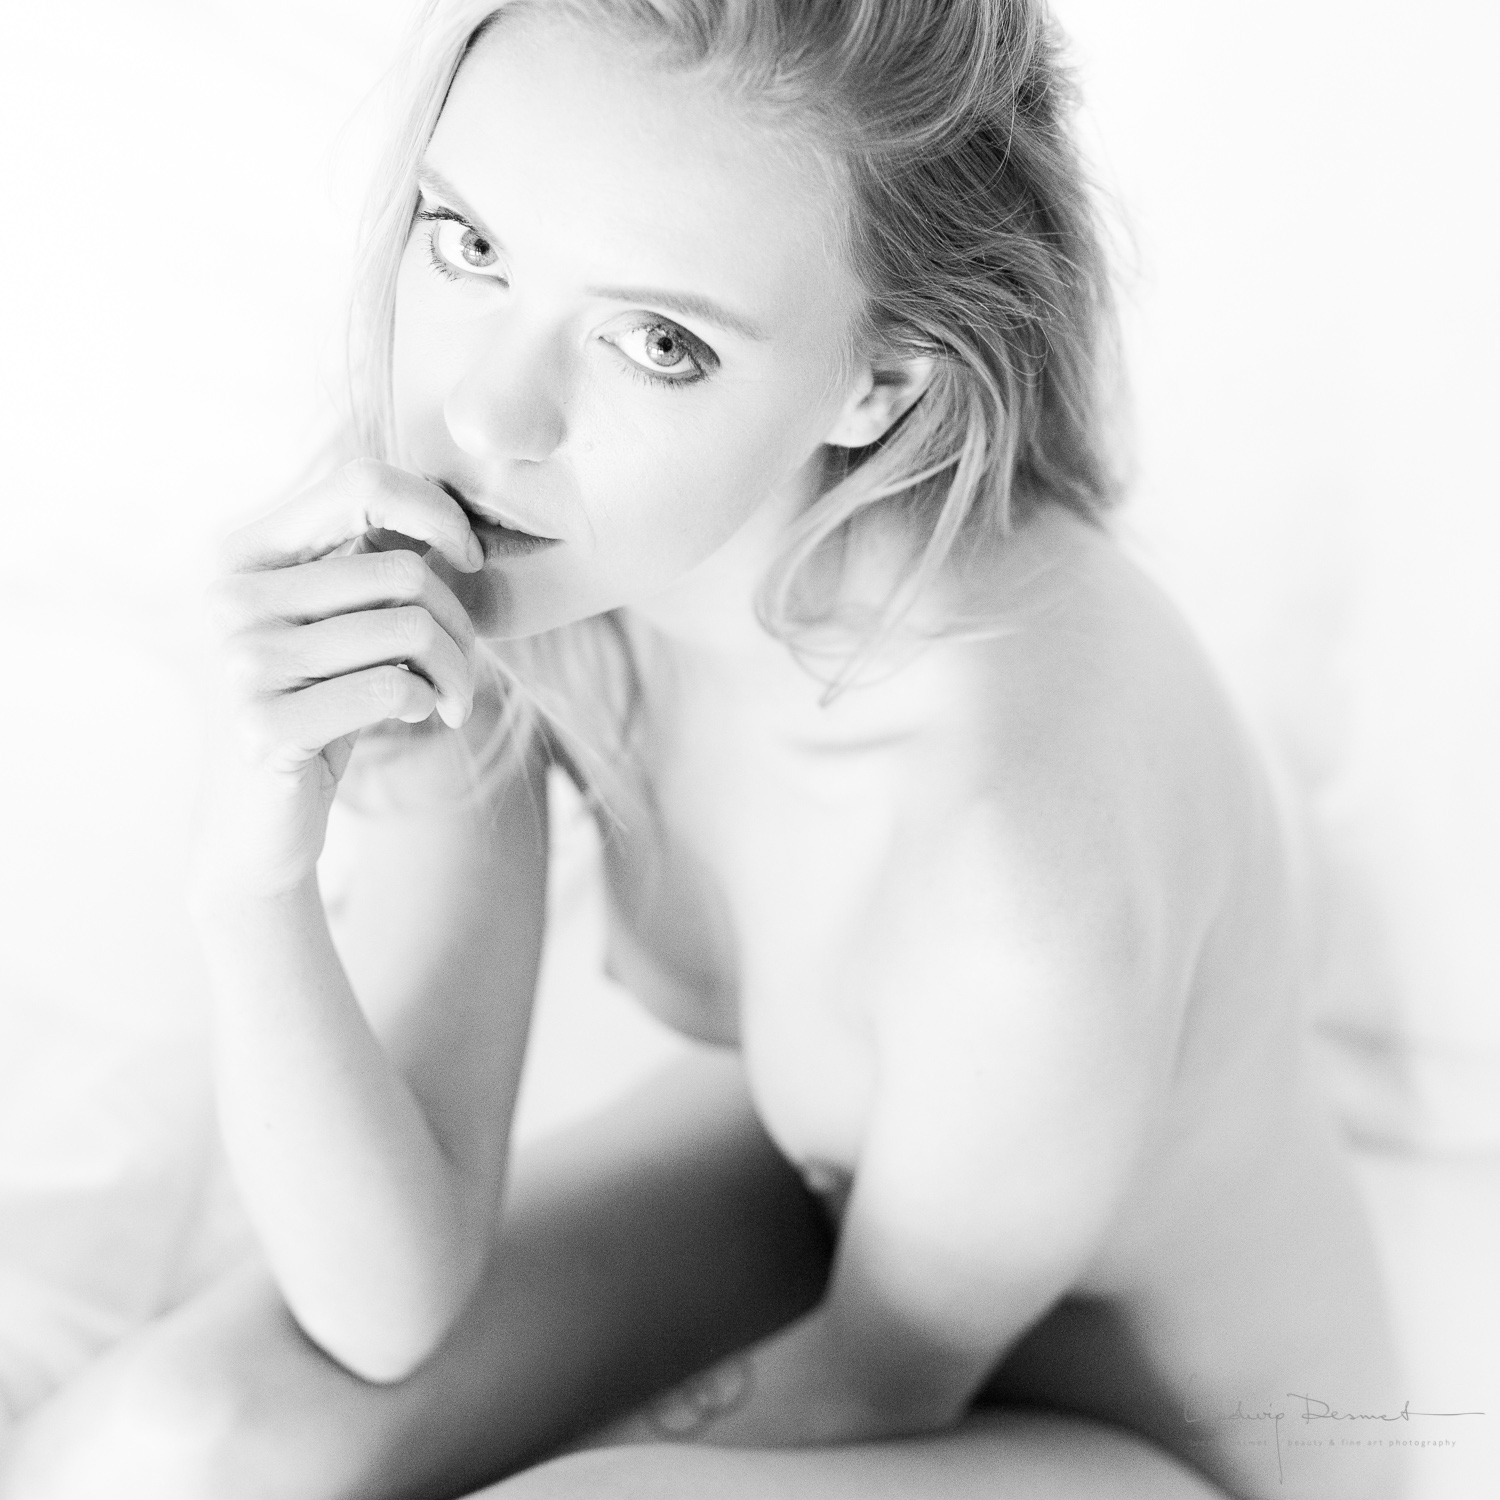
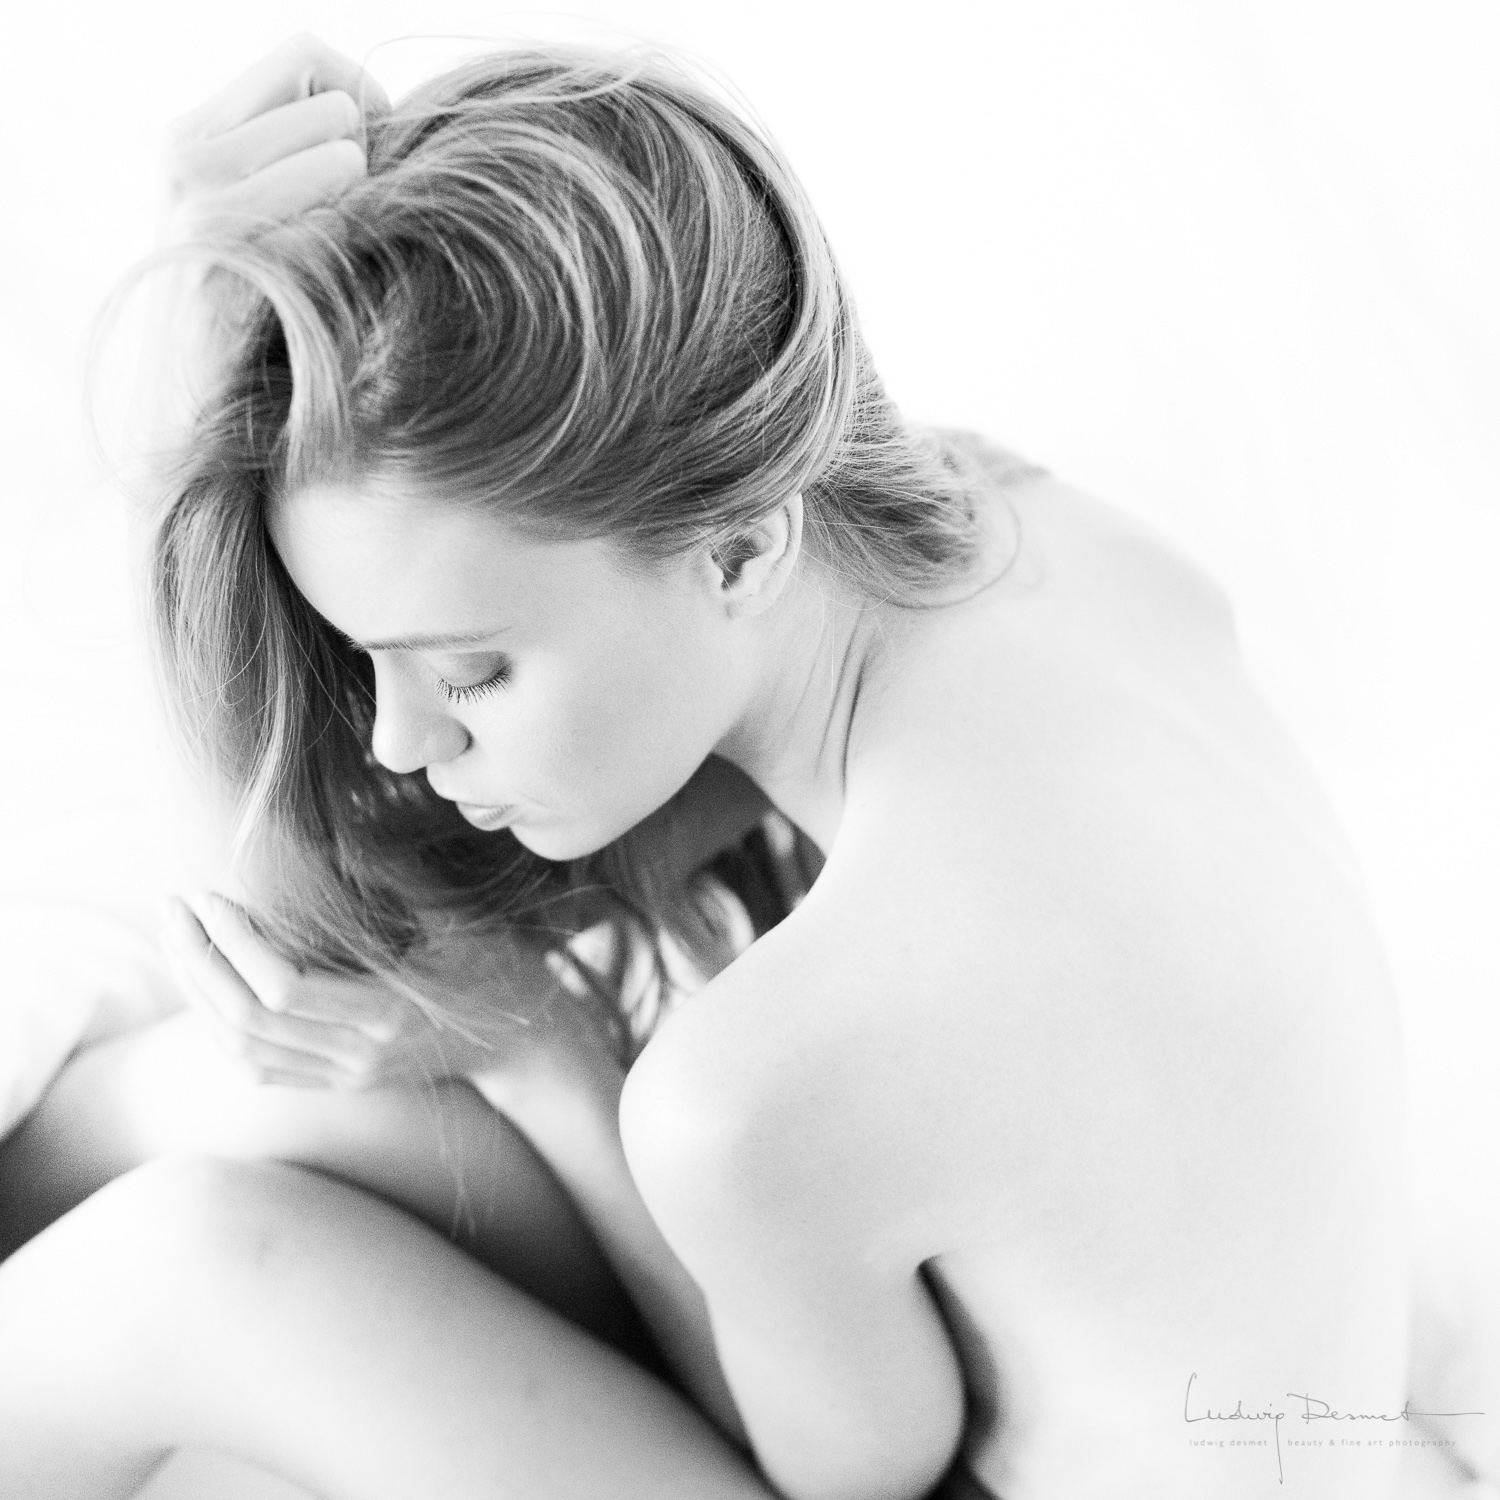
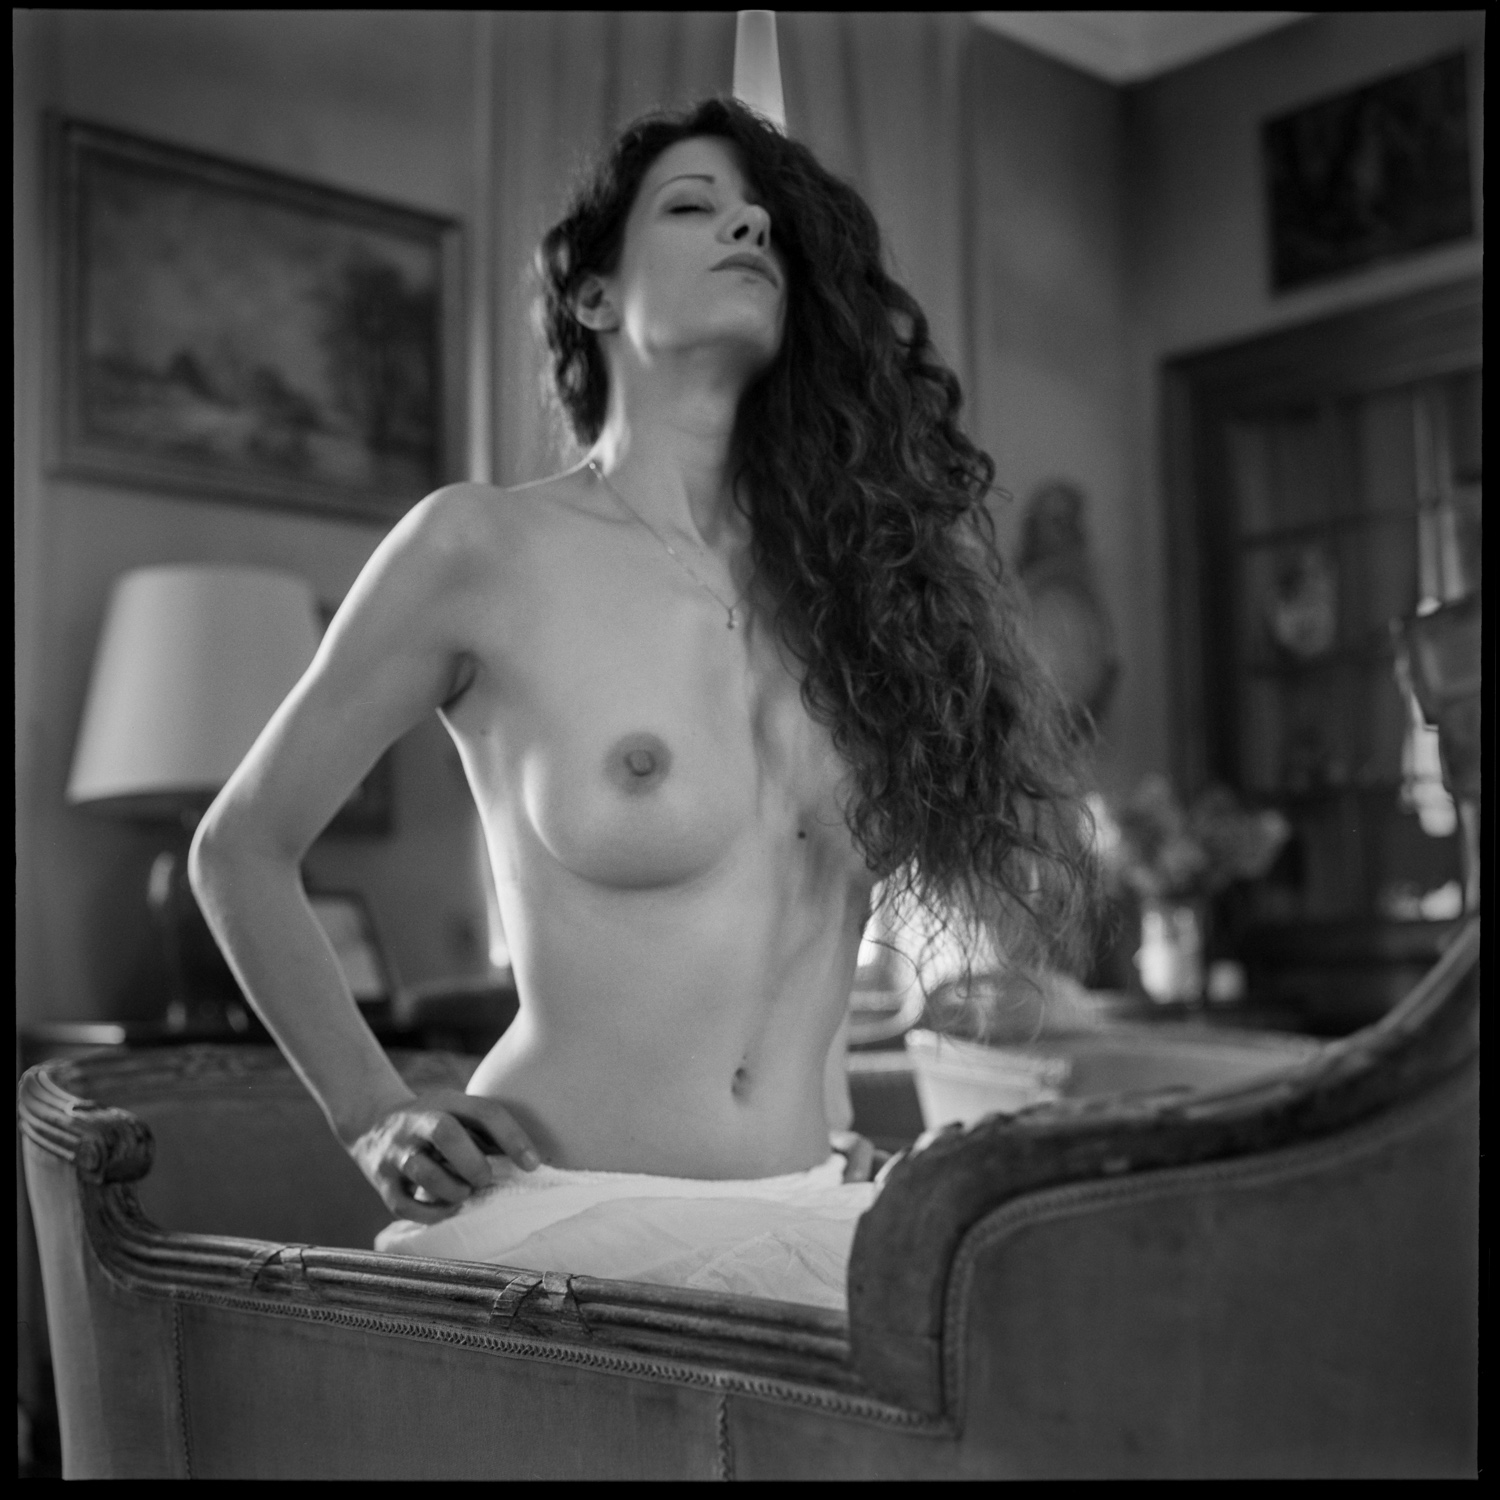
certainly keeps the doctor away …
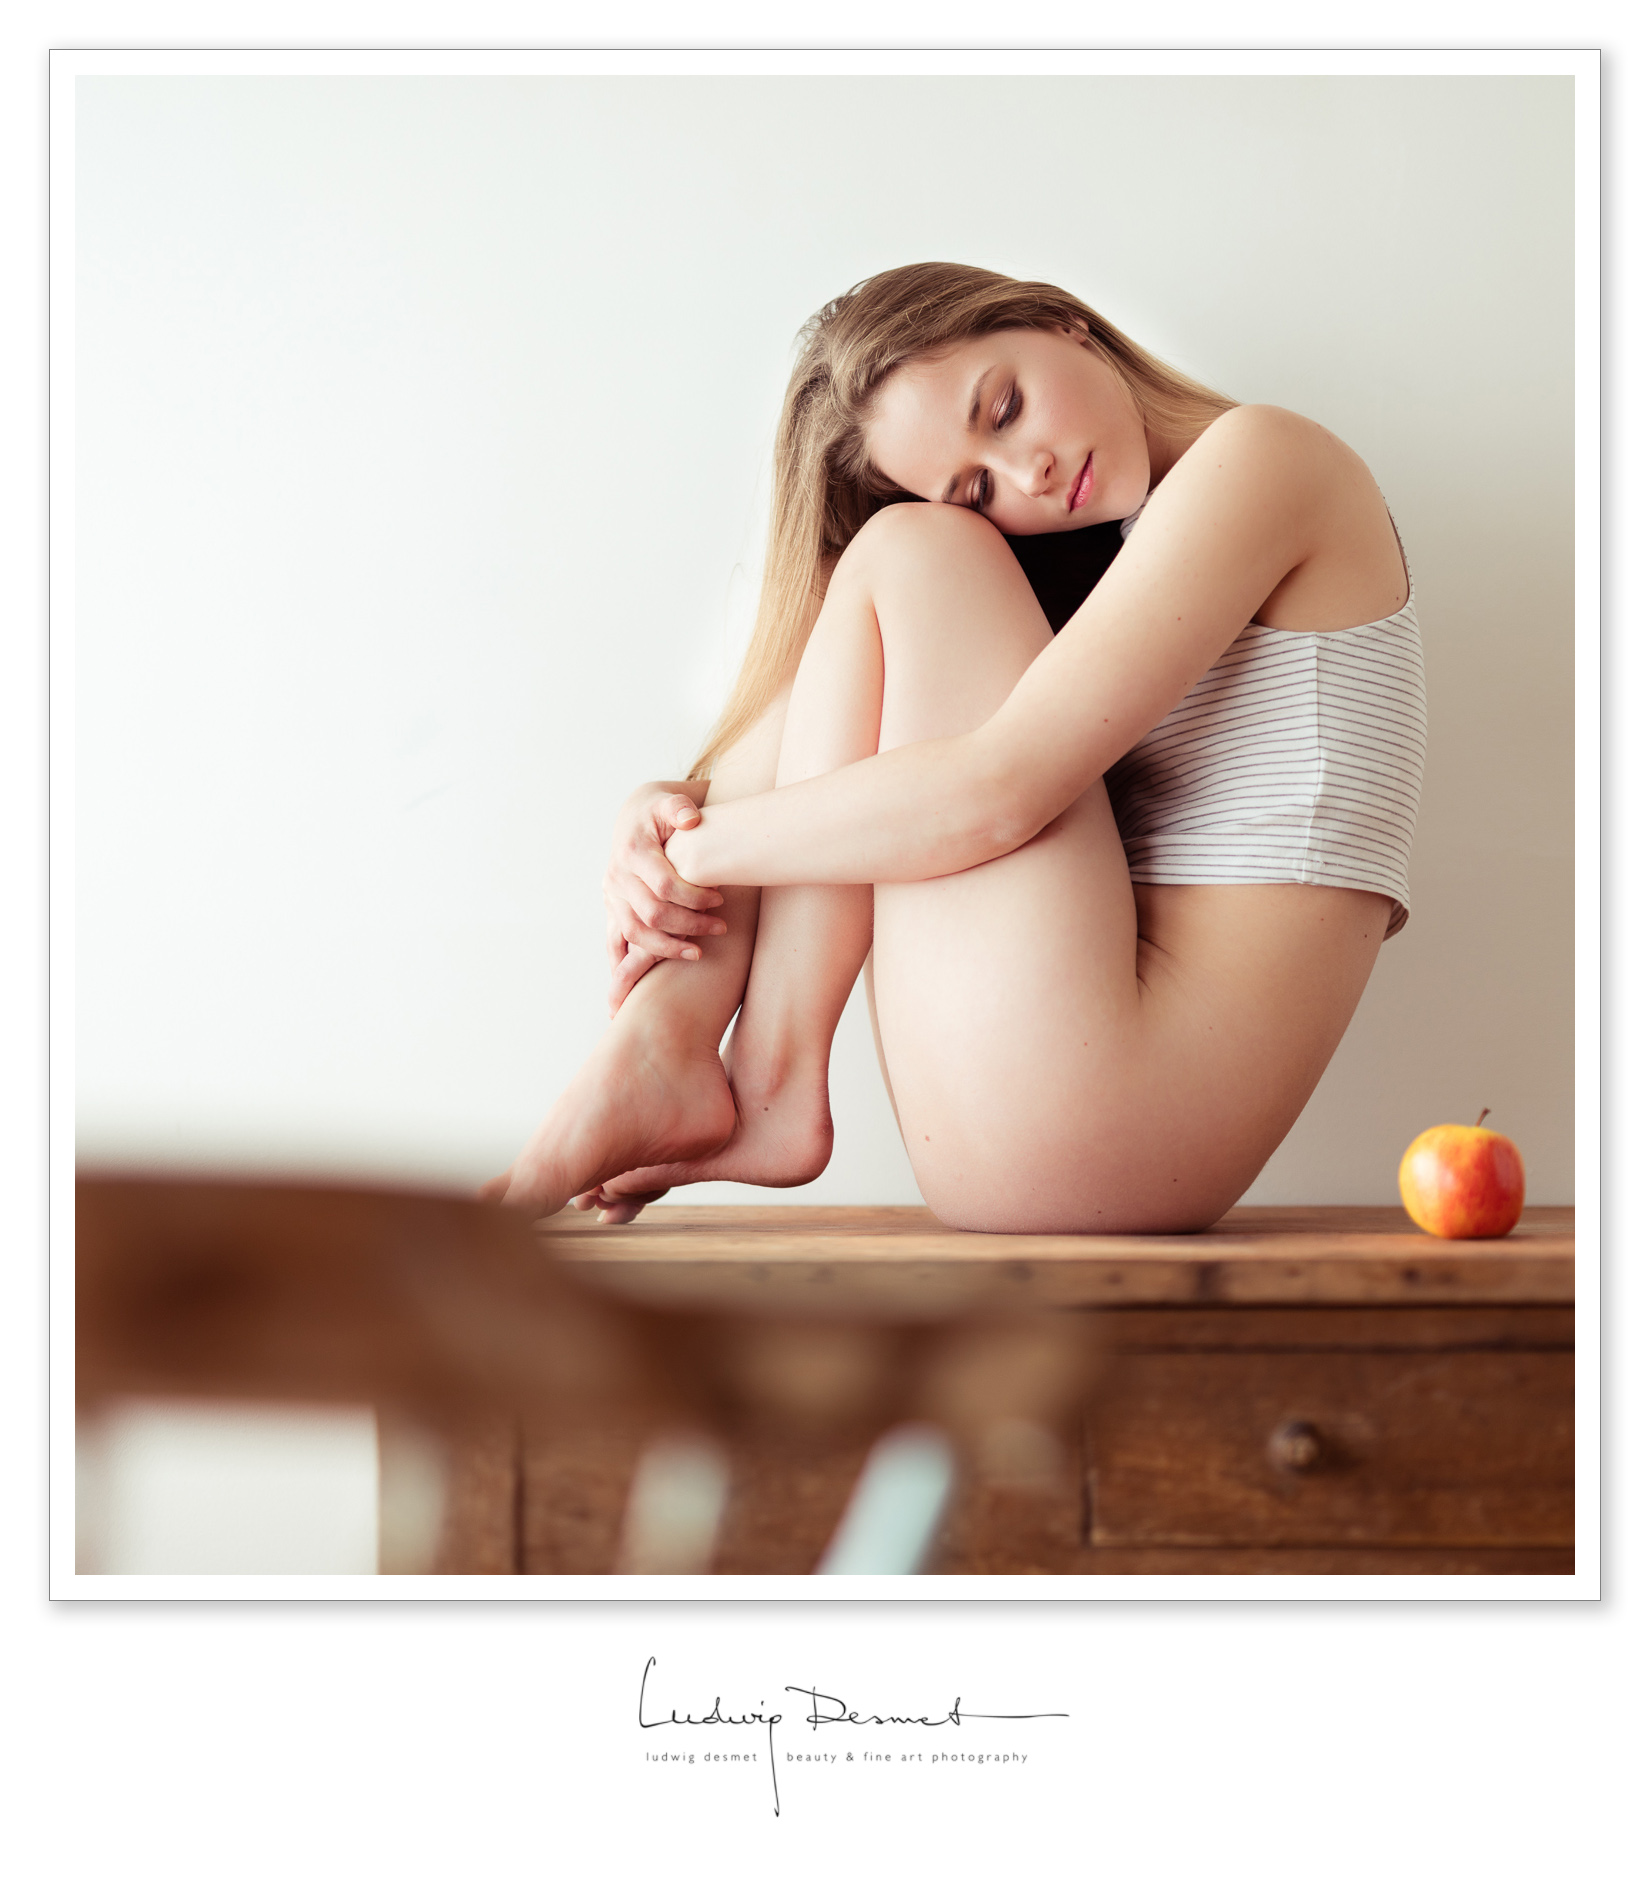
model and make up: Charisse
Location: My available light studio in Ronse (Belgium)
Exif: Canon 5Ds with Sigma 50mm f1.4 DG A – 1/400s f1.6 ISO100
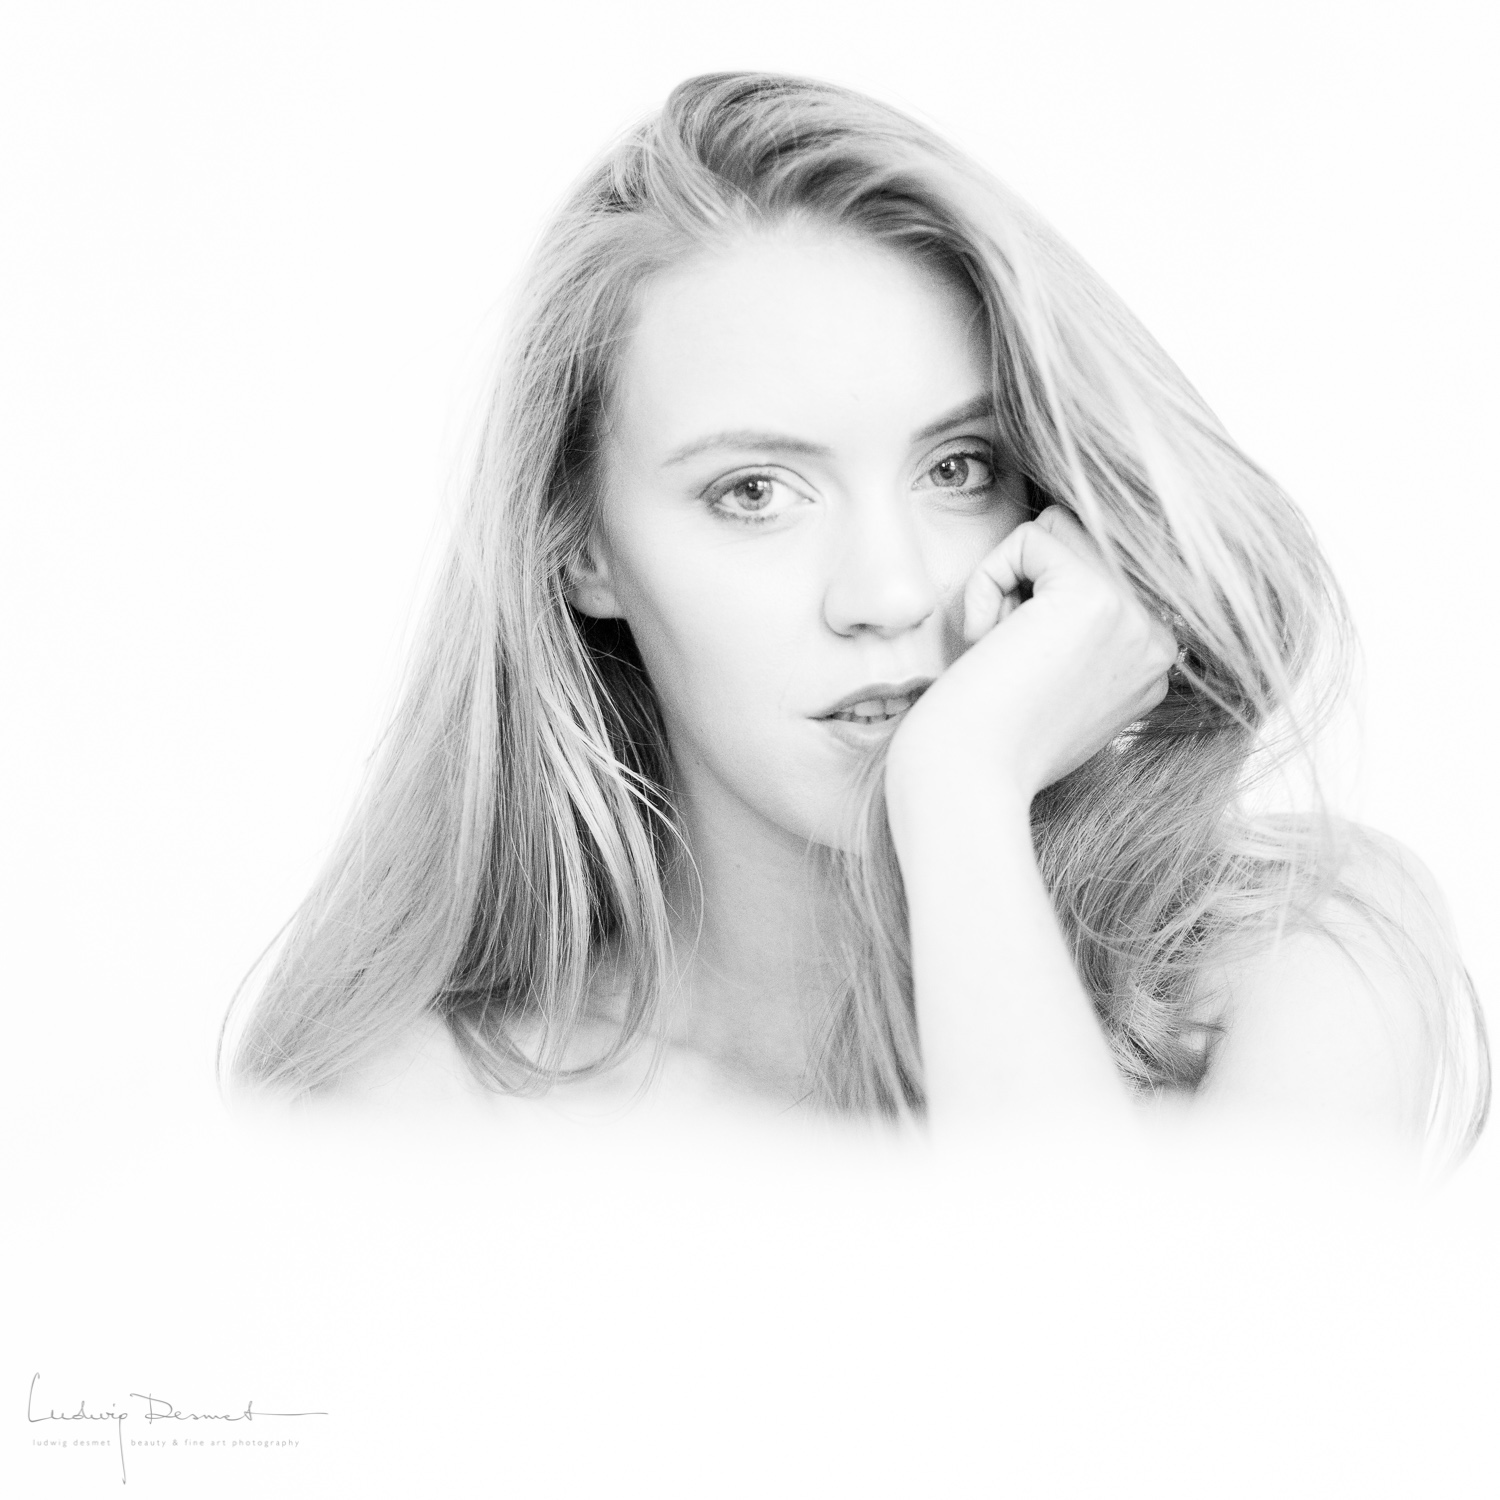
certainly keeps the doctor away …
model and make up: Charisse
Location: My available light studio in Ronse (Belgium)
Exif: Canon 5Ds with Sigma 50mm f1.4 DG A – 1/400s f1.6 ISO100
I’ts been about a month that I have the new studio space available, it took me a couple of days to get the walls freshened up (two coats of paint) and a couple of weeks before I got some furniture and props ready and moved in, but I’m about to call it ‘ready’ for work.
I think it probably never be a steady setup, because I want to keep some variation in my images, and variation will probably mean that I will bring in some new stuff from time to time and get rid of some ‘used’ furniture in the same pace.
Some observations so far just in case you think about setting up your own studio space:
• I have windows (large) only on one side of the room. Not easy to work with, so get yourself some large reflectors to bring some light back from the non-window side of the room. I use styrofoam boards 120x180cm, painted black on one side.
• The wooden floor gives me a particular white balance in the space, some warm tone that is not easy to get right all the time.
• Too much light will kill you, or at least will often create overly bright images. I love to work with light and shadow equally, sometimes even more shadow than light. So I bought a large theatre cloth (6x3m) to cover up 2/3 of the windows when needed. I use additional styrofoam boards if needed to cover up even more window area.
• The space has sun-screens, I didn’t even notice when I agreed to rent it. These are great to work with when there’s direct sun falling in. The screens are fine woven, so they create no patterns, and they lower the light level not too much. They help evening out the hard contrasts in sunny situations. They are neutral in color. Perfect!
• The wooden parquet is kind of slippery, very good for moving around mattresses and large carpets without too much of an effort. For furniture I have a wheeled board for easy moving.
• The ceiling is at 2.90m, that is an absolute minimum. I have some curtain rails hanging up, they are kind of permanent, and sometimes they are hindering my viewing angles.
• I have an adjacent stock room, where I can move all unnecessary items (flash lights and their tripods when I don’t need them, drinks, clothing, background system, paint, cleaning materials, … Perfect again!
• I have brought in a large trunk (some kind of monastery huge heavy dark wood piece) that I use for quick storage nearby. It makes your stored stuff invisible, it is useful as a decor piece, there’s always something you might need in a minute, it’s there.
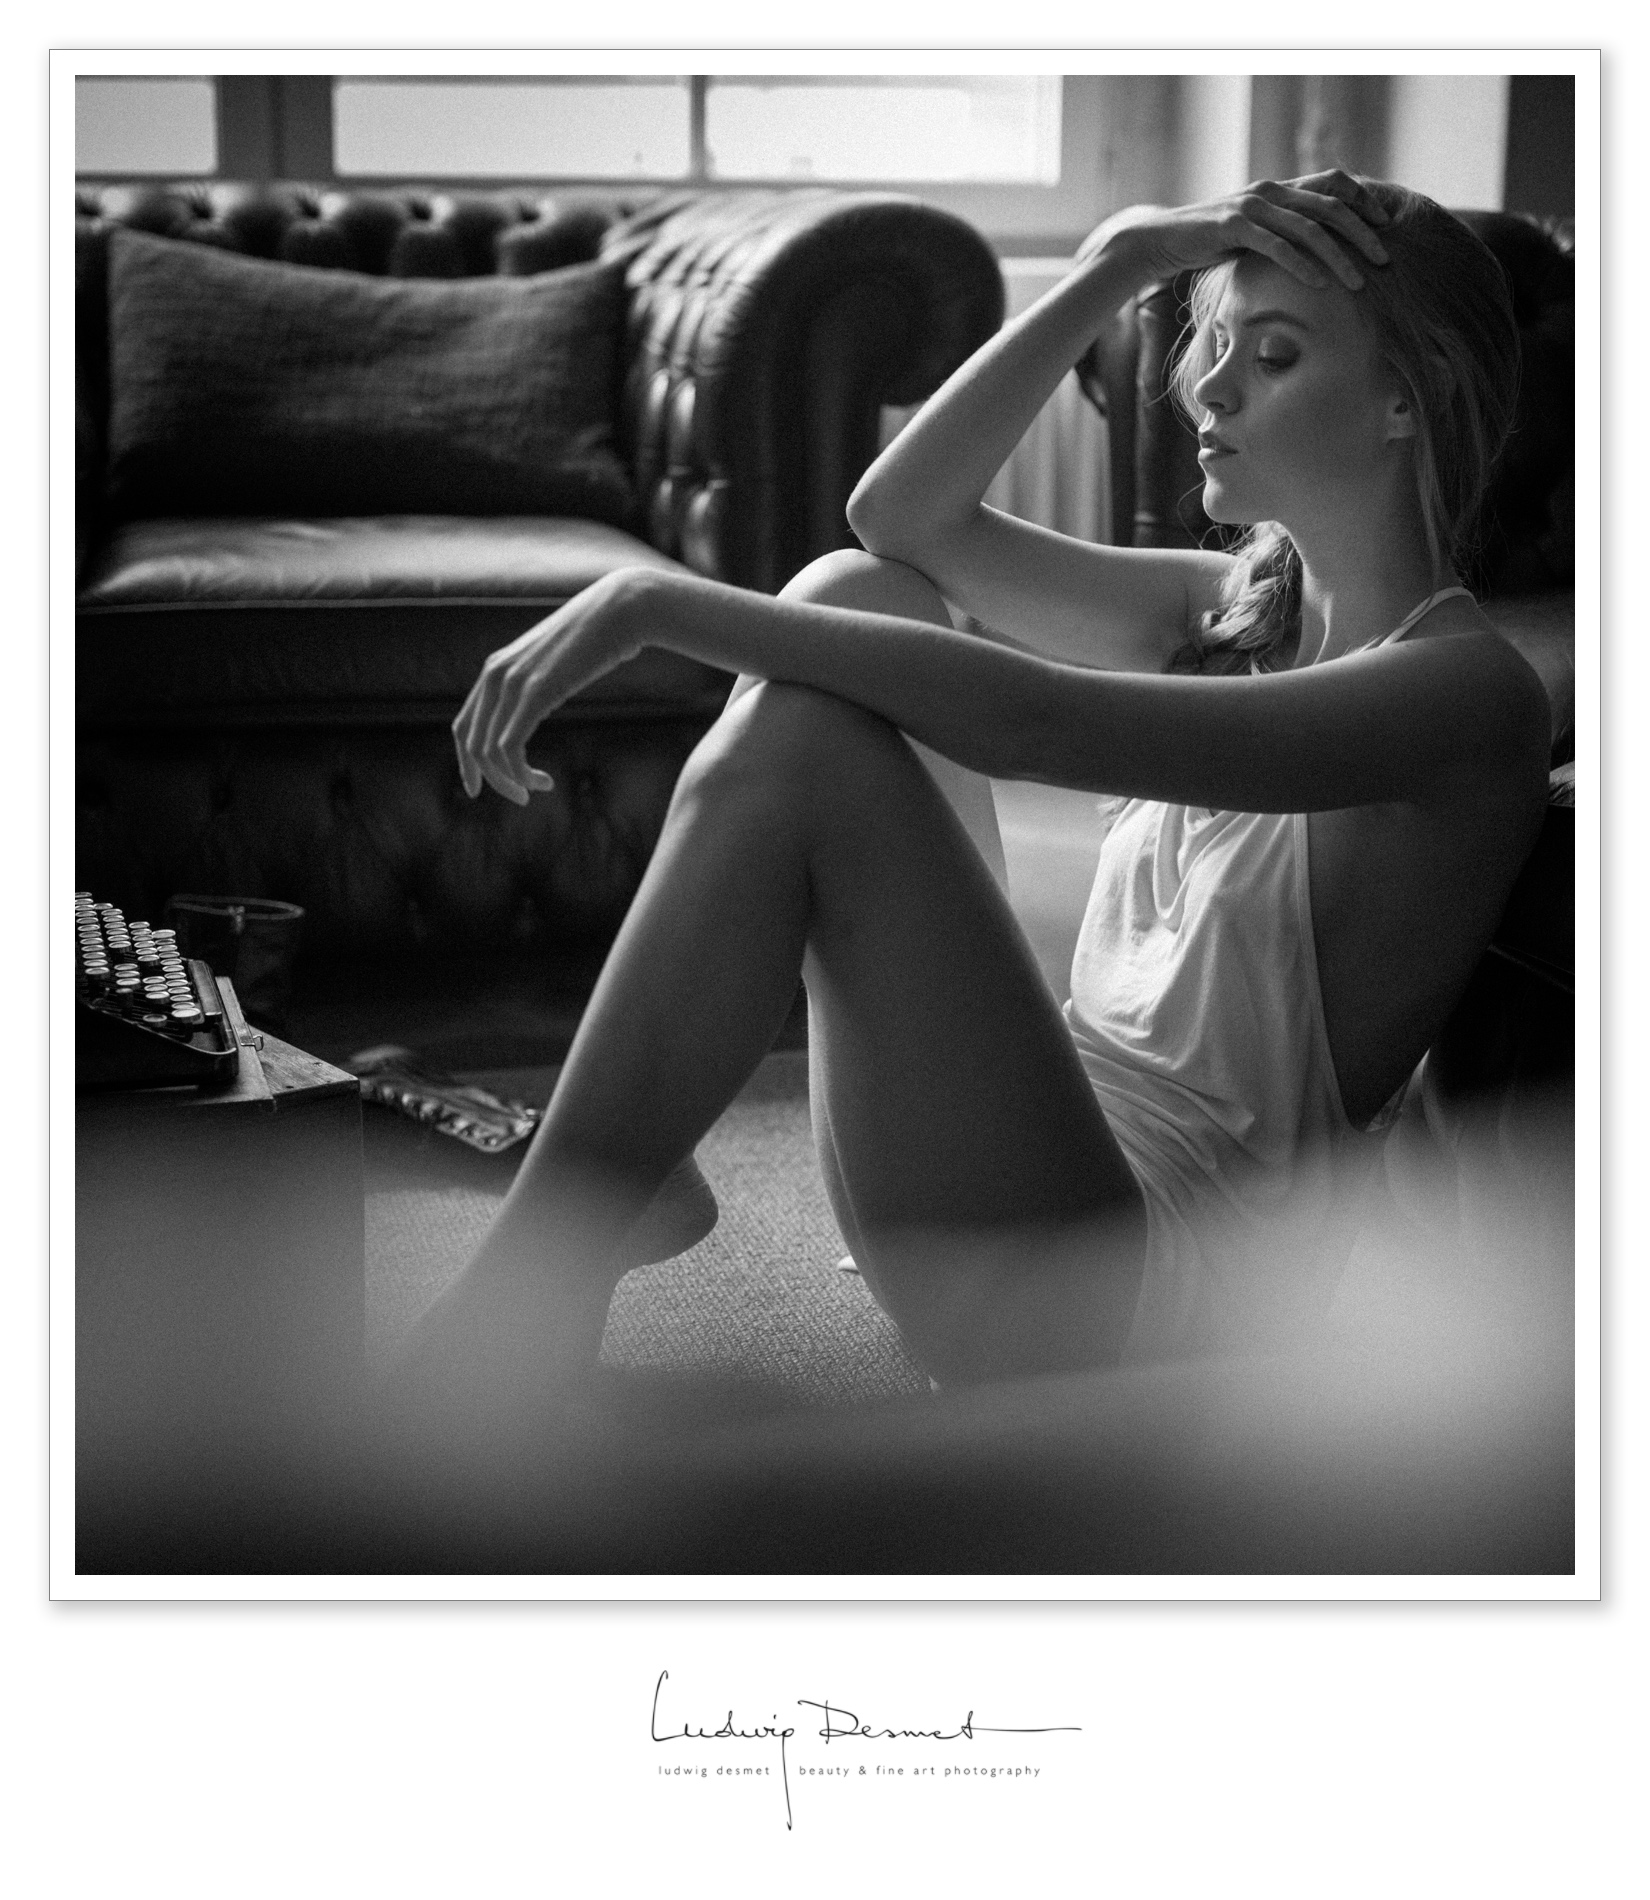
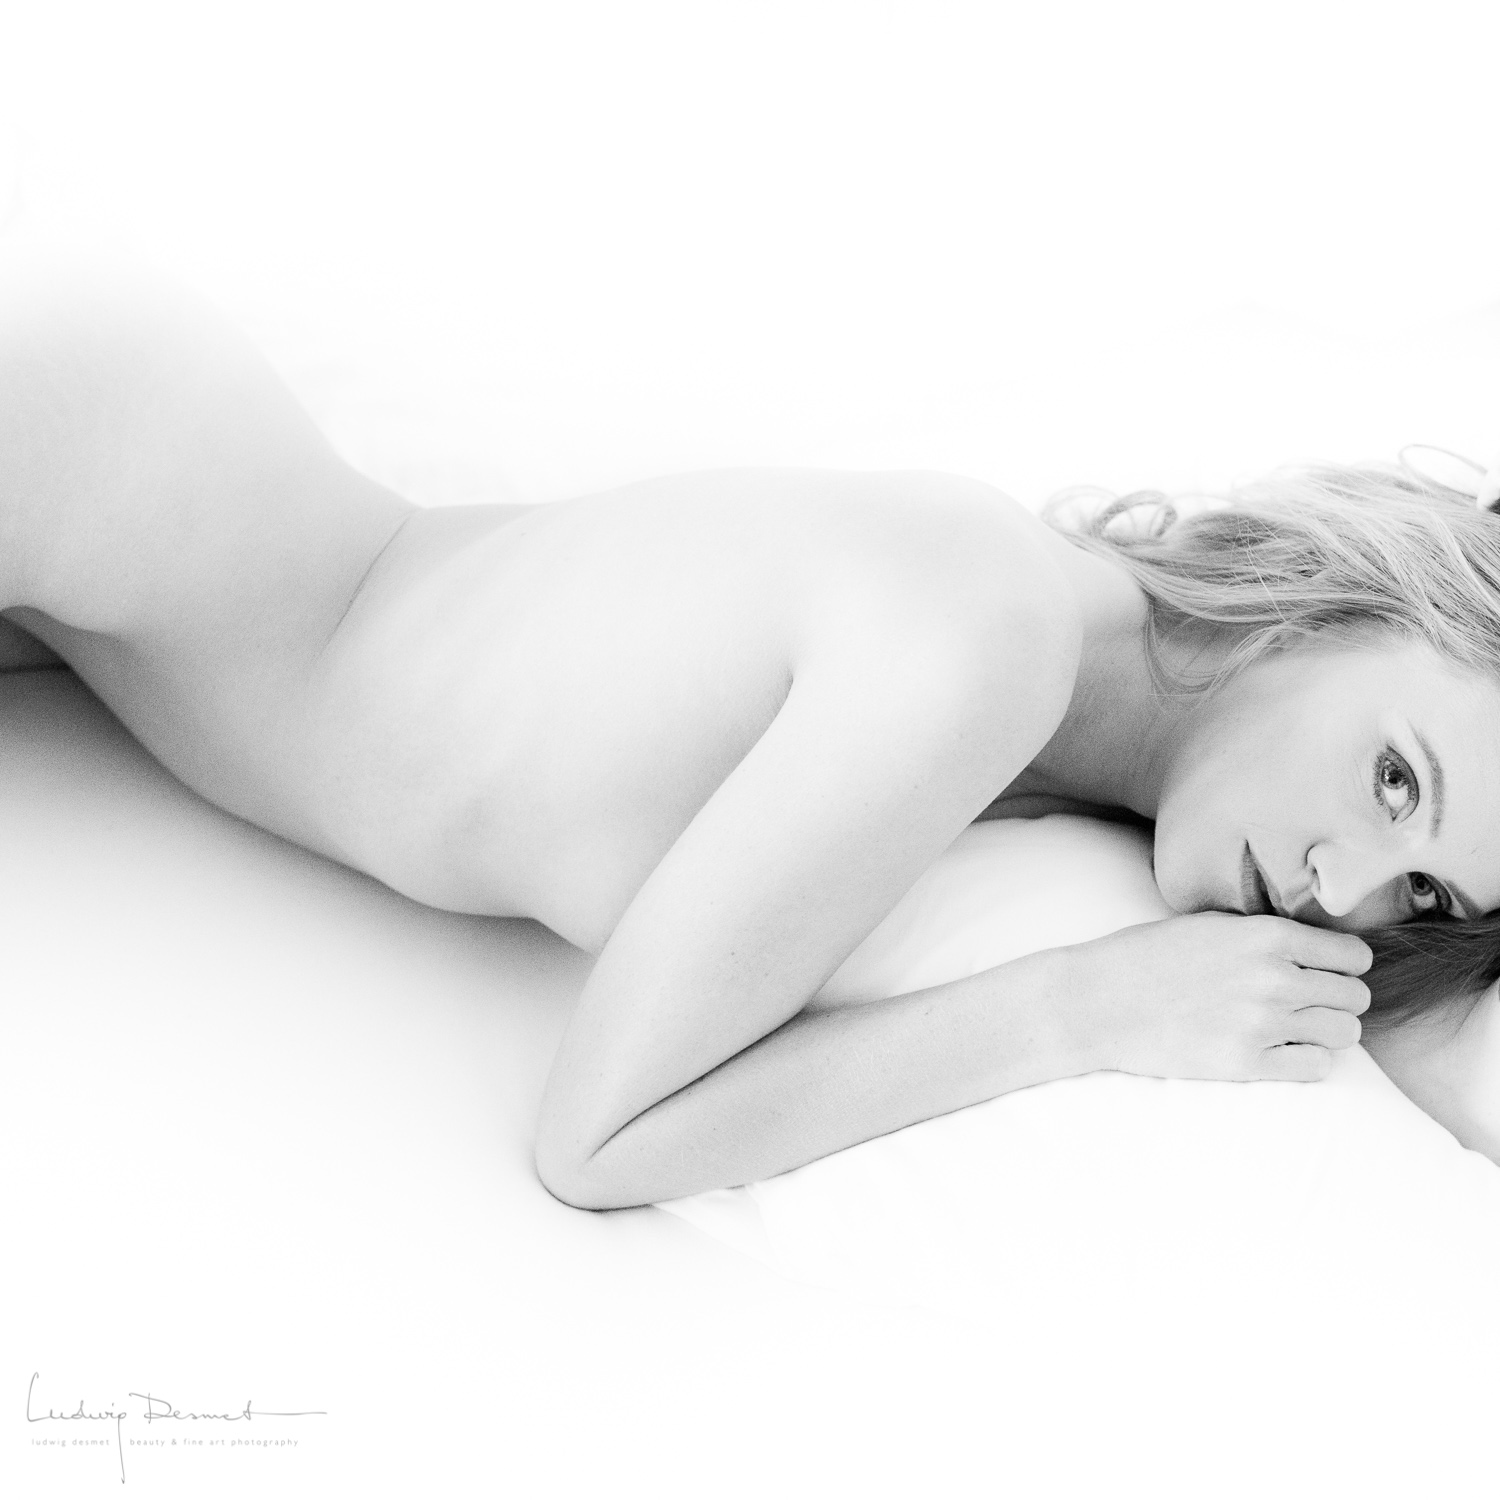
some images taken in the new studio:
![]()

2 white walls, a black wall, a wall with plenty of windows, and some creativity …
more to come,
best,
Ludwig
Hi,
quite a while since my last post, great news, exciting changes.
no more doubts
no more last minute panics
no more goosebumps
no more begging other people
…
I’ve got my own dedicated shooting studio !
I’ve rent a space in my home town, 6 x 11 meters open space, 3m ceiling height … nice oakwood parquet floor, big windows south side …
Started gathering decor elements and painting about two weeks ago, and yesterday I had my first shoot there. It takes a bit of getting used to, where do I have good light, what are the best looking lines, etcetera, but I’ll manage to make this into a fine shooting space!
enjoy this first image of yesterday’s shoot
• inspiration •
thanks Valérie, for being my ‘test’ model in this new space.
thanks Joyce, for being my make up artist,
settings: 1/100 f2.8 ISO250 – Canon 5Ds with Canon 100mm f2.8 L Macro IS
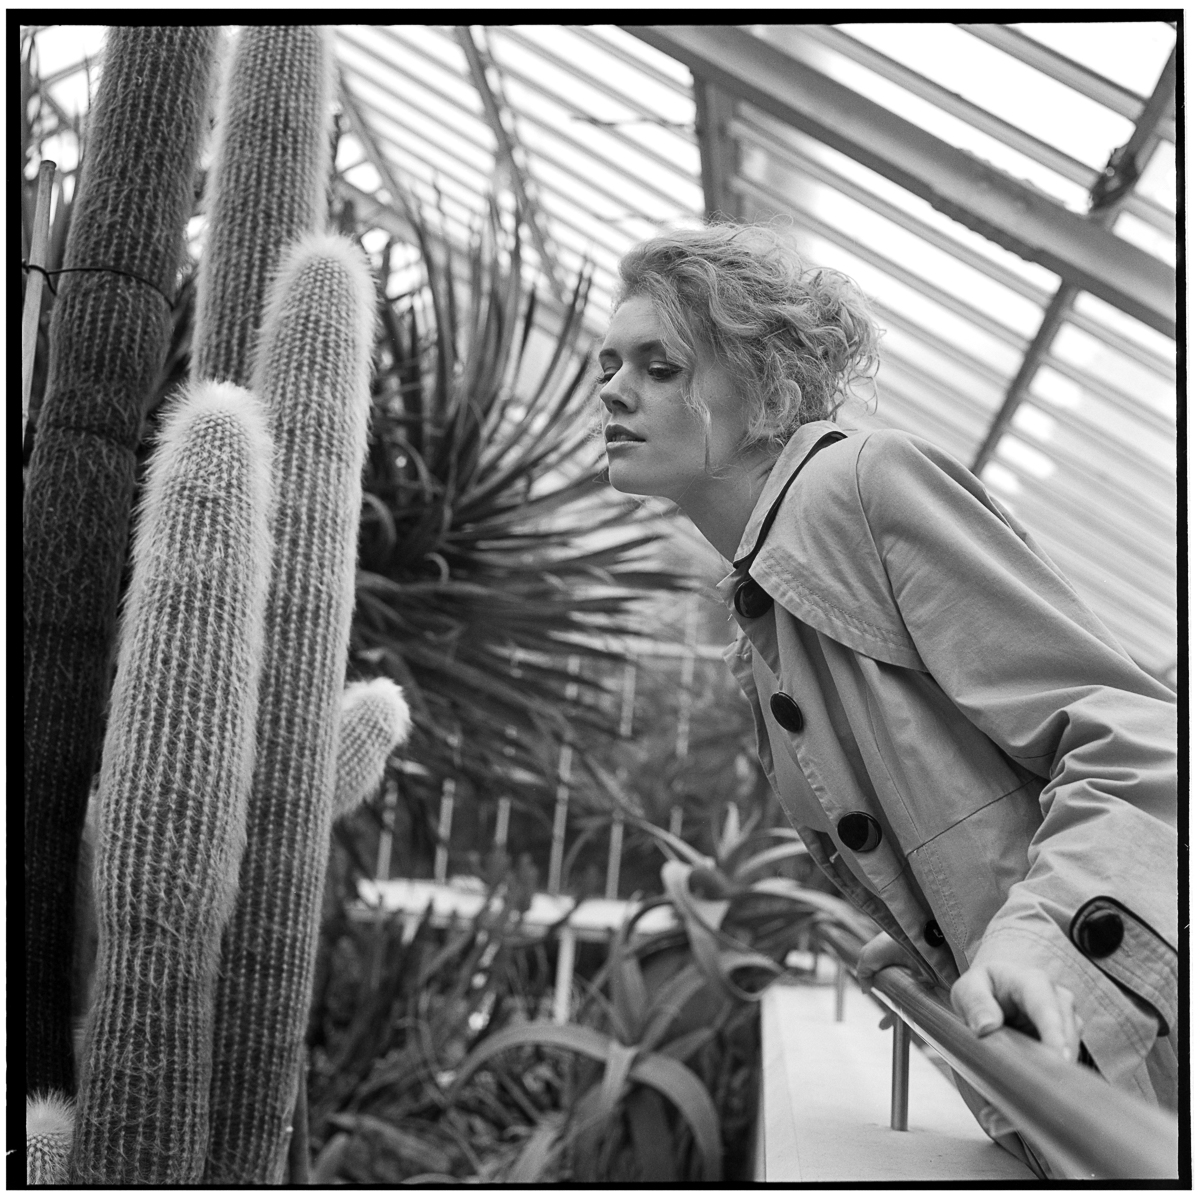
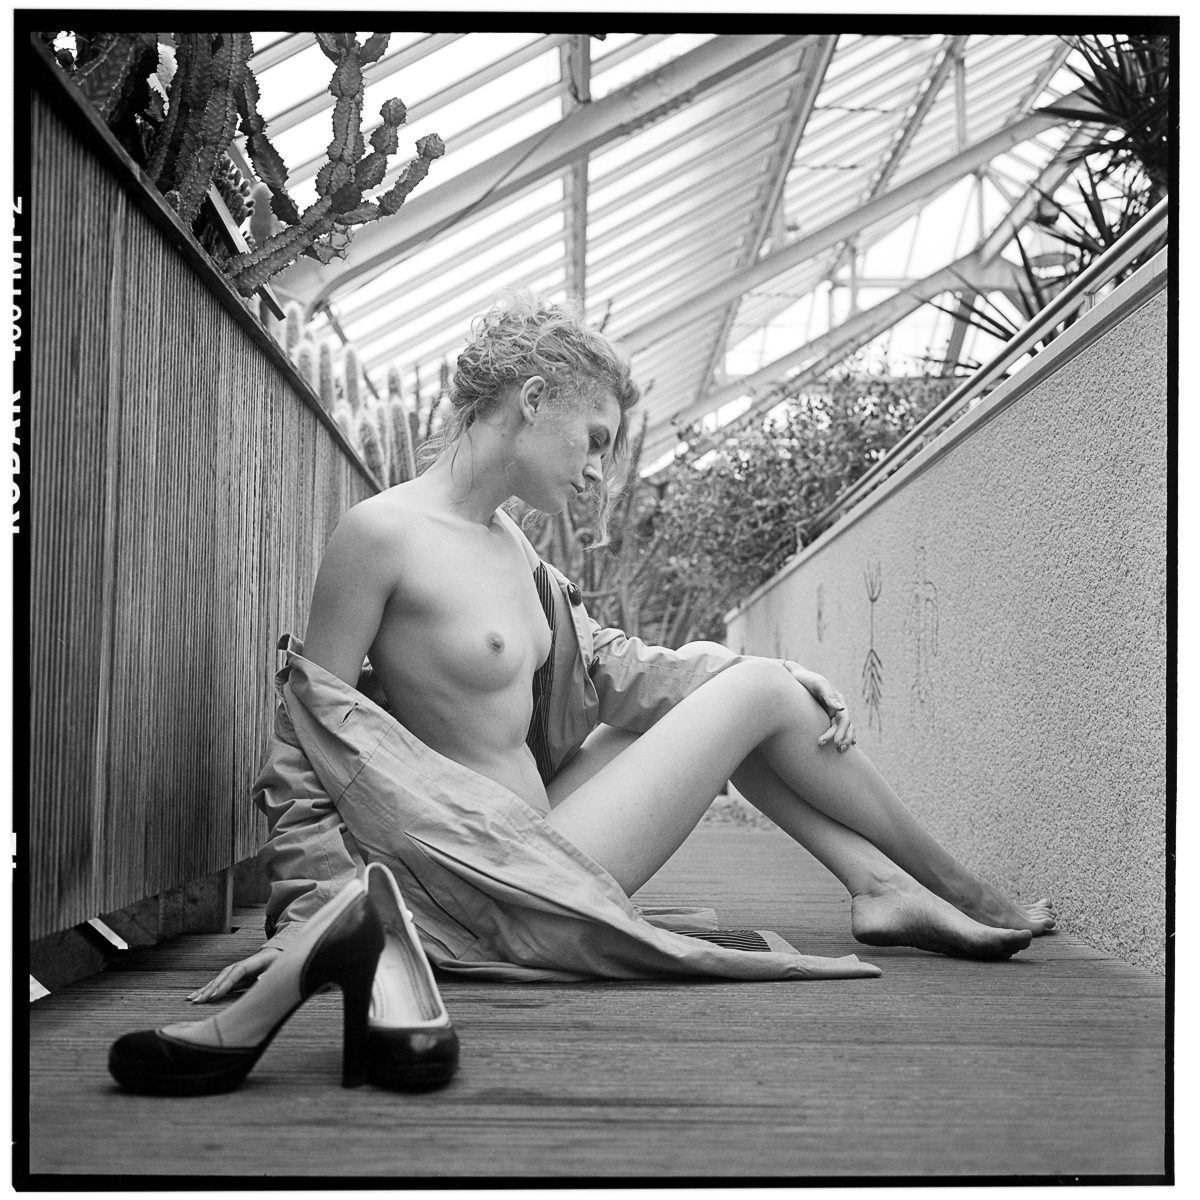
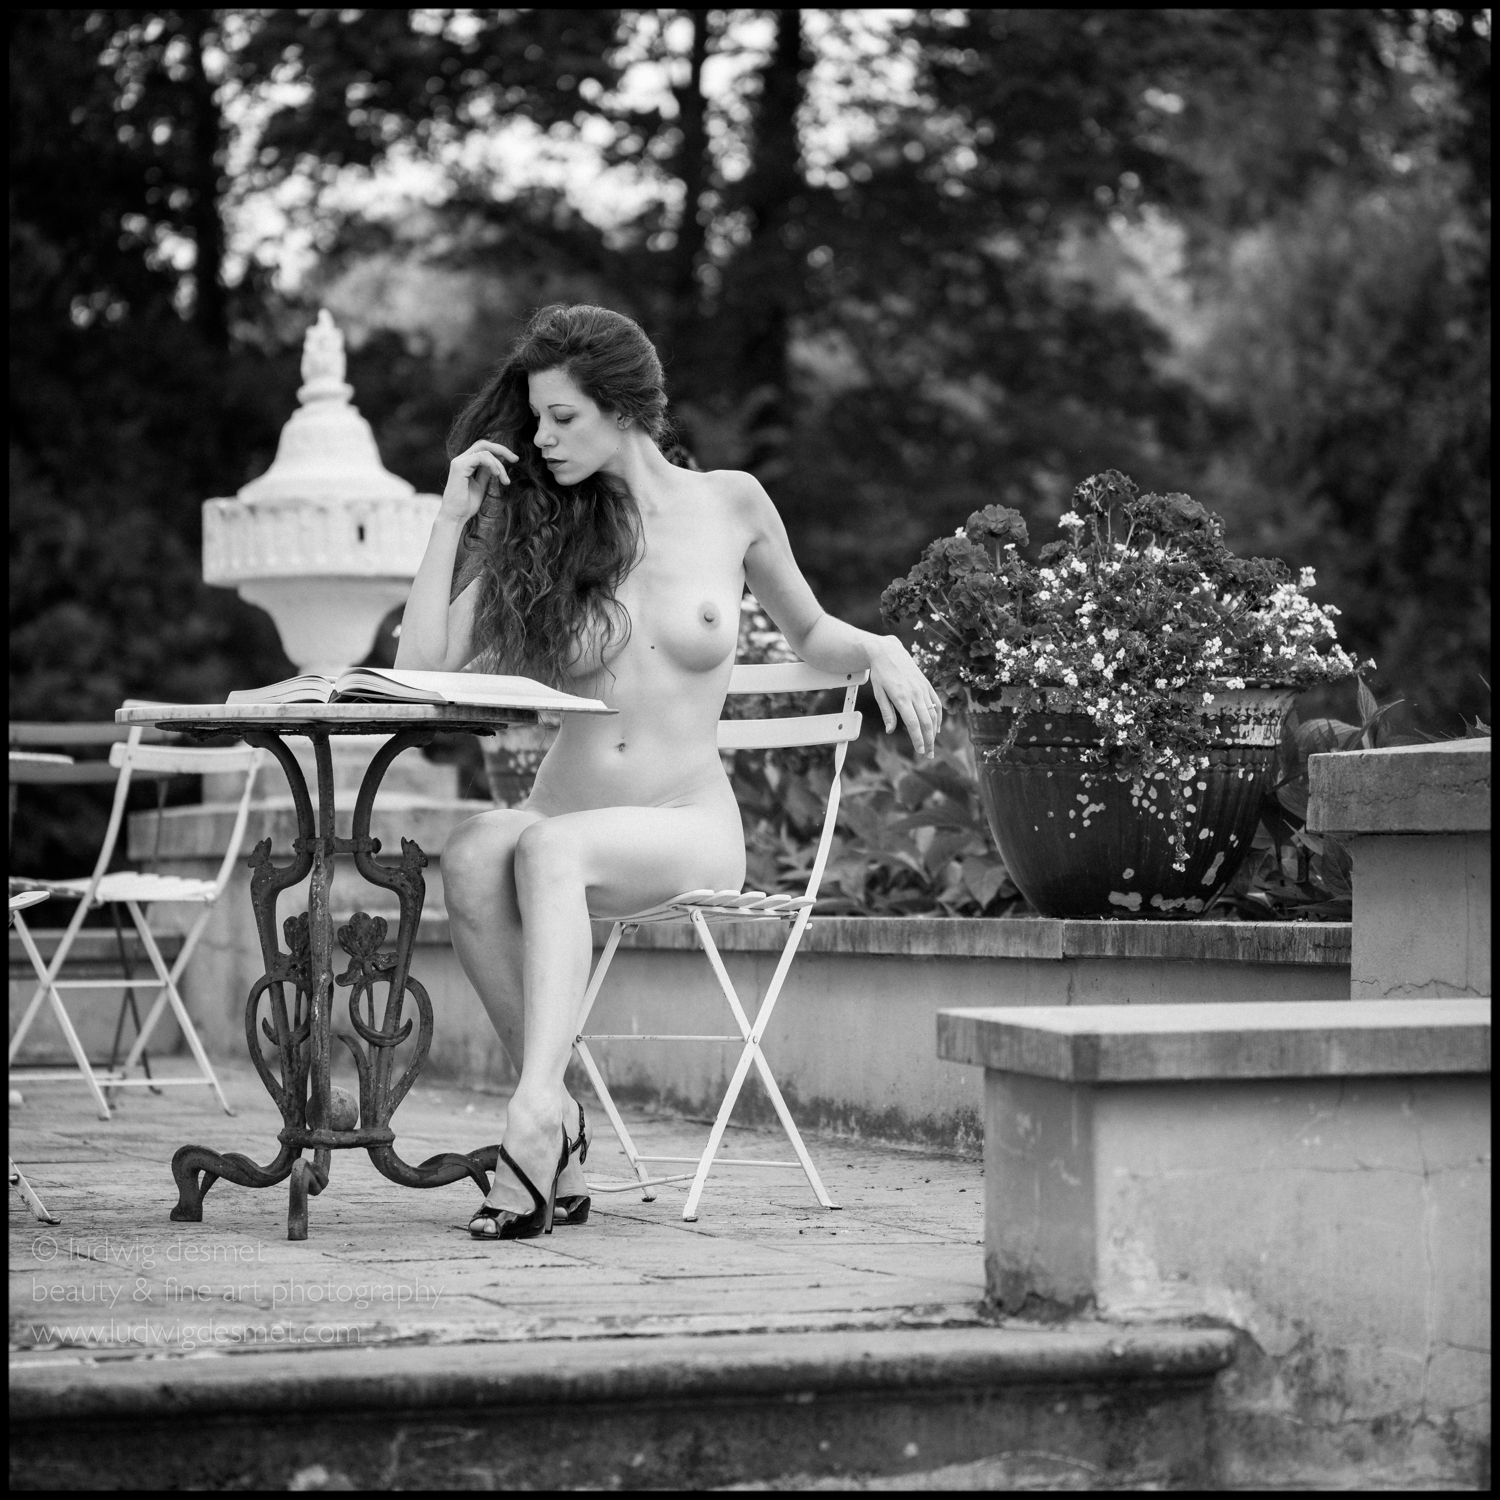
A cactus (plural: cacti, cactuses, or cactus) is a member of the plant family Cactaceae, a family comprising about 127 genera with some 1750 known species of the order Caryophyllales. (From Wikipedia)
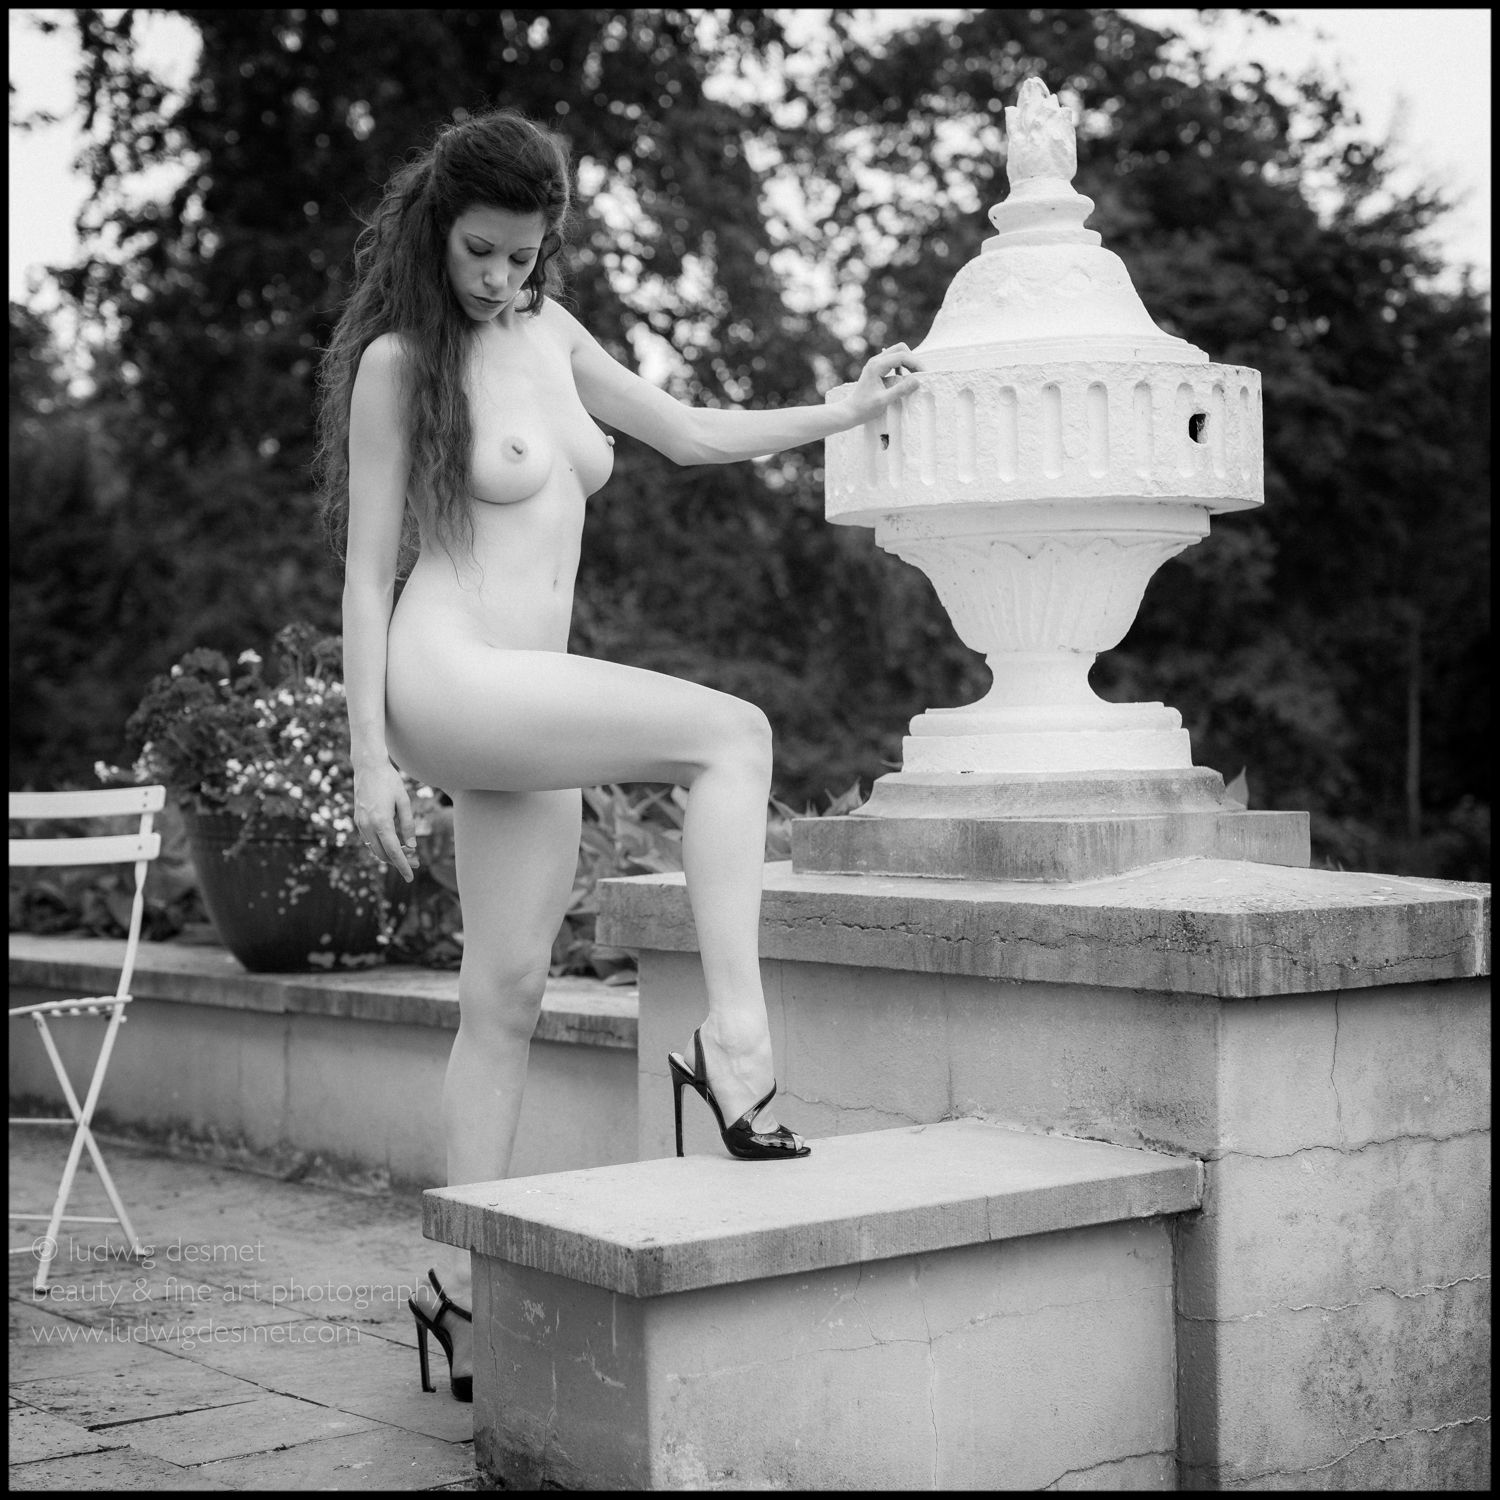
A small series of images I did about a year ago together with Kate in some semi-public glasshouse. The glasshouse was the only place where it was more or less hot enough to do nude work, and Kate didn’t care about the public character of the place, we met only very limited people, and managed to keep out of sight of most of them, at least we think. 😉
Taken with the Rolleiflex 6×6 TLR, on Kodak TMax400 film.


hope you liked that,
come again soon,
Ludwig
another shot from the shoot ‘paradise lost’ in Corsica.
• have a drink, my dear … •
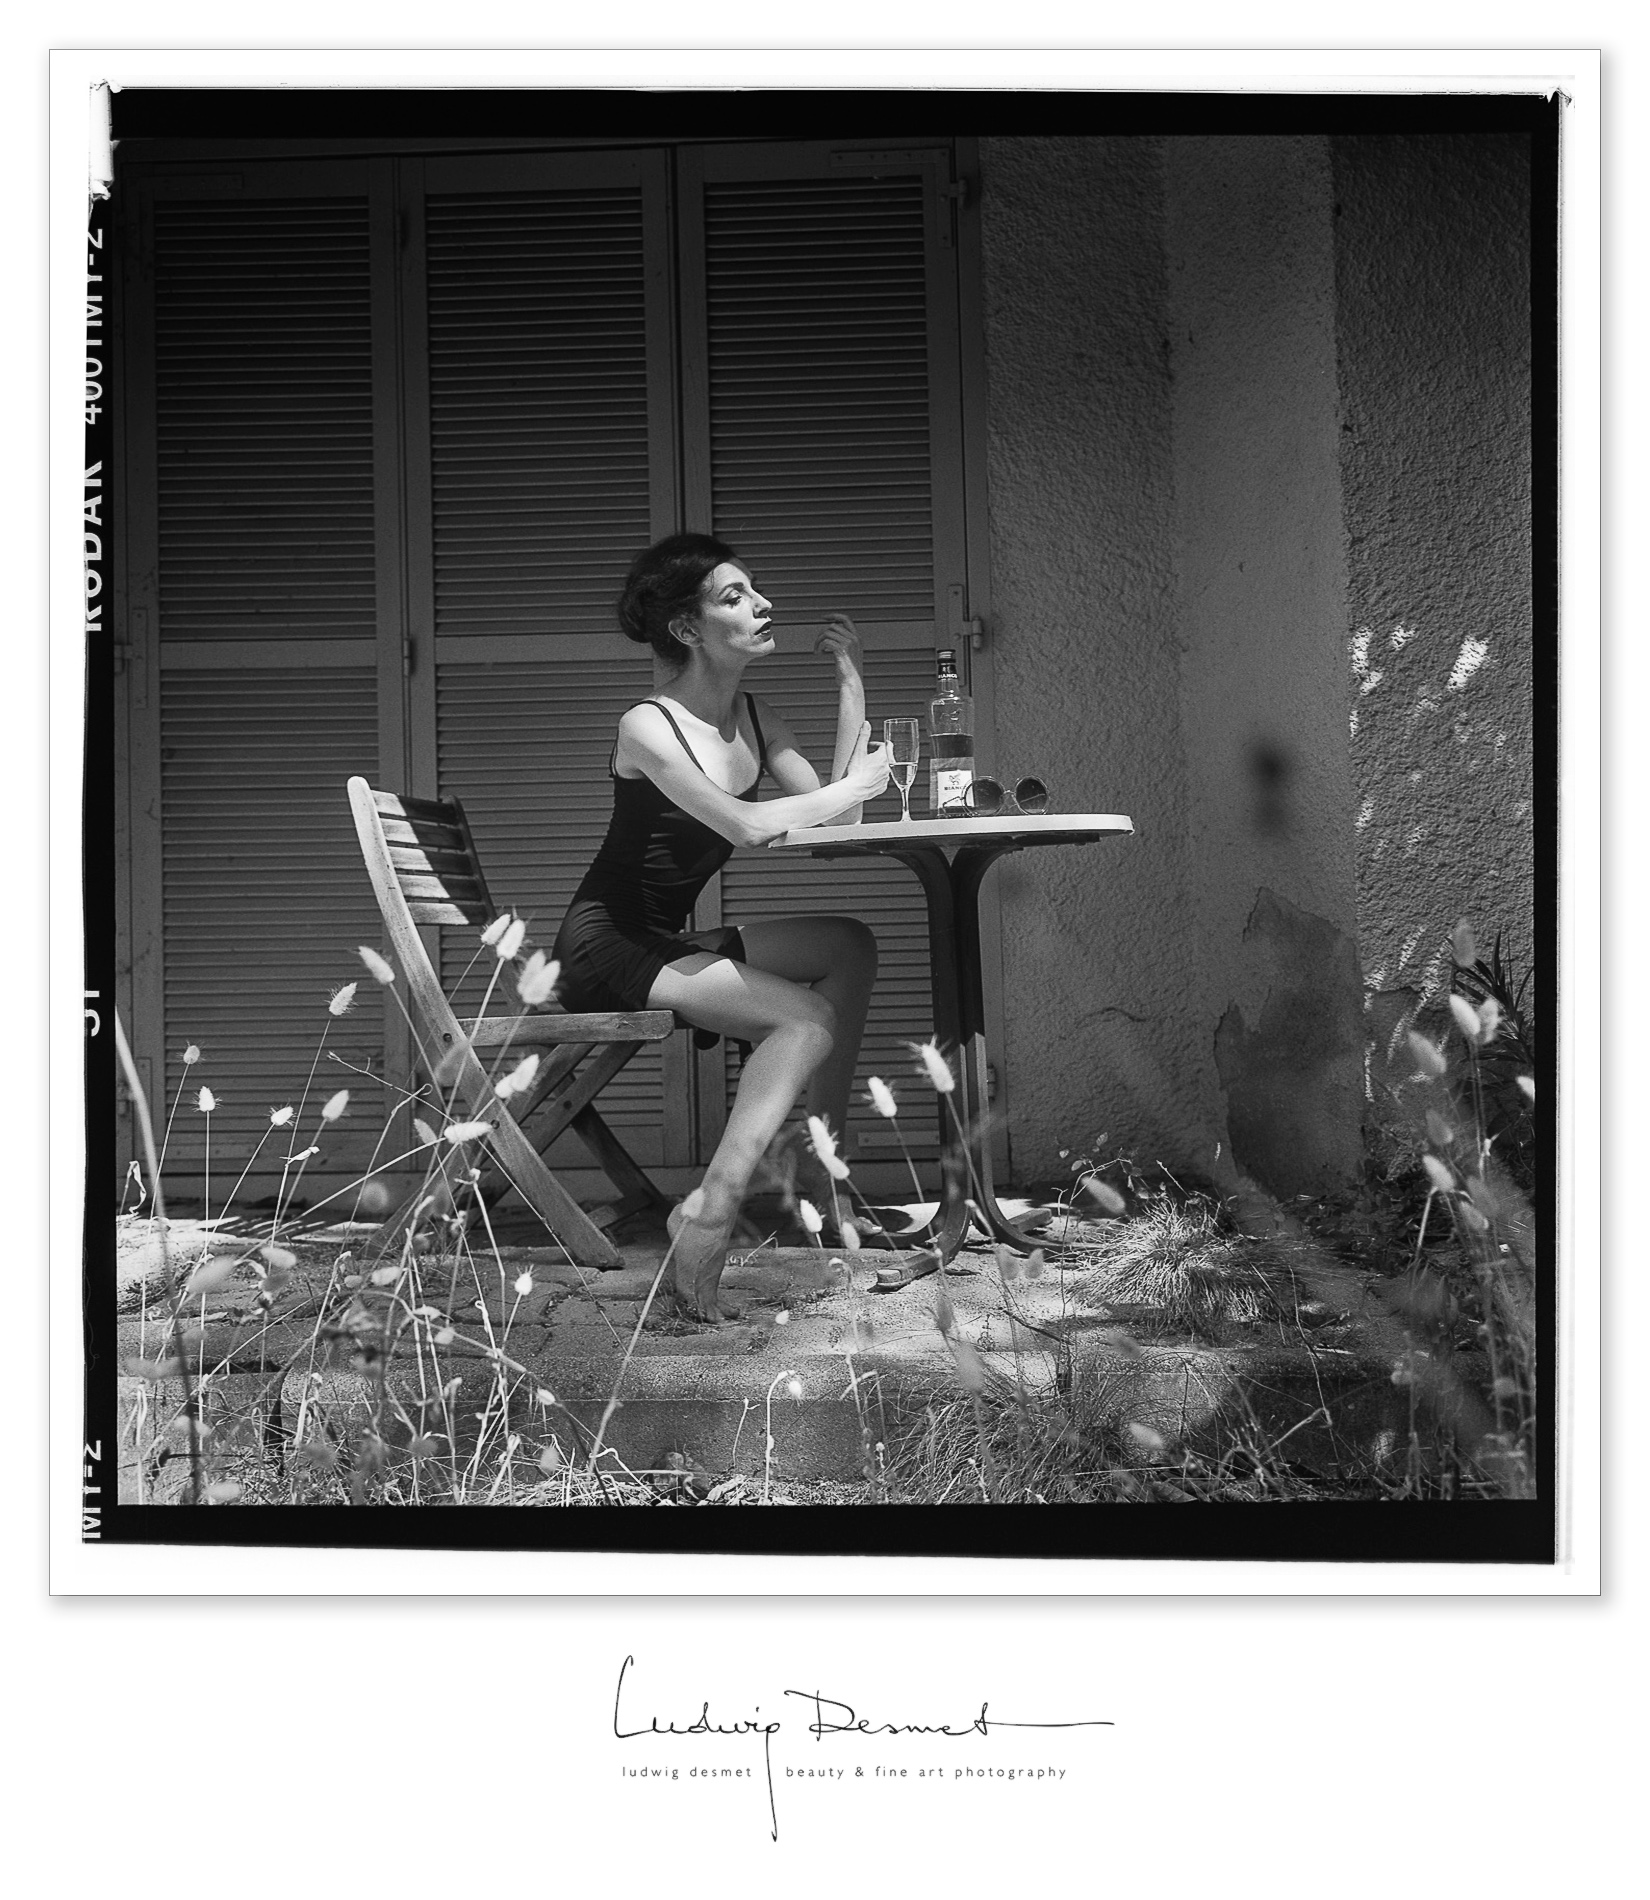
shot with Rolleiflex 3.5 TLR, on Kodak TMax400 film
the exhibit is soon, October 14th and 15th, grab your agenda’s
best
Ludwig
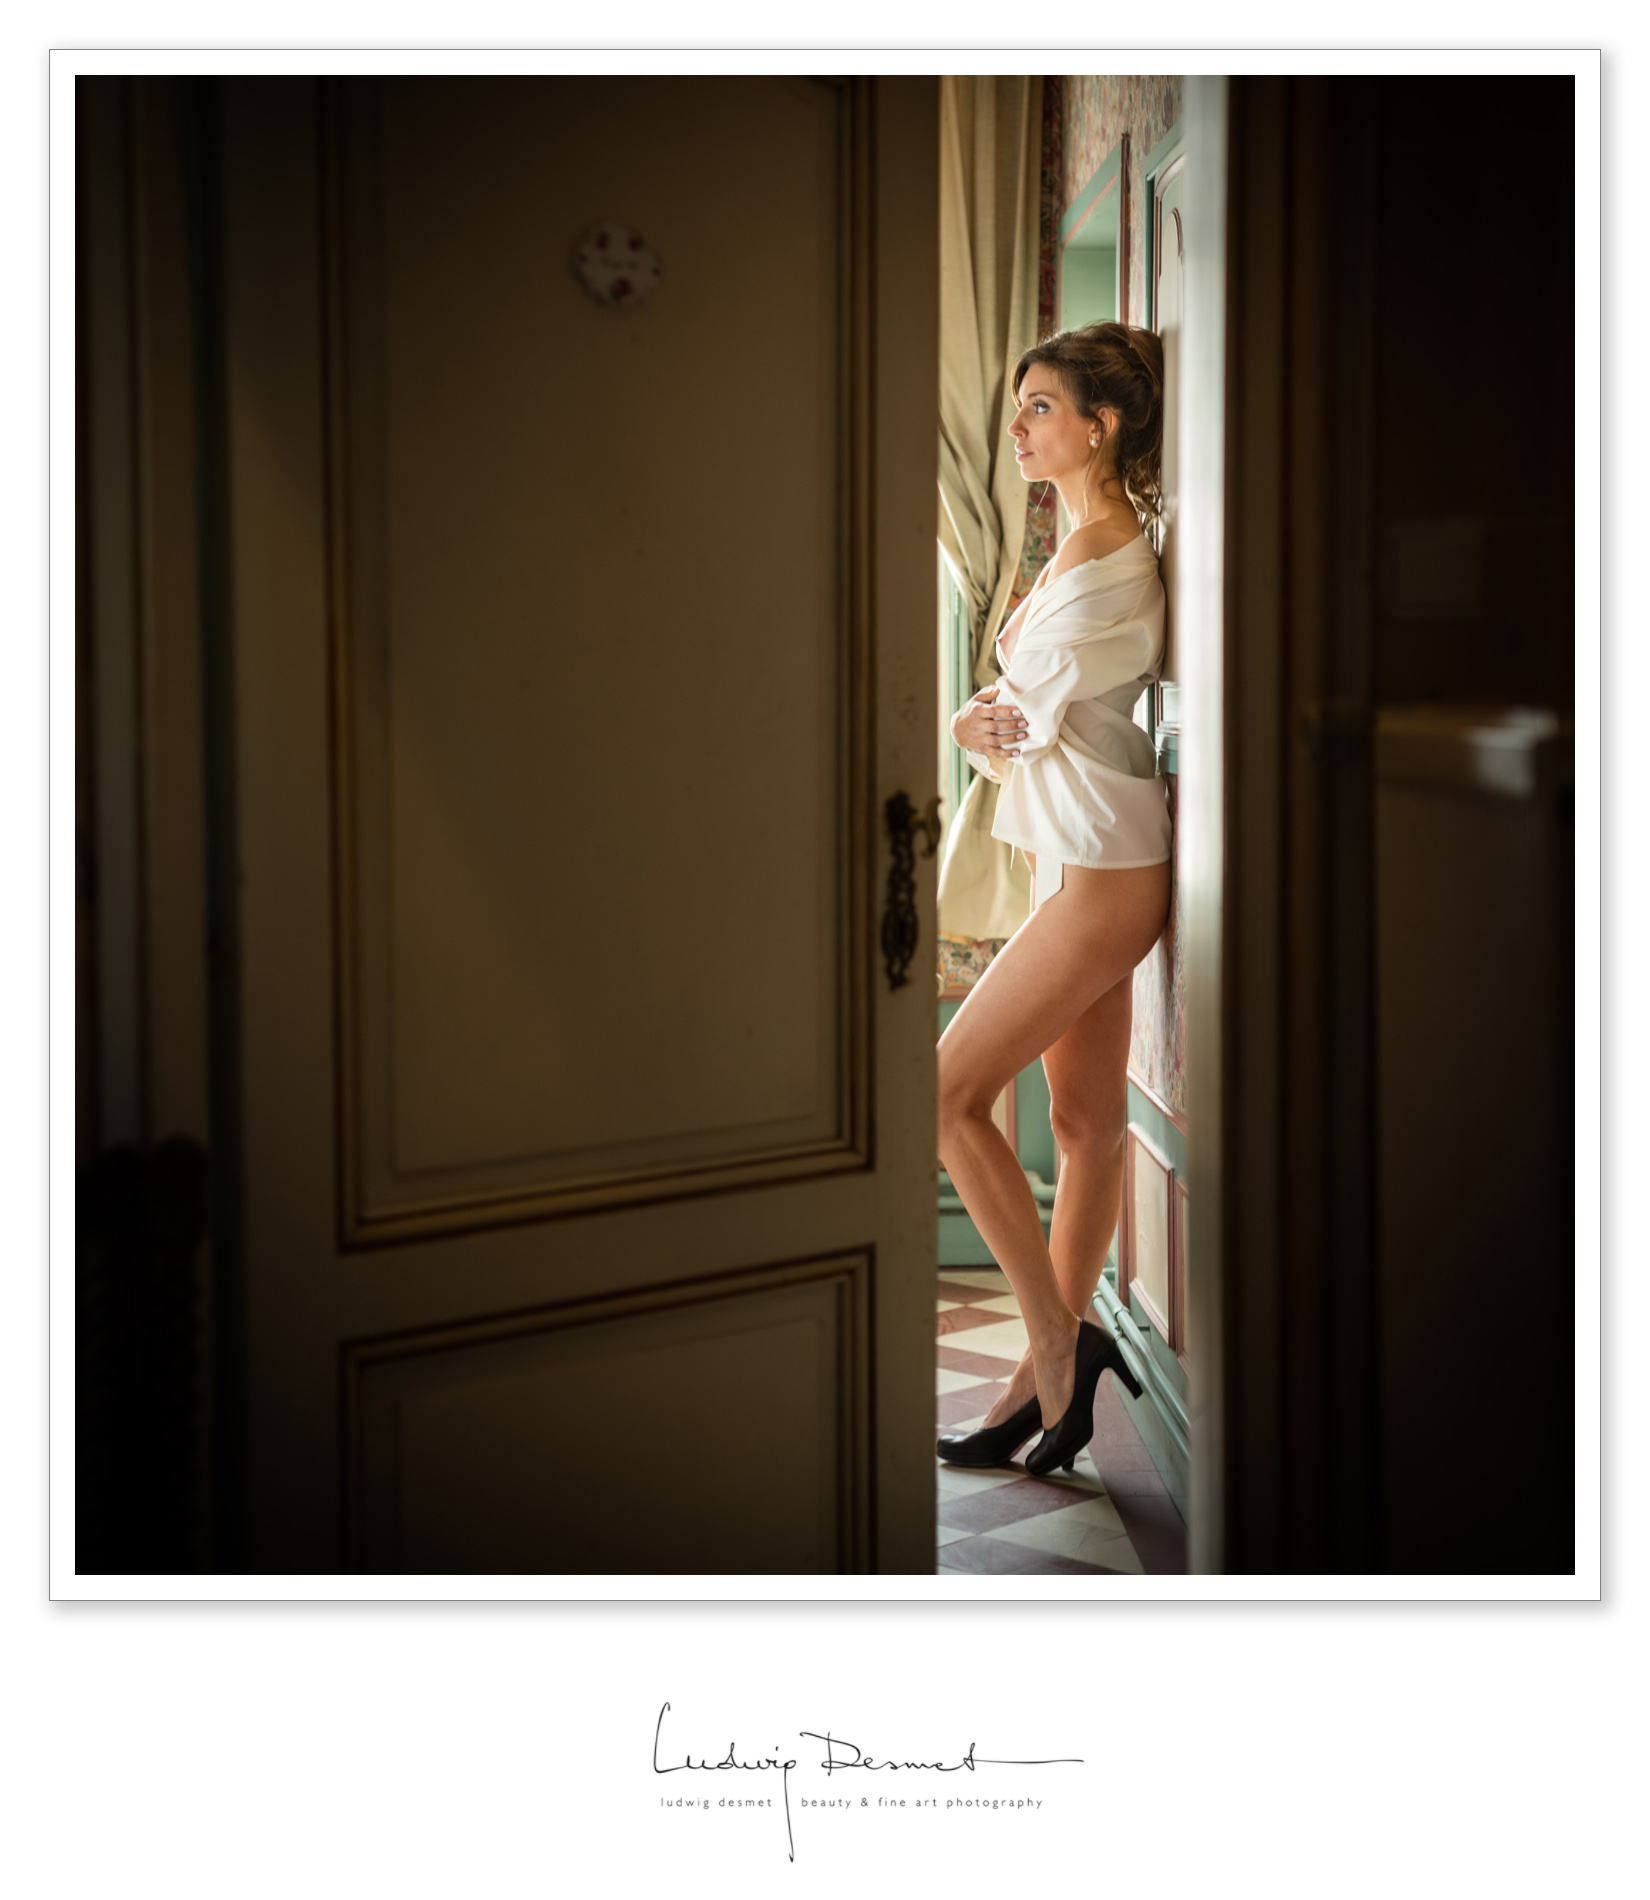
• The birdkeeper •
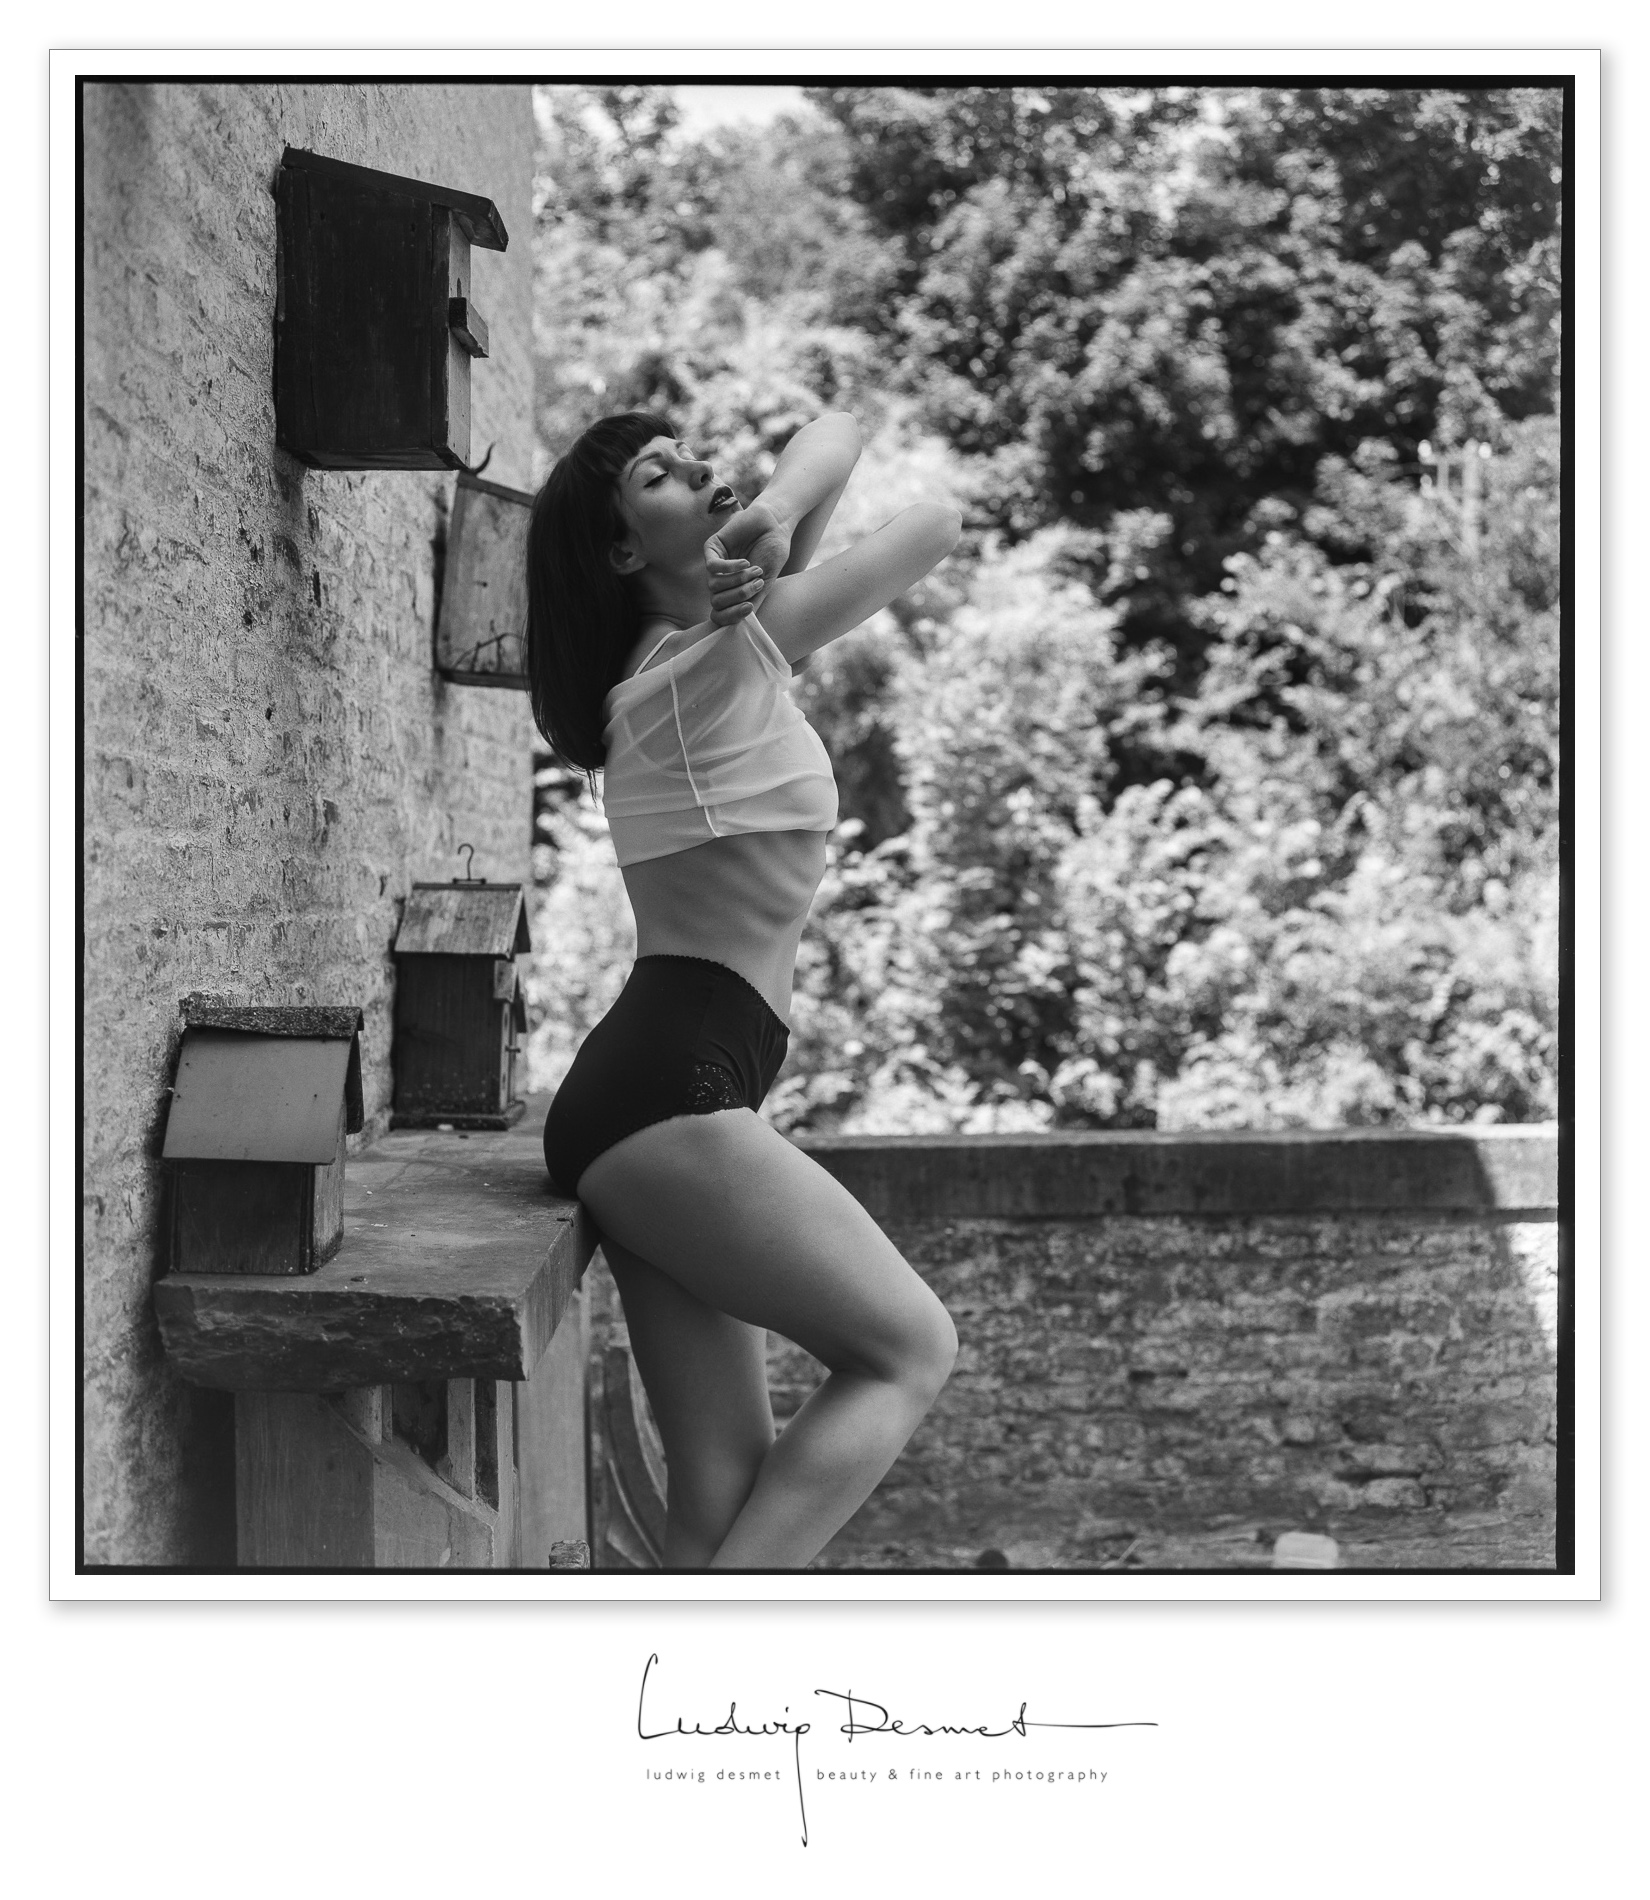
Summer is long gone it seems, but this shoot was taking place on one of those hot summer days, when models do not hesitate to pose in lingerie or nude, sun will keep them warm.
The image was taken in a little castle near my hometown, on a shady terrace. The owner had opened the door and then vanished. Eva was in a good mood, the birds were singing all around.
Shot with my old Rolleiflex TLR, on Kodak TMax 400 film. Shooting on film is a strange thing, it is slow, expensive, delicate, cumbersome … but I love it. It makes the experience more real, and the waiting for the negatives makes you take some distance from your own work. It is always exciting to see the images coming, 3, 4 weeks after you’ve shot them.
have a nice Sunday afternoon,
ludwig
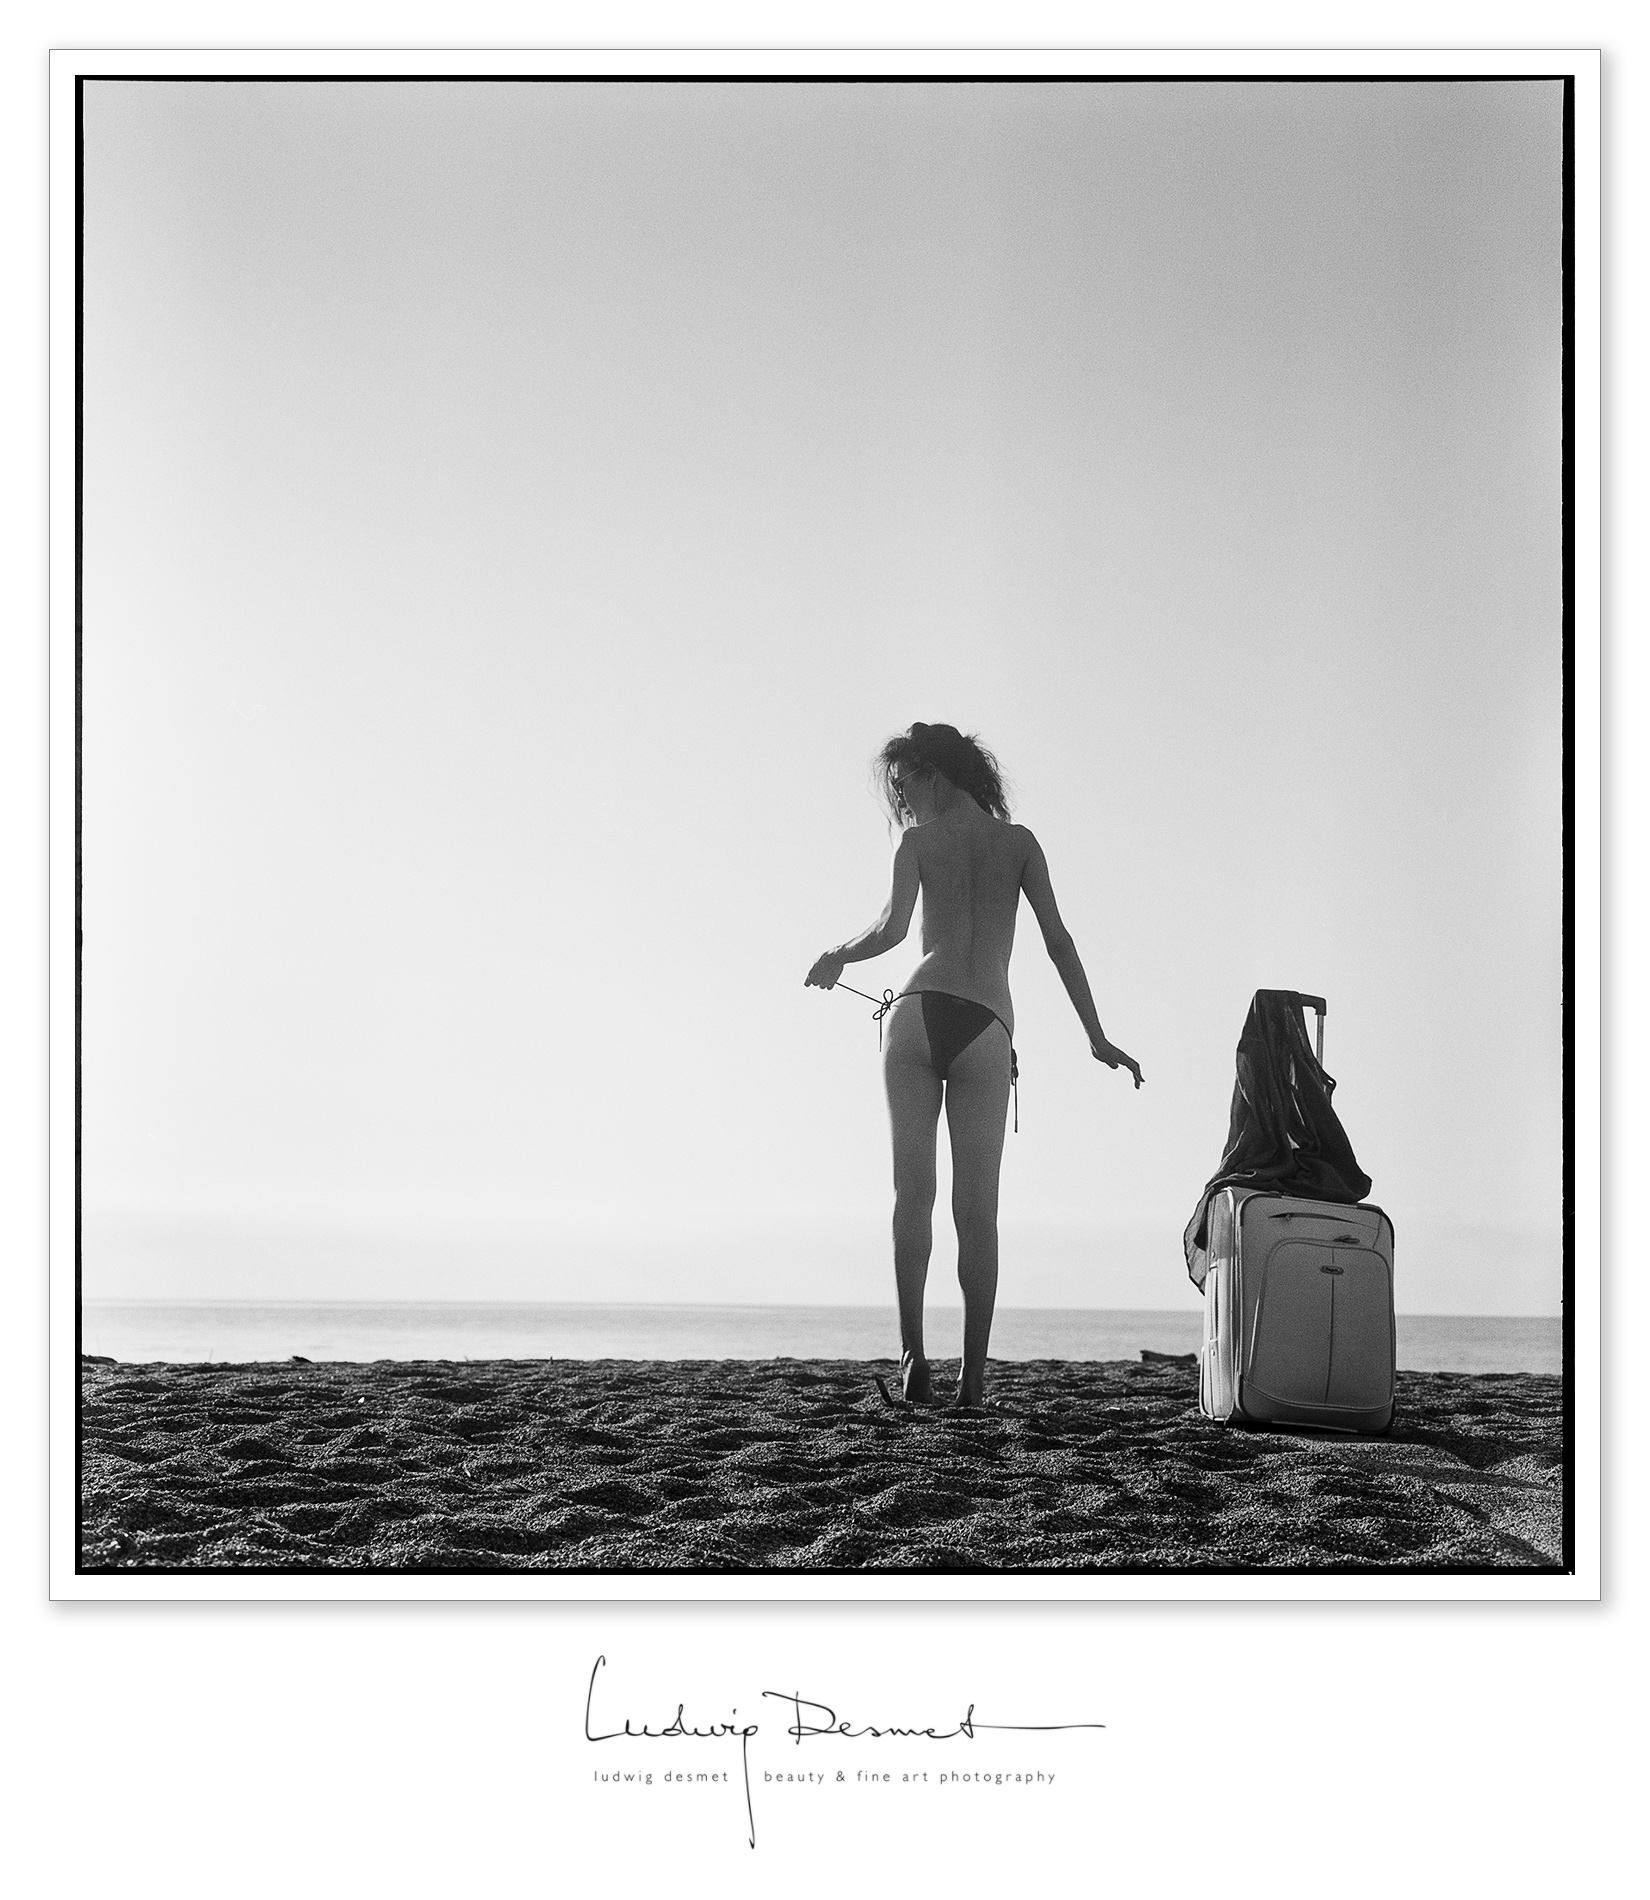
Rolleiflex 3.5 – Kodak TMax400 film
shot on a deserted very early morning beach in Corsica.
Model: Carlotta Kah
Assistant: Nathalie Renard
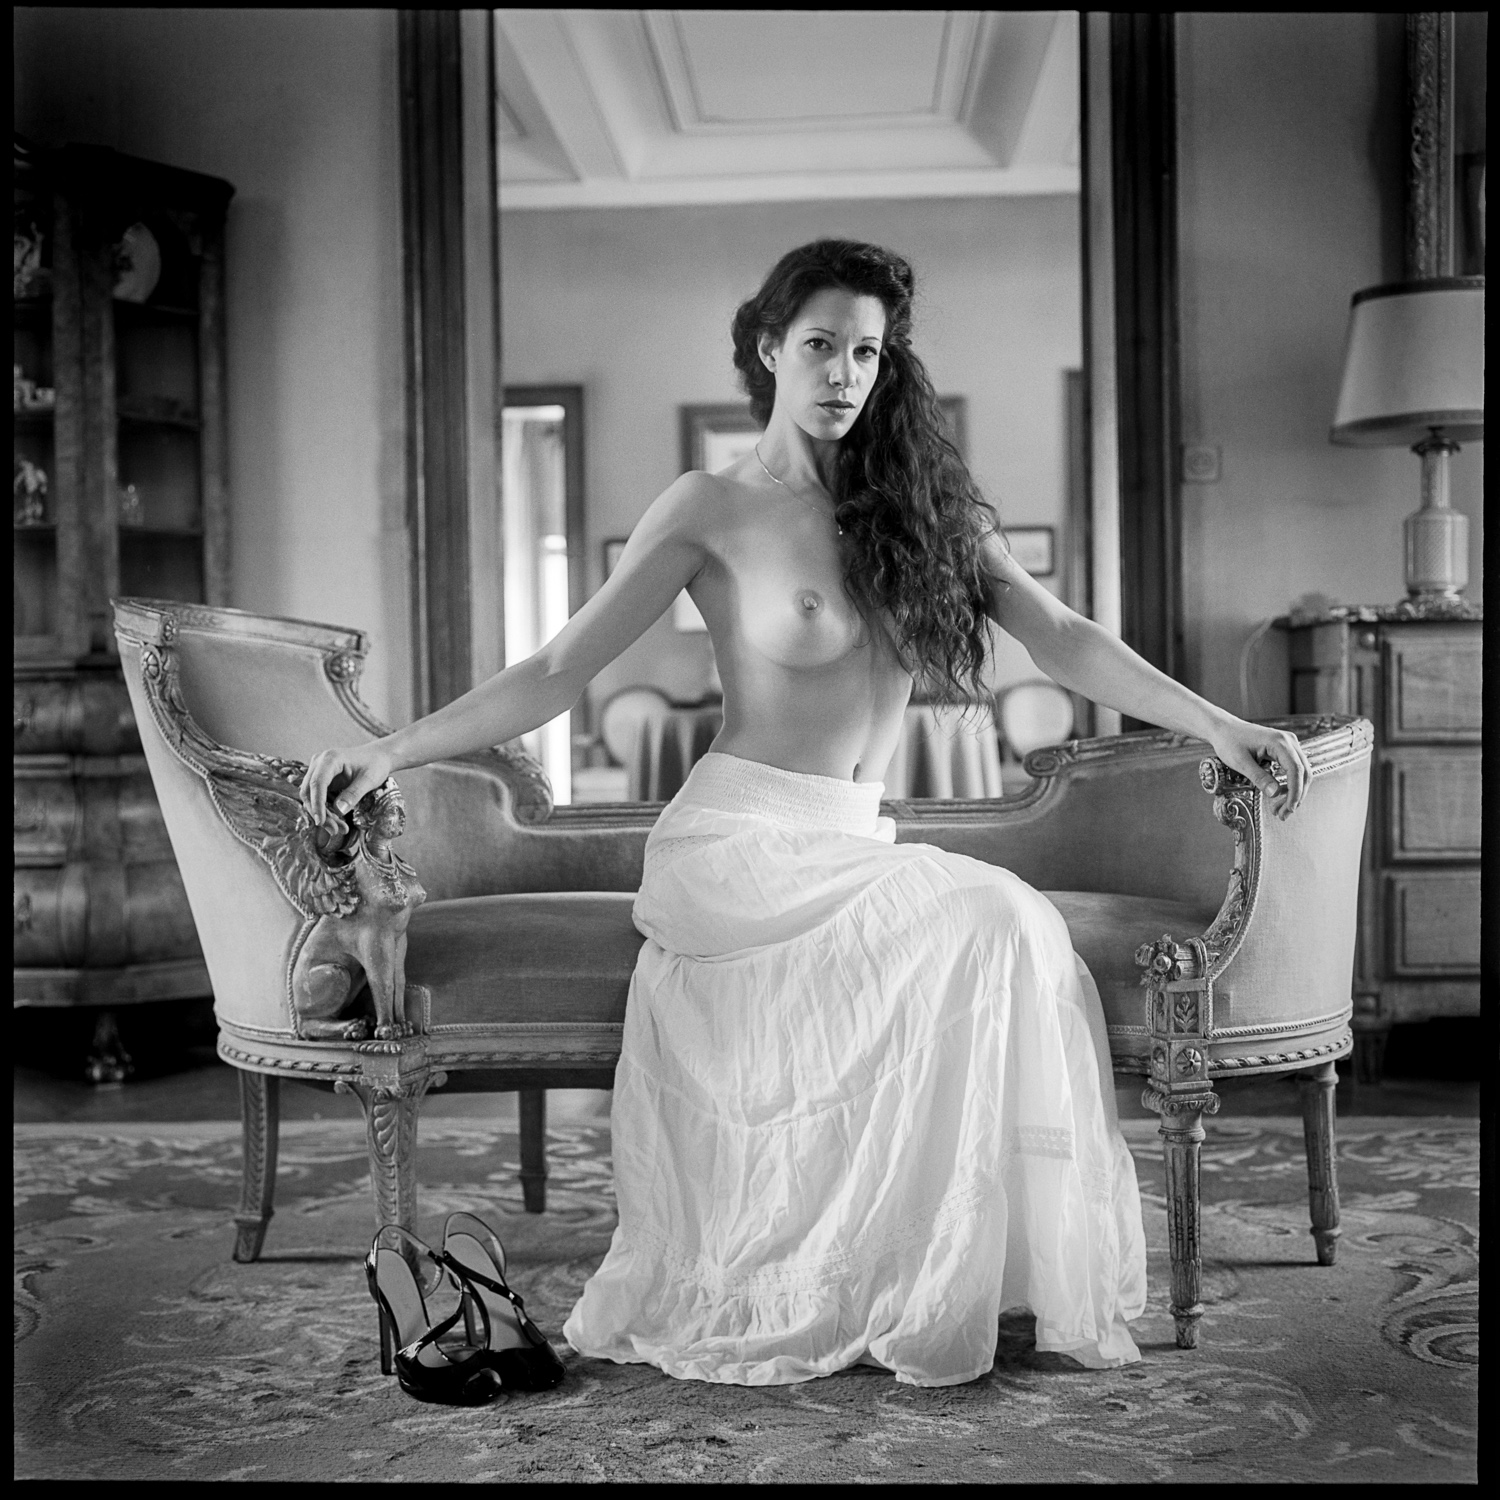
• Lady Madonna •
shot today in a remote castle in Tournai, Belgium,
lots of thanks to the owner of the place, and to my model of course.
sometimes all falls into place and beauty is the result of it.![]()
Model and make up: Eva Evian
styling and photography: Ludwig Desmet
shot on Canon 5Ds with Canon 135mm f2 – ISO 200 f2.8 1/250s
thank you for watching,
Ludwig
… it is something I try to repeat to myself every day
the exhibit was good, a lot of people passed by to see it, despite the very good weather we had in these weeks. It was a pleasure to talk to so many people about photography in general, my work in particular. I have received compliments, appraisal and suggestions, they are all welcome. Still, doing what I do remains an investment in time, energy, money and other resources so I have to stand firm and not surrender.
the quote is by Abraham Lincoln.
• be sure to put your feet in the right place, then stand firm •
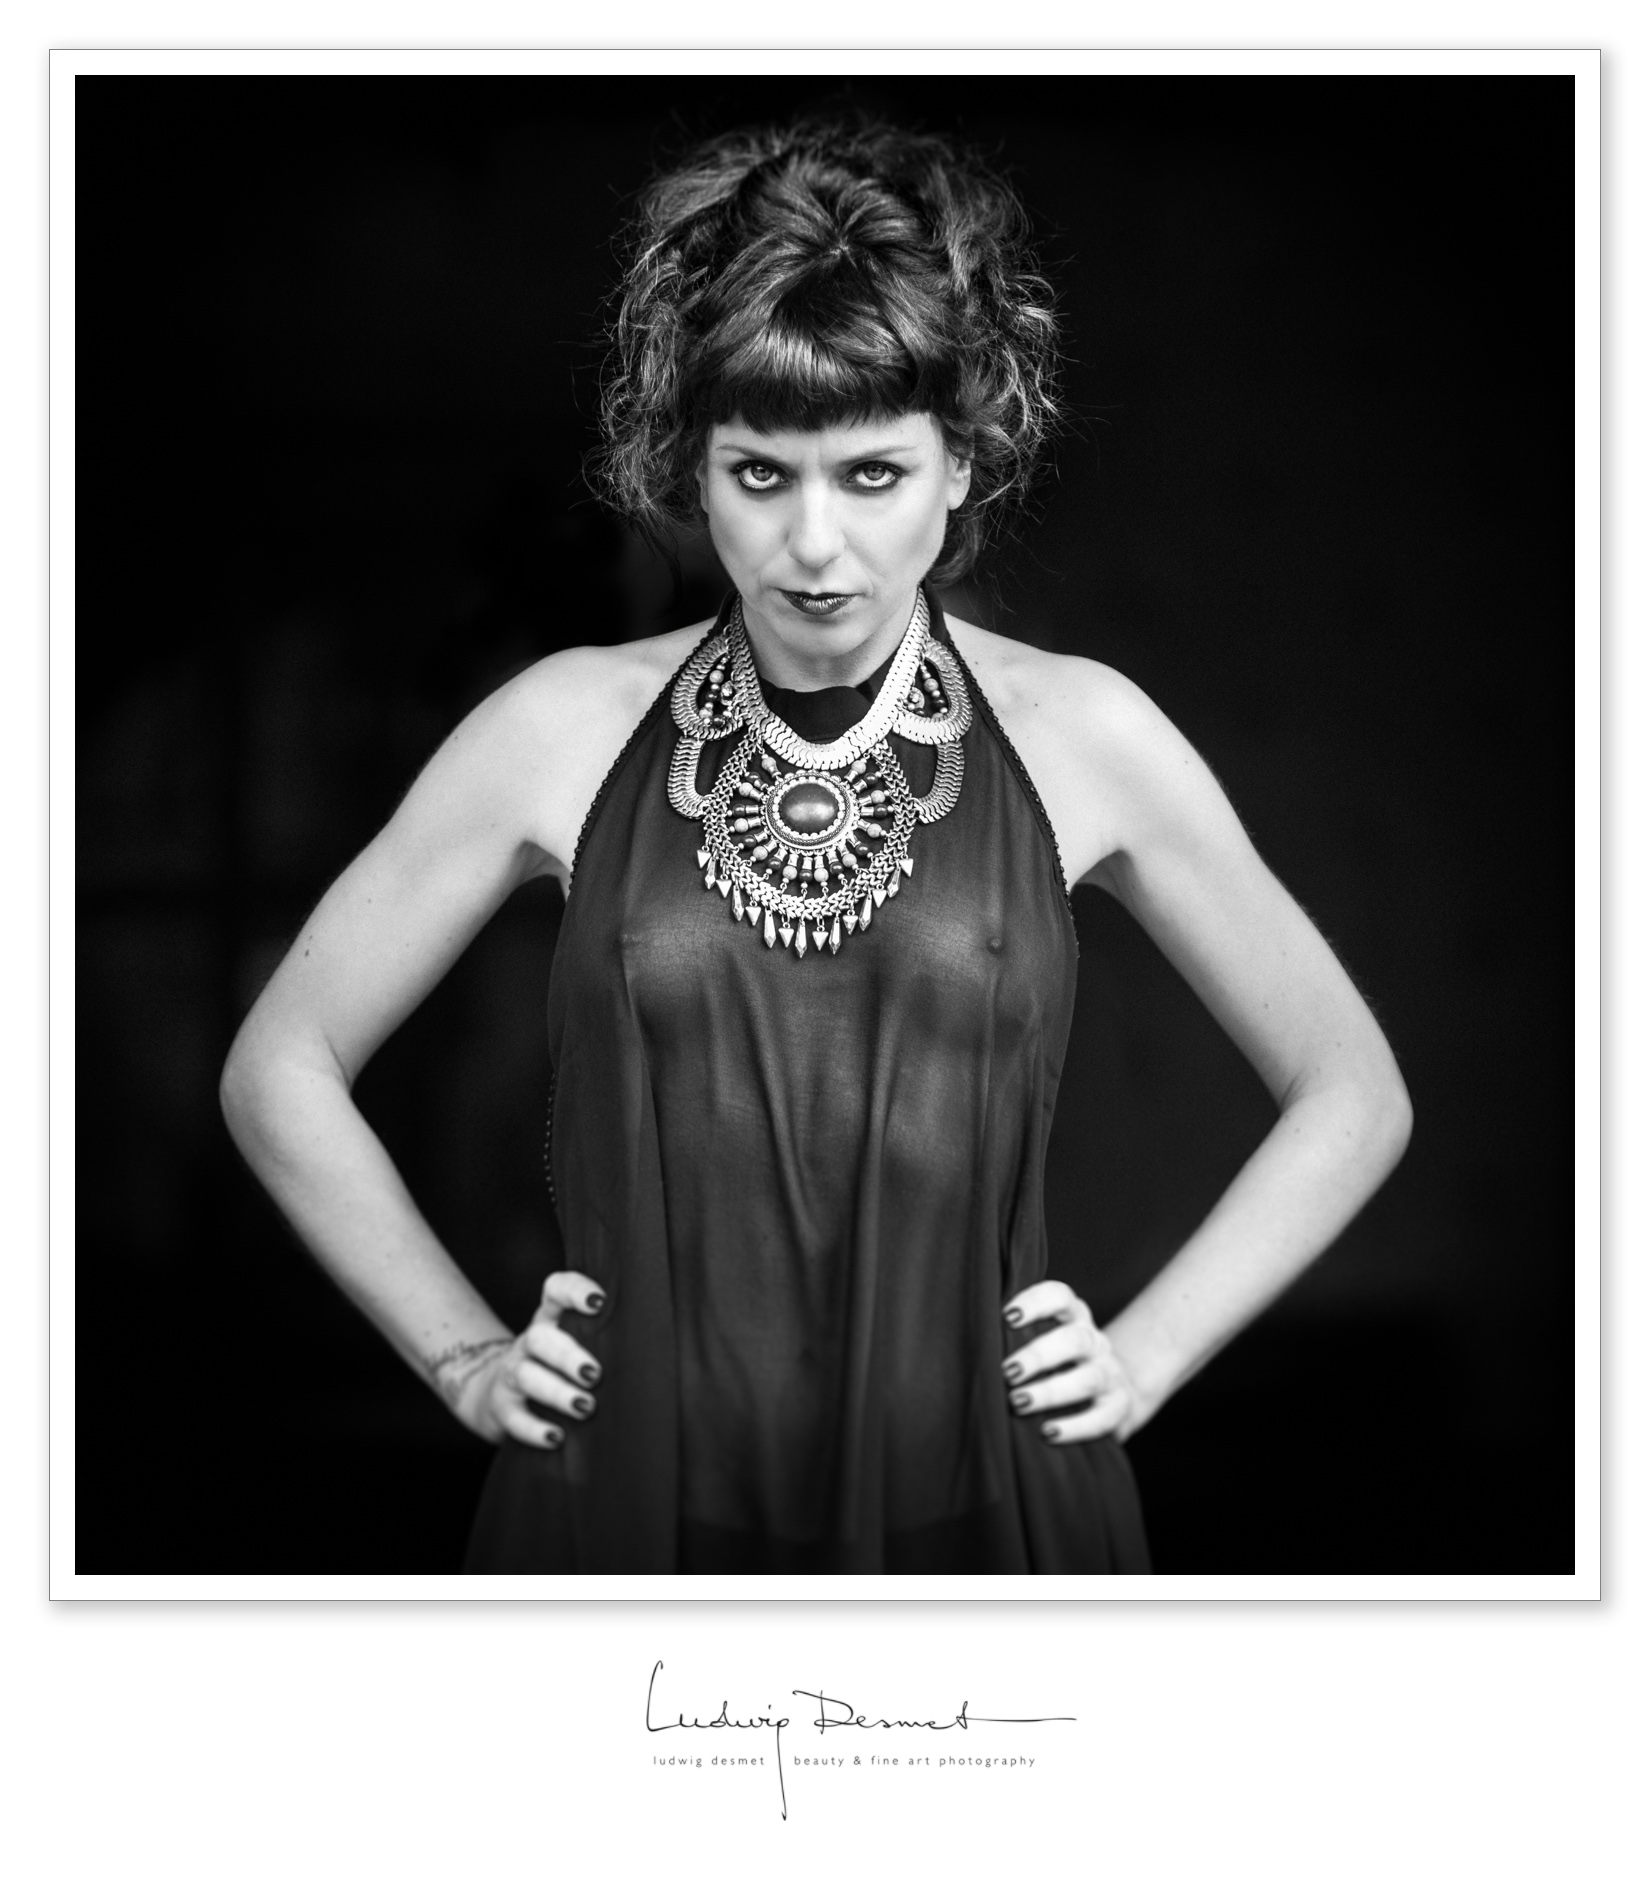
image details:
model: Elise
Make up: Heidi
Assistance: Nathalie
Photography: ludwig desmet
Canon 5Ds with Canon 135mm f2.0
1/125s f2.0 ISO 100
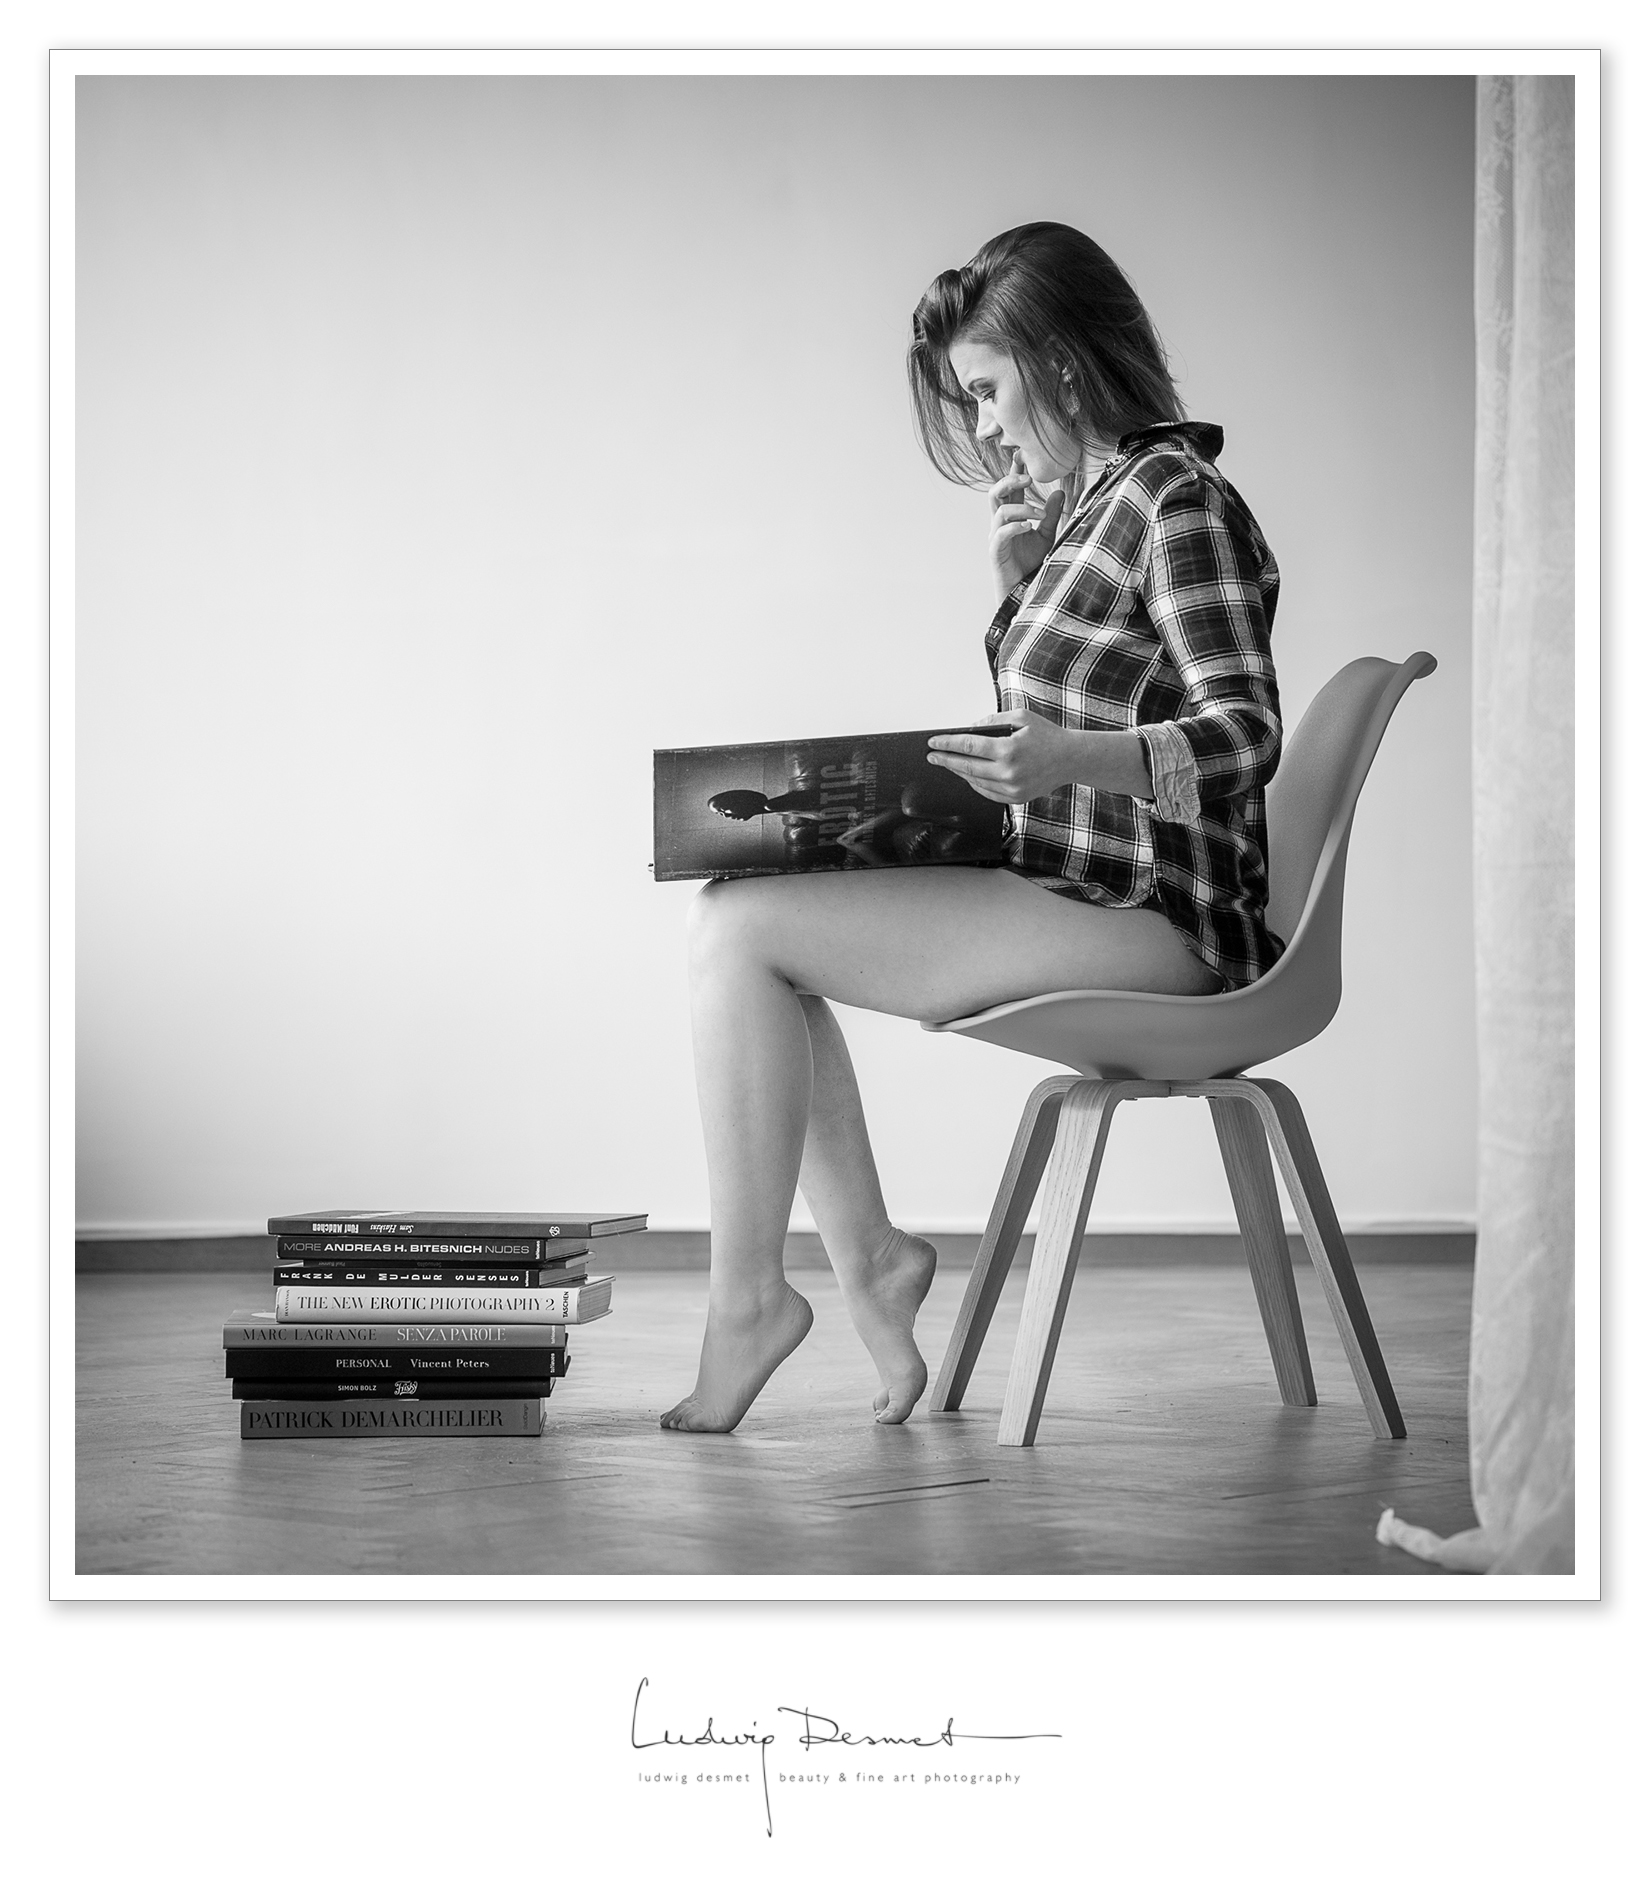
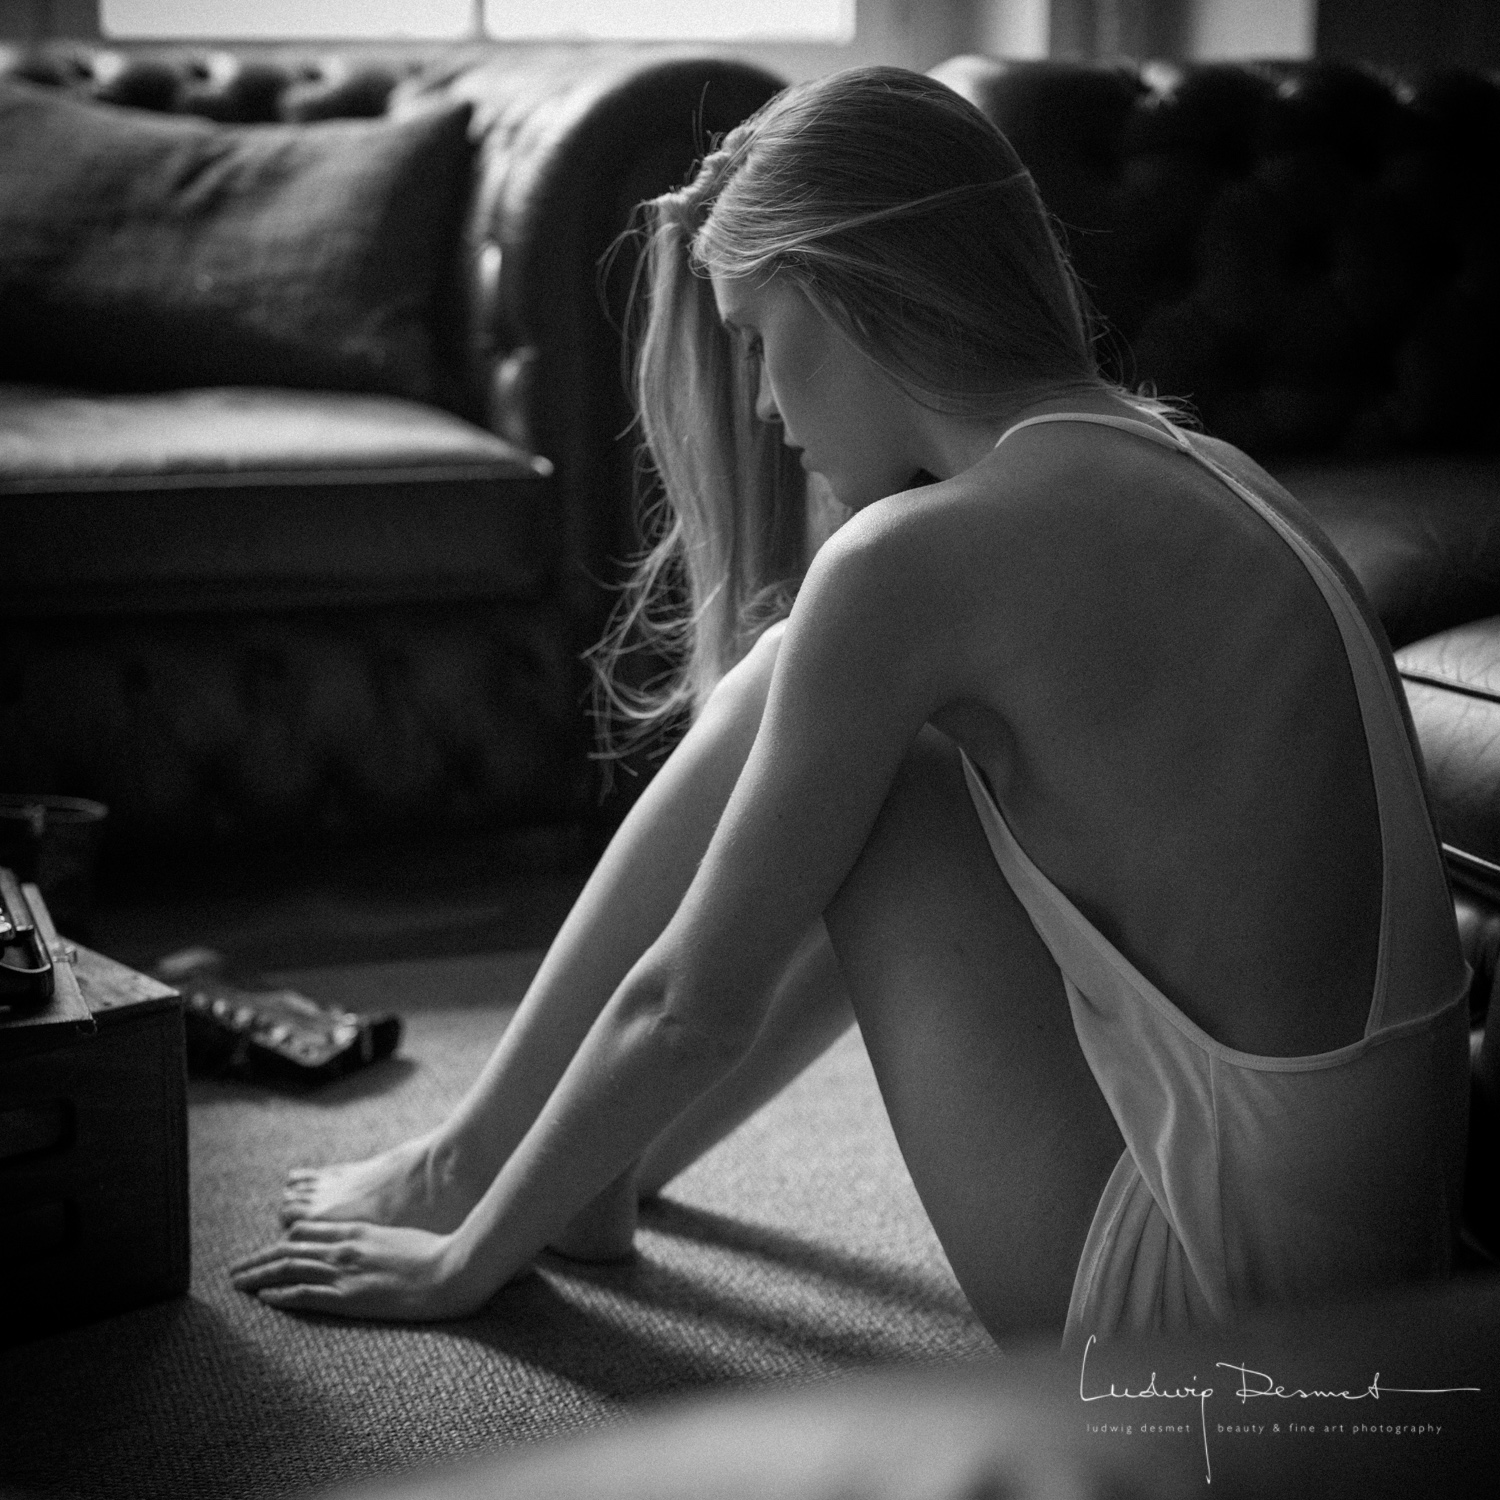
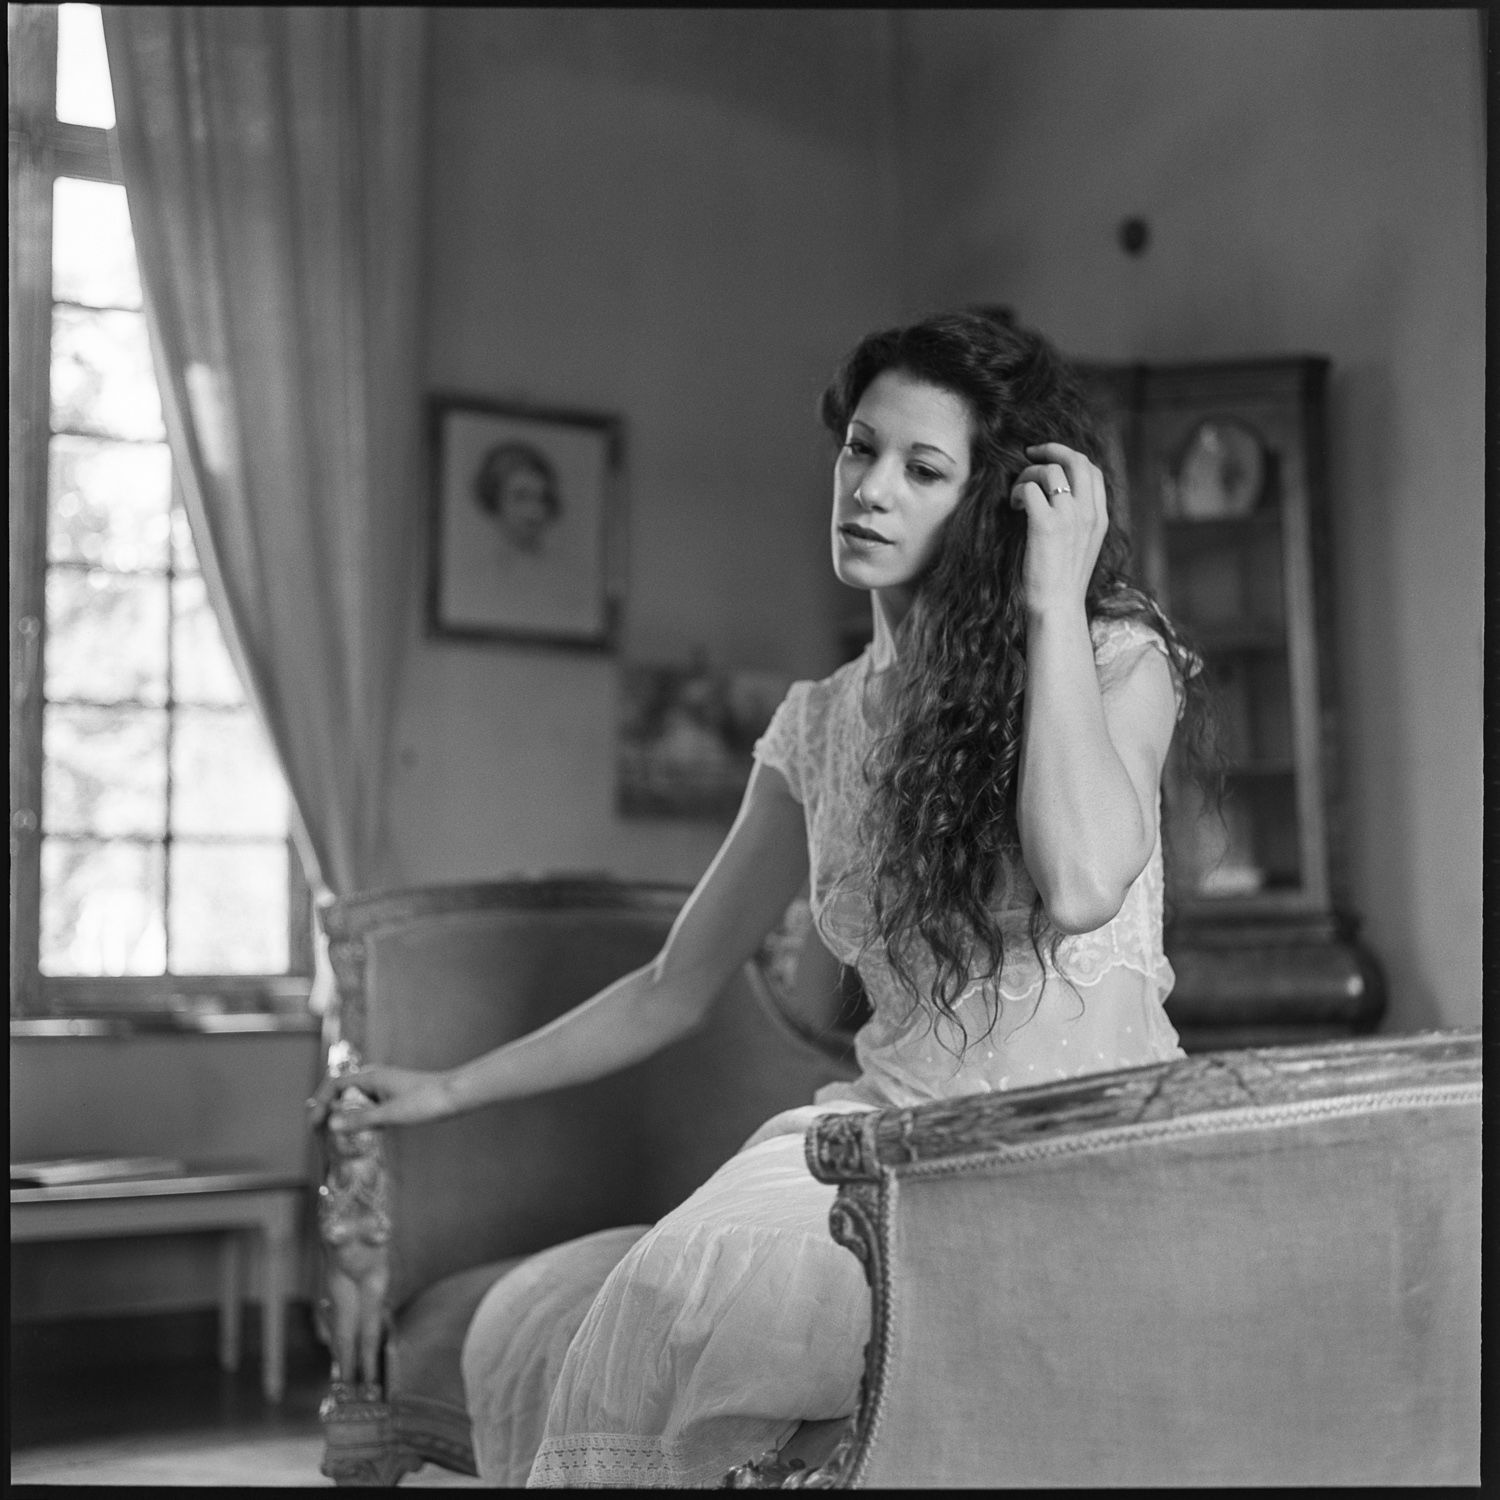
… and then she started wondering, why she didn’t get these letters he promised to send her. Was he killed in battle? Had he forgotten about her, or probably he couldn’t find the time to write to her. These questions filled her with doubt and restlessness, even more because she was unable to reach to him …
Shot on a one-to-one workshop with Sacha Leyendecker in his available light studio.
Model and make up: Rubia Stri
Photography: me for sure.
shot on canon 5Ds with Sigma 50mm f1.4 DG A
settings for the main image: 1/80s f2.0 at ISO800
and then especially for Valentine’s day, complete series:


What I’ve learnt from the workshop:
Don’t be afraid to shoot at higher ISO settings if you need to to keep your shutter speeds safe. Play with light to create volume and atmosphere. Get some music into your studio to set a good mood. Create visual triangles in your images for dynamic compositions. Use props to create a setting and invite the viewer to imagine his/her way into the story.
What I didn’t agree on with Sacha (sorry Sacha, I think our styles are rather different, so the approach is different too): he told me to just have the model do whatever she likes to do, and what she feels comfortable with. I tend to interfere more with my model, and direct in certain ways (I also often work with non-professional models, maybe that’s why. Pro models are very much aware of what they look like, and how to move to get good shots).
I was very pleased with the results of the workshop. I was happy to meet Rubia, who is from Brussels by the way, and I had a very pleasant day for sure! Thank you Sacha, thank you Rubia!
thank you for watching.
• the bathroom •
Sorry if the title is somewhat misleading 😉
Model: Jane
Make up: Heidi
Hair: Nathalie
shot on location by me – ludwigdesmet –
Canon 5Ds with Sigma 50mm f1.4 A DG
1/40s f2.0 ISO160
Remember ‘Pearls’ ? Wow, one and a half year ago already. Time to meet Pearls II, with beautiful Eva this time. Hope you like it.
• Pearls II •
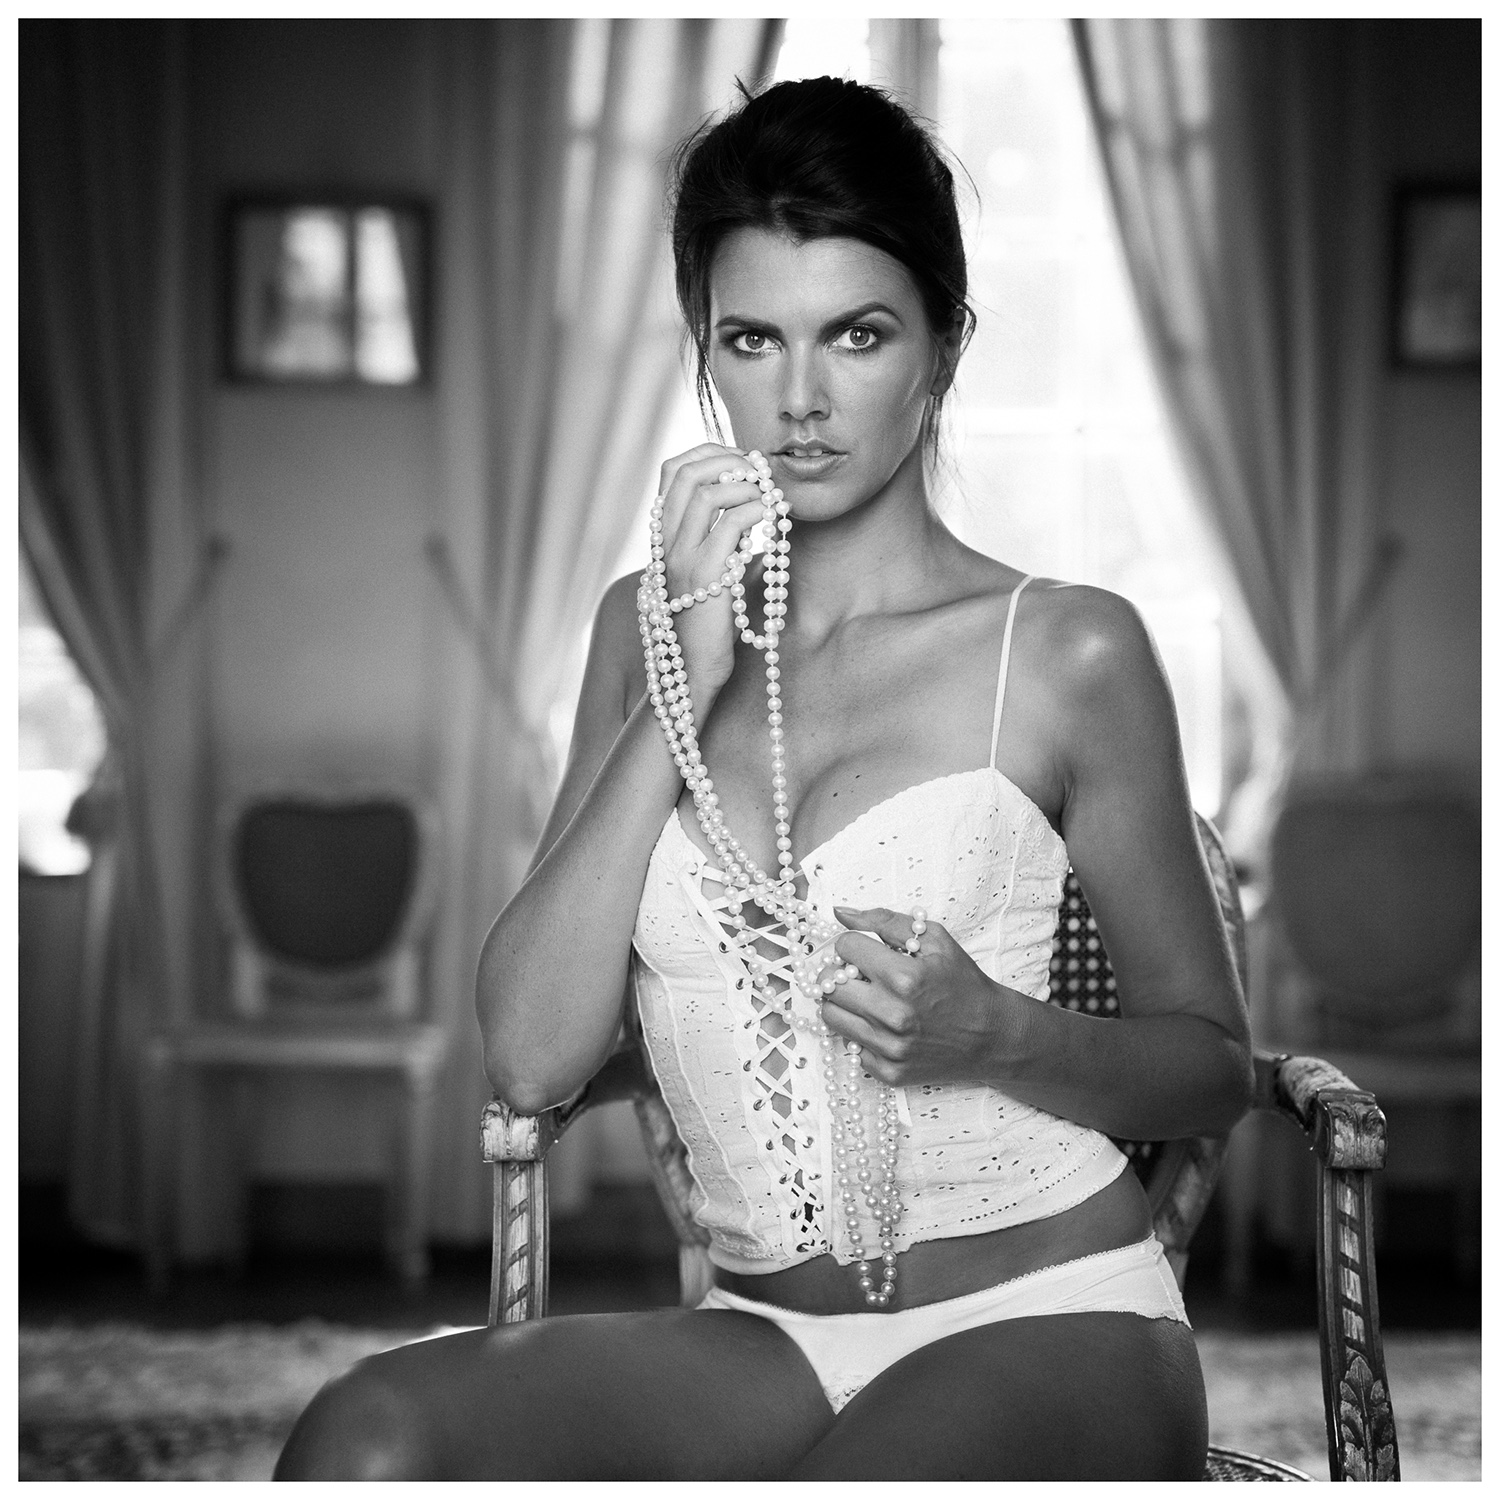
Canon 5Ds with Sigma 50mm f1.4 A DG. 1/80s f2.0 ISO100
Shot on location in Tournai – Belgium.
Model: Eva
Make up: Danitsha
Assistance: Nathalie.
Photography: ludwig desmet
I was sorry to hear about your death, earlier this week. I think your images have been a great inspiration to many young boys.
I mentioned you in a Facebook comment no longer than a few days ago. … ‘Unwanted David Hamilton effect’, as a comment on the below image.
What I am even more sorry about however, is that your death might be related to the accusations/assumptions made against your person, … for incorrect behaviour towards young, very young women. I think of that as a very very sad thing.
I feel sorry for all the models out there having been, or being wrongly treated by so-called photographers, mis-using the context of photography to cover up their abuse towards them.
• Kate in the greenhouse •

about the image, and the (I won’t call it D.H. effect any longer) soft focus effect, it was created by extremely humid conditions (75% humidity and about 25°C) and a too cold camera coming from outside (5°C at most), immediately damping my front lens, again and again and again. Couldn’t wipe it off, it re-appeared after 10 seconds. … A lot of dehaze, extra contrast and clarity in LR kind of saved this image from deletion.
Model and make-up: Kate_Ri, styling by me.
Canon 5Ds with Sigma 50 mm f1.4 DG A
1/50s f2.2 ISO100
ludwig
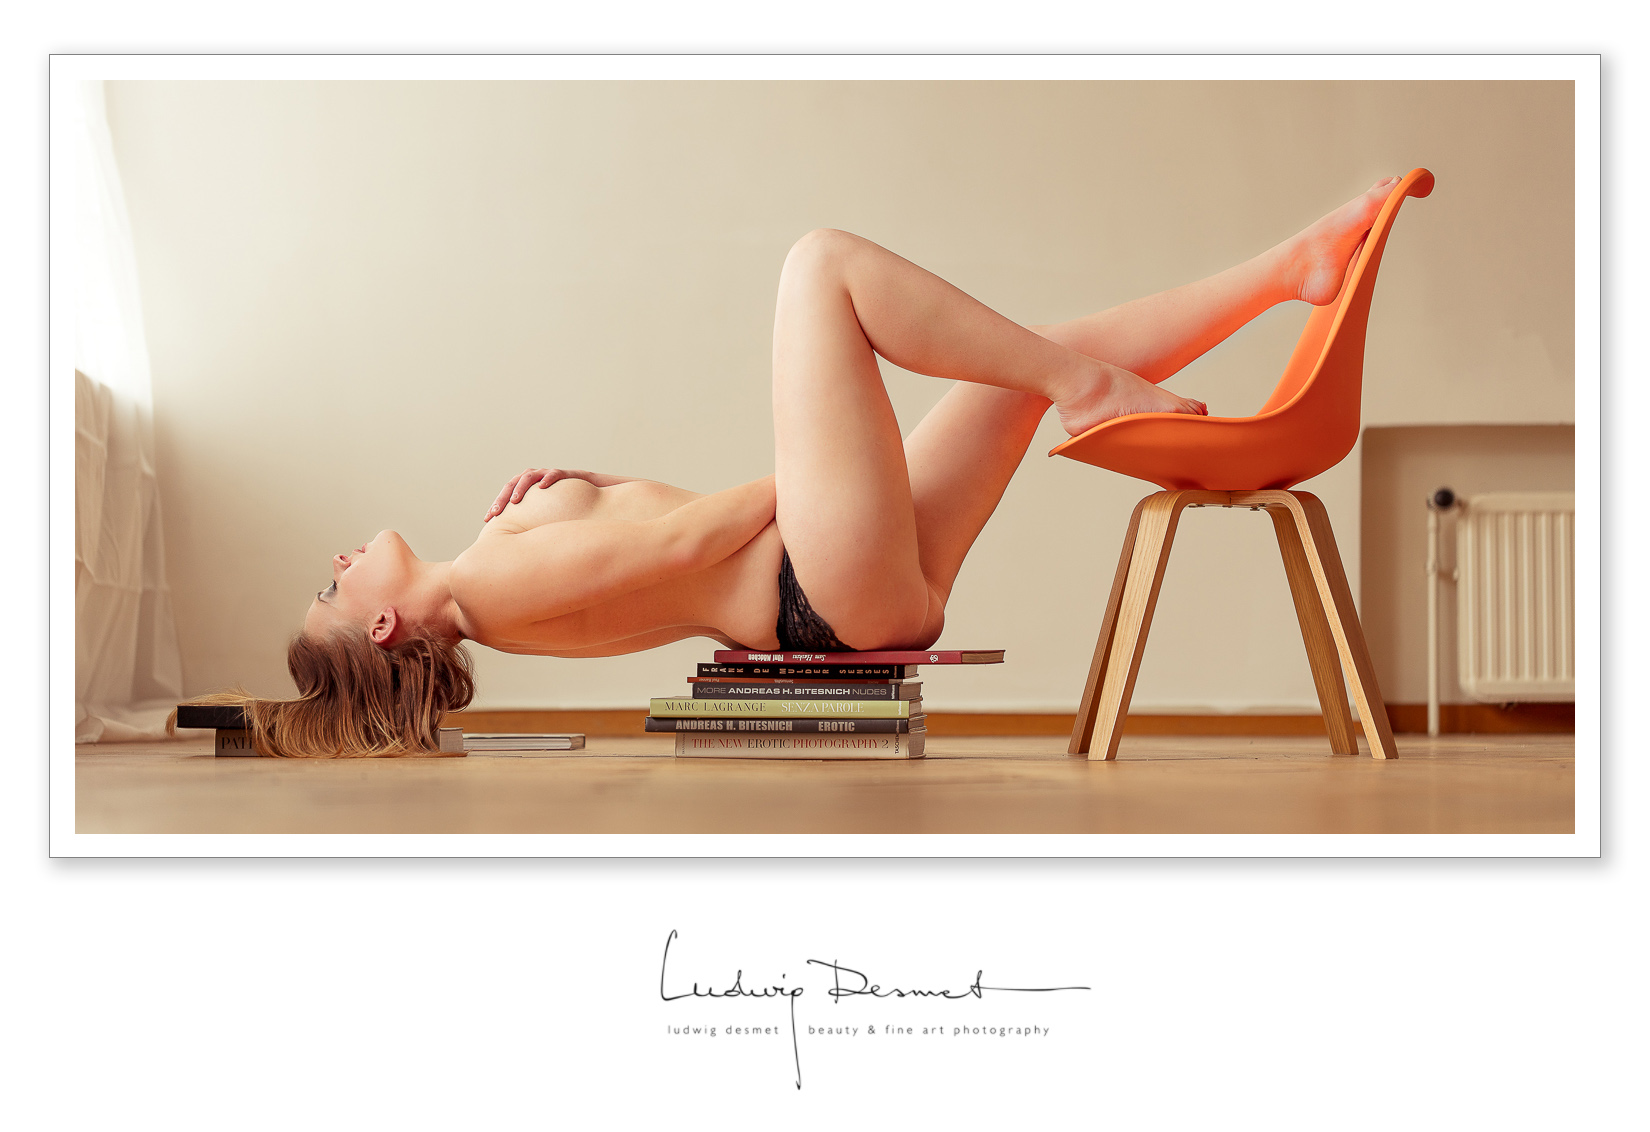
as a final setup on the Sacha Leyendecker workshop (yes, I can still learn a lot too) we had a mattress and some white bed linen and a very enjoyable – wasn’t it Rubia? – down bed cover.
I tried to create an atmosphere of comfortable well being in this series. Rubia is a professional model and she understood the idea well. The advantage of professional models is that they know very well how to move to have a good looking pose, the downside of it can be that they are very hard to be photographed as their real personality. They often get some kind of ‘model layer’ that gets in front of their person. This was not the case with Rubia. We had a long talk before the shoot, that helps to get barriers down. We both got very relaxed before the shoot started. I rather have the habit of giving quite some direction to my models, Sacha asked me to try to let Rubia do her own thing, easier said than done, this set is the result of a mixture of ‘self induced posing’ and ‘directed posing’. See here for the technique used to create the high key effect.
Bad lighting conditions (dark) which means high ISO settings, but a nice set after all.
Bedroom mood


All images Canon 5Ds with Sigma 50 mm f1.4 A DG
1/60 f2.2 ISO 2000
Thank you for watching, come again soon,
ludwig
a small preview of the shoot I did with Erika Albonetti in Brussels.
model and make up: Erika Albonetti
assistance: Nathalie Renard
photography: Ludwig Desmet
• way too hot today •

Erika is a wonderful model to work with, you’ll see more of her appear here in the weeks to come. Photographed with Rolleiflex 3,5 on Kodak T-Max100 film.
location: Kunstberg/Mont des Arts – Brussels.
A second series with Ava at the Castle.
The weather is fine, not much to do but being beautiful
and spend the afternoon on the quiet back-terrace of the castle.


All except the last images on Canon 5Ds and Canon 100mm f2.5 Macro L IS.
Last image Sigma 50mm f1.4 A DG.
thank you for watching – I’m on instagram too now, but there you won’t find any nude images: instagram.com/ludwigdesmet
cheers,
Ludwig
One of the often overlooked features of Lightroom is the camera calibration tab.
Camera calibration optimises the way Lightroom will interpret the RAW files of your specific camera. It reorganises the colour values in relation to a pre-defined target, and the way your camera reproduces this target.
In very short, RAW files do not have a colour profile embedded, nor do they contain a predefined color reproduction definition. It is up to your raw-editor to interpret the raw files and do some kind of a pre-development when importing and previewing on screen.
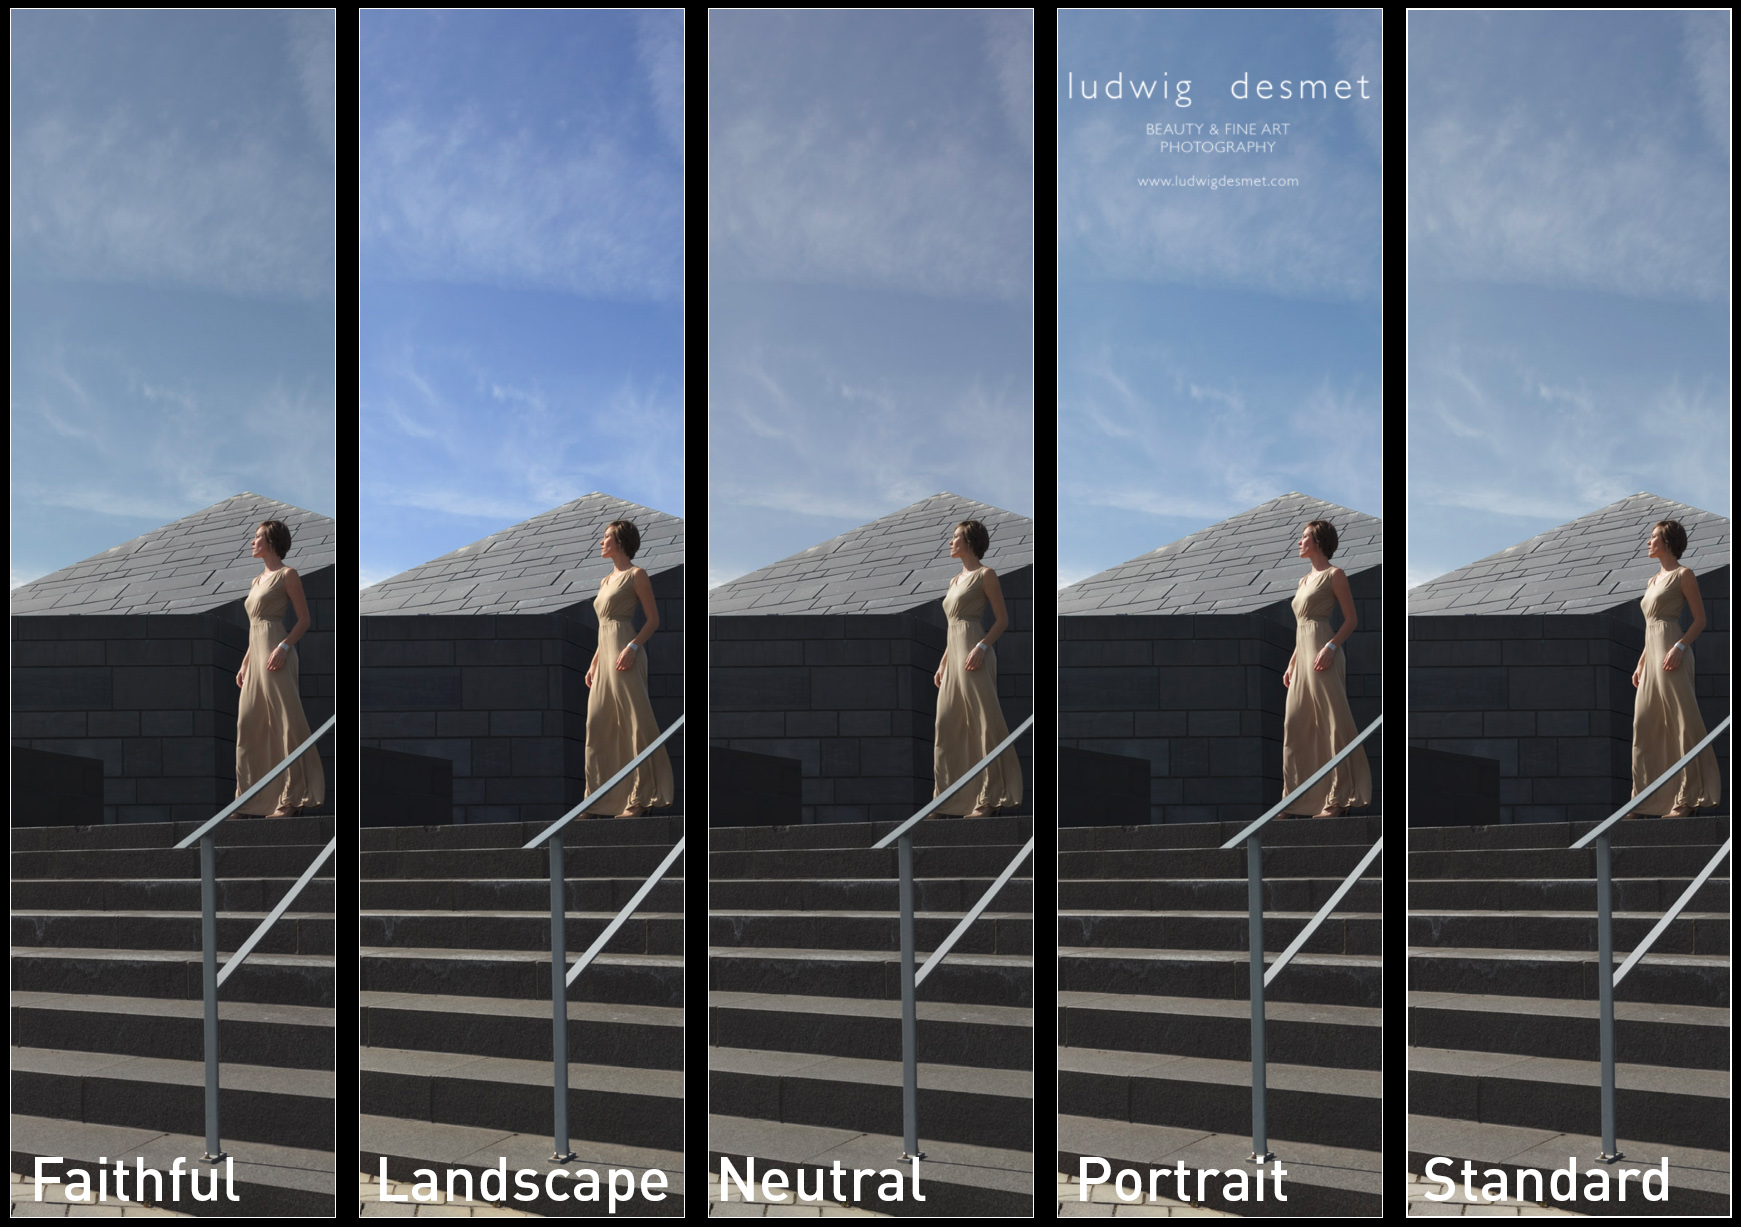
Current Lightroom versions use the ‘Adobe Standard’, or one of the options also available in your camera image settings modes (with Canon, this is for instance: Camera faithful, landscape, portrait, standard, … )
This is no guarantee for a correct reproduction of colours or brightness values.
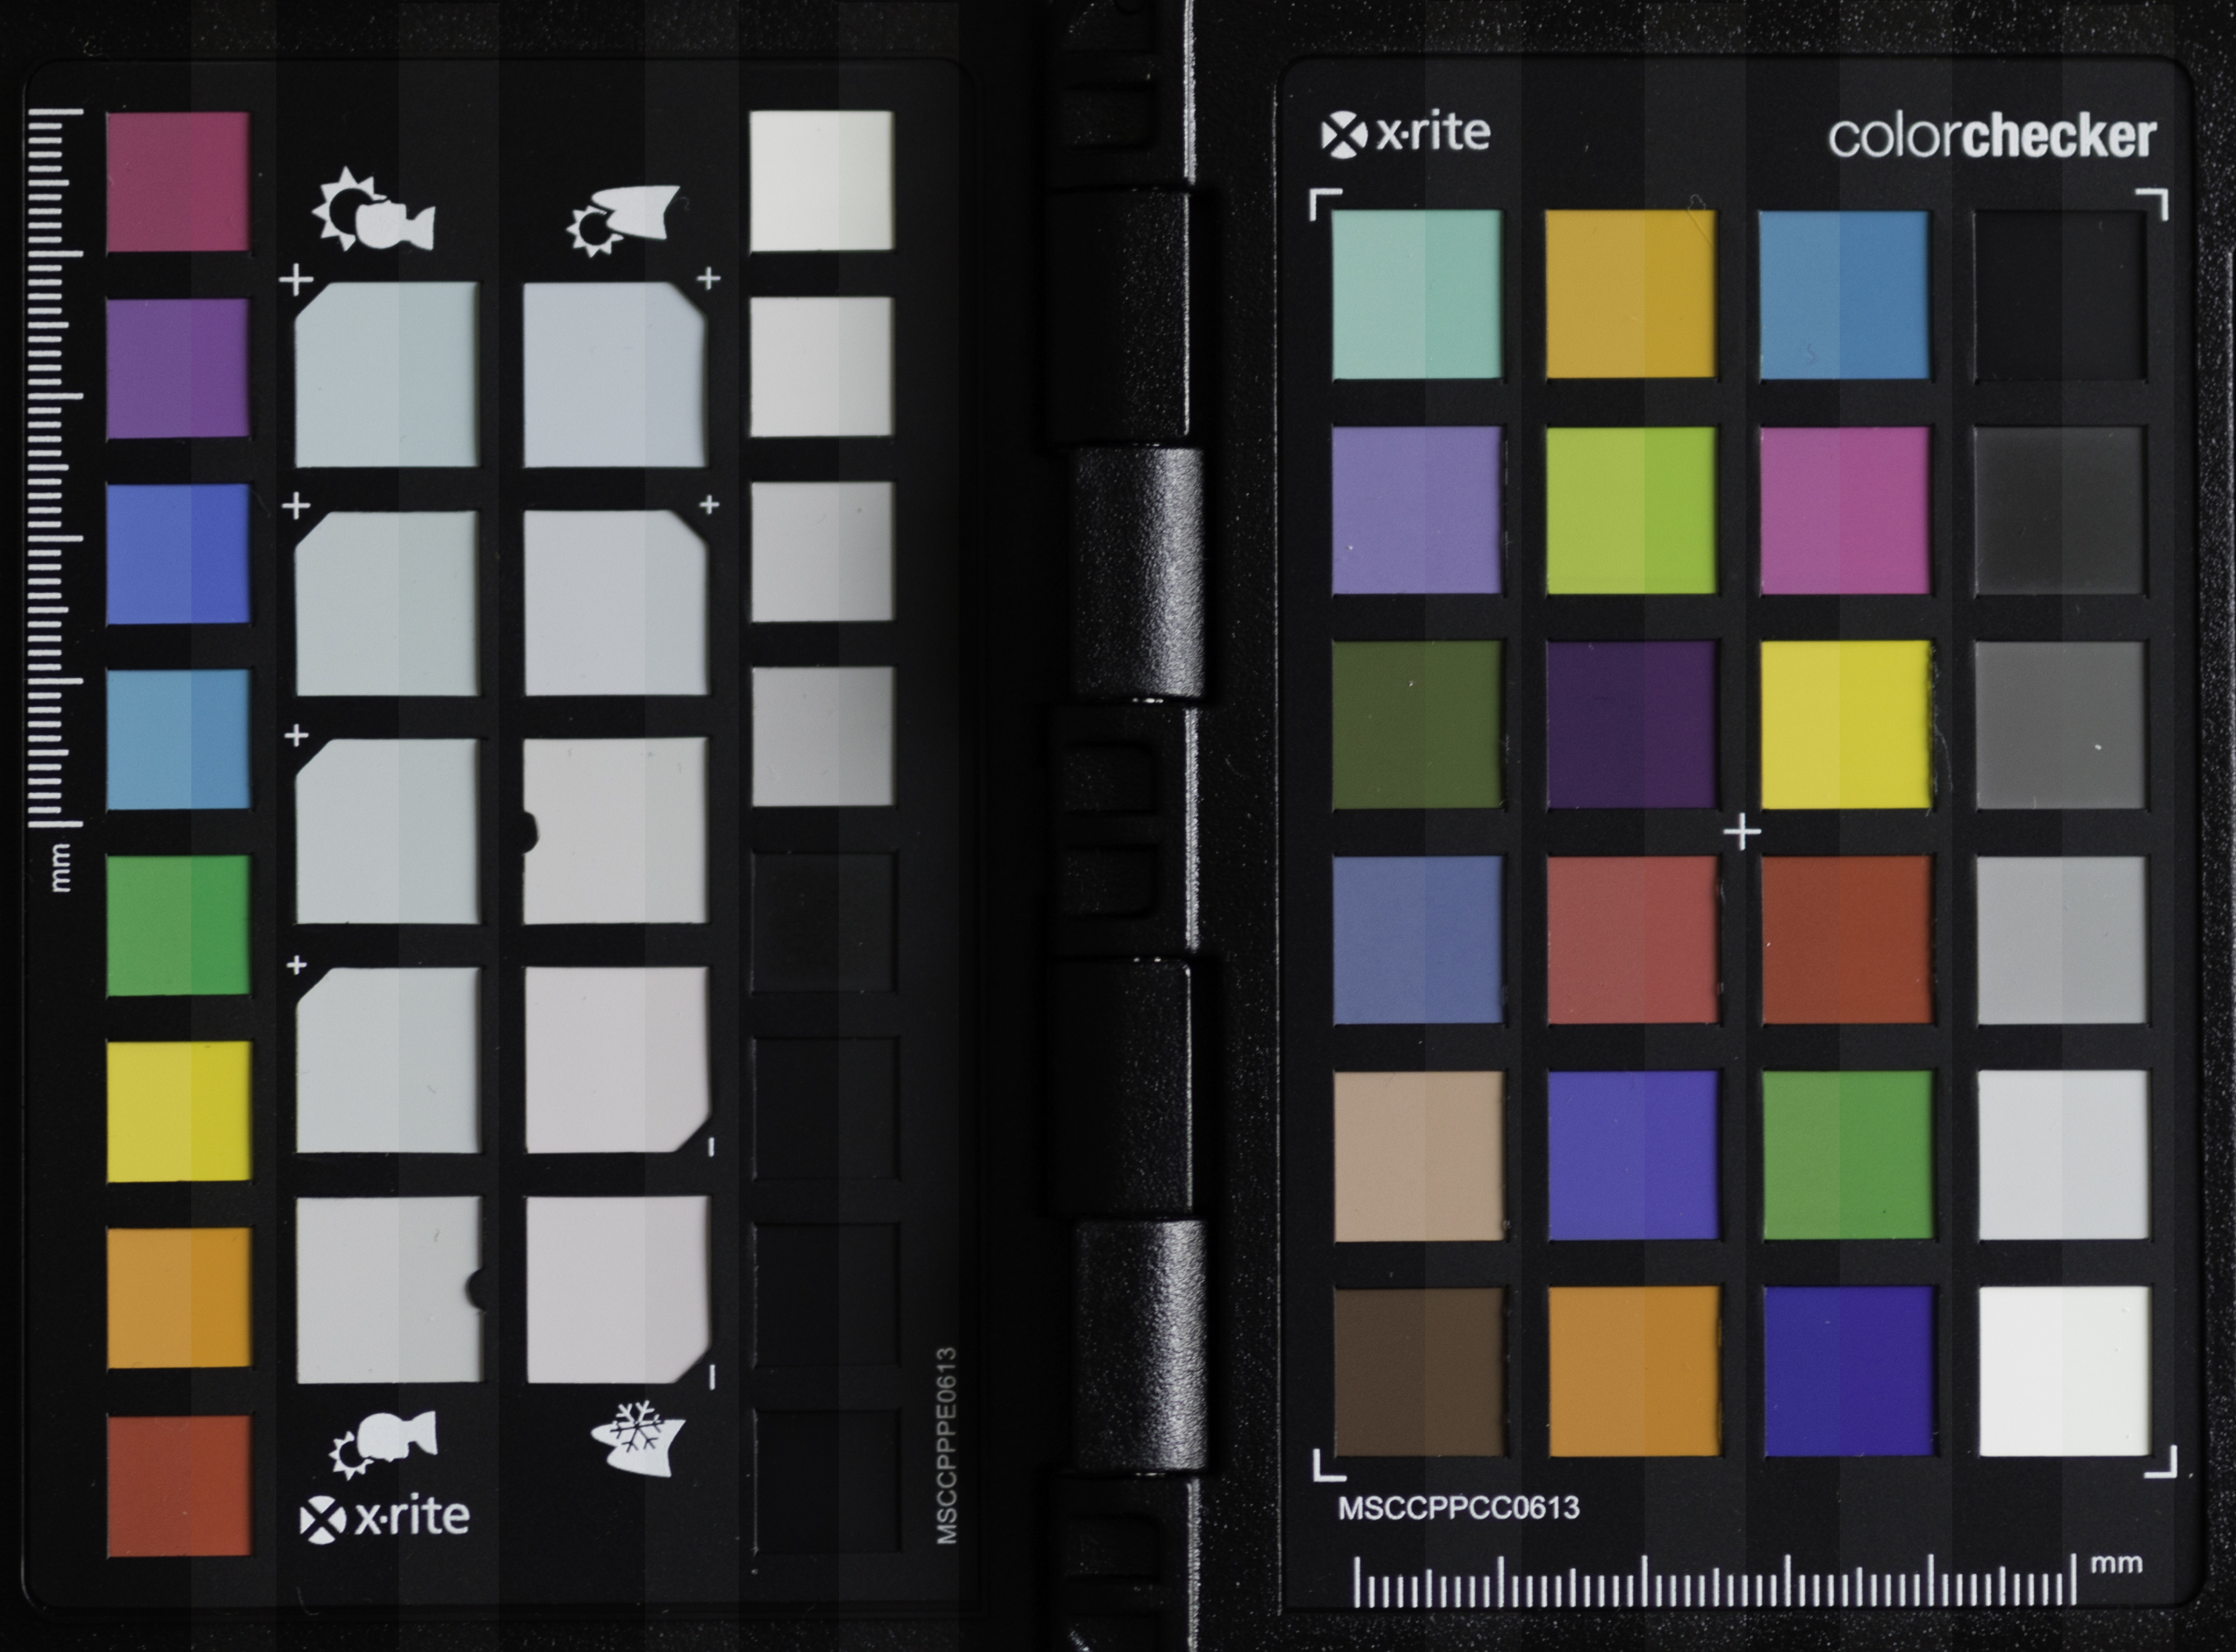
In comes the camera calibration tool. I have the colorchecker passport photo from X-rite. This is a combination of a small piece of hardware (a plastic booklet with 2 screen printed colour target sides and a white face) and a piece of software to be installed on your system.
The simplest way of doing a camera calibration is a single light situation calibration, in which you take a picture in the light situation you will use for your images, including the colorchecker target. Take care the target is lit by the same light as your images that follow.
After that, shoot your images.
In Lightroom, you will need the first image with the target included to make build your camera profile. This is very simple by selecting the image -> export -> Colorchecker passport. This will automatically compare your camera’s ‘target reproduction’ with the target’s known values in the software, and build a ‘custom camera profile’ for you to start with. The new profile won’t show up until restart of Lightroom. (there are certainly more detailed step by step explanations on Youtube 😉 )
Below you can see the target without and with the newly activated camera calibration.
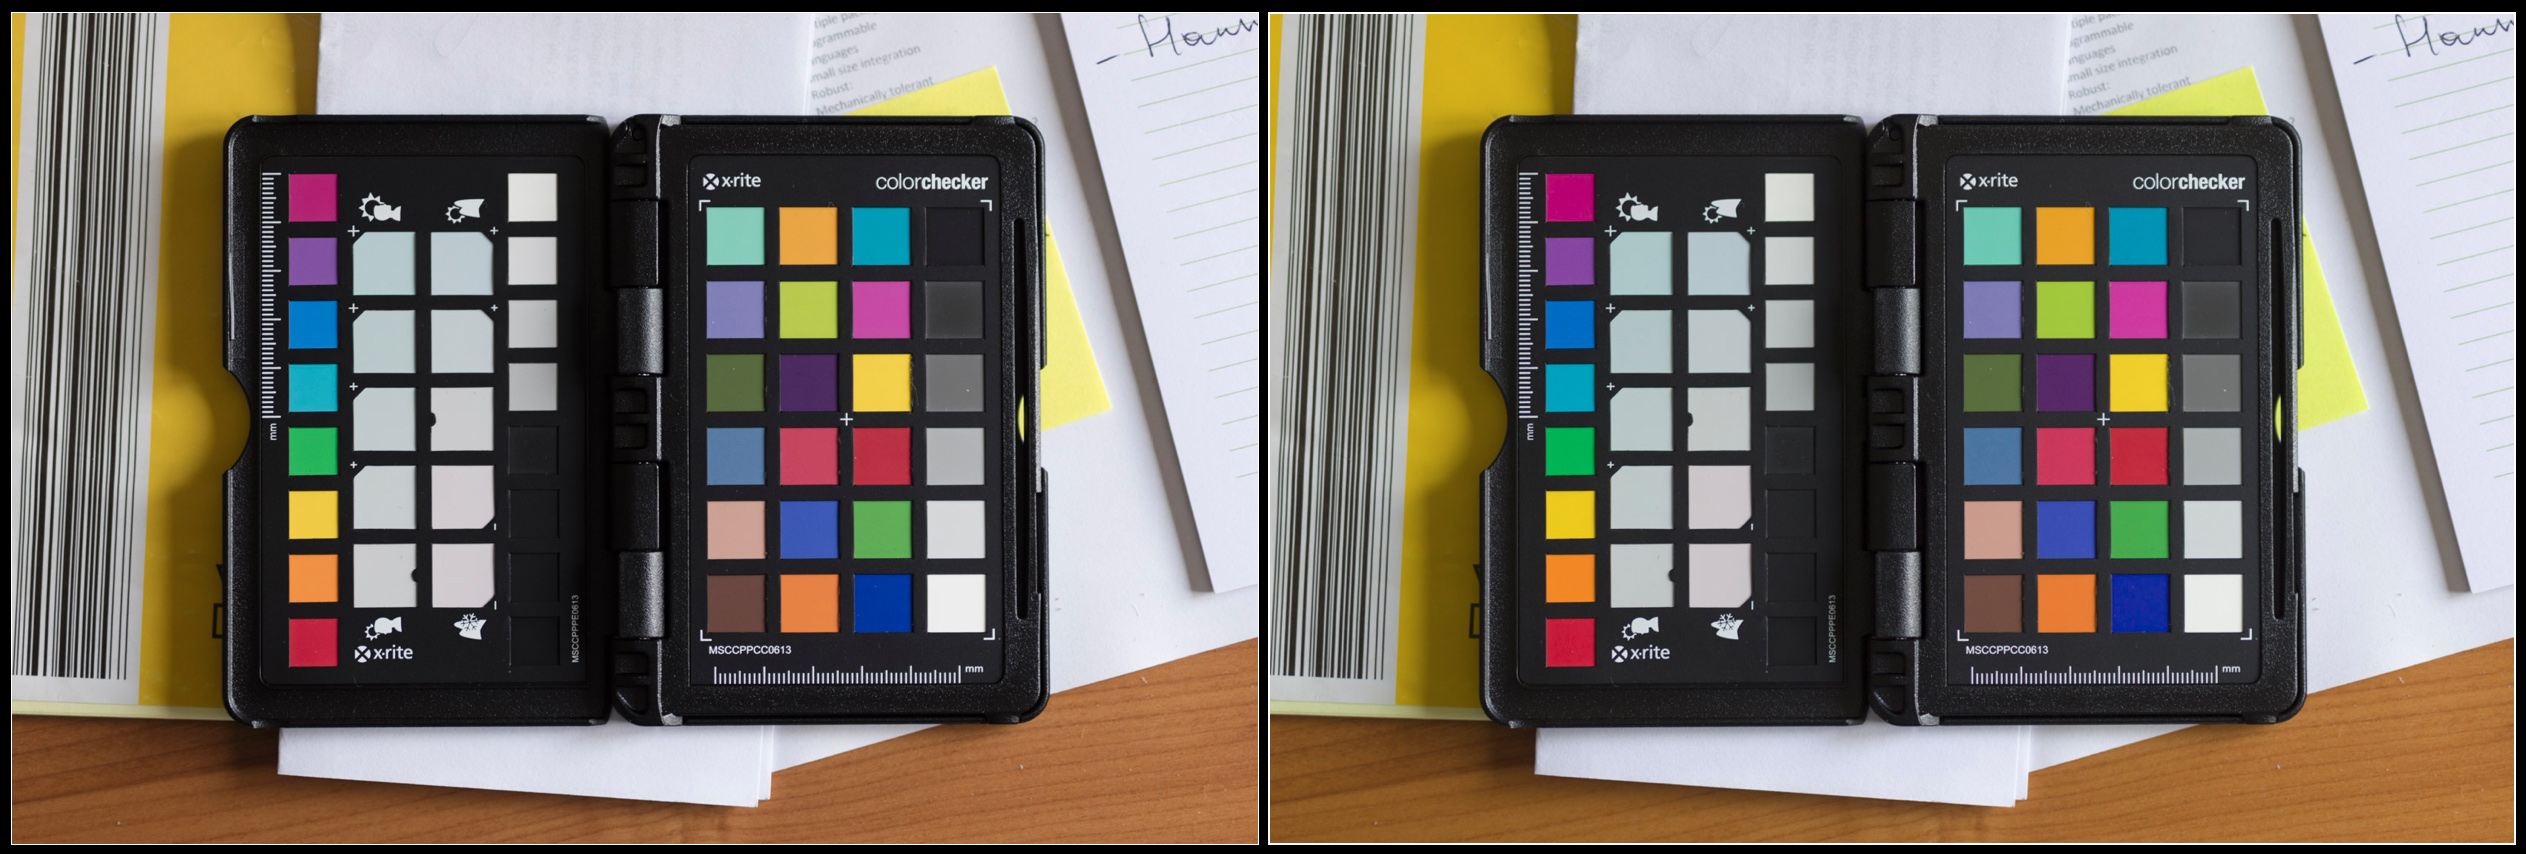
not a big deal you’ll probably say, and this camera is indeed rather color-correct compared to some others I’ve seen. To make things more obvious, I placed both images onto each other, and made a layer mask to cover up half of the targets:
left half with ‘Adobe Standard’, right with my custom color profile on the Canon 5Ds.
Colours are more saturated, some a tad lighter, others a little darker, some colours shift slightly, (note the purple and the yellow-green on the right) but especially the blacks are less deep. This is especially helpful if you need to uplight the dark tones (shadows) in LR.
These are two versions of the same RAW file, but they get different RGB values. This means that the initial state of your raw file is very much dependent of your Camera calibration settings. If you are very fond of let’s say the ‘camera portrait’ picture style settings on your camera, then you might as well use this profile in your RAW-editor. (as photographing in RAW will not edit the data in your images, but the preview on the camera’s back is based on a jpg file modified by the settings in your camera. your preview will still get the ‘camera portrait’ picture style view, but your RAW will not reflect it.
That is why an image might look good when importing in LR, and then switch to something dull a second later. The initial look is from the embedded preview file, generated by your camera, the second look is from the preview generated by LR, based on the camera calibration settings currently active (standard setting = Adobe Standard)
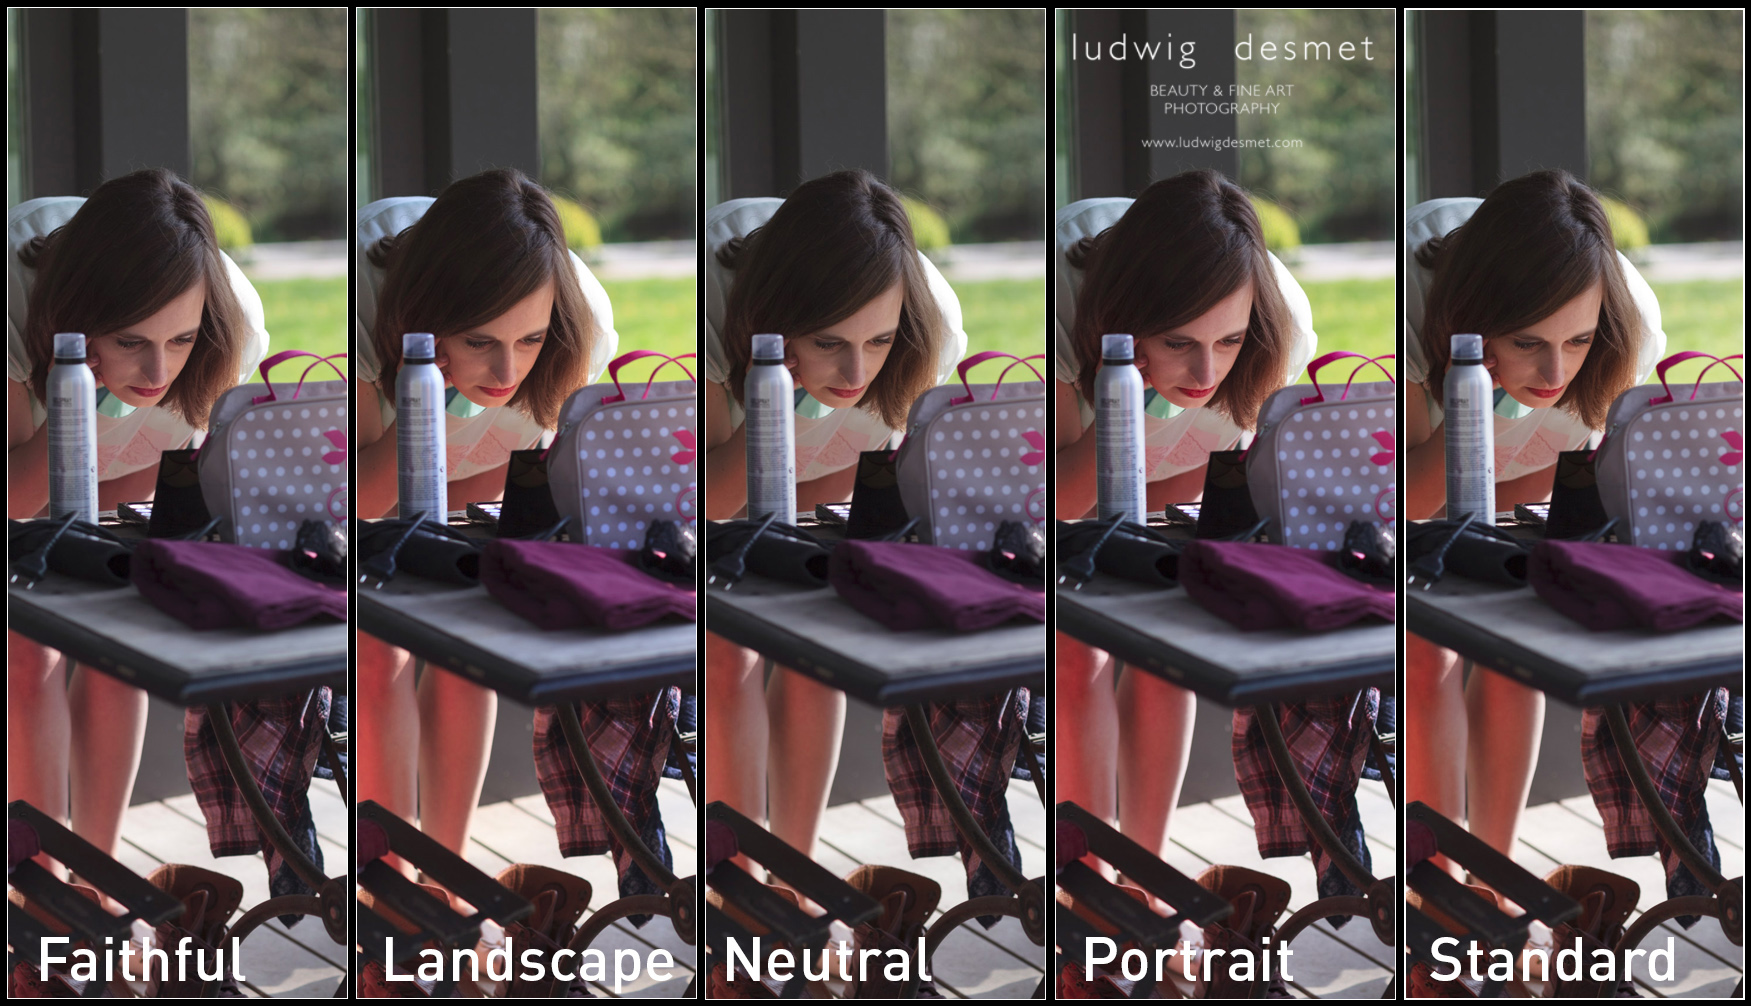
If you want to experiment with camera calibration without buying the tools needed, try using the ‘picture style calibration settings’ available in the drop down menu. They should reflect the ones you have available on your camera. The differences should be obvious.
Below two examples of different ‘picture style camera calibration’ settings. Note the changing skin tones in the first image, the changing sky colour in the second.
The process version is the way LR interprets RAW files since earlier versions, you should currently use the 2012 version. (July 2016)
To give a real world example, first image with ‘Adobe Standard’ profile, second with Custom made profile:

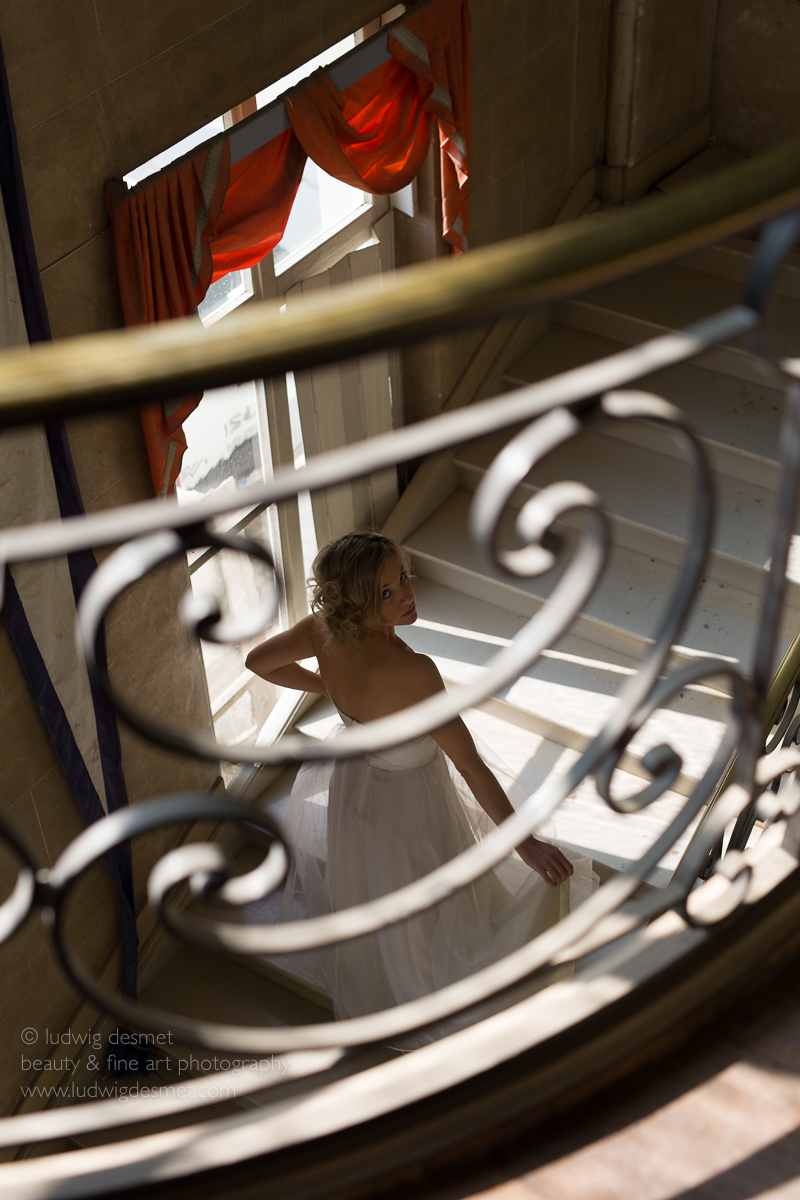
I think that the shaded area’s are very obviously lighter in the second picture, with the correct camera calibration profile. These are unedited images. For me this lighting situation is very common, high contrast, backlit situations, where you want to make sure that the highlights are not blown out (clipped). As you know I seldom use extra light on a shoot (except for a reflector from time to time. In this way I absolutely need to be able to enhance my shadow area’s to a descent light level. This less dark starting situation is of a lot of help.
The edit looks like this (same editing on both images) Adobe Standard above, 5Ds profile below. In the first image, the colours are slightly red, but especially the corner shadows completely run black (due to my vignette, I know). Compare with the corners in the second image, where I can keep plenty of detail, with the same amount of vignetting.
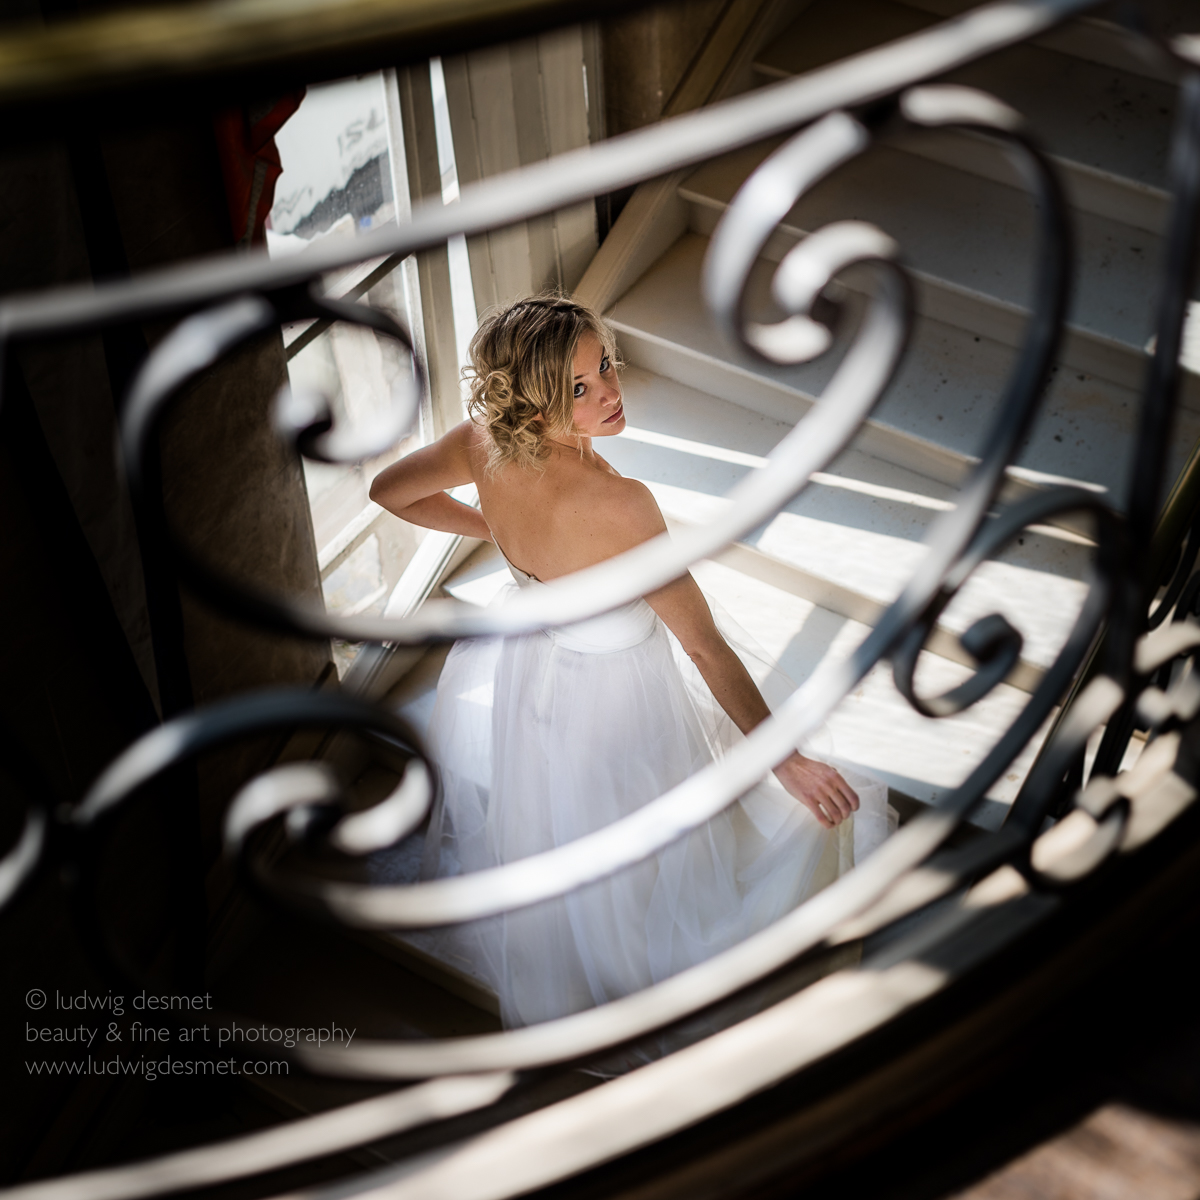
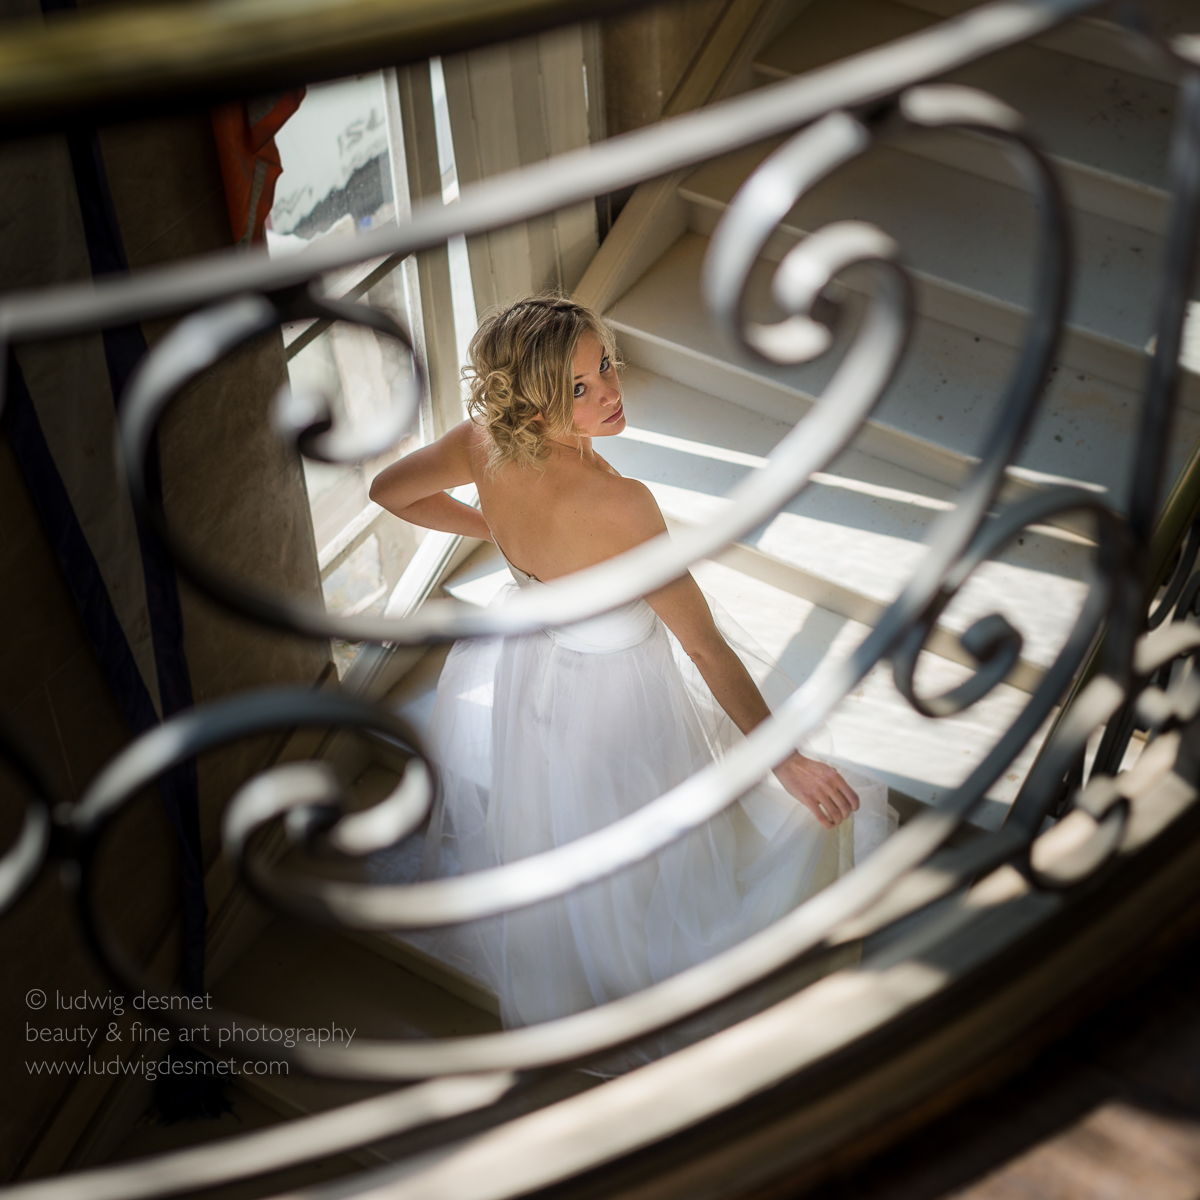
When looking in detail, you’ll see that I keep a lot more detail in the hair, and I have less noise appearing in the second image. (upping the shadows a lot also emphasises image noise)
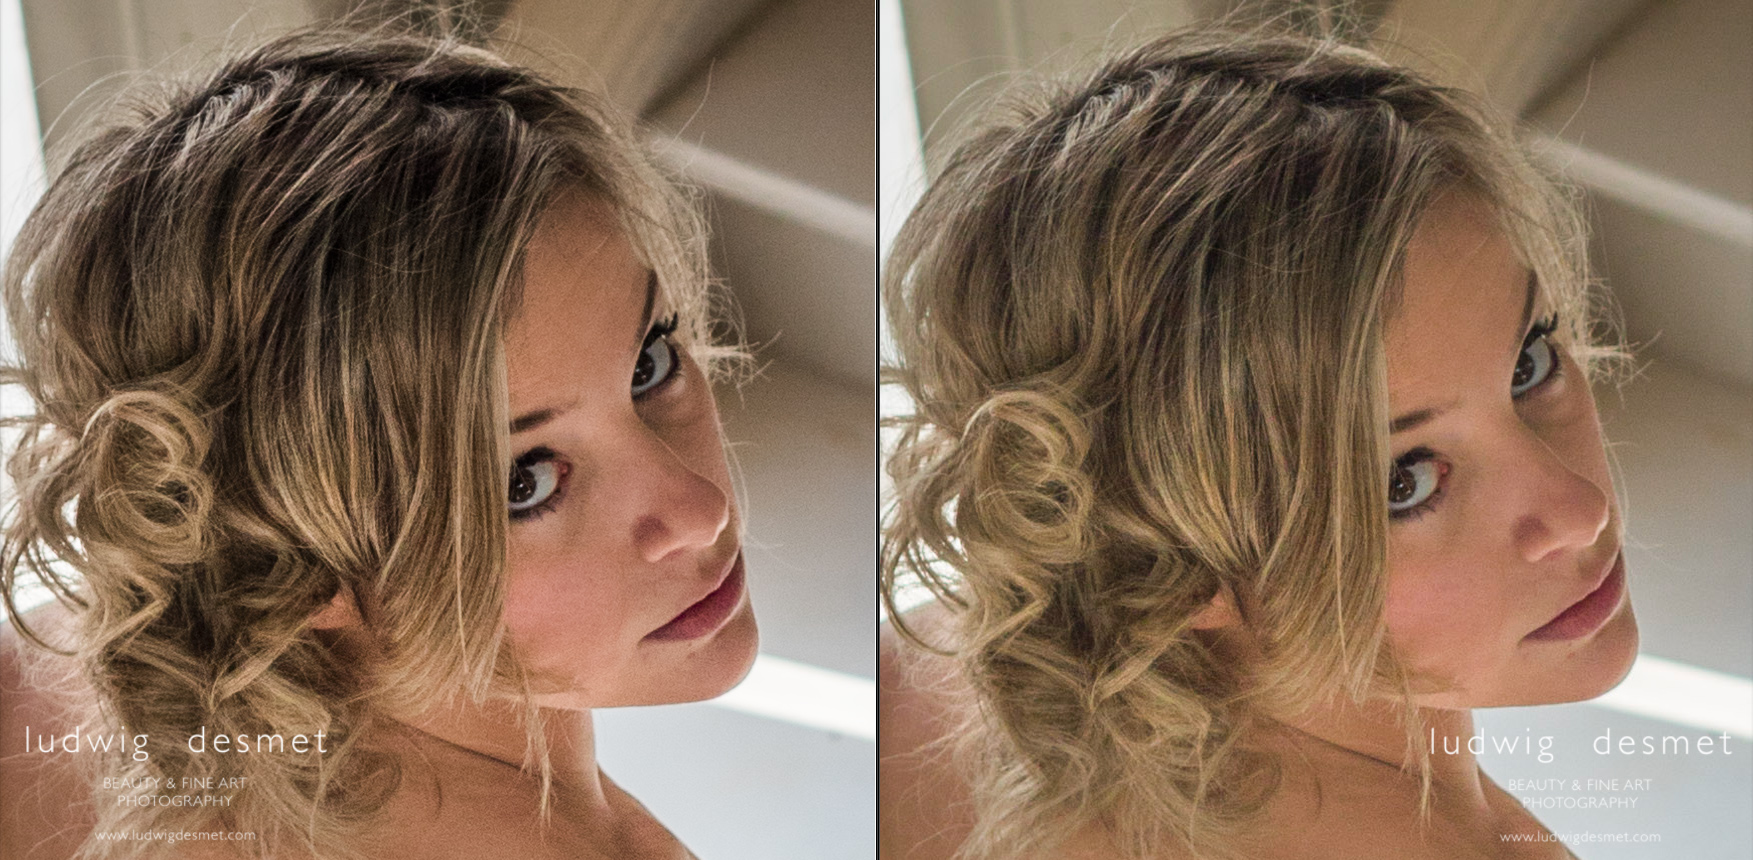
Image: Jenn at Baudries Castle
Hair: Nathalie
Make up: Heidi
I think Jenn has a large amount of ‘Nathalie-Portman-looks’ here 😉
Canon 5Ds with Sigma 50mm f1.4 DG A – 1/640s f2.8 ISO 160
see you soon for part two of this explanation, and for a lot more images:
summer time, shooting time
ludwig
Ava playing solitaire at the chateau.
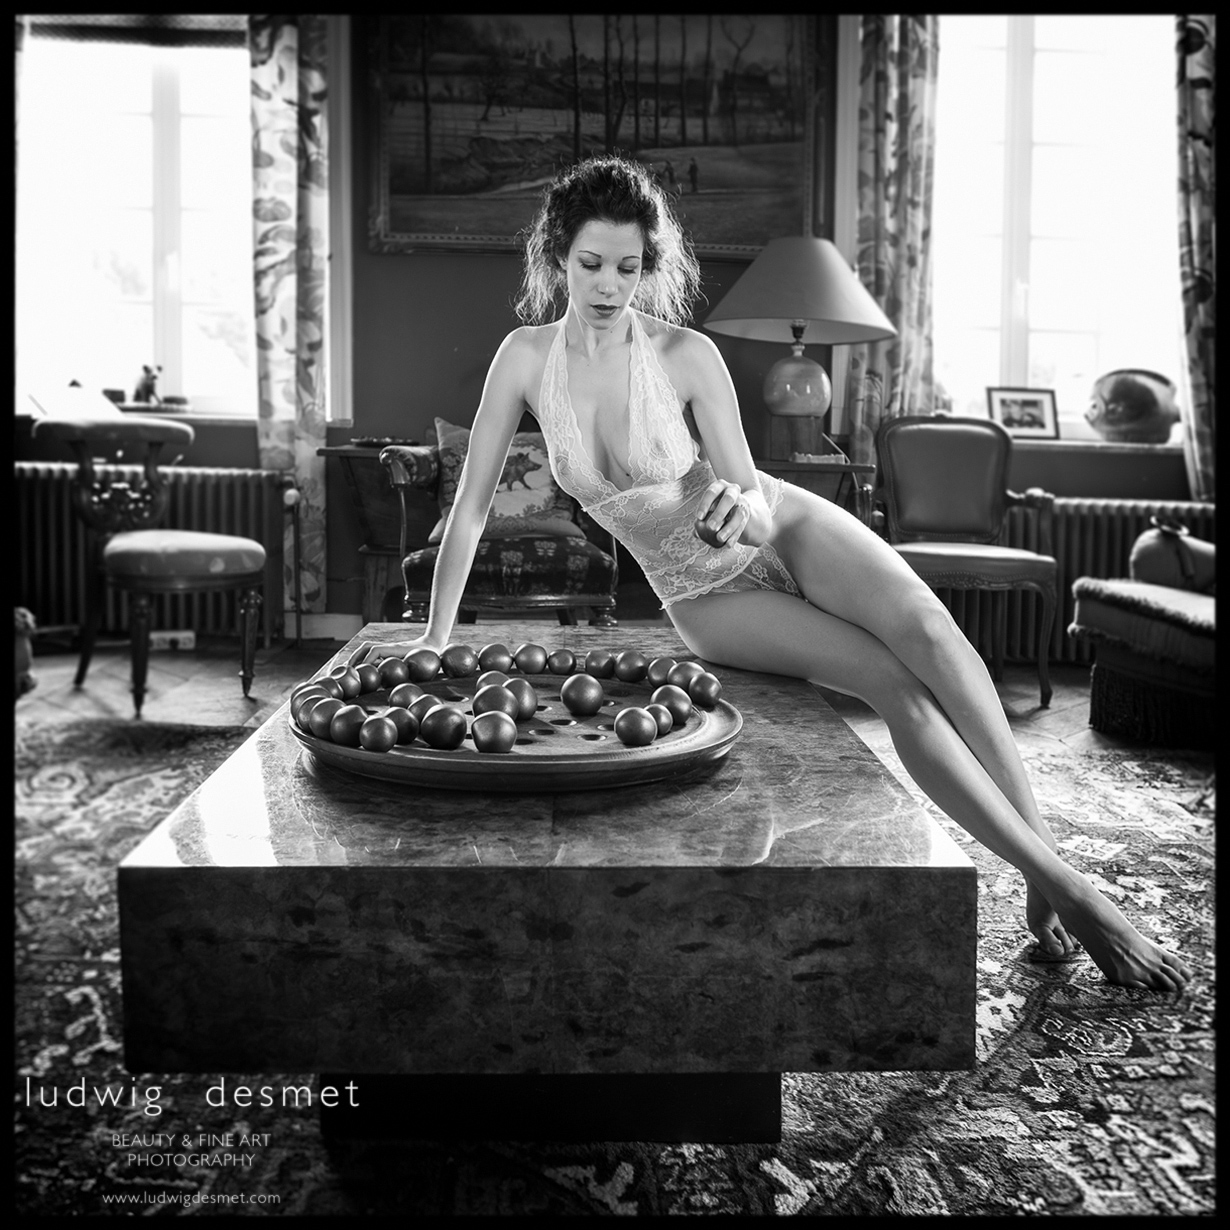
Hair and assistance: Nathalie
Model and make up: Ava
Photography: Ludwig Desmet
Canon 5Ds with Canon 24mm f1.4 L II – 1/8s f3.5 ISO100
available as limited edition print, for info: ludwig@ludwigdesmet.com
… due to a very cold and wet spring, the cherries are late this year …
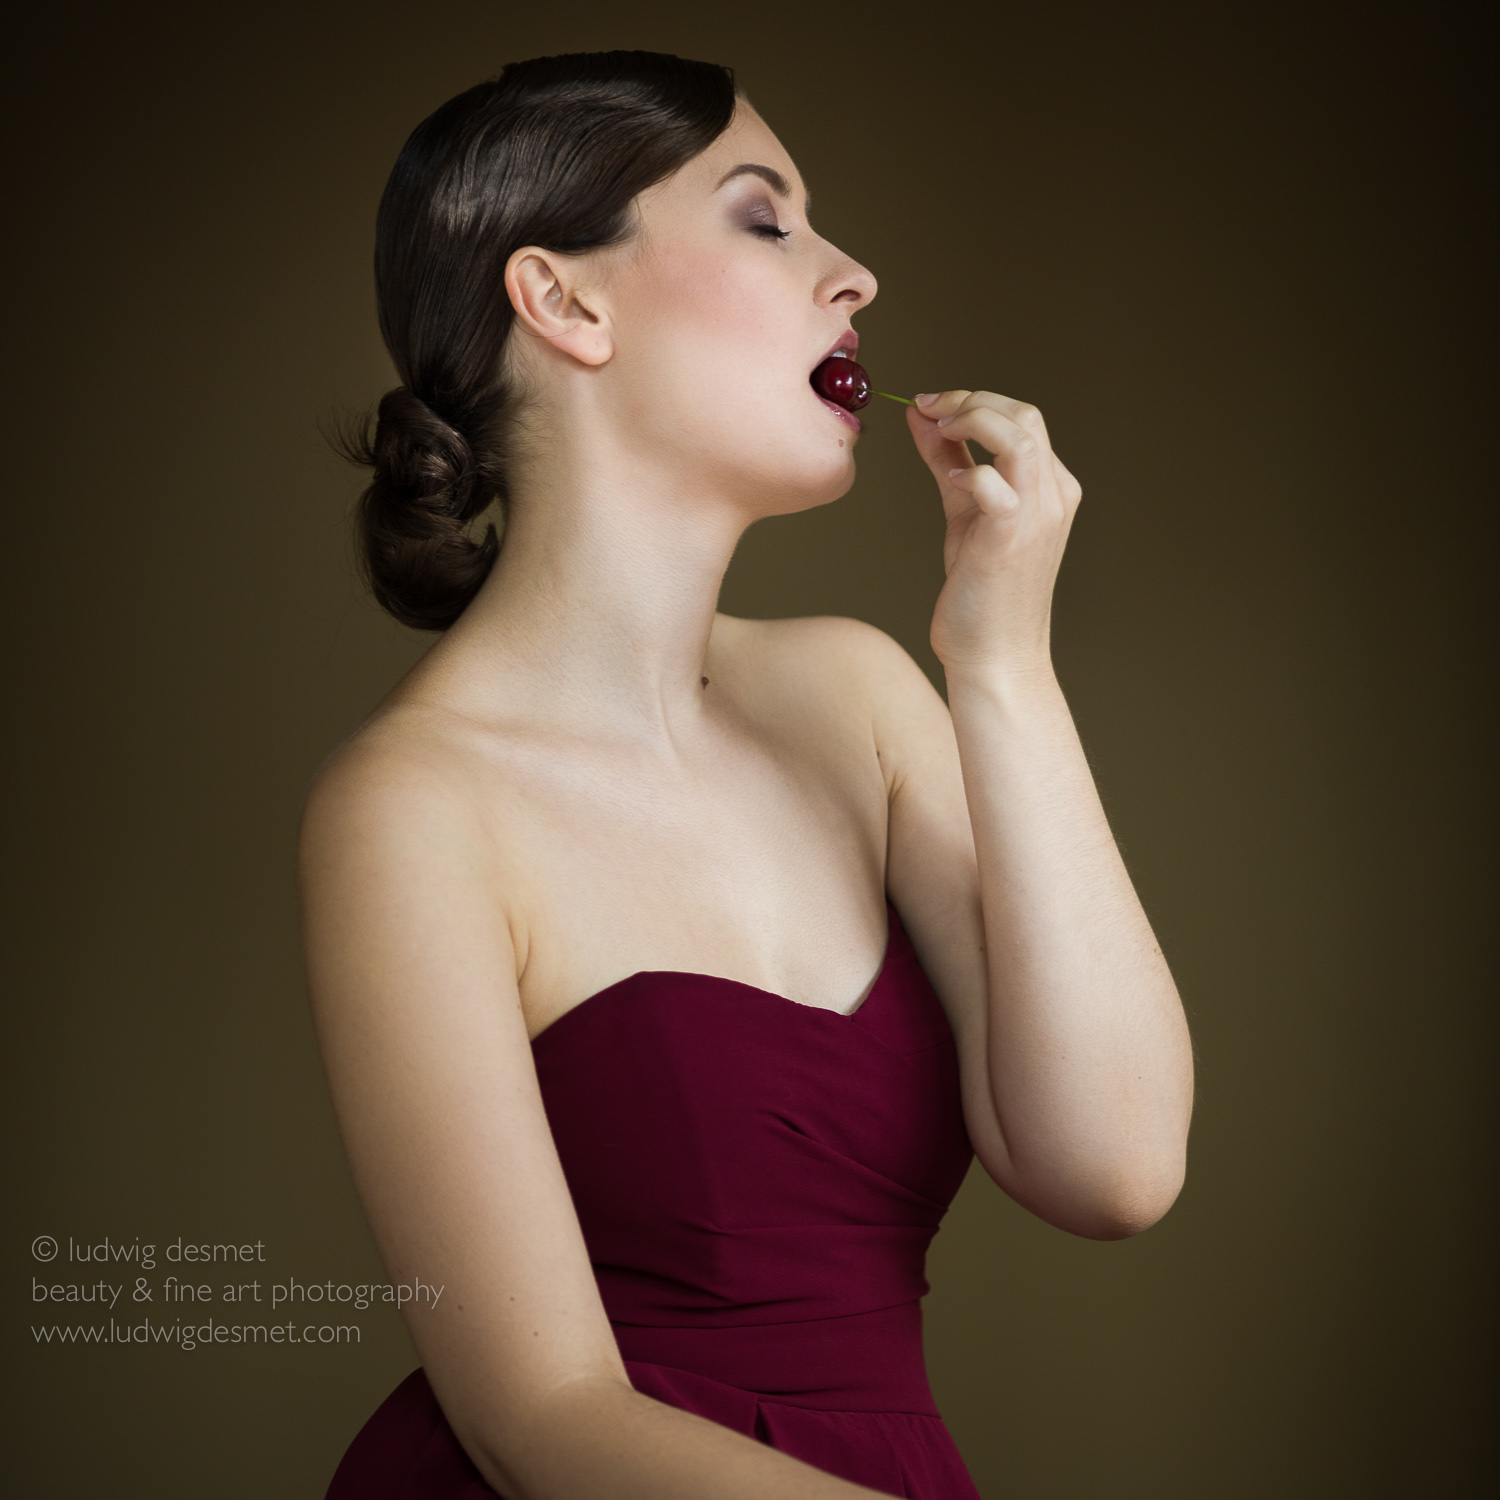
Model: Pauline
Hair: Nathalie
Mua: Hanna
photographer: me
Canon 5Ds with Sigma 50mm f1.4 DG Art – 1/40s – f2.0 – ISO 320
thank you for watching,
ludwig

