Battle of the 50’s Part II – Canon 50 mm f1.4 USM vs. Sigma 50 mm f1.4 DG HSM Art

Personal Pictures, photo gear, tests

A lot of good rumors about the Sigma 50mm Art that was announced for the end of April. I have decided to order one as soon as it was available here in Belgium, and I wanted to do a comparison between this praised newcomer and the 50 mm f1.4 I have been using since about two years. (see battle of the 50’s for a comparison between Canon’s cheap (fantastic plastic) 50 mm f1.8 and the second in line 50mm f1.4 from Canon as well)

So this time a comparison between the Sigma 50mm f1.4 DG HSM Art and the Canon EF 50 mm f1.4 USM.

Both aimed at the full frame market, a rather old design for the Canon, brand new for the Sigma, part of the ‘Art’ series of new lenses from the latter.

In my photography I often have to deal with difficult light situations (I mostly work with natural light only) in dim lit interiors. I so have decided a couple of years ago to mainly go with fixed focal length lenses with big apertures. I currently have a Canon 24 mm f1.4 L II, a 50 mm f 1.4 (Canon and Sigma, although the Canon has already been sold and will be transferred to its new owner as soon as this test is over) a Canon 85 mm f1.8, a Canon 100 mm f2:8 macro (NEW) and a Canon 135 mm f2.0 L. A lot of glass and a lot of weight in my photo bag.

Additional weight for this 50 mm lens from Sigma too, compared to the Canon f1.4 (290 g) the Sigma comes at 815 grammes, meaning a lot more weight to carry. In combination with the Canon 5D mark II I use, this combo weighs about 1700 grams all together. My wife complained about the weight when I had her review the images of my last shoot.

The design of the Sigma lens is definitely more attractive, with is matte finish and sleek all black no colors approach. It comes with a hood and caps, and a square semi-hard lens case. The price here in Belgium is 839 € (Art & Craft pre-order) while the Canon comes at 339 € at the same shop.

All images for this test have been taken in my backyard or home studio, no special things going on here, except for young vegetable sprouts struggling against the spring rains we had lately.

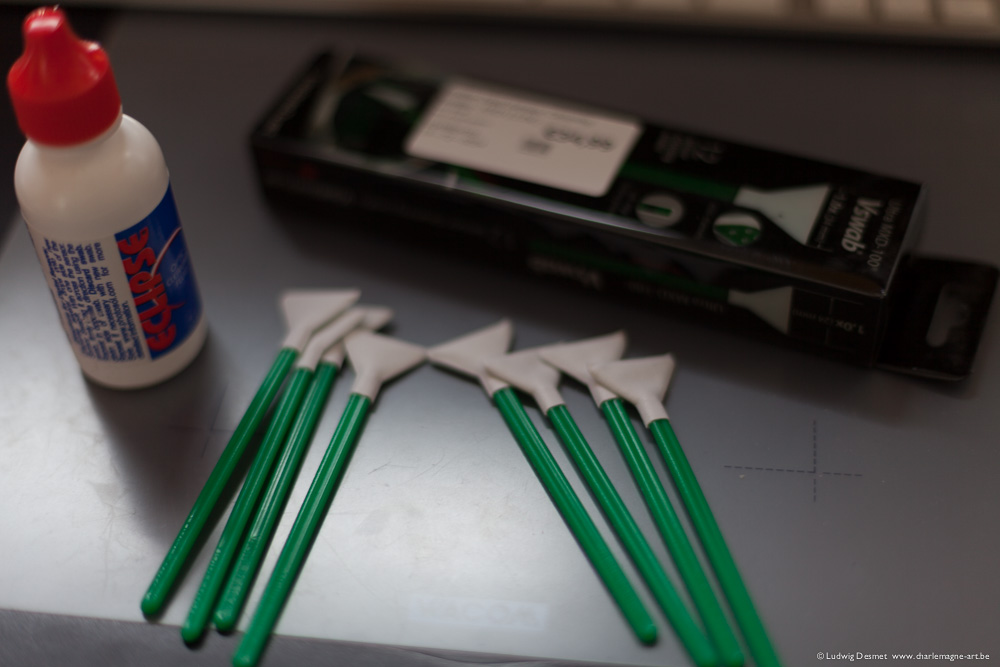
As far as needed, all images are taken with tripod, live view magnification for focussing and with the same 5D II camera. Self timer to prevent touch shake.

The images show the entire scene on top, 100% crops from unedited images (except standard sharpening in LR5) below. The aperture setting is mentioned on every crop. All Jpg’s are saved at 100% quality. Take care, some of these images are big! All these images are for informational purpose only, no legal claims made!

You should really look at the images full size to be able to judge on the results obtained!

Sharpness center and edge:

Left to right: Canon center sharpness, Sigma center sharpness, Canon edge sharpness, Sigma edge sharpness.

Full size on click, 11.9 Mb Jpg file.

Sigma vs Canon 50mmtest-sharpcomp

My observations:

Center sharpness Canon: soft wide open, reaches full sharpness at f2.8, stays sharp till f8.0, a little diffraction softening at f16

Center sharpness Sigma: similar sharpness wide open as the Canon at f2.8, small increments of additional sharpness till f8.0, clearly visible diffraction effects at f16

Edge sharpness Canon: strong image distortions in this part of the image at f1.4 and f1.8, as if the image has had a rotational blur, gradually improving image quality, acceptably sharp at f8.0, soft degradation at f16

Edge sharpness Sigma: similarly sharp at f1.4 as the Canon at f1.8, but no distortions, f4.0 similar to Canon at f8.0 and sharpest at f8.0 and better image detail as the Canon at f8.0. More diffraction degradation at f16 than Canon.

Note the strong vignetting on the Canon f1.4 USM when used wide open. Less visible on the Sigma.

Vignetting is becoming invisible at f4.0 for the Canon, at f2.8 for Sigma.

Minimal focussing distance. Sharpness and magnification:

the minimal focus distance for the Canon is 0.45 m, for the Sigma it is at 0.4 m, so a bigger magnification is possible.

Another set of images, both showing the magnification comparison, and a crop showing sharpness with different apertures.

Sigma vs Canon 50mmtest-minfocus

my observations:

similar as previous test, very weak performance at the image edge for Canon, at least one stop better sharpness for the Sigma in both center and edge.

The Sigma lens has however more problems with purple fringing when used wide open (note the hairs on the plant stem). This reminds me of the ‘quick’n dirty 85mm lens test’ I did a couple of years ago, where similar fringing problems where appearing with the Sigma 85 mm f1.4

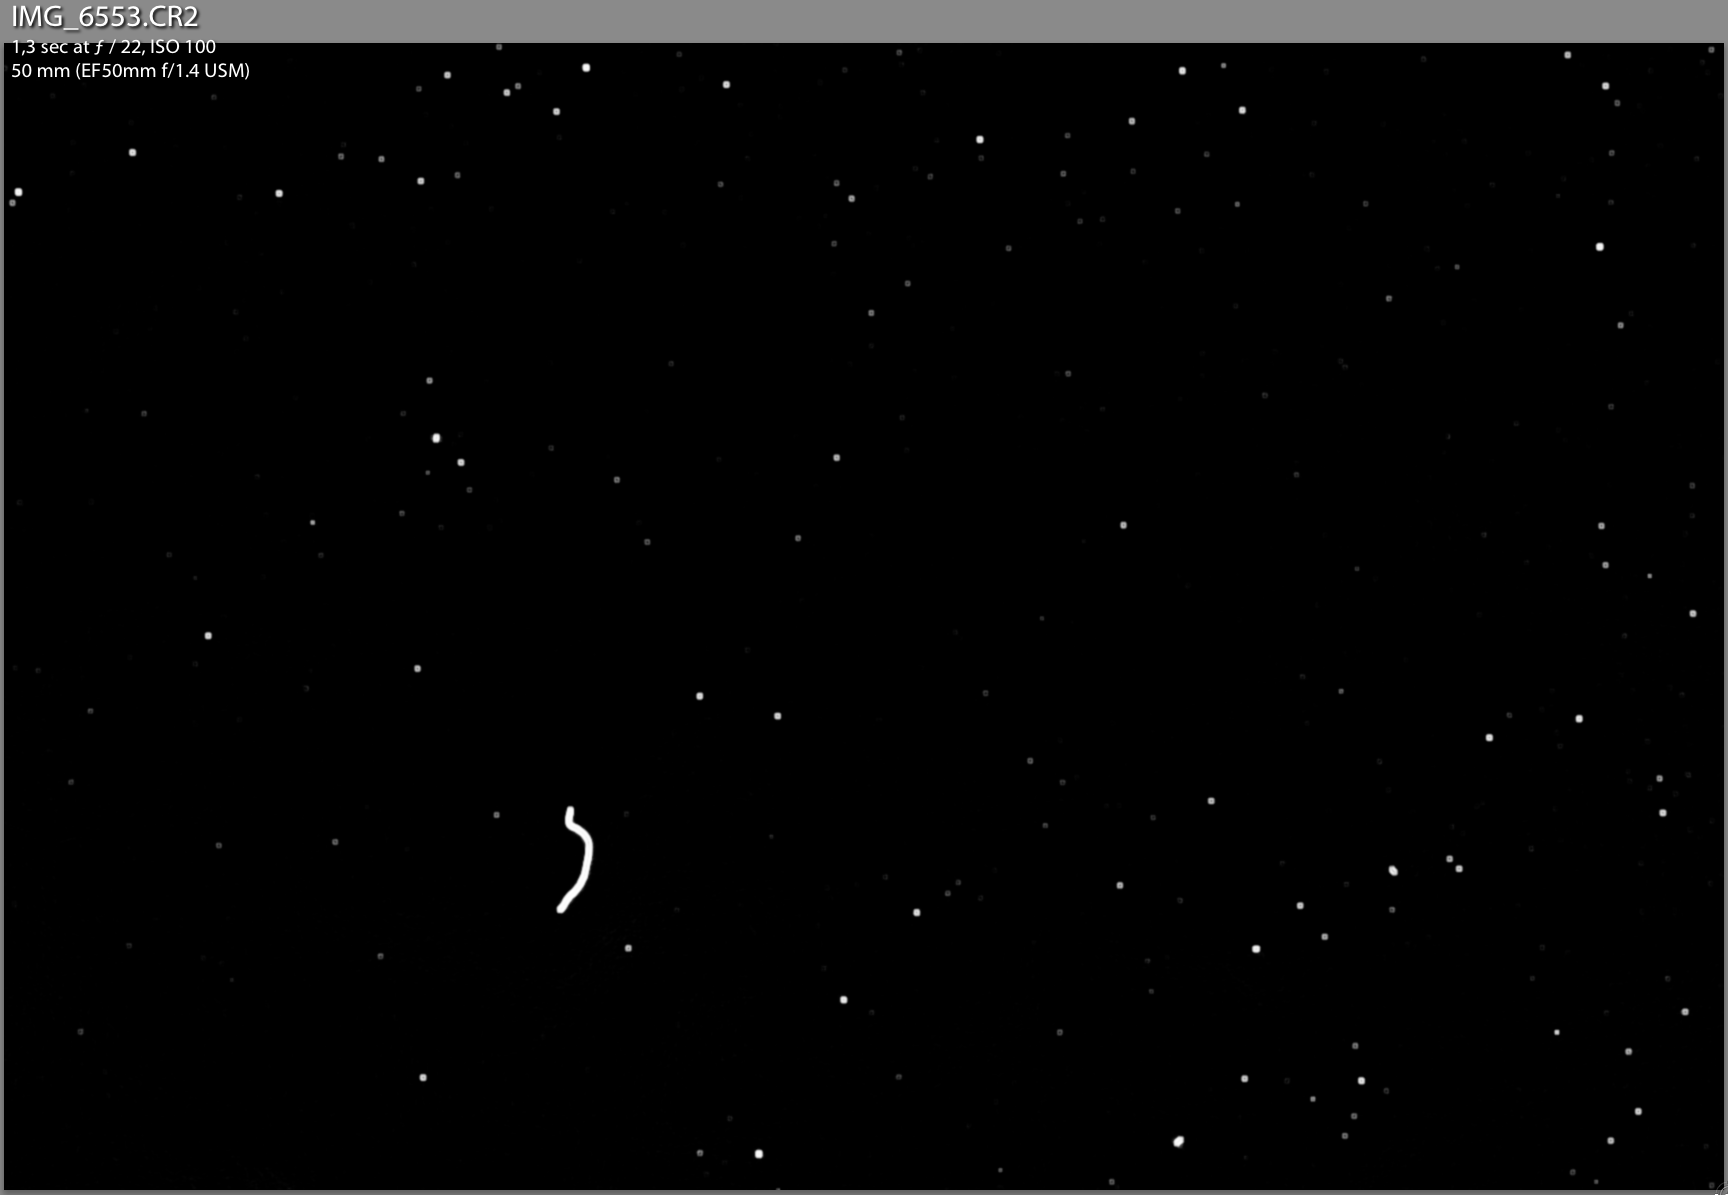
Chromatic Aberration and color fringe:

I remember from the previous test that the Canon proved horrible in the shots with the branches agains bright background. Let’s see what the Sigma does in comparison. I had no clear sky as the previous time today, but I kind of see the same things happening here.

Sigma vs Canon 50mmtest-CA center

Sigma vs Canon 50mmtest-CA edge

The Canon f1.4 USM suffers from severe fringing in high contrast areas, when used wide open. (strange that this phenomenon did not show in the plant close up) This is even apparent in live view, making it hard to focus correctly. When stopping down to 2.0, this greatly improves, and then we see similar things in both lenses, the Sigma not noticeably performing better in this aspect, showing purple fringing in front of the focus area, green fringing behind the focus plane.

In both examples in this test however (overcast sky, dull weather) I have noticed very little CA in both lenses, a little bit of cyan-orange at f8.0 in the Canon image close to none in the Sigma. I suppose that in higher contrast situations, that might be worse. (to be confirmed).

Worth noticing in this respect is that the Sigma 50mm Art lens profile is not yet currently available in the standard Lightroom 5.4 upgrade, nor could I find a link to a profile for this lens on the web (may 13, 2014)

Longitudinal CA:

Chromatic aberration that is visible in the unsharp areas in front and behind the sharp area. Not the magenta shift in front of the sharp area, the green shift behind. Both images taken at f2.0. Remarkably higher in the Canon. Note the big difference in sharpness and contrast in the sharp areas between the two of them. Best viewed at 100% of course.

Sigma vs Canon Longitudinal CA

Flare:

Canon to the left, Sigma to the right.

Sigma vs Canon 50mmtest-Flare

My observations: Do I really need to? It’s obvious I guess.

Bokeh:

Canon to the left, Sigma to the right. I think Sigma’s bokeh is softer and smoother. In the Canon unsharpness, there is still some structure and noise. Not 1/1 images but big enough to analyze.

Sigma vs Canon 50mmtest-Bokeh

Thank you for reading, I think I will keep my Sigma, and trade on the Canon.

You are welcome to share this comparative review, I take no responsibilities of any kind 😉

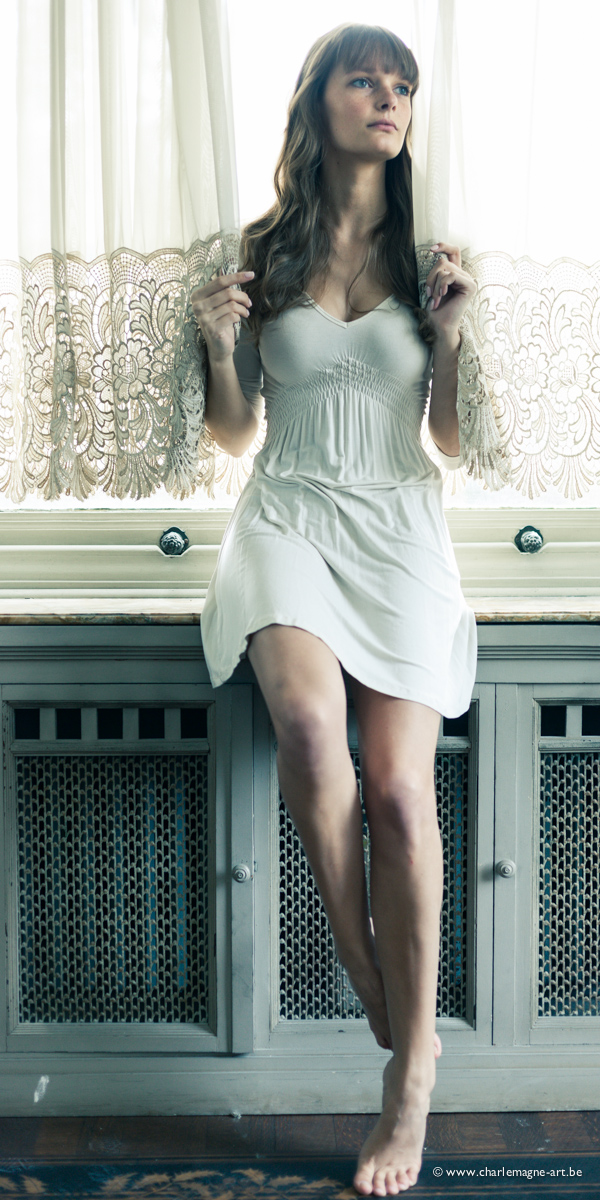
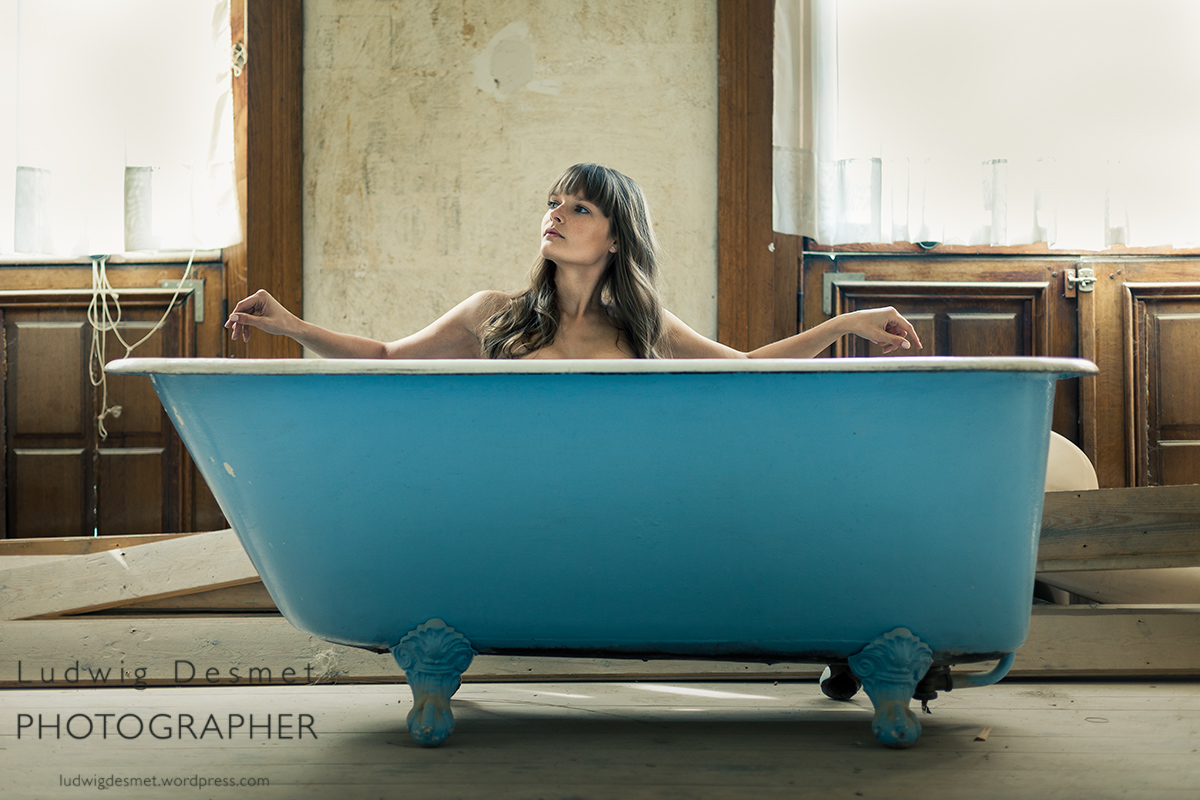
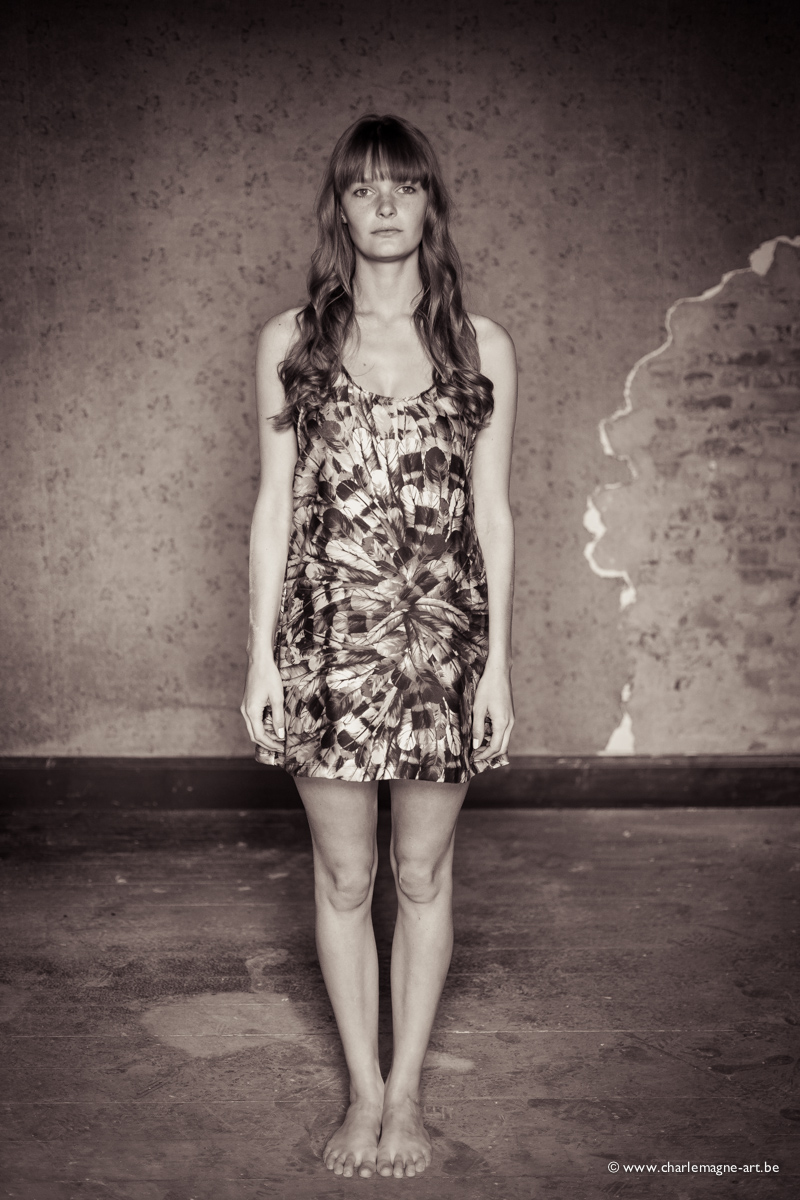
come back again for some real world image samples of this lens in my shoots!

best,

Ludwig

Sensor cleaning

photo gear, Tips and Tricks

I’ve had my camera’s about 2 years/3 years now, and I never had the nerve to clean the sensor. I have always been afraid something might happen to the sensor surface while cleaning it. Till now.

Some weeks ago I went to a local shop buying the necessary equipment.

I received a bottle of Eclipse, optical cleaning fluid (www.photosol.com) and a box of Vswab Ultra MXD-100 from VisibleDust (12 pcs). Attention, you should always get the right swabs for your size of sensor. Full frame, aps-c x1.6 or aps-c x1.5 or aps-c x1.3, depending on your type of reflex camera. The bottle is good for at least a hundred sensor wipes, the box of swabs will be quickly gone, as I discovered quite soon. The swabs are individually packed in plastic foil, and should only be unpacked just before use. (the image below is after cleaning 2 sensors)

I’m not sure it’s the best tools around, but it’s the stuff they recommend. Since I have no experience with other makes, I can’t judge. One remark, it might be a good idea to use one of those static brushes, to wipe of loose dirt first, but I don’t have one, so I couldn’t use it.

Ludwig_desmet-sensorclean-4583

What I could judge, is how dirty my sensors were before cleaning.

The best thing to do to reveal dust on your sensor, is photographing an even surface (or a grey cloudy sky) and make sure you have your lens off focus (only possible in manual focus mode) dial in your smallest possible aperture value, and adapt shutter speed to have a slightly overexposed image. It should look something like this:

(ALL IMAGES CLICKABLE FOR BIGGER VIEW)

Ludwig_desmet-sensorclean-4572

this is an image of an overcast grey cloudy sky, f22 – 0,5 sec at ISO 100.

In Adobe lightroom 5, you can easily judge on how much dust you’ve gathered on your sensor by selecting the spot removal tool, and then checking the box visualizing spots just below the image. this turns your image into a black and white image, with all dust visible. (depending on the position of the visualization slider, you’ll see even the smallest dust spot)

Screen Shot 2014-01-06 at 10.54.33

For those not working in Adobe Lightroom, in photoshop, you can similarly visualize the dust spots by putting a curve on your image, and putting the white and black point just left and right of your histogram. Since you have a low contrast image, your histogram should be rather small.

This is the first image of the other camera, with the above explained curve applied:

Screen Shot 2014-01-06 at 11.16.04

So these definitely need cleaning.

How to proceed? (this is for Canon 5D II, but it should be fairly similar on any other system)

1. make sure your battery is fully charged.

2. Get your lens of of the camera

3. find the menu item that says sensor cleaning -> manual cleaning

4. the camera warns you that the sensor will be exposed for manual cleaning.

5. Make sure you work in a clean environment, and have everything ready (enough light to clearly see where you put your swab down, cleaning fluid, sensor cleaning swab, …)

6. push the ok button on your camera. The mirror locks in the up position, the shutter opens. This remains so until you turn off your camera. If your battery is well charged, that should give you plenty of time to clean your sensor.

7. put some drops of cleaning fluid onto the first swab, insert it gently into your camera house, and put it down on one short side of your sensor. If you bought the right set of swabs, it should neatly fit the width of your sensor.

8. gently sweep across the sensor till you reach the other end, flip it over and sweep back. (in this way, you use both sides of the swab, without the risk of re-disposing any dust from the first used side. It took a while till I found out that that is probably the best way to do it. you’ll see in the different stage images.)

9. gently lift the swab away from the sensor (when you have reached the starting point of course)

10. dispose the used swab, no use in re-using the swabs, they are full of sticky dirt now.

11. switch of the camera, this should close the shutter and lower the mirror

12. put a lens on, and check the results. Repeat if necessary.

I used four swabs per camera, that’s because I’m a total beginner in sensor cleaning. I feel comfortable now to say that 3, maybe even 2 swabs should do to clean a sensor.

result after cleaning: You’ll still notice some dirt spots, but I can live with that for now (it was late yesterday evening, and I had to eat 😉 )

Also have I set the visualize threshold high, so you can see even the smallest spot of dust.

Screen Shot 2014-01-06 at 11.07.33

Camera 2, before cleaning:

Screen Shot 2014-01-06 at 11.09.22

And after cleaning:

Screen Shot 2014-01-06 at 11.09.37

Not perfect, but for a first attempt very much ok with me.

see you soon, I’ll be posting another ‘at the Mansion’ shoot very shortly,

take care

Ludwig

Nathalie M. at the Mansion

beauty, Personal Pictures

Still working hard at the mansion, doing natural beauty shoots whenever I find the time.

I never prepare these shoots I must tell, I prefer working into the magic of the moment, and taking instantaneous decisions based on the conditions of that day, based on the mood I am in, and the model I am working with. The results are varying of course, but always a true result of a spontaneous collaboration. The mansion is still being renovated, and some places are unusable, while others are near finished. I can’t but express my feelings of joy for being able to expose my work in the mansion soon. I will try to show the images in the same place they were taken, to make a direct link with the building and the atmosphere that reigns in every room.

enough talking, here are the images. Thank you Nathalie, for being my model that early morning, thank you to the owners of the place, for letting me in.

All images with Canon 5D mark II and Canon 50mm f1.4, Canon 85mm f1.8 and Canon 135mm f2 L. Processing in Lightroom 5.

charlemagne-art_NathalieM-0925

charlemagne-art_NathalieM-0934

ludwigdesmet_NathalieM-0979-F

charlemagne-art_NathalieM-1022

charlemagne-art_NathalieM-1112

charlemagne-art_NathalieM-1144

charlemagne-art_NathalieM-1161

Thank you for watching, come again soon!

ludwig

Amsterdam Highlights

Personal Pictures

In my ‘highlights’ series, I had Barcelona and twice Paris (I) and (II), this time I visited Amsterdam hit-and-run style (about 24 hours between arrival and departure)

In short:

Bikes, old and new architecture, canals, (missing) prostitutes, a lot of wind, (noisy) dutch people, good company … and a restaurant cat.

Oh I love strolling around in a big city, taking pictures, watching people, searching for good subjects and good light.

I don’t wanna spend a lot of words on this one. I enjoyed my walks, I hope you enjoy the pictures.

I have taken these pictures with the only lens I had with me, Canon 50 mm f 1.4. It is a challenge worth taking. Take only one lens, look for subjects, frame them.

charlemagne-art_amsterdam-9669

charlemagne-art_amsterdam-9673

charlemagne-art_amsterdam-9674

charlemagne-art_amsterdam-9676

charlemagne-art_amsterdam-9679

charlemagne-art_amsterdam-9681

charlemagne-art_amsterdam-9685

charlemagne-art_amsterdam-9687

charlemagne-art_amsterdam-9701

charlemagne-art_amsterdam-9718

charlemagne-art_amsterdam-9723

charlemagne-art_amsterdam-9727

charlemagne-art_amsterdam-9732

charlemagne-art_amsterdam-9740

charlemagne-art_amsterdam-9757

charlemagne-art_amsterdam-9759

charlemagne-art_amsterdam-9769

charlemagne-art_amsterdam-9773

take care, and come again soon. There’s quite some beauty shoots on the planning.

Ludwig

The best possible add-on for your dslr.

beauty, Personal Pictures, photo gear

I give evening classes for adults, teaching them the very basics of photography. They learn about aperture, shutter speed and iso settings, the basics of composition, light metering, Depth of Field, how to handle their camera etc. …

In about 5 months, they become a bit more aware of the ins and outs of digital photography.

Soon, after a couple of months, the same question comes up in every group: ‘I’m willing to invest in some more equipment, what should I buy?’.

You should see this question in the understanding that most people bought a DSLR (digital single lens reflex) without any technical knowledge about photography, and mostly they have followed the sellers advice of buying a body and a kit-lens (or two kit-lenses).

These zoom kit-lenses generally have a maximum aperture of about f 1:4.0 closing further down to f1:5.6 on zooming.

Especially when we talk about DOF (depth of field) and the relation between the aperture setting and the span of depth of field, my students quickly realize that with their zoom lenses with relatively small maximum apertures, they will never get the result they want.

A bigger aperture setting gives a more shallow depth of field, this means that the bigger your aperture is, the blurrier the background will be. An effect often sought after, to make the subject ‘pop up’ from the background.

So my advice mostly is: ‘buy yourself a good portrait lens, that is a fixed focal length lens, 50 mm for a camera with crop sensor, 85 mm for a full frame camera. It’s cheap, it’s lightweight and small, you can shoot in low light conditions, because the big maximum aperture lets in a maximum amount of light, and it will allow you to work creatively with the shallow depth of field it can give you.’

The best value for money you get with a 50mm f1:1.8 lens, which will cost about 120 € in Canon and Nikon.

Some examples with my Canon 50 mm f1:1.4

charlemagne-art_50mm-1794

charlemagne-art_50mm-1826

charlemagne-art_50mm-6546

charlemagne-art_50mm-6976

charlemagne-art_50mm-7821

charlemagne-art_50mm-8226

see you soon for more pictures!

Take care and happy shooting!

Ludwig

Paris Highlights II

Personal Pictures

Last weekend I was in Paris again, for a short break of one and a half day.

I was there with the family, and we strolled around a lot. my kids got to see the Moulin Rouge, place Pigalle, the Sacré Coeur with place du Tertre, we visited an exhibition at the Institut du Monde Arabe, we saw the Panthéon, the Jardin the Luxembourg, visited the Tour Montparnasse and we walked a lot!

I’m not so much into the classical pictures of monuments and all, but couldn’t resist to include some of them. I love the city atmosphere and the typical details you get to see in Paris.

Imagine a gray overcast sky, chilly but not cold, horns tooting everywhere, and the constant chatter of the Parisians.

I hope you get a feeling of being there, at least a little.

All pictures taken with Canon 5D II and Canon 50mm 1.4. All images can be clicked for a bigger version.


Parisians love dogs, apparently. There’s dogs on every quay, in every park.

ludwig_desmet_academie-6731


The institute of the Arabic World held an exhibition on the stories of 1001 nights. This was a listening area, where one could sit down in almost complete darkness and listen to the spoken versions of the stories. Next is the facade of the building, and a metal sculpture.ludwig_desmet_academie-6739

ludwig_desmet_academie-6746

ludwig_desmet_academie-6747


Nightlife in front of the Sacré Coeur chirch, and then down towards the place Pigalle. Made me think of the movie ‘Midnight in Paris’.ludwig_desmet_academie-6756

ludwig_desmet_academie-6760

ludwig_desmet_academie-6762

ludwig_desmet_academie-6767


The banks of the Seine, with the Notre Dame, and next the Panthéon, the Jardin de Luxembourg and the magnificent view from the Tour de Montparnasse. No queue, and I believe it to be cheaper than the Eiffel Tower.ludwig_desmet_academie-6769

ludwig_desmet_academie-6776

ludwig_desmet_academie-6778

ludwig_desmet_academie-6789


The woman felt my presence. She suddenly looked back at me.ludwig_desmet_academie-6781The ambiance in the restaurants and food almost as good as in Belgium. 😉ludwig_desmet_academie-6804

ludwig_desmet_academie-6806

The Mansion Shoot – prt II – The mirror & Curtain play

beauty, people, Personal Pictures

Hi,

I promised you to post another part of the shoot today, so here it is.

This house is really full of marvelous decoration elements, so we tried to make use of them. The floor is covered up with thick plastic sheets, to protect it from damage during restoration works, so that was the only thing to avoid. some of the curtains are gone, but in this very particular room they are still there, and they offered a lot of different possibilities.

I hope you enjoy the images. I hope you are not bothered with the mild nudity in some of them. If you are bothered by the nudity, please continue here and have fun.

All images can be clicked for a bigger view.

Next week I’ll publish the last part of this shoot: The upper floor. Happy viewing!

see you soon!

The Mansion shoot – Prt I – the directors office –

beauty, Personal Pictures

A week ago I had the opportunity to shoot in beautiful mansion style house. The building is from the first half of the 20th century, and full of splendid decorative details that make for a perfect setting for beauty shoots. I had never shot there, only visited it once for a very short moment, so it was new to me.

I had Pauline for a model. We never met before. Actually her mother linked the two of us together to get a shoot organized. We discussed some things over FB about the style and the mood we would work in. I sent her two mood boards I made before: Natural beauty and clothed sexy. I’ll leave it up to you what genre the results best fit into.

Pauline has some previous experiences with modeling work. She has a well sculpted muscular body and beautiful blue eyes. We worked together for about three hours, finding our ways trough the house. It is not really big despite its appearance from the outside, and currently undergoing restoration. This made for an extra challenge to cover that up. (ladders, floors being covered with protective sheets, bags of old tapestry all over the place, tools, etc.)

All images taken with Canon 5D II, with Canon 24 mm 1.4 L II, Canon 50 mm 1.4 and Canon 85 mm 1.8. No artificial lights were used (except for the desk lamp). In some settings an extra Lastolite Trigrip reflector was used. Some minor touchups have been done in Lightroom 4. Mainly getting back highlights in some pictures and adding some contrast here and there. The sepia tinted images all got some extra contrast.

Click for a bigger view!

Thank you Pauline, for this wonderful shoot, and a big thank you to the owners of the house, who willingly gave me access.

Next week I will post the second part of this shoot – the mirror & curtain play – so come again soon.

thanks for reading

Morning mood in old villa.

people, Personal Pictures

Hi there,
I’m very pleased to be able to share these images with you.
I did a model shoot with Lien, in the old villa where I shot the urbex shoot some weeks ago.

I did a call for models some weeks ago, on my Facebook Page, asking for models for a ‘natural beauty’ shoot. No make-up, no special hairdo, no flash or other light accessories. Just a female model, some sensual female clothing, a nice location and limited photo gear. Lien was happy to volunteer. Thank you Lien, it was a pleasure working with you, and you did really well!

Lien has never posed before, she’s a mother of two young boys and just a regular mom and wife. I think it is important to tell you this, because I want to stress on the fact that for a good shoot, you don’t need any specific experience or training. It is the photographers task to talk his model into the right poses, and I think we worked together very very well. I knew Lien before, she’s a daughter of a couple of good friends of mine, so she was quite relax from the beginning of the shoot, that helped of course. But, it could have been anyone, … really.

We have worked with some different clothing sets, in different rooms of the villa. It is really a wonderful place to work in as a photographer. I would like to say thank you here to Dirk, owner of the house, to let me in for these shoots. Thank you Dirk.

I will not tell a lot more about this shoot, except that we worked together for about two hours, we had great light, good atmosphere, and we could easily start all over tomorrow and come with another complete set of fine pictures.
All images taken with my Canon 5D II, and Canon 50 mm f1.4, Canon 85 mm f1.8 and Canon 135 mm f2.0 . I love fast lenses and wide open apertures. A limited gear setup like this allows working fast, and concentrating on poses and light. Post processing was done in Lightroom 4, that took me another 2 and a half hours for the entire set of 115 selected images. I’m sure I could work more on any of the images, but I’m not that picky on details. 😉

Click on any image to view a larger version.


Comments are most welcome!

My website: charlemagne-art

Hope you come back soon!

Ludwig

low light model shots

people, Personal Pictures

Did a shoot tuesday afternoon in Ghent, with model Annelies.
We got so cold during the shoot that we decided to go for a coffee late in the afternoon. Good moment to test my new 50mm 1.4. Very little light, not too much place for moving around. These are the results (heavily tweaked in LR I admit), think I’m gonna love my new lens.


All images wide open at f 1.4, 1/30th of a second, ISO 640.

Battle of the 50’s

Personal Pictures, tests

Hi,
last week I bought a new 50mm lens from Canon. I had the 50mm f1.8 II before, but sold it last week, and I bought the 50mm f1.4 USM. Did I make the right decision? Time to find out.
So after my excellent, quick’n dirty test for the 85mm lenses, time to have the 50mm’s compared.
The images are rather big for your convenience, sorry about the download time.

On the left the 50mm f1.8 II selling for 90 Euros, on the right the 50mm f1.4 USM, selling for 299 Euros. (prices Art&Craft – Ghent jan. 2012)

Just before I shipped my old 450D and the nifty fifty (or fantastic plastic) I took some comparison shots with both of them.
All images are taken on tripod, with a Canon 5D II, with Live view magnification for focusing (manual mode). White balance set to 5600 (flash). The images have not been processed, except for my standard processing settings at Lightroom import, so they all present in the same way. All images are saved jpg compressed, quality setting 11, from Photoshop, with sRGB IEC61966-2.1 profile attached, I don’t know what happens to the profile when publishing to WP.
I have chosen my subjects in a way to provide some real-life hard time situations for the lenses. Any comments welcome, suggestions, or if someone, or some big company wants me to do some tests on other lenses, please give me a sign. All images are done in my backyard, no exotic things going on here.

Now for the results, I will post some personal ideas, but you don’t have to agree on them, just my opinion.

Vignetting test


Some heavy vignetting on both of them, in my opinion a bit better for the 1.4 at 1.8. Note the color difference between the two lenses.

Sharpness test Same setup as vignetting pictures, 100% crops, click on the image to view full size.
Center:

Edge:

To me the 1.4 seems sharper on the entire line. I know a lot of tests seem to give opposite results and quote the 1.8 higher than the 1.4. A lot gets lost in the corners due to vignetting, but the center crop looks crisper on the 1.4.

Sharpness test2
Entire scene:

100% crops, click on the image to view full size.
Center:

Edge:

Here too I think the 1.4 is a tad sharper. This can be due to better contrast too. Same in the edge as in the center, although it is hard to see some difference at bigger apertures.

Flare test I forgot to do a test at 1.8 for the 1.4. So both of them are wide open shots.

The 1.4 clearly has more flare here, but also keeps a little more contrast in the center of the image. The cheap 1.8 does very well. I will take a shot at 1.8 with the 1.4 as soon as we get some sun in the morning.

Bokeh test Two different scenes, each time I show background and foreground bokeh. Sorry about the leaf that moved. These crops are at 50%, because in a 100% crop I couldn’t present enough image. You can see the entire shot in the top-righ corner.


To me there’s really very little difference, except that on the 1.4 you have a little softer when wide open, seems normal to me. On the other hand, when you look at the second sample you start seeing one of the biggest problems with the 1.4, purple fringing on the highlight edges.

Chromatic aberration and purple fringing center and edge crops at 100%. Note that the second image for the 1.4 is at f2.2

Entire scene:

Center crops:

Edge crops:

Ouch, that really really hurts! Never seen it soooo bad! Here the cheap nifty fifty clearly wins hands down. I made a little mistake, taking my second shot at 2.2 in stead of 1.8 for the 1.4, and it still is worse than the 1.8.
Also remark that both lenses loose contrast when stopping down too far. The branches are softer at f14 than at f7.1. I didn’t really got the image perfectly sharp with the 1.8 but I think the message is clear enough here. With the 1.4, CA on the edges never completely disappears until f14, and then contrast is gone already.

Personal conclusion
Am I happy with my new purchase, I don’t know yet. Practical use will need to prove.
– – – –
It has some serious problems with the purple fringing and Chromatic aberration, as well as with flare, compared to the nifty fifty.
It’s more expensive than the 50mm 1.8 (which really is a cheap lens for the image quality offered)
+ + + +
The sharpness results please me though, although I had read not so good reviews before, for me it is sharper than my copy of 50mm 1.8, and a little more contrasty.
It has USM autofocus, which is way faster and more accurate than the micro motor in the 1.8
It is more solidly built than the 1.8, which even has a plastic bayonet.
It is 2/3’s of a stop faster.
It is still quite cheap for a fast prime, at less than 300 euros.

Thank you for reading!

Ludwig.