Charleston, for something a little different

beauty, location, personal tips & tricks, Tips and Tricks


it is always good to see that models bring their own ideas and clothing along on a shoot.

Next to being a source of variation and new ideas, it can also be a challenge do make something work that was not really in your mind-set when you started the shoot. We had shot early that afternoon in ‘the orphanage’, a huge former orphanage I guess, now rented as guesthouse for large groups. The weather was very dull and grey, and besides that it was raining and cold. Not really a nice environment to be in as a model. Rachel also brought some ‘Charleston inspired’ clothing and accessories, and we tried them out in my own home space. As there was very little light, and I wanted to create an evening atmosphere, I switched on the ambient lights in the hallway and staircase. These lights being very dim and not really at an ideal height for lighting a model. I rather not use flashes as they make the setup cumbersome and slow, but here I could not do otherwise, so I also installed two monobloc studioflashes. You clearly see the effect of one light (right of the model – 80cm octa) the other one is left of me, (60×60 softbox) in the room next to the hall way (there’s a triple entry door with glass inserts that filters the light softly into the hallway). The flashes are both at low power settings since I still wanted to use a rather wide aperture, for less depth of field. there’s a light setup at the bottom of this post.


the image is shot at 1/125s f2.0 ISO200. Canon 5Ds with Sigma 50mm Art. By using flashes I managed to dim the daylight even further, to an acceptable level that just keeps a small reminder of the structures in the window framework at the end of the hallway.


A big thank you to Rachel, for being my model on this day, and to Nathalie, my lovely assistant.


light setup:


bathroom elegance

beauty, location, Nude, personal tips & tricks, Tips and Tricks

I had a hard time figuring out how to pose Riona in the bathroom, but once I decided to get her feet warm in the bathtub, things all became simple. See this link for a behind the scene’s movie from this shoot: BTS with Riona Neve.
Not only is Riona a charm to work with, she also has a wonderful figure, and we worked out some fine poses in this setting.
These are my favourites from this series, I hope you like them as well.

The light is not modified in any way, there’s the large visible window at the left side, there’s a similar window right from the bathtub. This semi-back light gives a very fine definition of the volumes on the body. The windows are tinted slightly green, I left the image colours to reflect that in the final developing. It matches well the green curtains and wall colour.

image settings below,

cheers,

ludwig


Canon 5Ds with Sigma 50mm f1.4 DG A

1/30s f2.0 ISO400 – beware of camera shake!!

… and then she started wondering …

beauty, location, Personal Pictures, personal tips & tricks, Tips and Tricks

… and then she started wondering, why she didn’t get these letters he promised to send her. Was he killed in battle? Had he forgotten about her, or probably he couldn’t find the time to write to her. These questions filled her with doubt and restlessness, even more because she was unable to reach to him …

Shot on a one-to-one workshop with Sacha Leyendecker in his available light studio.

Model and make up: Rubia Stri

Photography: me for sure.

shot on canon 5Ds with Sigma 50mm f1.4 DG A

settings for the main image: 1/80s f2.0 at ISO800

and then especially for Valentine’s day, complete series:


What I’ve learnt from the workshop:

Don’t be afraid to shoot at higher ISO settings if you need to to keep your shutter speeds safe. Play with light to create volume and atmosphere. Get some music into your studio to set a good mood. Create visual triangles in your images for dynamic compositions. Use props to create a setting and invite the viewer to imagine his/her way into the story.

What I didn’t agree on with Sacha (sorry Sacha, I think our styles are rather different, so the approach is different too): he told me to just have the model do whatever she likes to do, and what she feels comfortable with. I tend to interfere more with my model, and direct in certain ways (I also often work with non-professional models, maybe that’s why. Pro models are very much aware of what they look like, and how to move to get good shots).

I was very pleased with the results of the workshop. I was happy to meet Rubia, who is from Brussels by the way, and I had a very pleasant day for sure! Thank you Sacha, thank you Rubia!

thank you for watching.

How I work – Behind the scenes with Riona Neve

beauty, Interesting Links, location, Nude, personal tips & tricks

I decided to make some more film material for my followers and for use on social media lately, and this was an excellent occasion to give it a first try. A real behind the scenes movie of one of my latest shoots. No mise-en-scene, no repeated scenes, … just the real thing. Nathalie was both assistant and camera-woman, so filming got interrupted at moments. The quality is not superb (very dull and gray day, and bad light, mediocre camera), but nevertheless I think you might enjoy watching this.

Attention, the video contains shots which depict a beautiful woman nude, … some might rate it 18+, I think it is fit for all ages 😉

Ludwig Desmet – fine art shoot with Riona Neve

If and whenever you think this is interesting material, let me know. If you would like to sponsor my work, you can give me a sign also or drop a coin on paypal info@renderhouse.eu  🙂

The images from this shoot will follow soon on this blog, so be sure to check in again soon.

thank you for visiting,

ludwig


dust in the wind …

landscapes, Lightroom, location, Personal Pictures, Tips and Tricks

… nothing lasts forever but the earth and sky


Milky way over Fort Mahon (Ambleteuse France)


ludwigdesmet

the recipe:

  1. Find yourself a group of crazy photography students, willing to go out at night in freezing temperatures for yet another experiment. Cover up well. Provide yourself with a headlight.
  2. Look for a low light environment, some kind of deserted landscape, no cities around. (This only half worked out, the Fort is near the village of Ambleteuse, hence the brightly lit right side of the building)
  3. find yourself a nice location that can serve as a foreground: A Fort, pebble beach, some straying rocks will do. Use your headlight to find your way around. (things will be black out there)
  4. Locate the milky way in the sky (if you have fulfilled step 2. of the recipe it should be visible to the naked eye), put up your sturdy tripod and compose. Fix your tripod well.
  5. Take some pictures (settings here: 10sec f1.4 ISO1600) I took a panorama of 5 images vertically. Taken on a Canon 5D mark II.
  6. Merge images in Lightroom (you’ll keep a RAW editable file). Post Process if needed. It probably will be needed, I played with exposure, contrast, blacks, white balance, …
  7. Sit back and start counting the stars.

grtz,

Ludwig

Bedroom mood – with Rubia

beauty, Nude, personal tips & tricks

as a final setup on the Sacha Leyendecker workshop (yes, I can still learn a lot too) we had a mattress and some white bed linen and a very enjoyable – wasn’t it Rubia? – down bed cover.

I tried to create an atmosphere of comfortable well being in this series. Rubia is a professional model and she understood the idea well. The advantage of professional models is that they know very well how to move to have a good looking pose, the downside of it can be that they are very hard to be photographed as their real personality. They often get some kind of ‘model layer’ that gets in front of their person. This was not the case with Rubia. We had a long talk before the shoot, that helps to get barriers down. We both got very relaxed before the shoot started. I rather have the habit of giving quite some direction to my models, Sacha asked me to try to let Rubia do her own thing, easier said than done, this set is the result of a mixture of ‘self induced posing’ and ‘directed posing’. See here for the technique used to create the high key effect.

Bad lighting conditions (dark) which means high ISO settings, but a nice set after all.


Bedroom mood

ludwigdesmet_rs-3918

ludwigdesmet_rs-3928

ludwigdesmet_rs-3924

ludwigdesmet_rs-3938

ludwigdesmet_rs-3934

ludwigdesmet_rs-3948

All images Canon 5Ds with Sigma 50 mm f1.4 A DG

1/60 f2.2 ISO 2000

Thank you for watching, come again soon,

ludwig

www.rubiasworld.com

www.sachaleyendecker.com

Camera calibration explained – part I

Lightroom, personal tips & tricks, Tips and Tricks

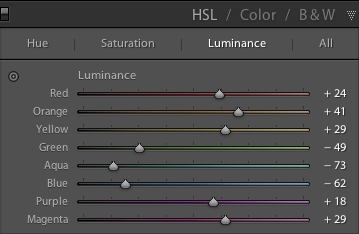
One of the often overlooked features of Lightroom is the camera calibration tab.

Camera calibration optimises the way Lightroom will interpret the RAW files of your specific camera. It reorganises the colour values in relation to a pre-defined target, and the way your camera reproduces this target.

In very short, RAW files do not have a colour profile embedded, nor do they contain a predefined color reproduction definition. It is up to your raw-editor to interpret the raw files and do some kind of a pre-development when importing and previewing on screen.

Current Lightroom versions use the ‘Adobe Standard’, or one of the options also available in your camera image settings modes (with Canon, this is for instance: Camera faithful, landscape, portrait, standard, … )

This is no guarantee for a correct reproduction of colours or brightness values.

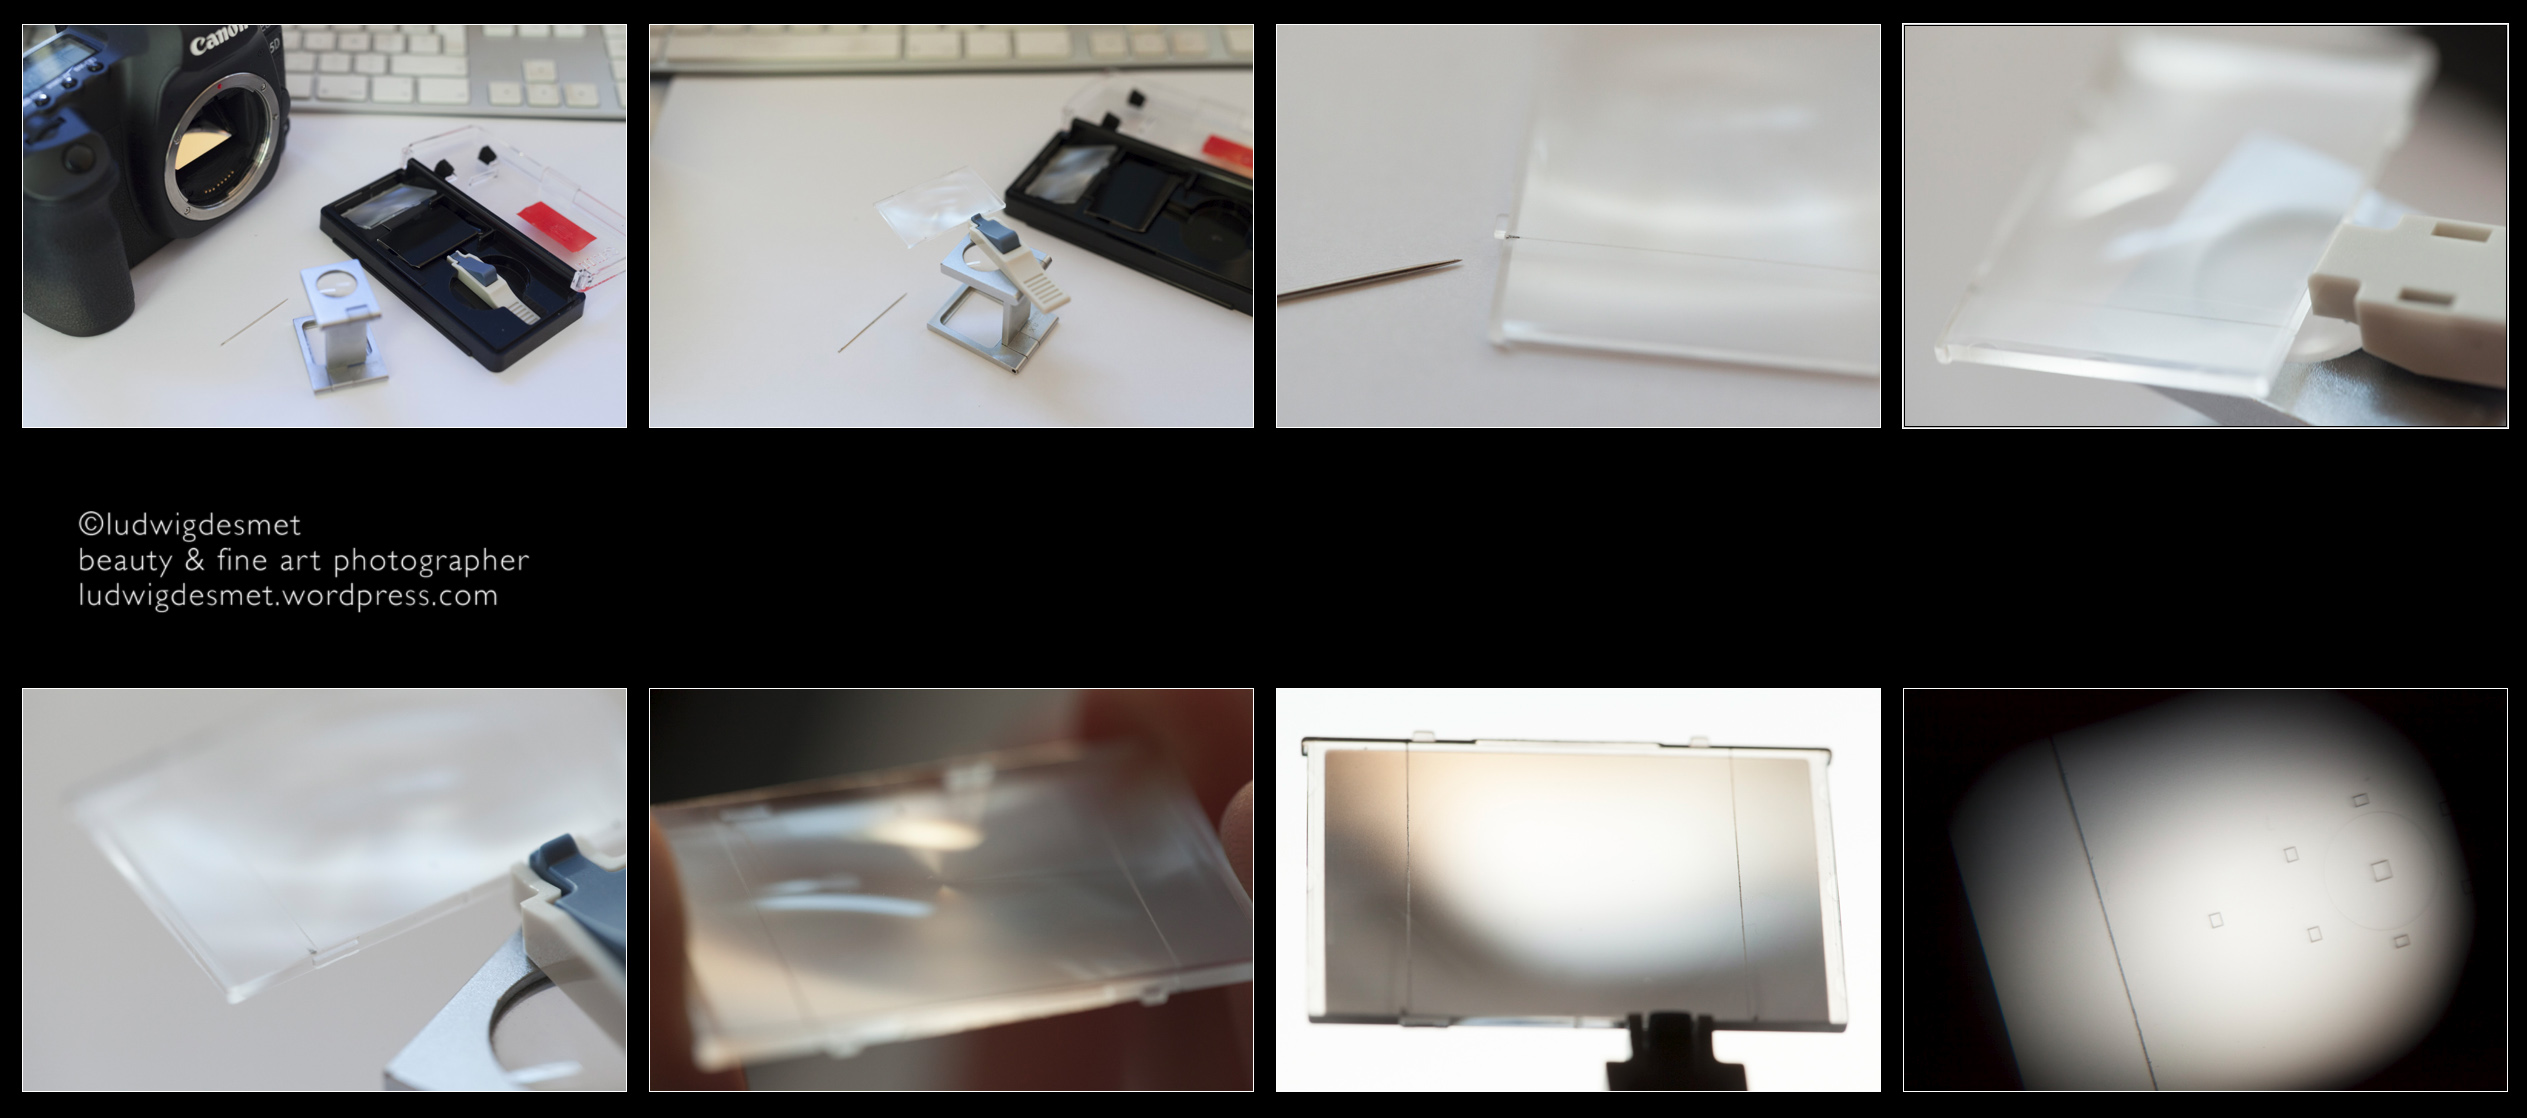
In comes the camera calibration tool. I have the colorchecker passport photo from X-rite. This is a combination of a small piece of hardware (a plastic booklet with 2 screen printed colour target sides and a white face) and a piece of software to be installed on your system.

The simplest way of doing a camera calibration is a single light situation calibration, in which you take a picture in the light situation you will use for your images, including the colorchecker target. Take care the target is lit by the same light as your images that follow.

After that, shoot your images.

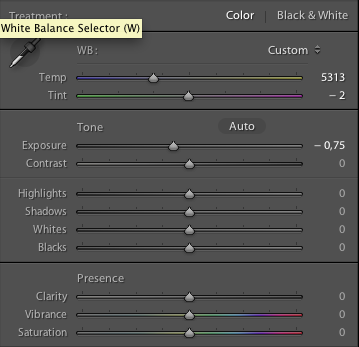
In Lightroom, you will need the first image with the target included to make build your camera profile. This is very simple by selecting the image -> export -> Colorchecker passport. This will automatically compare your camera’s ‘target reproduction’ with the target’s known values in the software, and build a ‘custom camera profile’ for you to start with. The new profile won’t show up until restart of Lightroom. (there are certainly more detailed step by step explanations on Youtube 😉 )

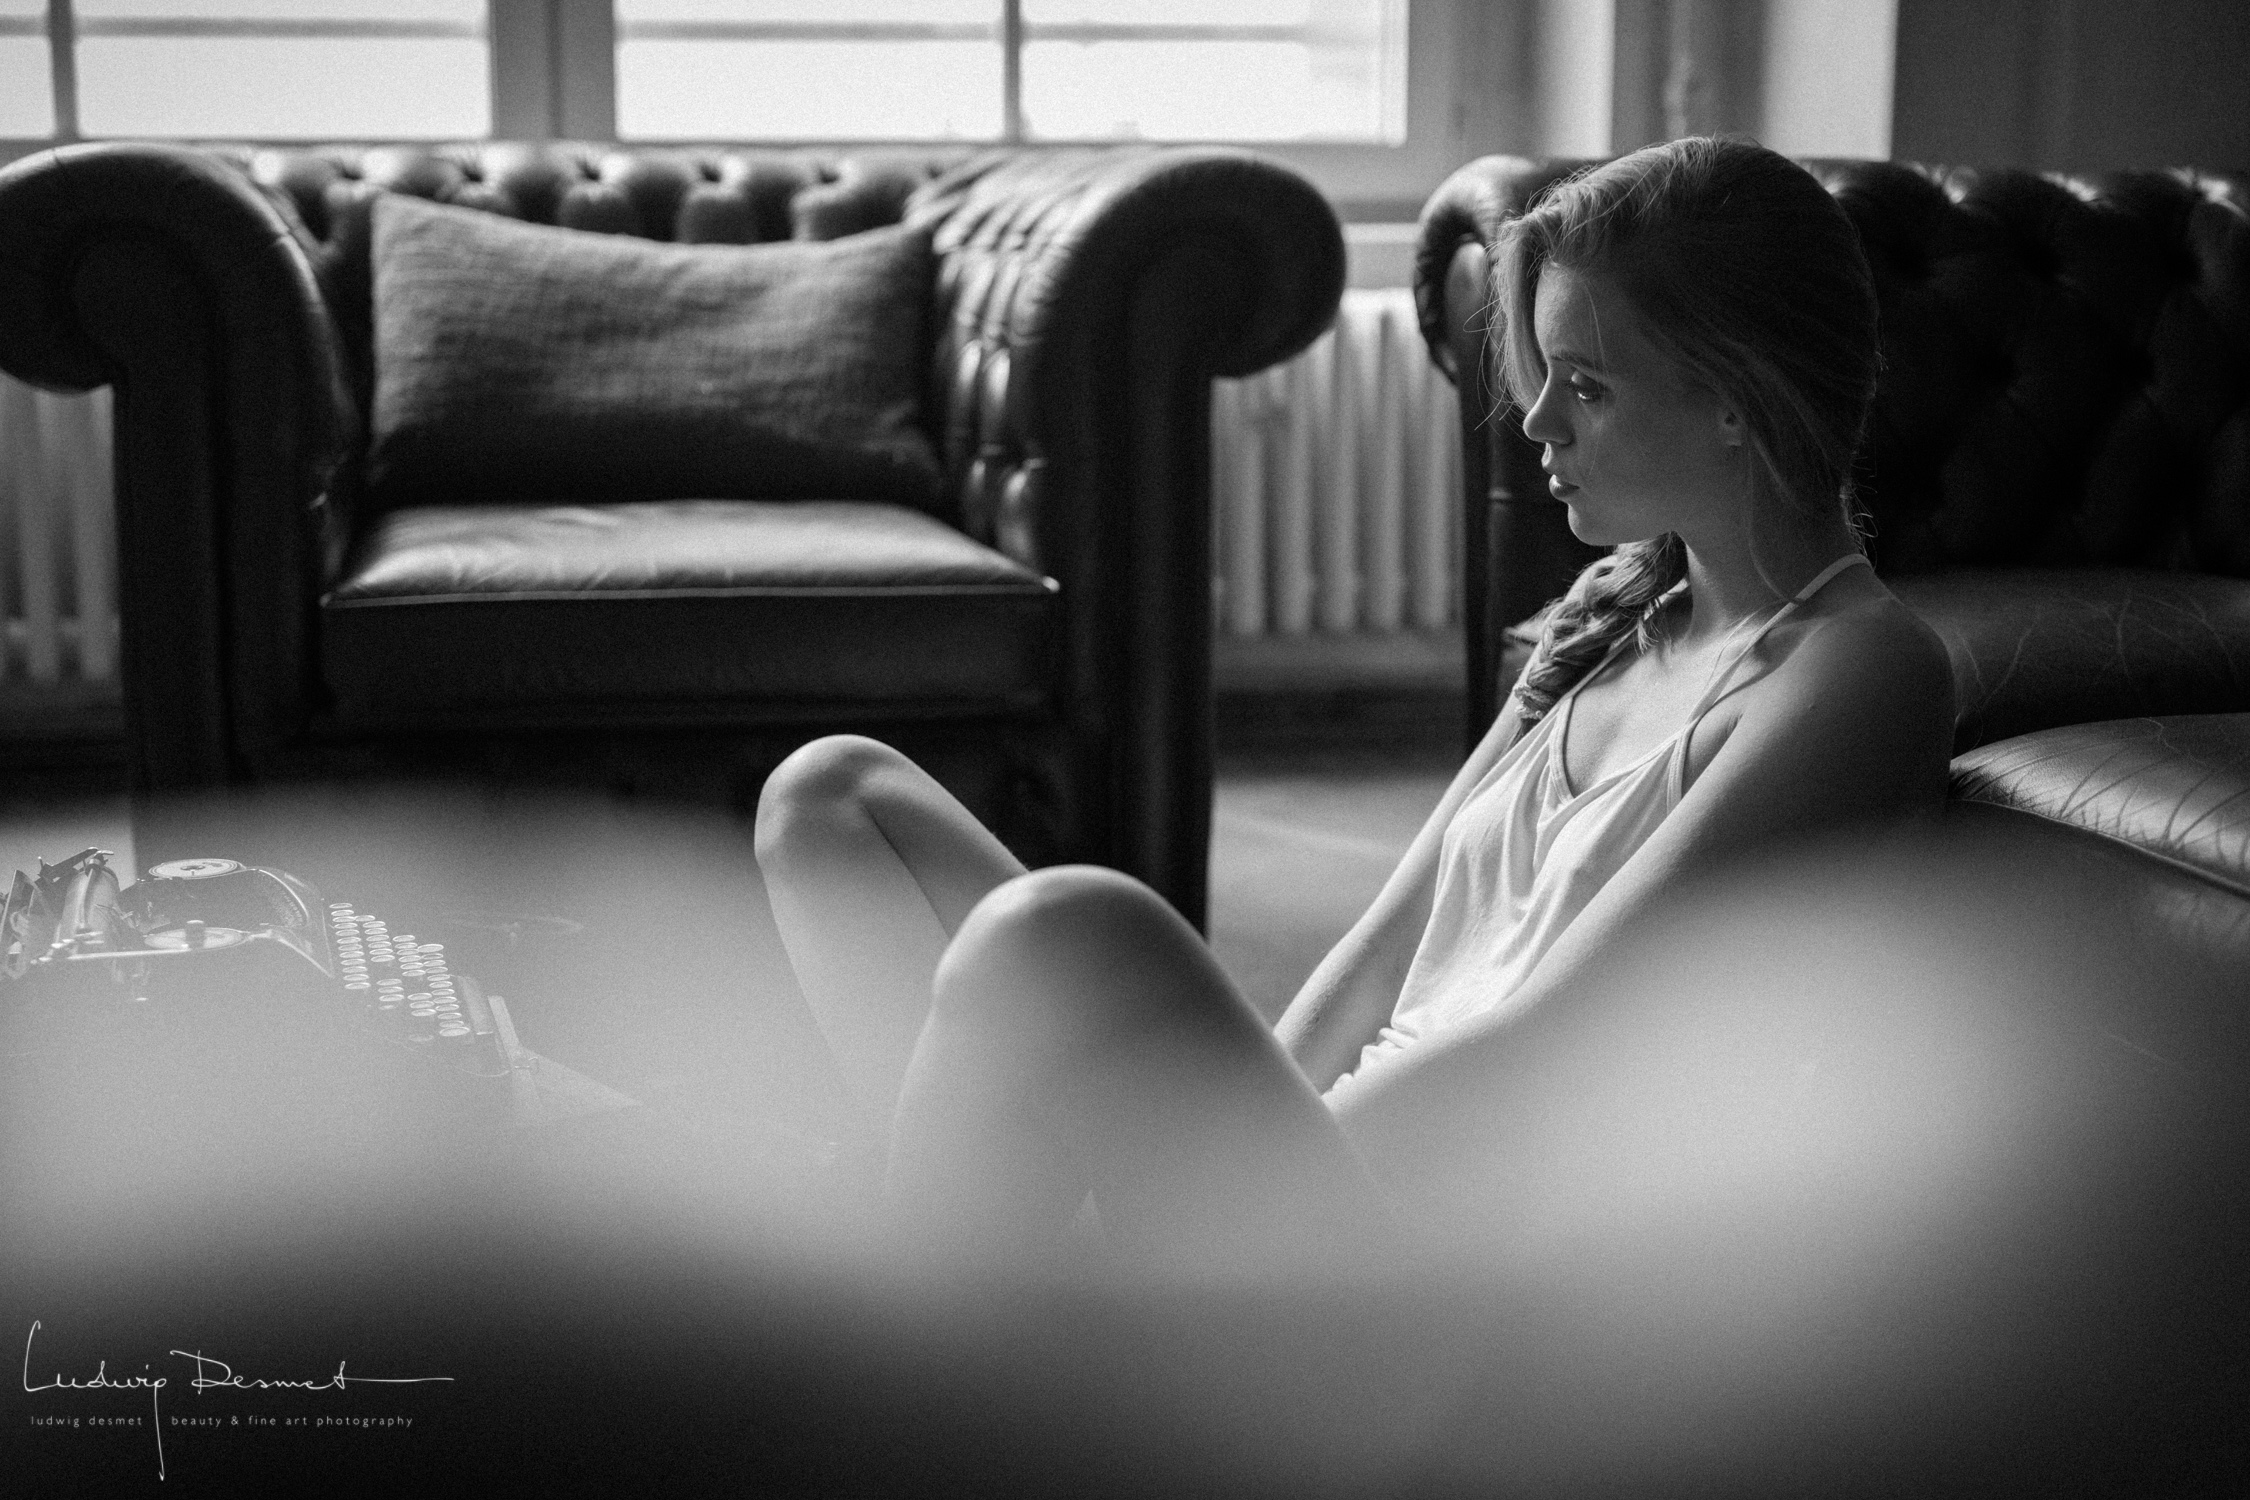
Below you can see the target without and with the newly activated camera calibration.

target change split

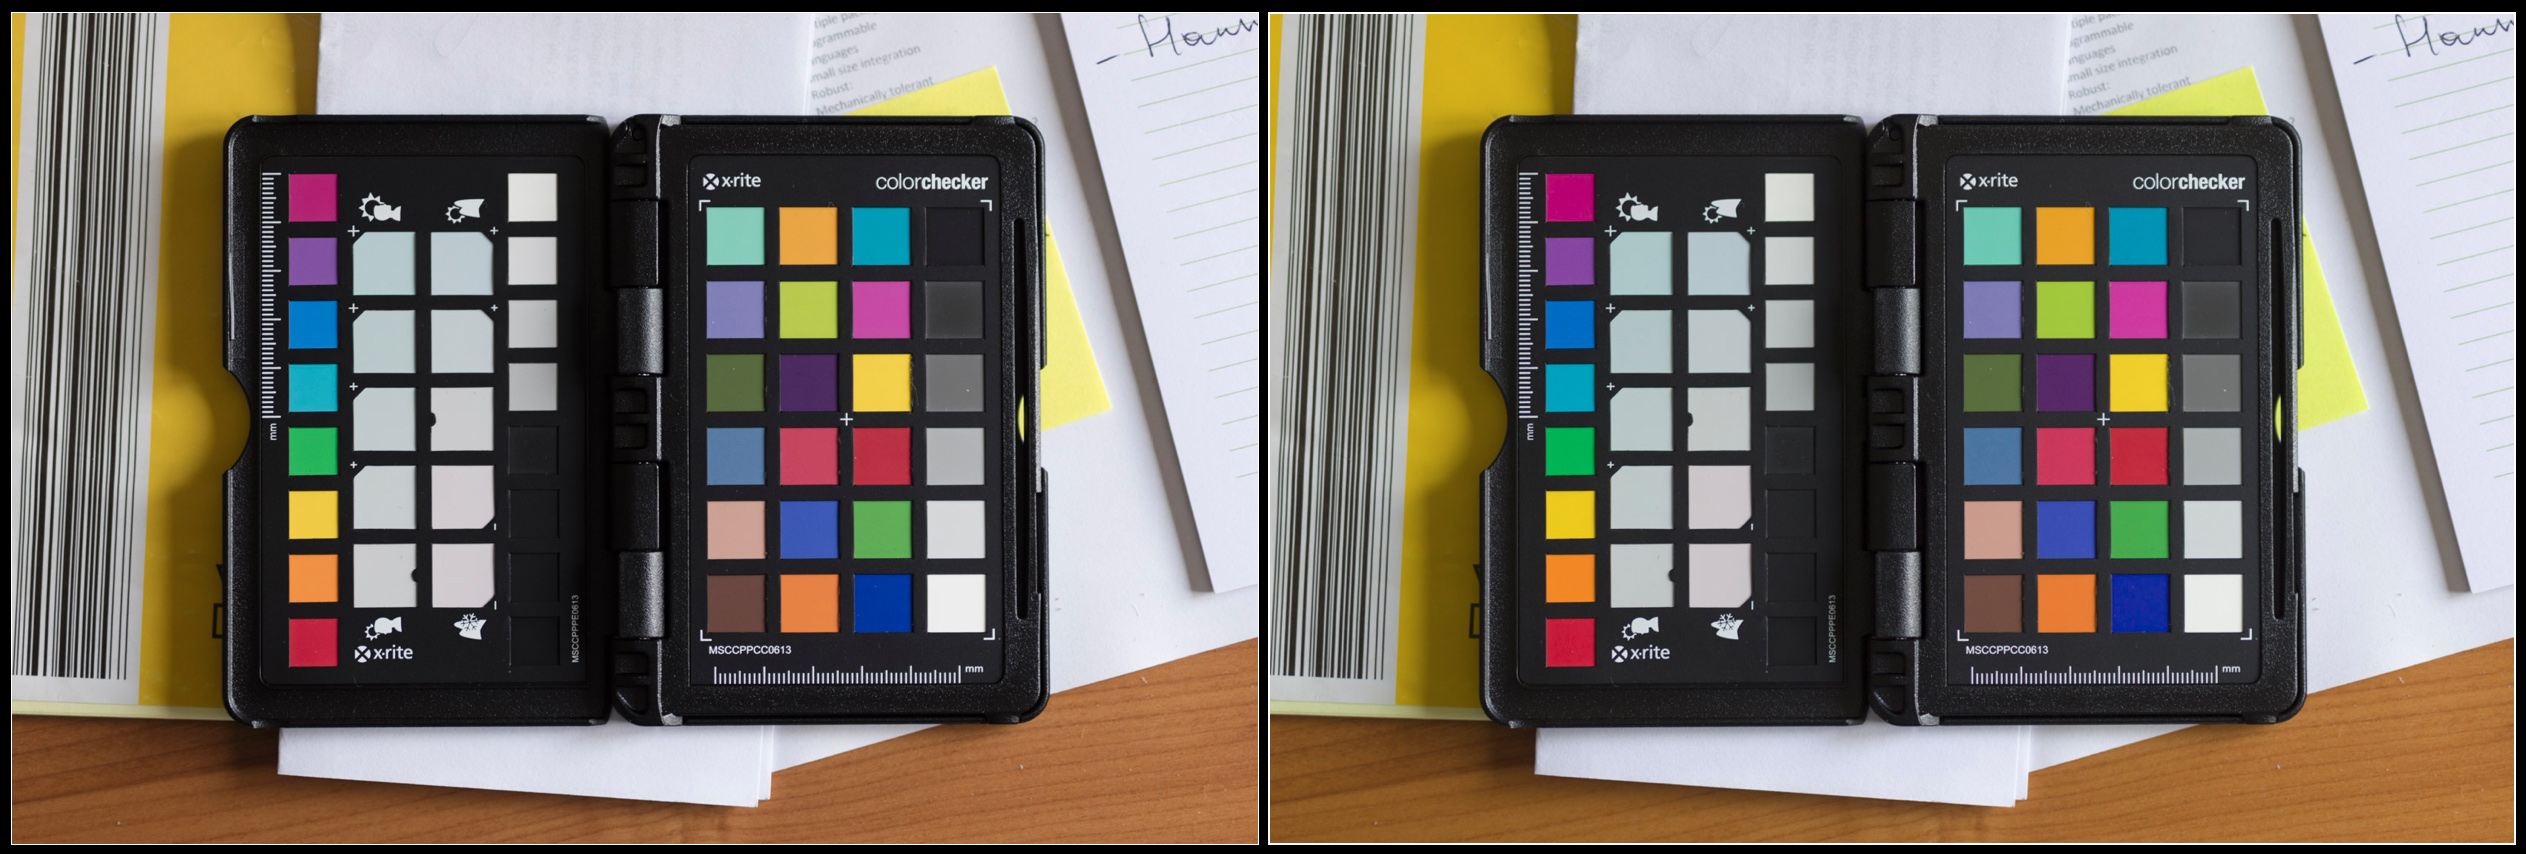
not a big deal you’ll probably say, and this camera is indeed rather color-correct compared to some others I’ve seen. To make things more obvious, I placed both images onto each other, and made a layer mask to cover up half of the targets:

target change half-half

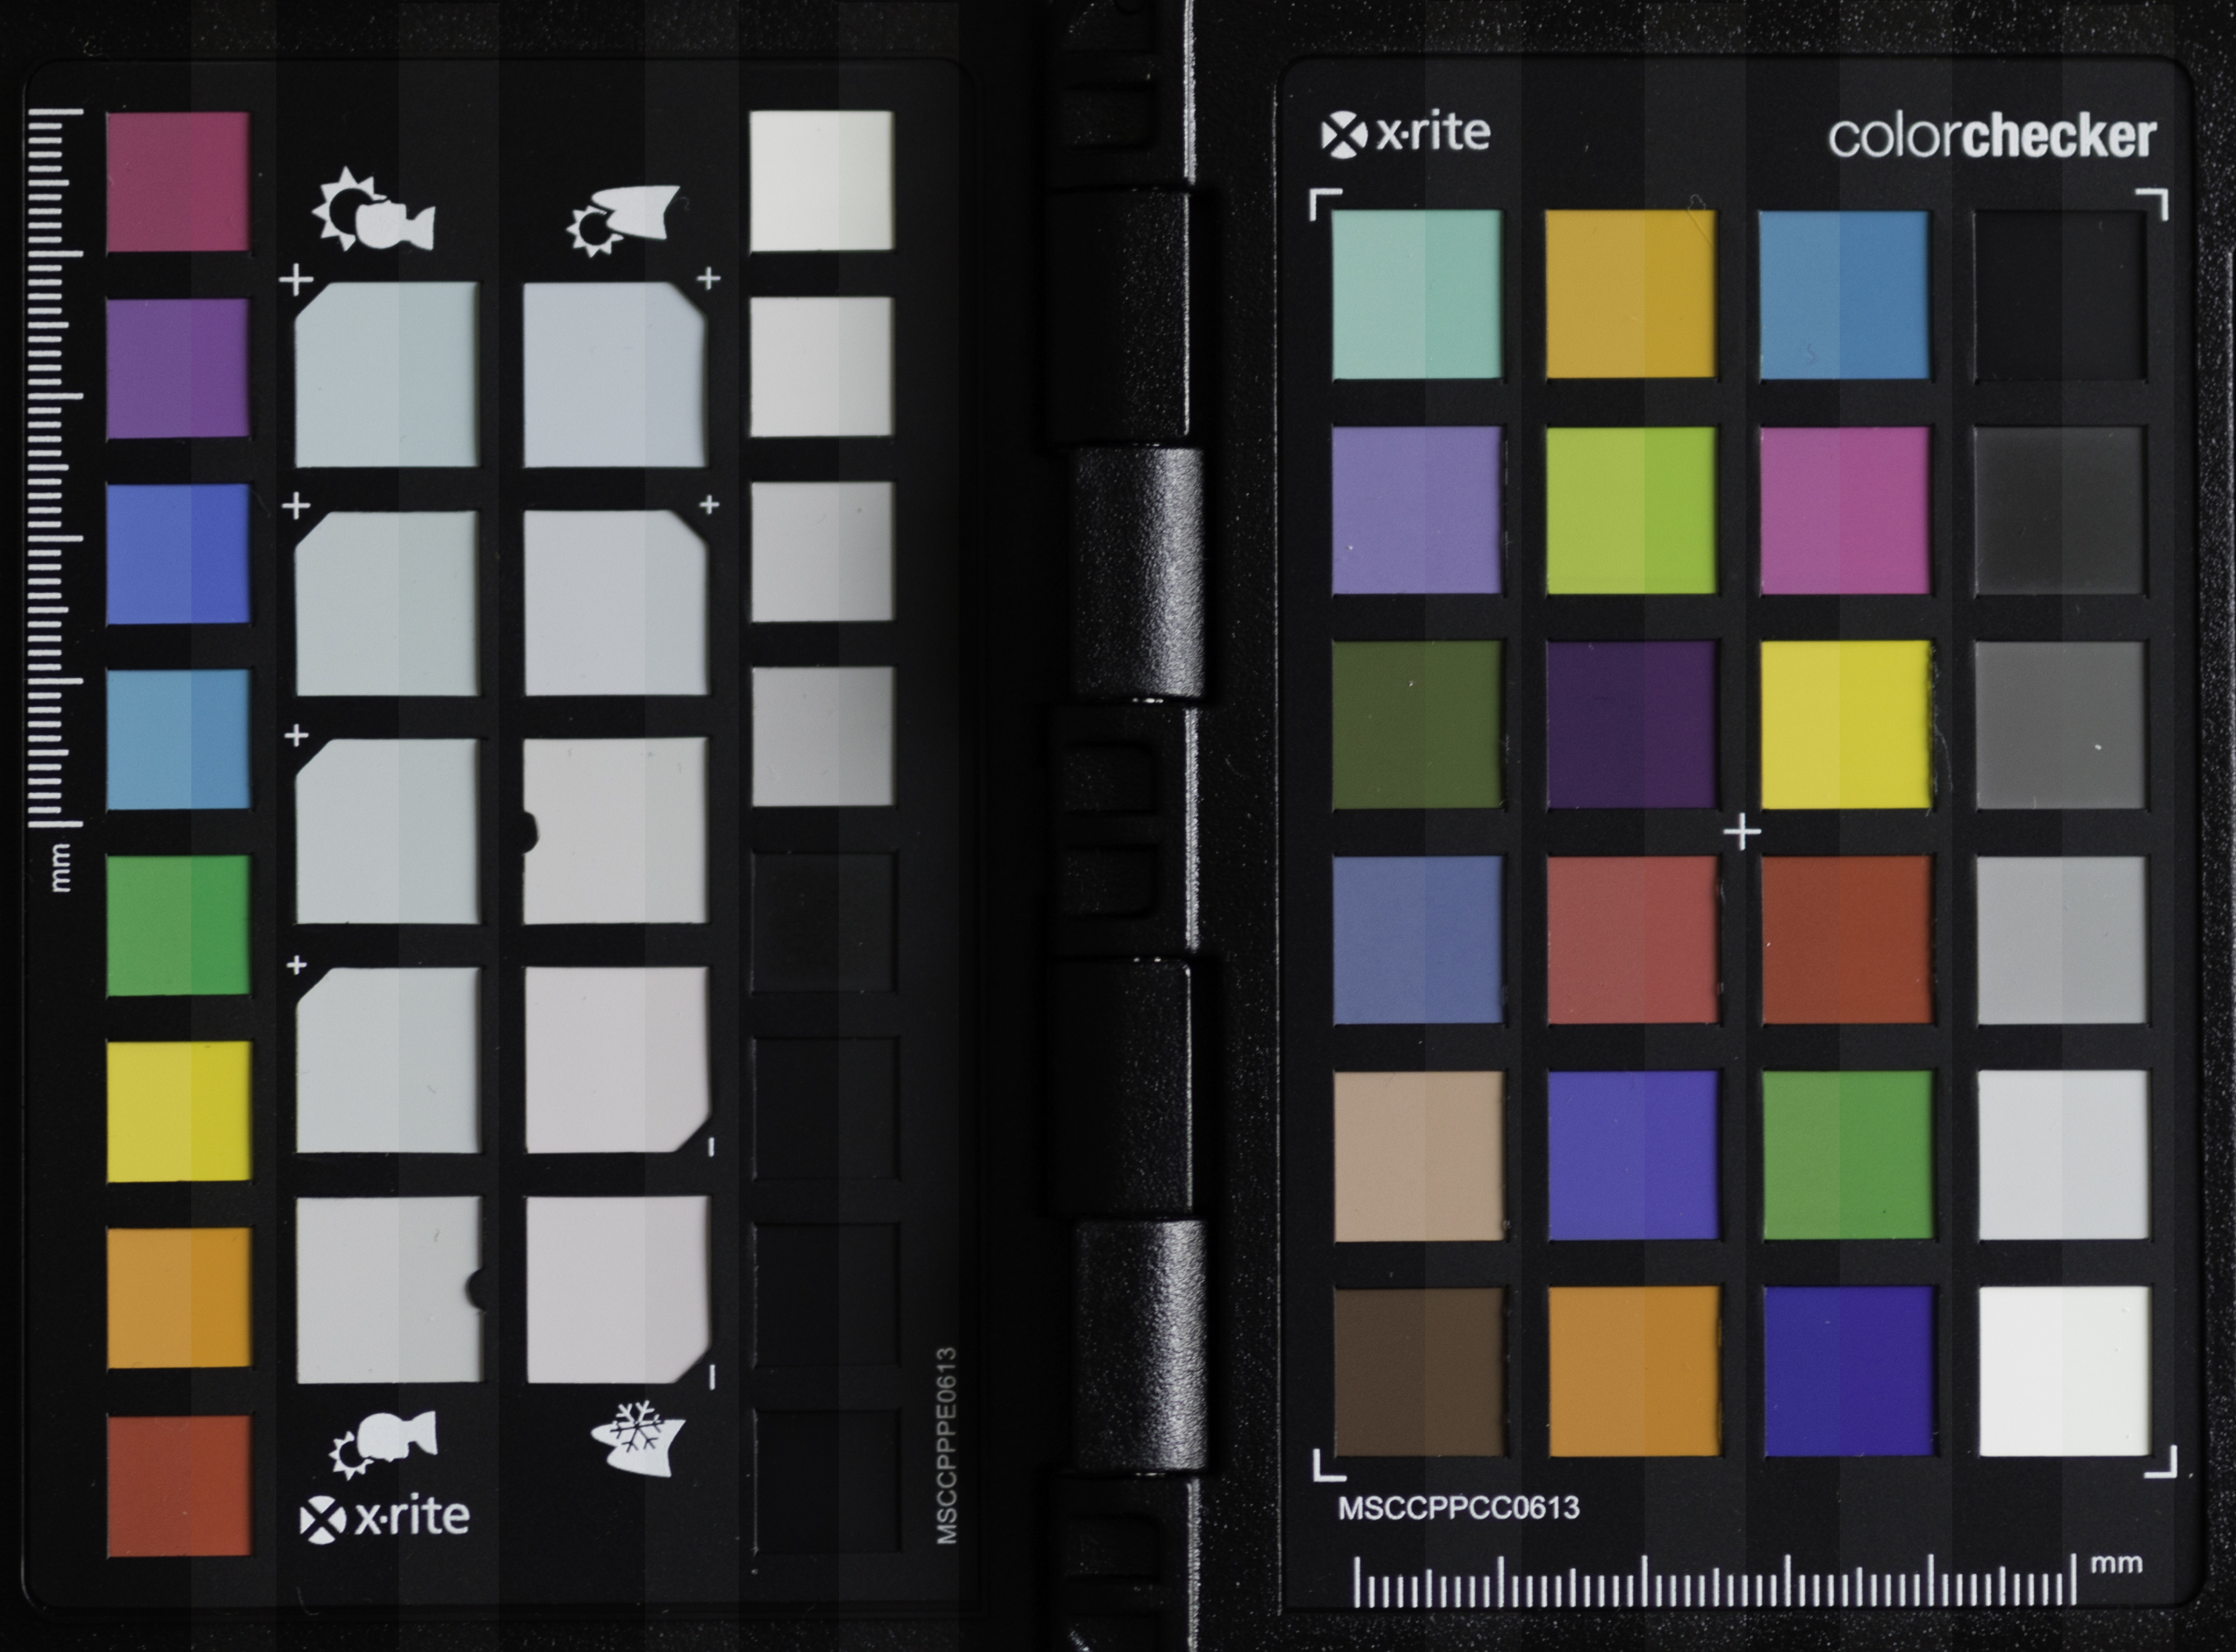
left half with ‘Adobe Standard’, right with my custom color profile on the Canon 5Ds.

Colours are more saturated, some a tad lighter, others a little darker, some colours shift slightly, (note the purple and the yellow-green on the right) but especially the blacks are less deep. This is especially helpful if you need to uplight the dark tones (shadows) in LR.

These are two versions of the same RAW file, but they get different RGB values. This means that the initial state of your raw file is very much dependent of your Camera calibration settings. If you are very fond of let’s say the ‘camera portrait’ picture style settings on your camera, then you might as well use this profile in your RAW-editor. (as photographing in RAW will not edit the data in your images, but the preview on the camera’s back is based on a jpg file modified by the settings in your camera. your preview will still get the ‘camera portrait’ picture style view, but your RAW will not reflect it.

That is why an image might look good when importing in LR, and then switch to something dull a second later. The initial look is from the embedded preview file, generated by your camera, the second look is from the preview generated by LR, based on the camera calibration settings currently active (standard setting = Adobe Standard)


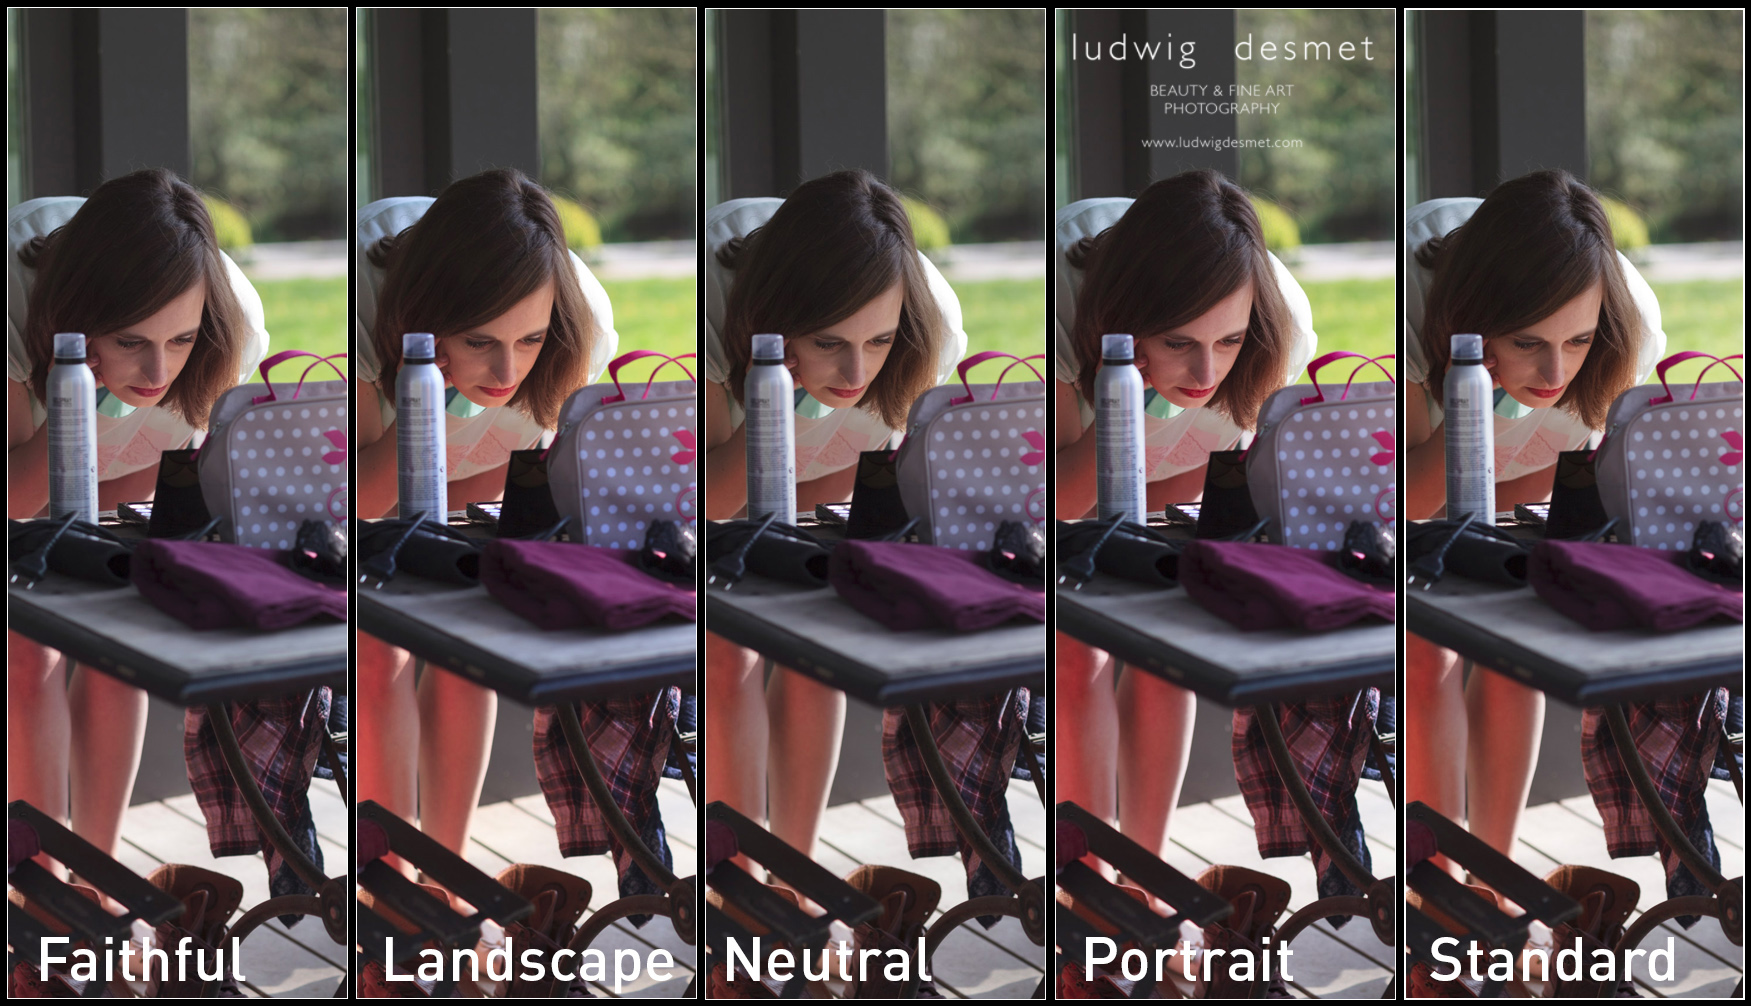
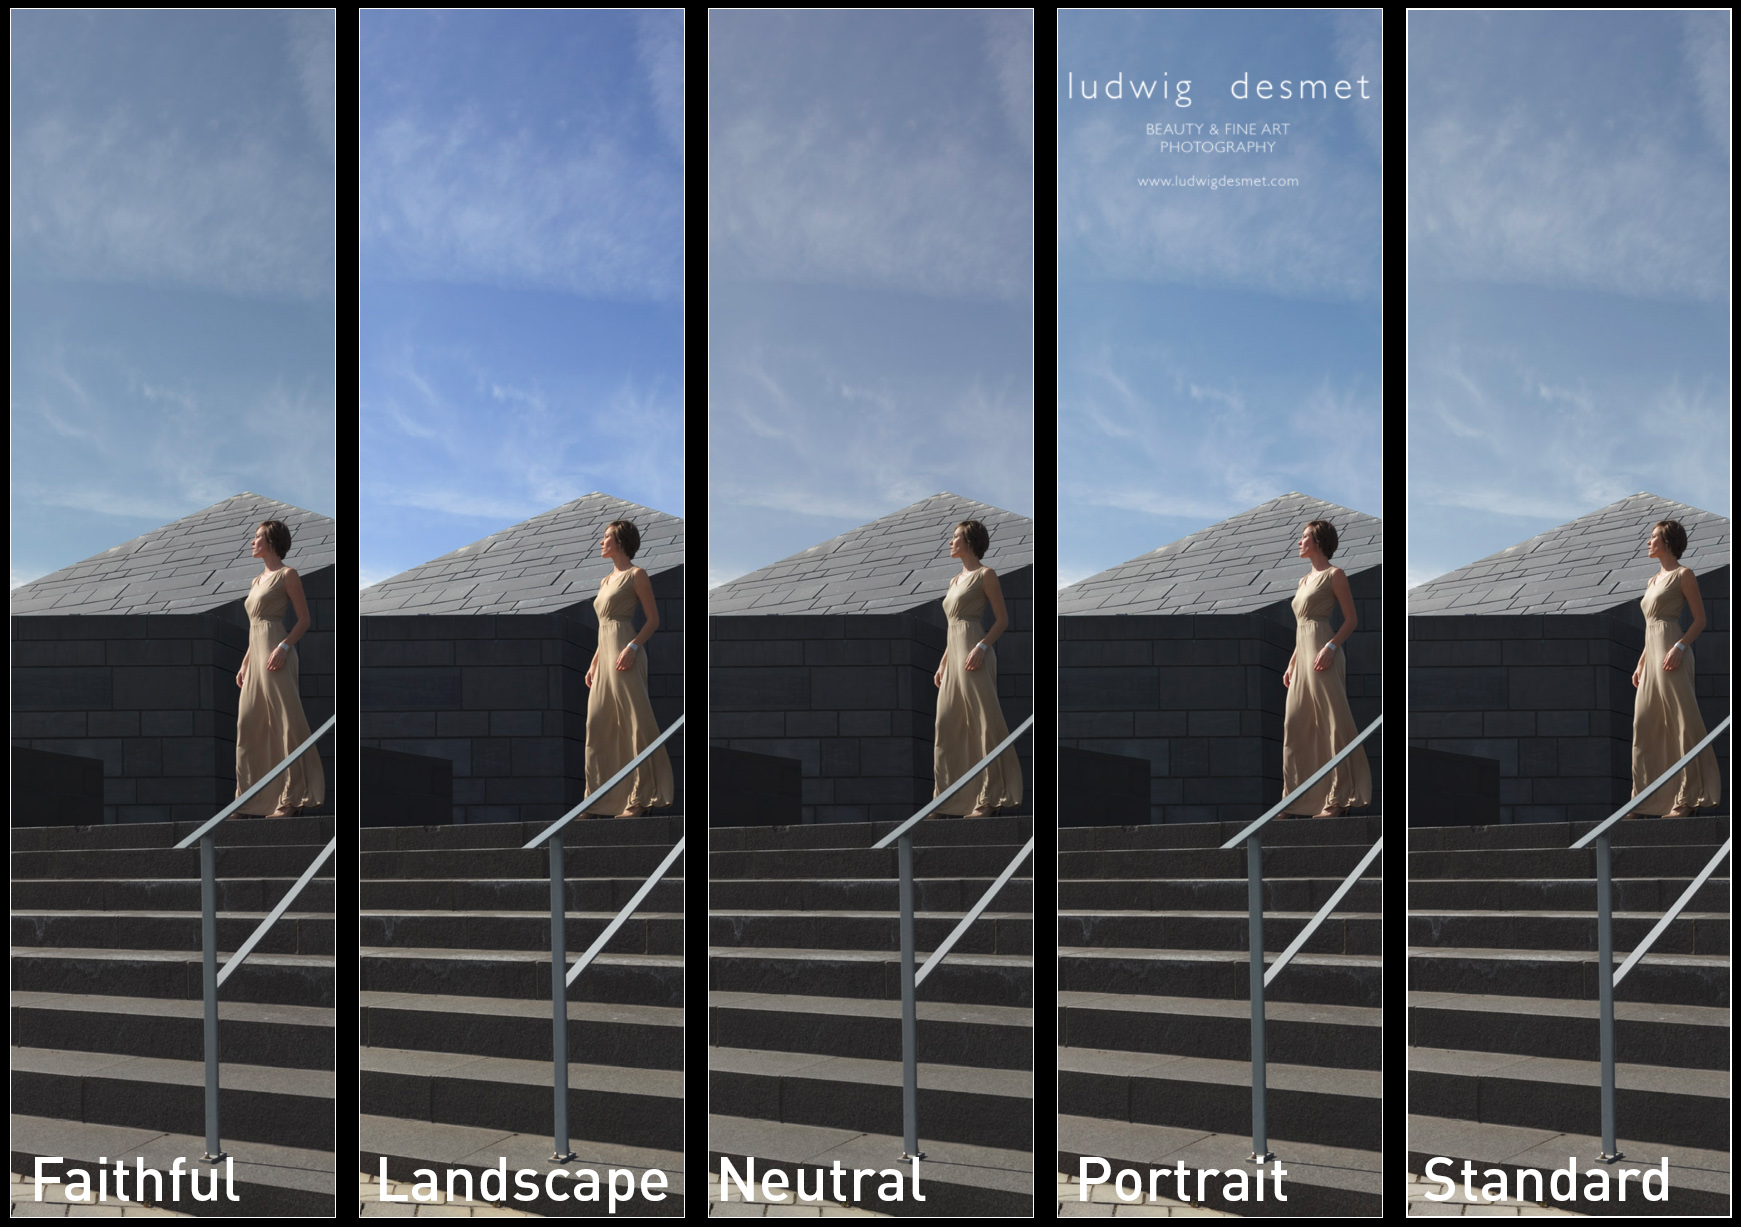
If you want to experiment with camera calibration without buying the tools needed, try using the ‘picture style calibration settings’ available in the drop down menu. They should reflect the ones you have available on your camera. The differences should be obvious.

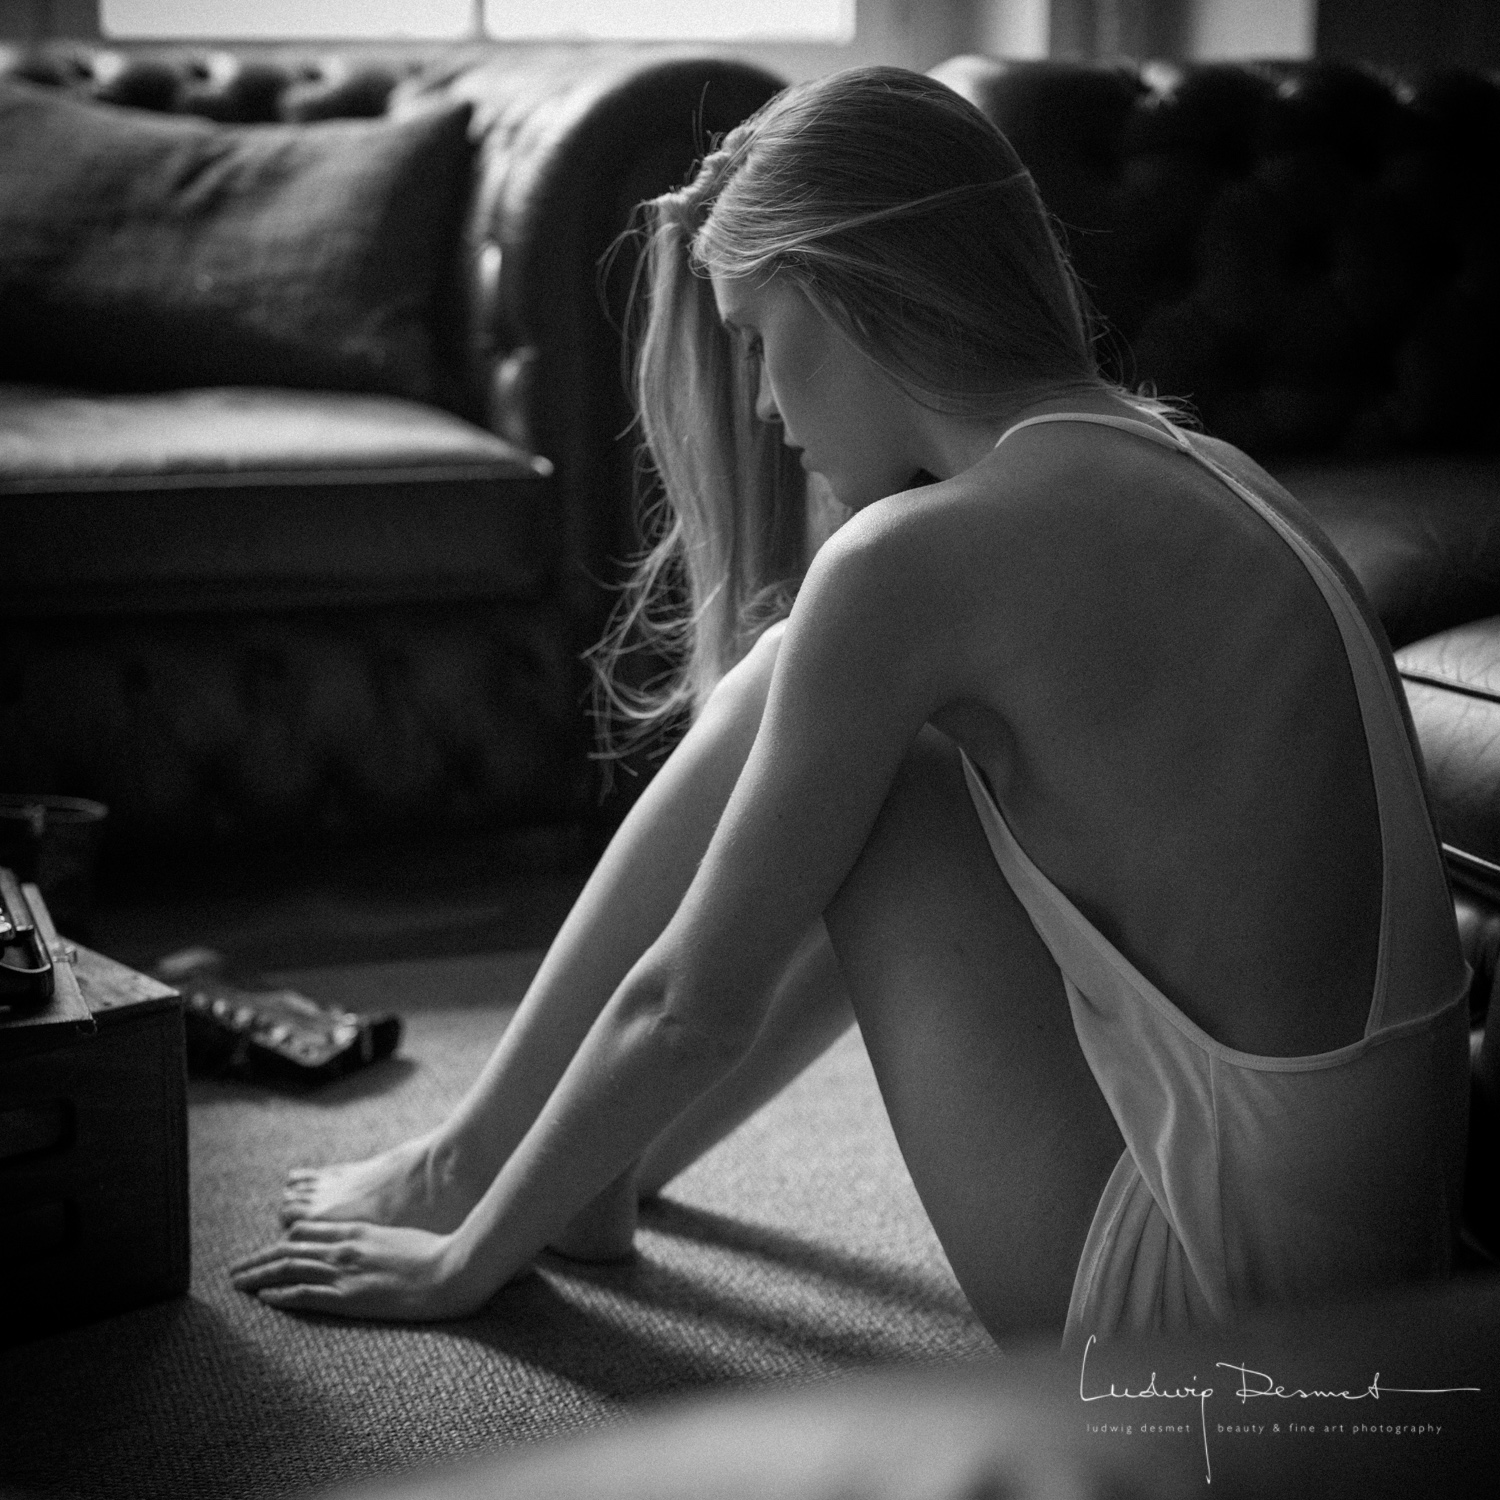
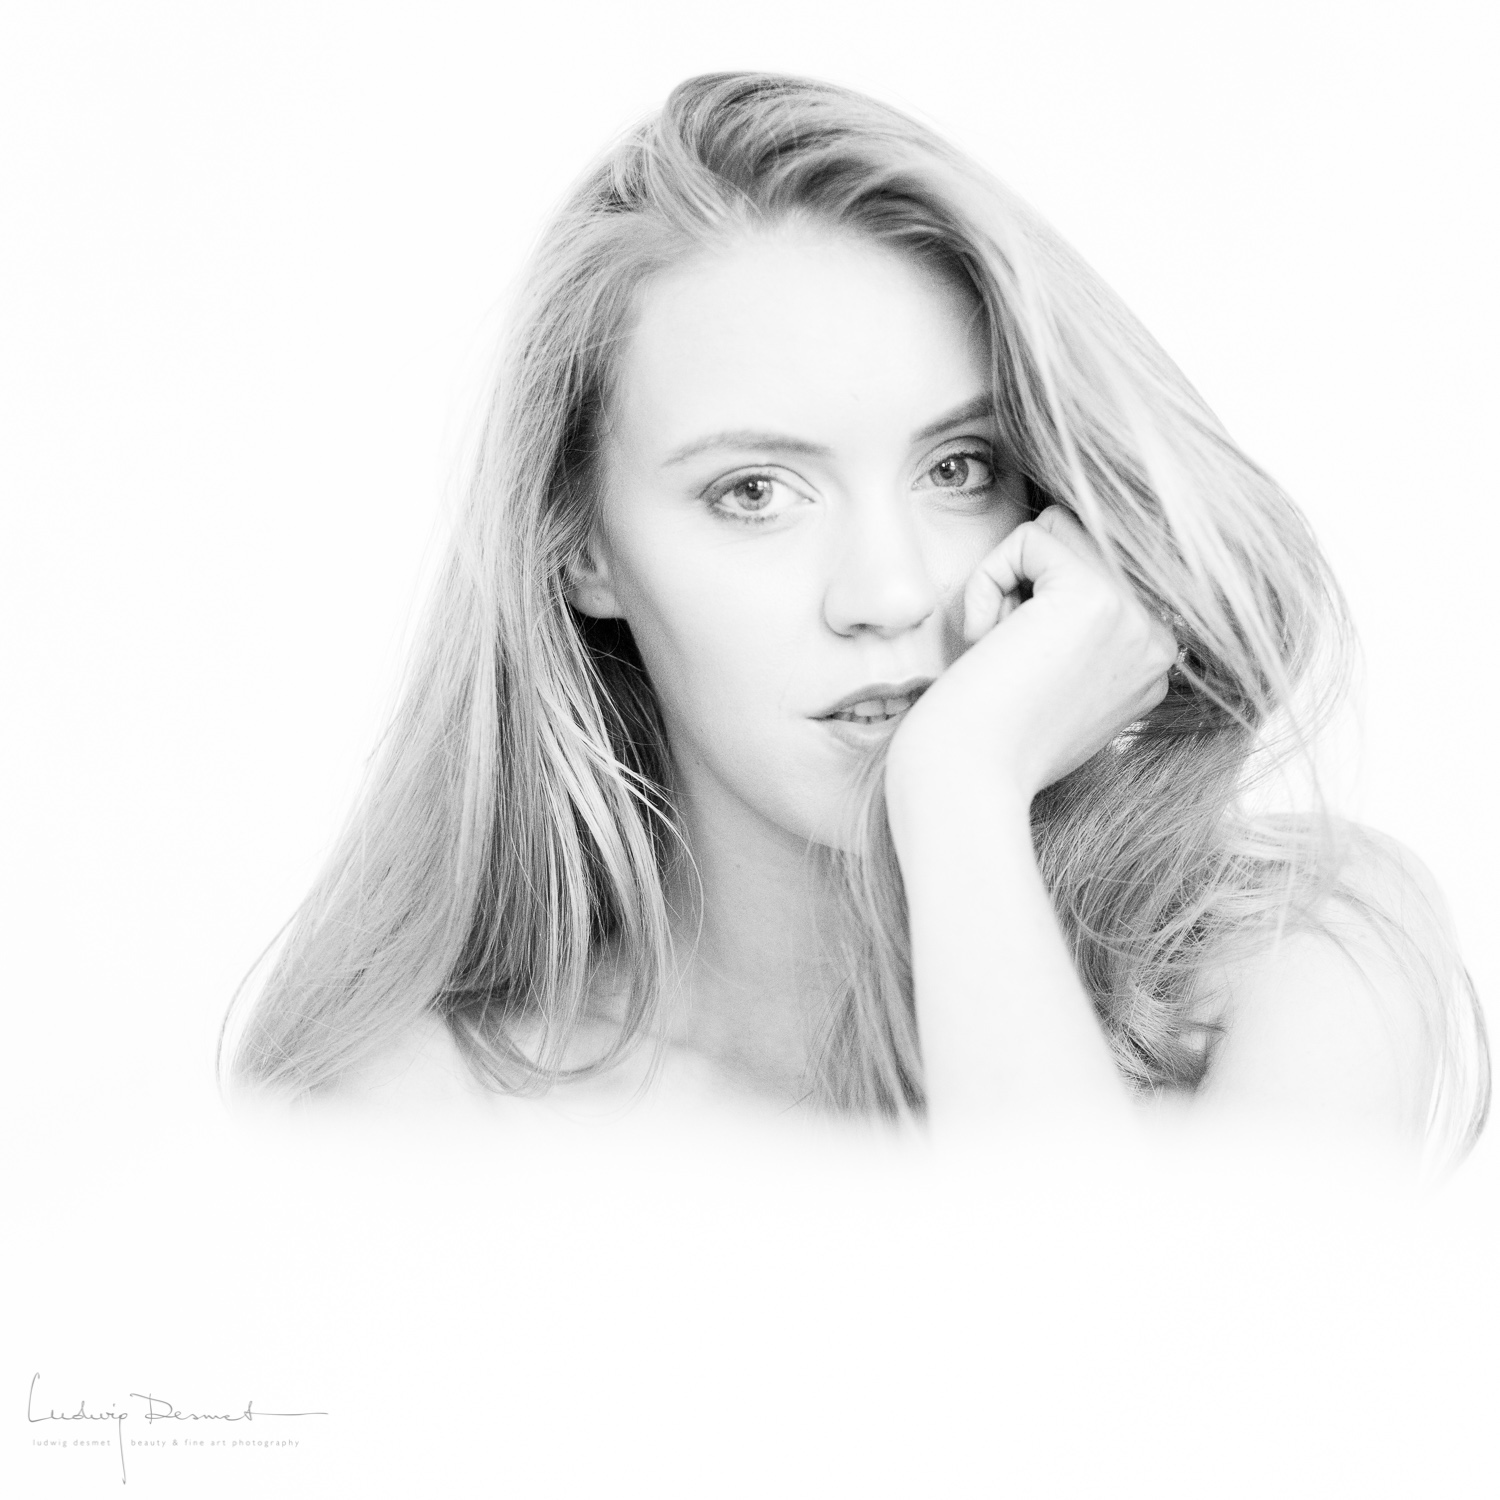
Below two examples of different ‘picture style camera calibration’ settings. Note the changing skin tones in the first image, the changing sky colour in the second.

picture style sample I

picture styles sample II


The process version is the way LR interprets RAW files since earlier versions, you should currently use the 2012 version. (July 2016)


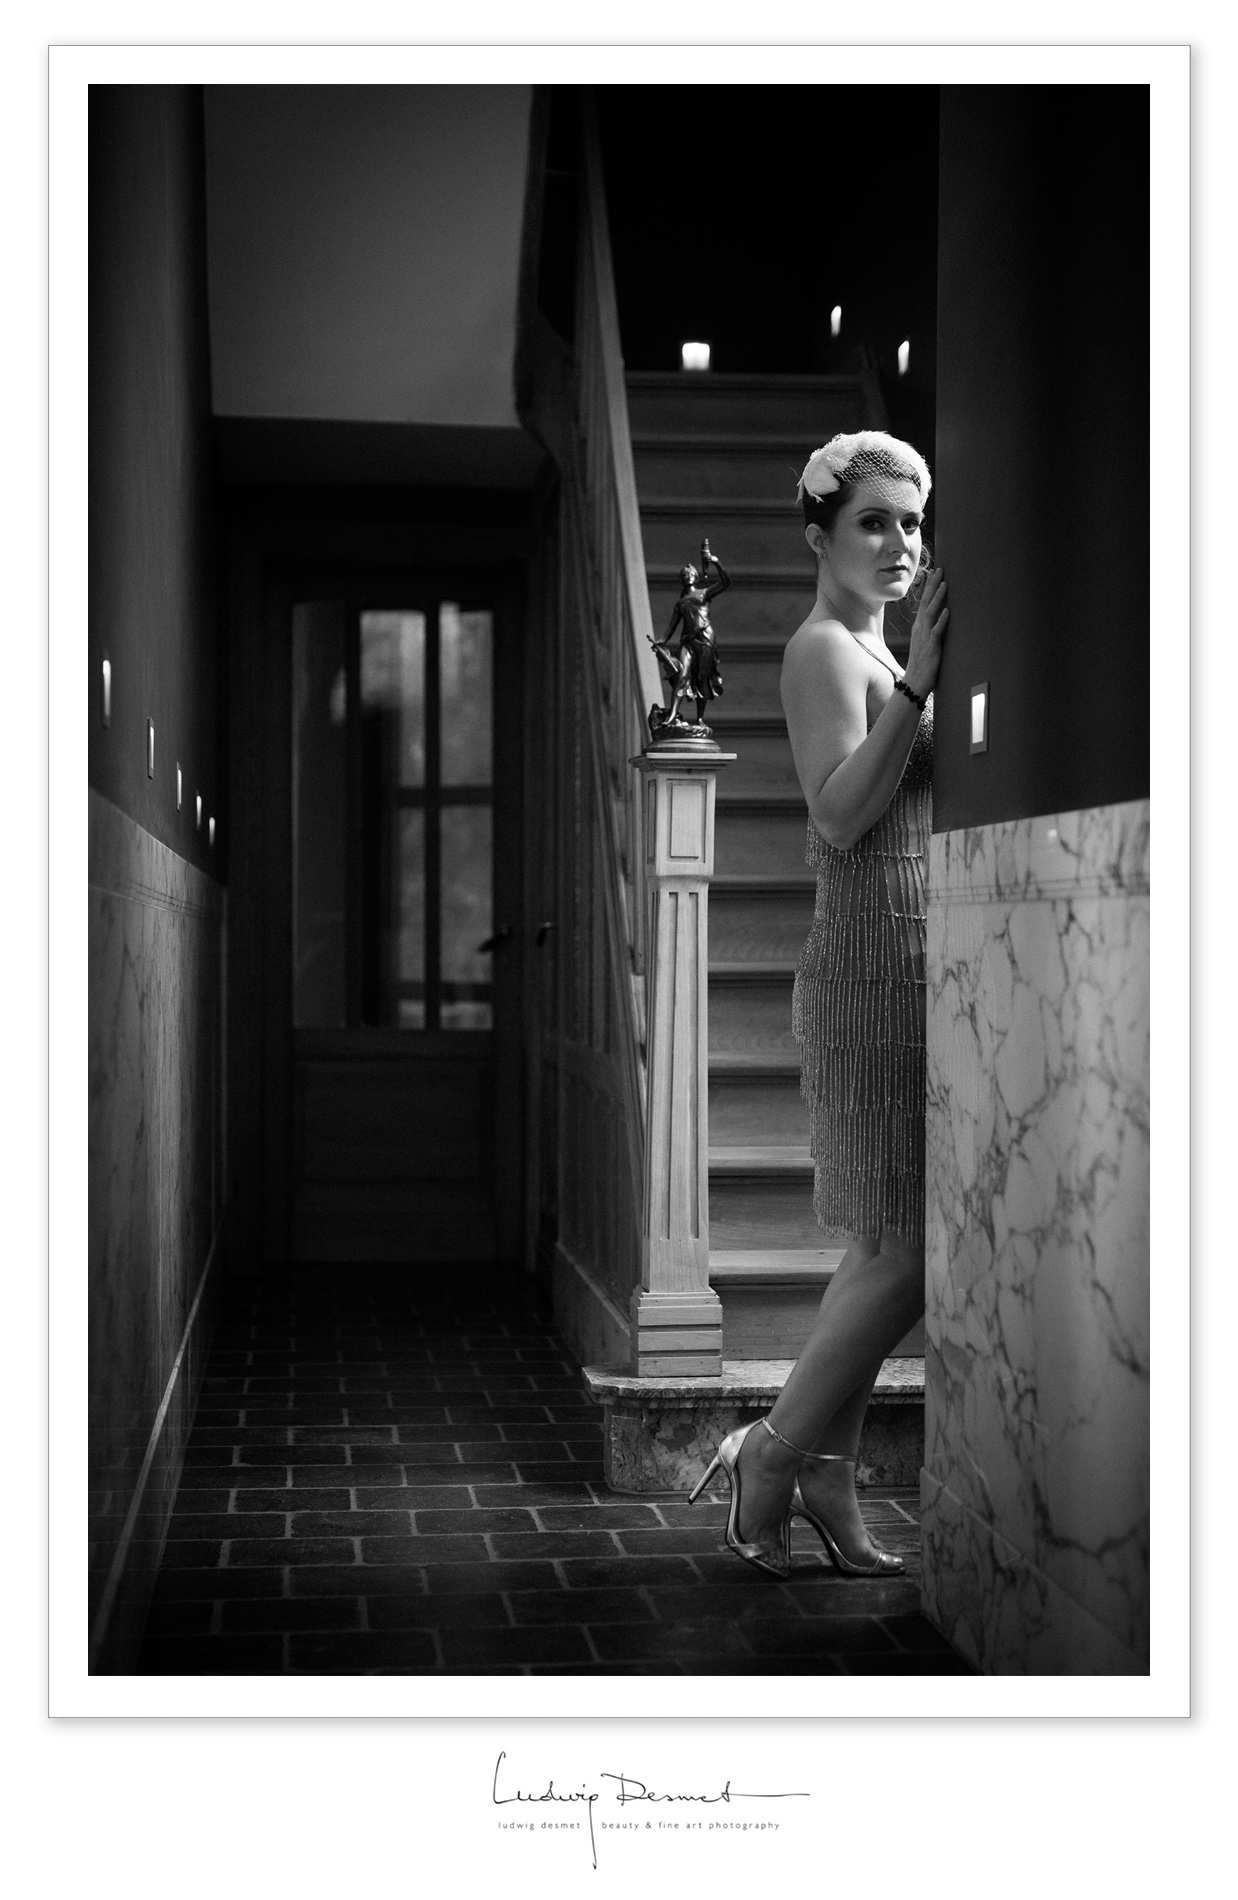
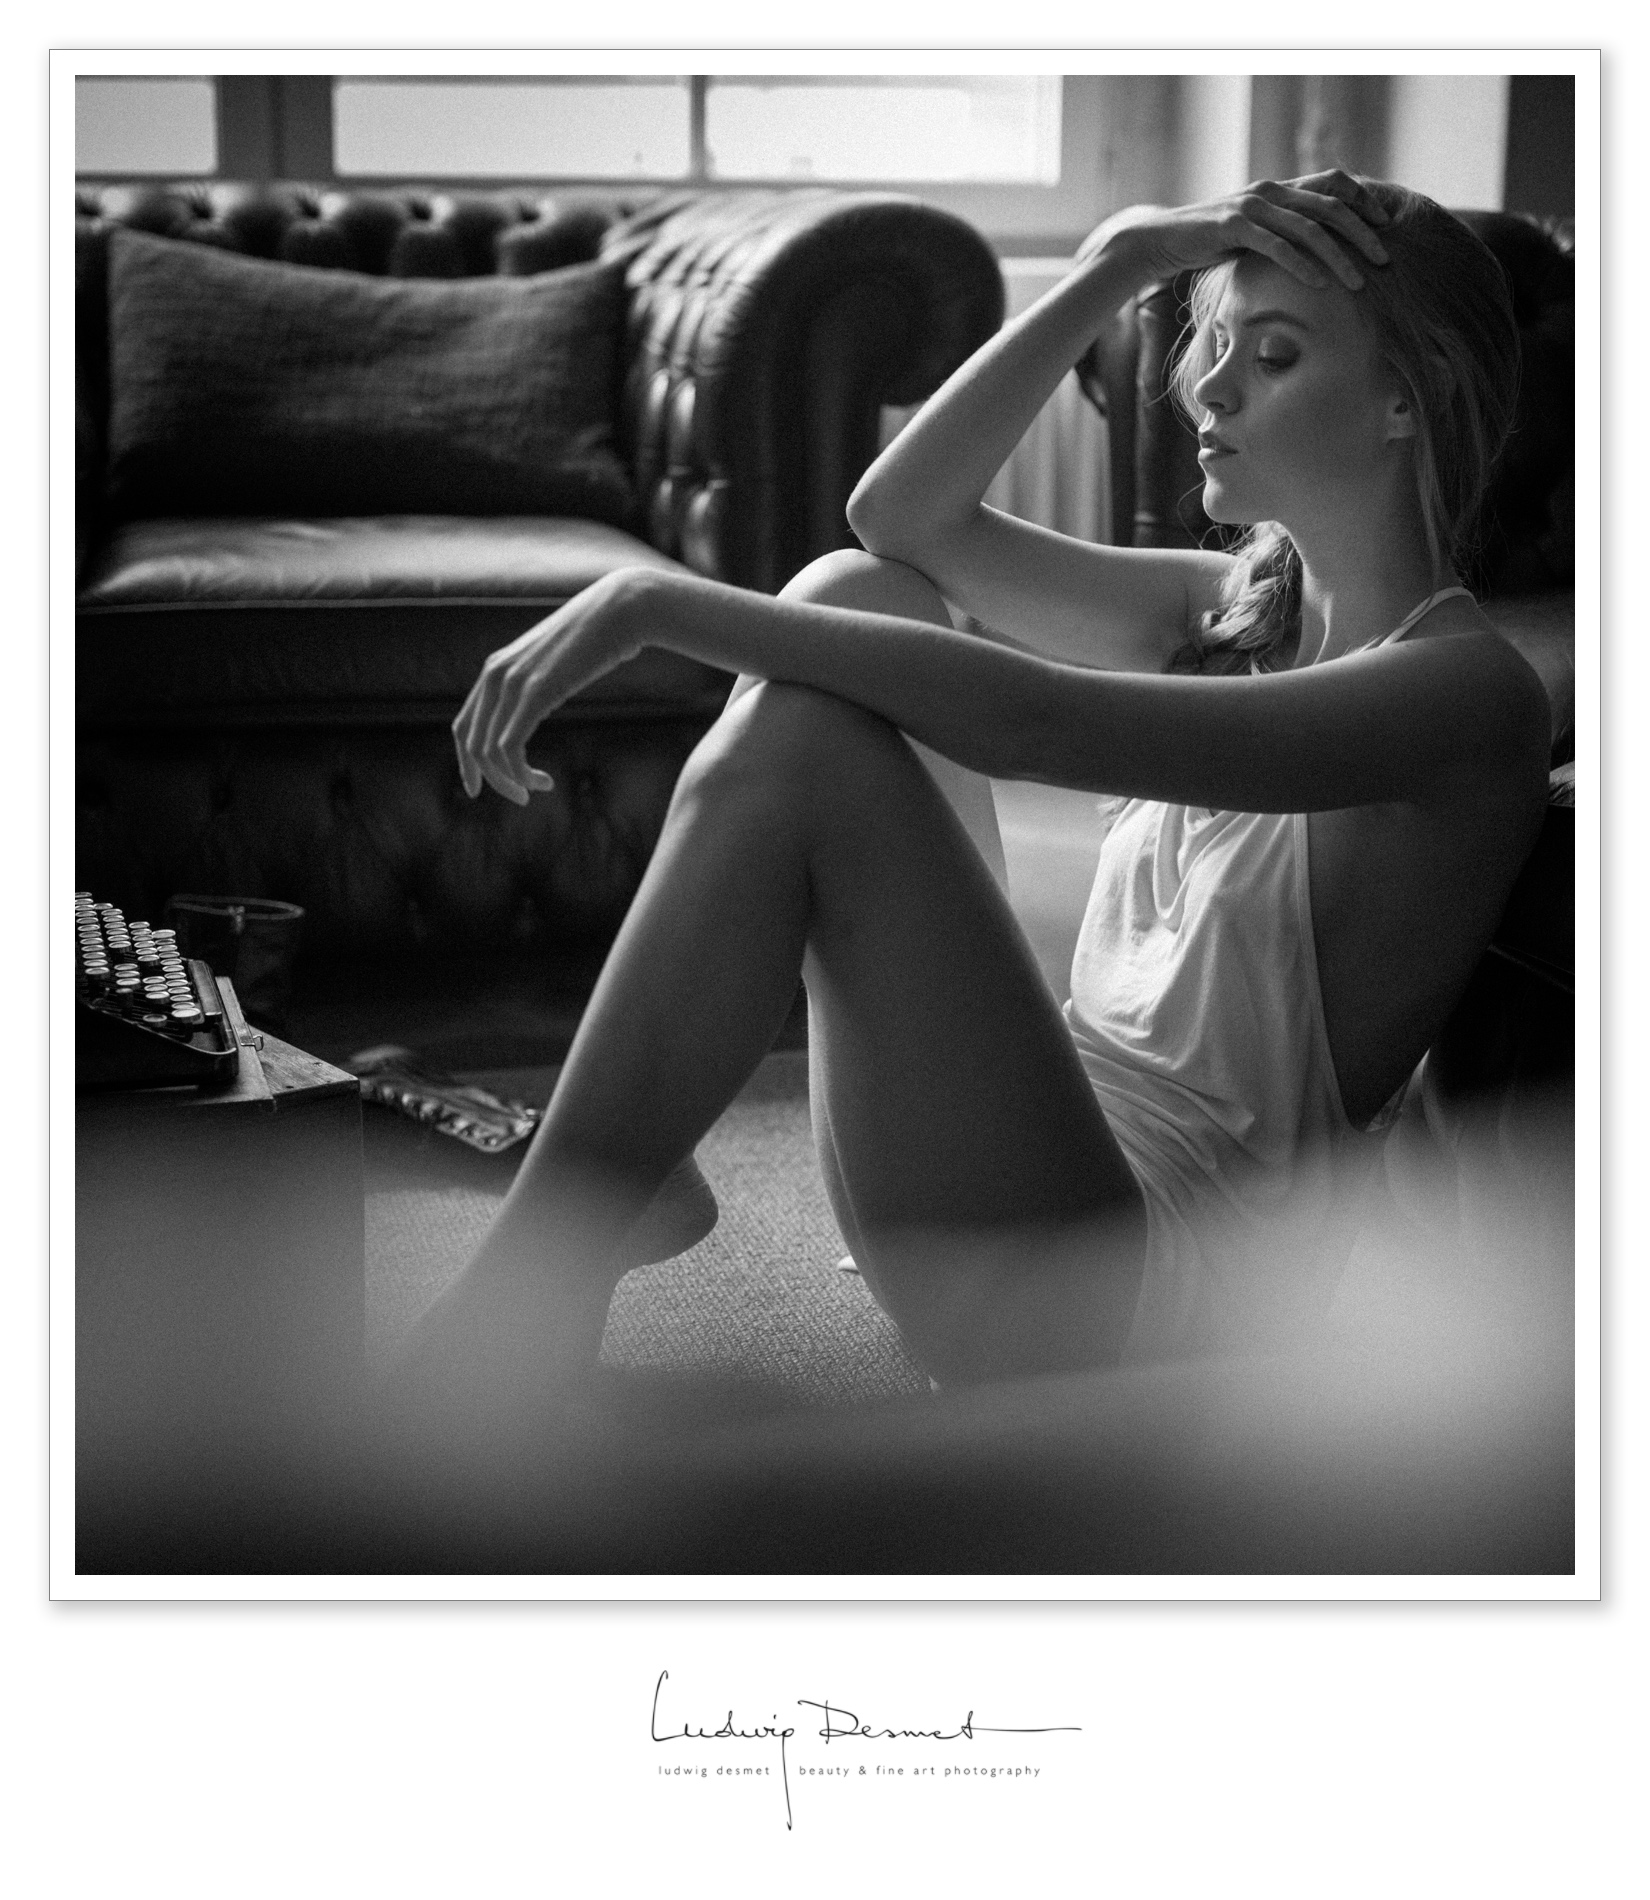
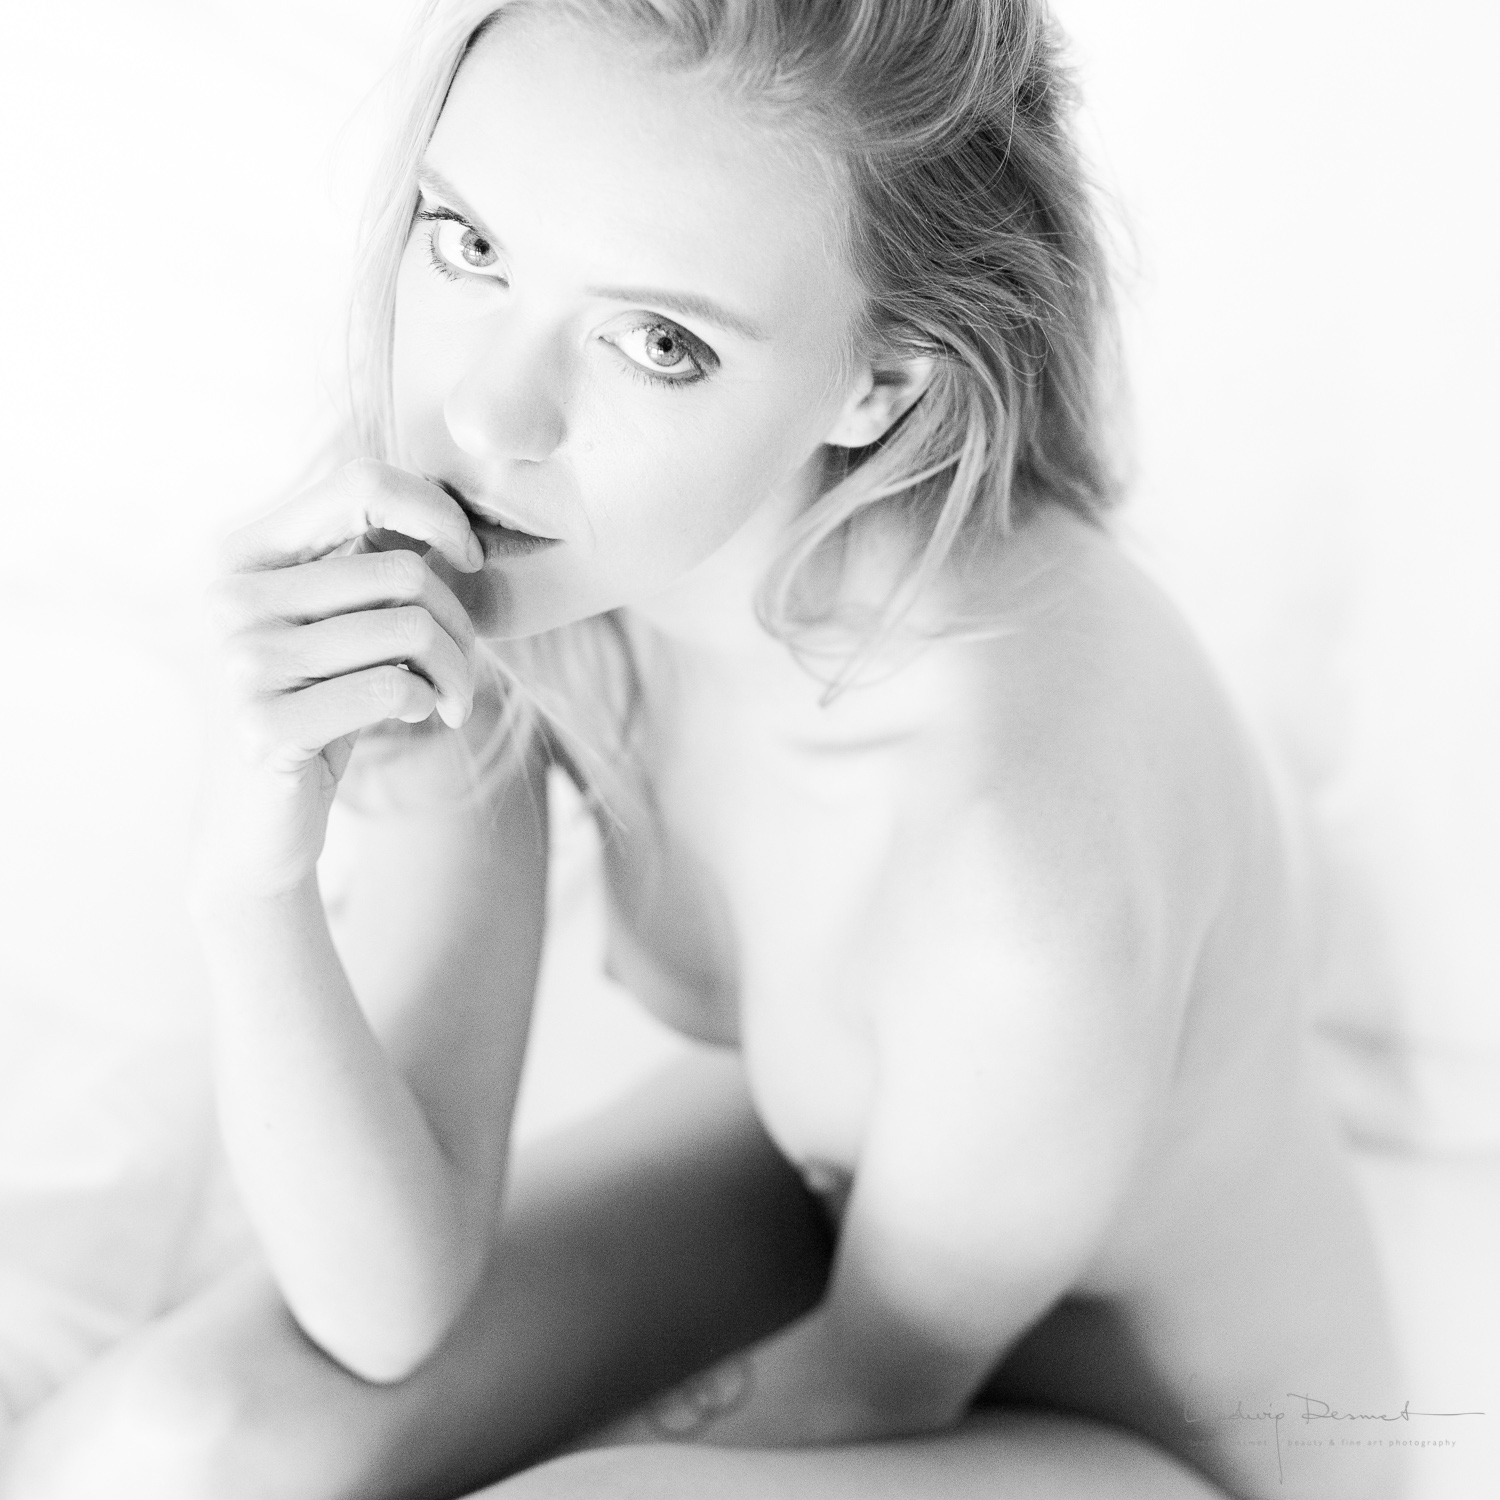
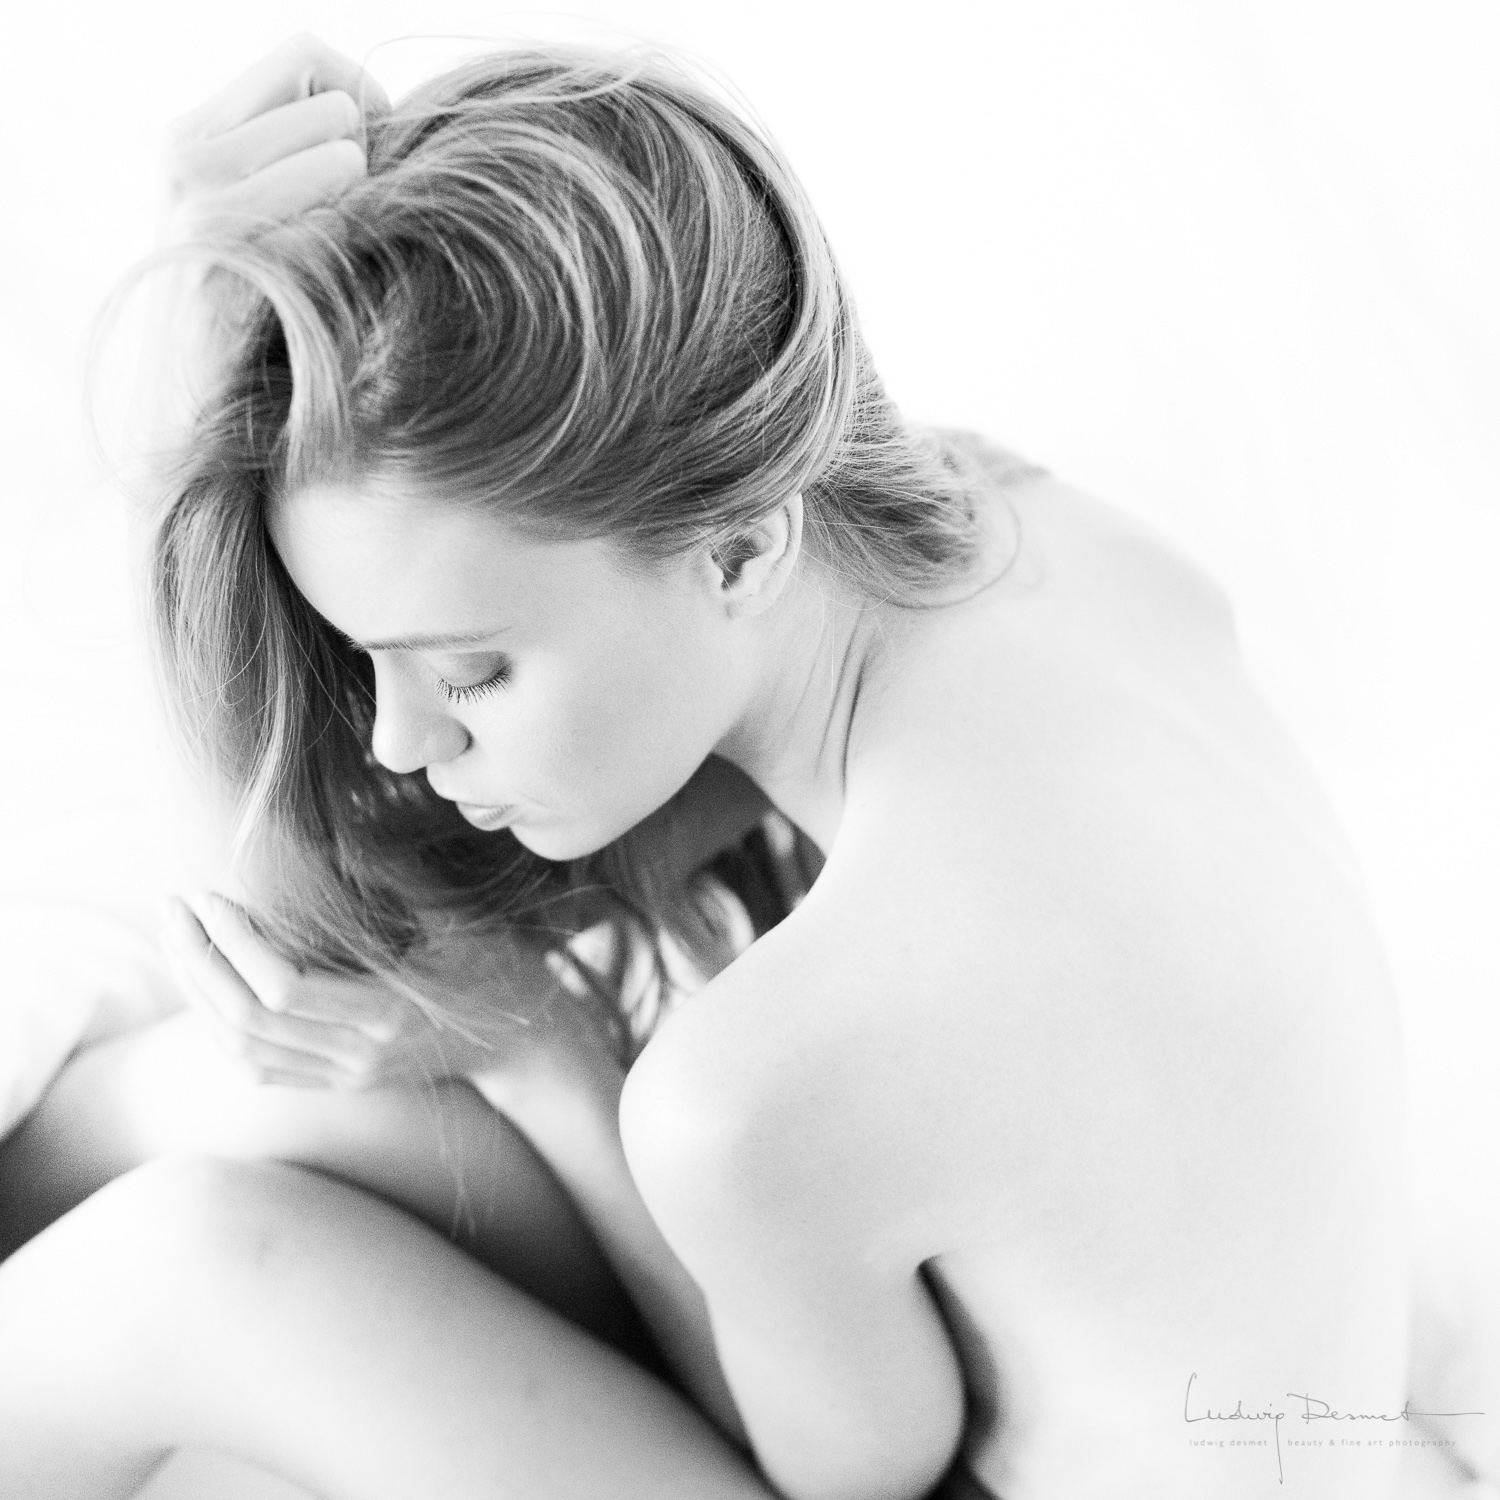
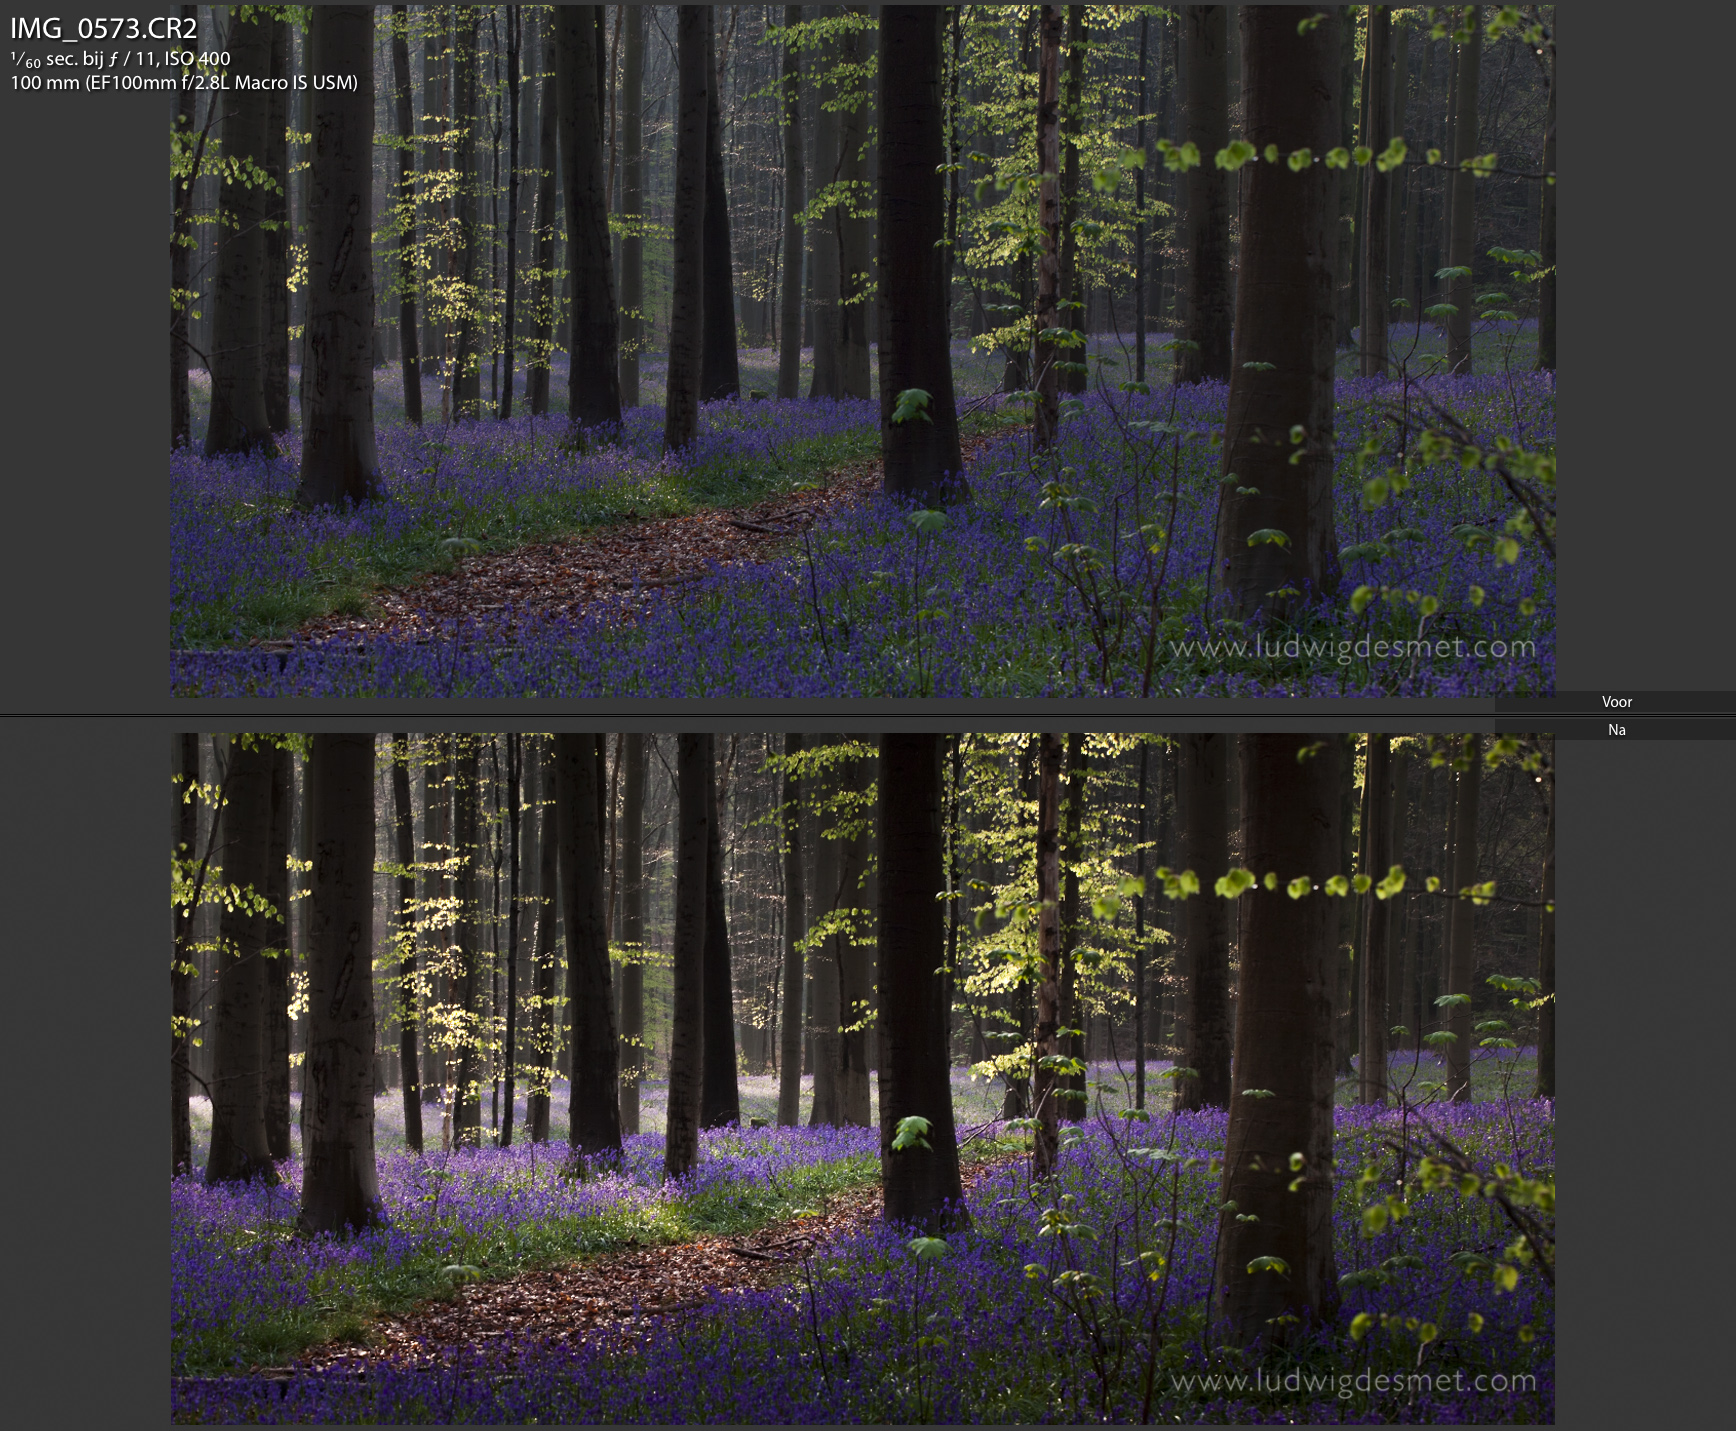
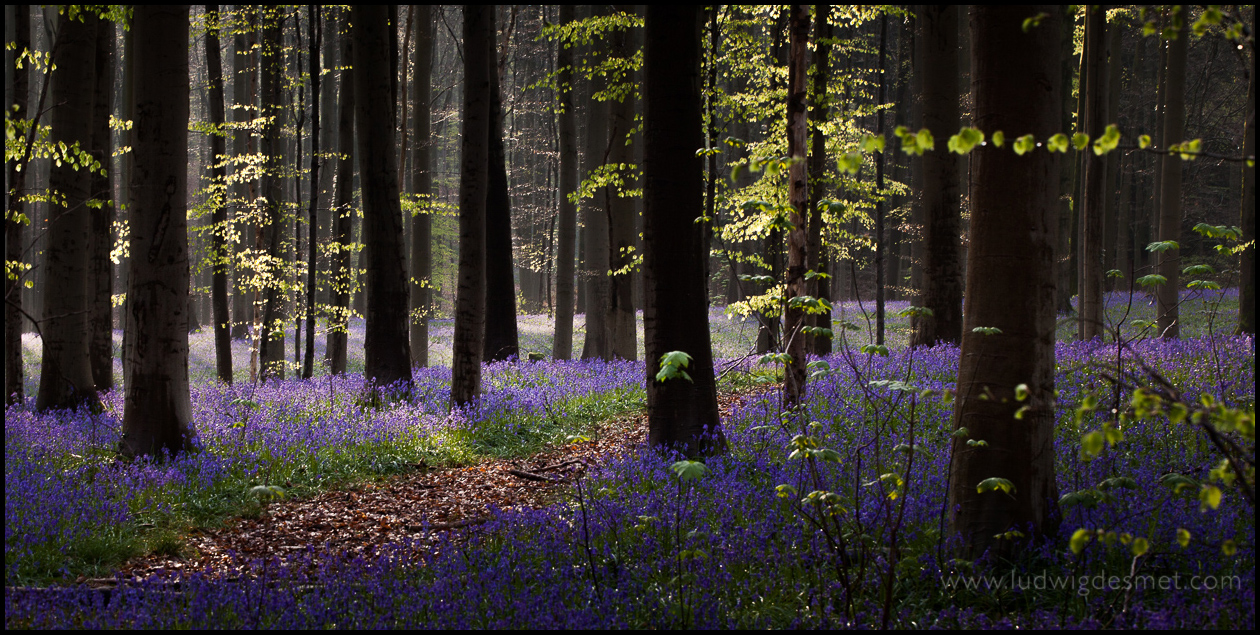
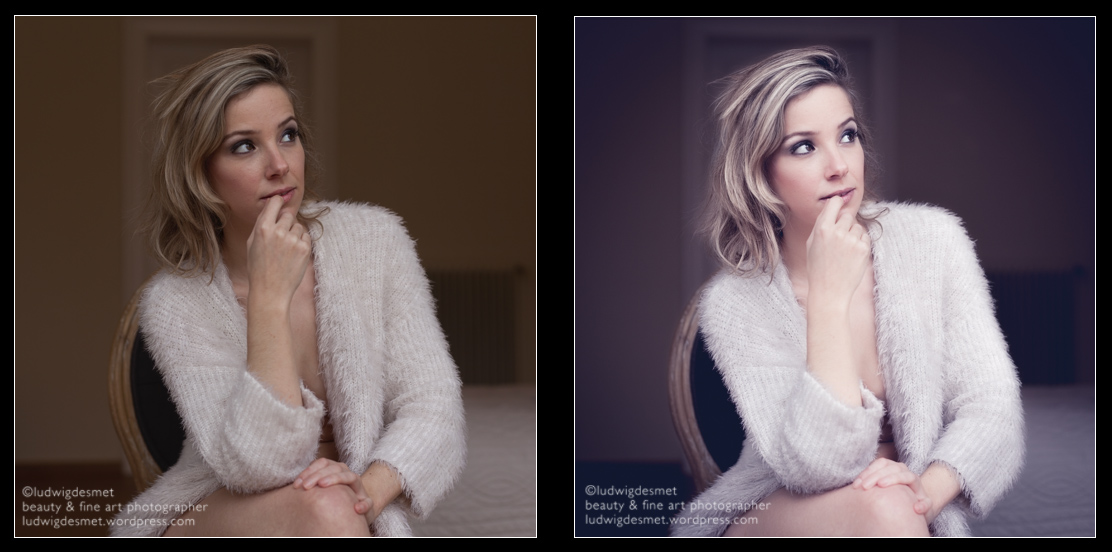
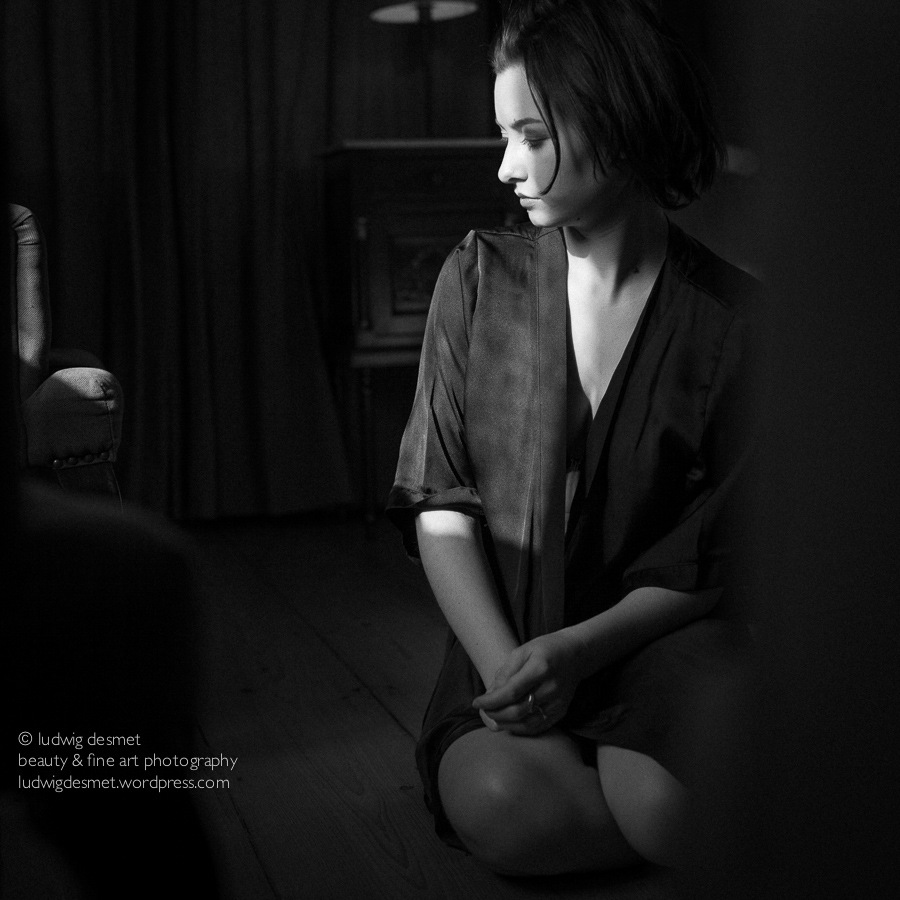
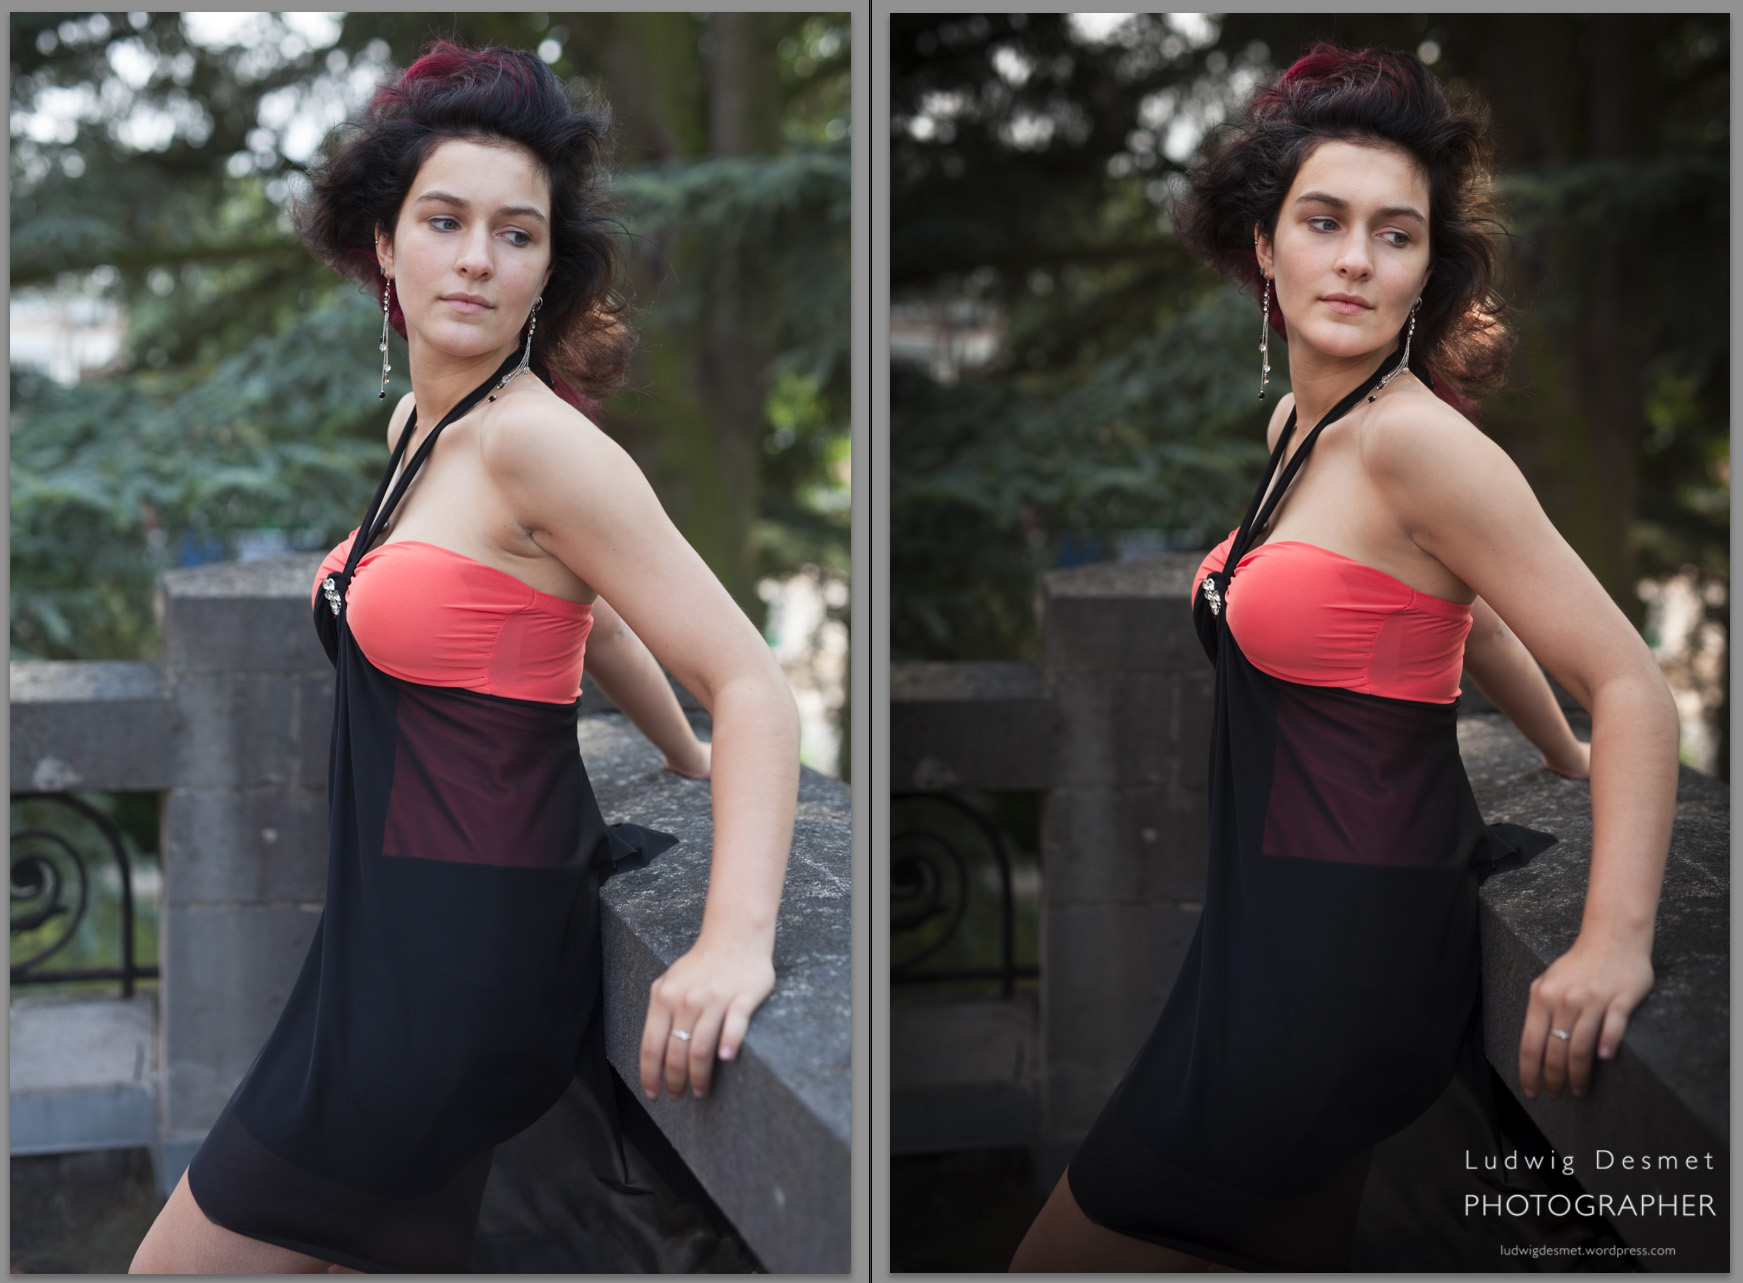
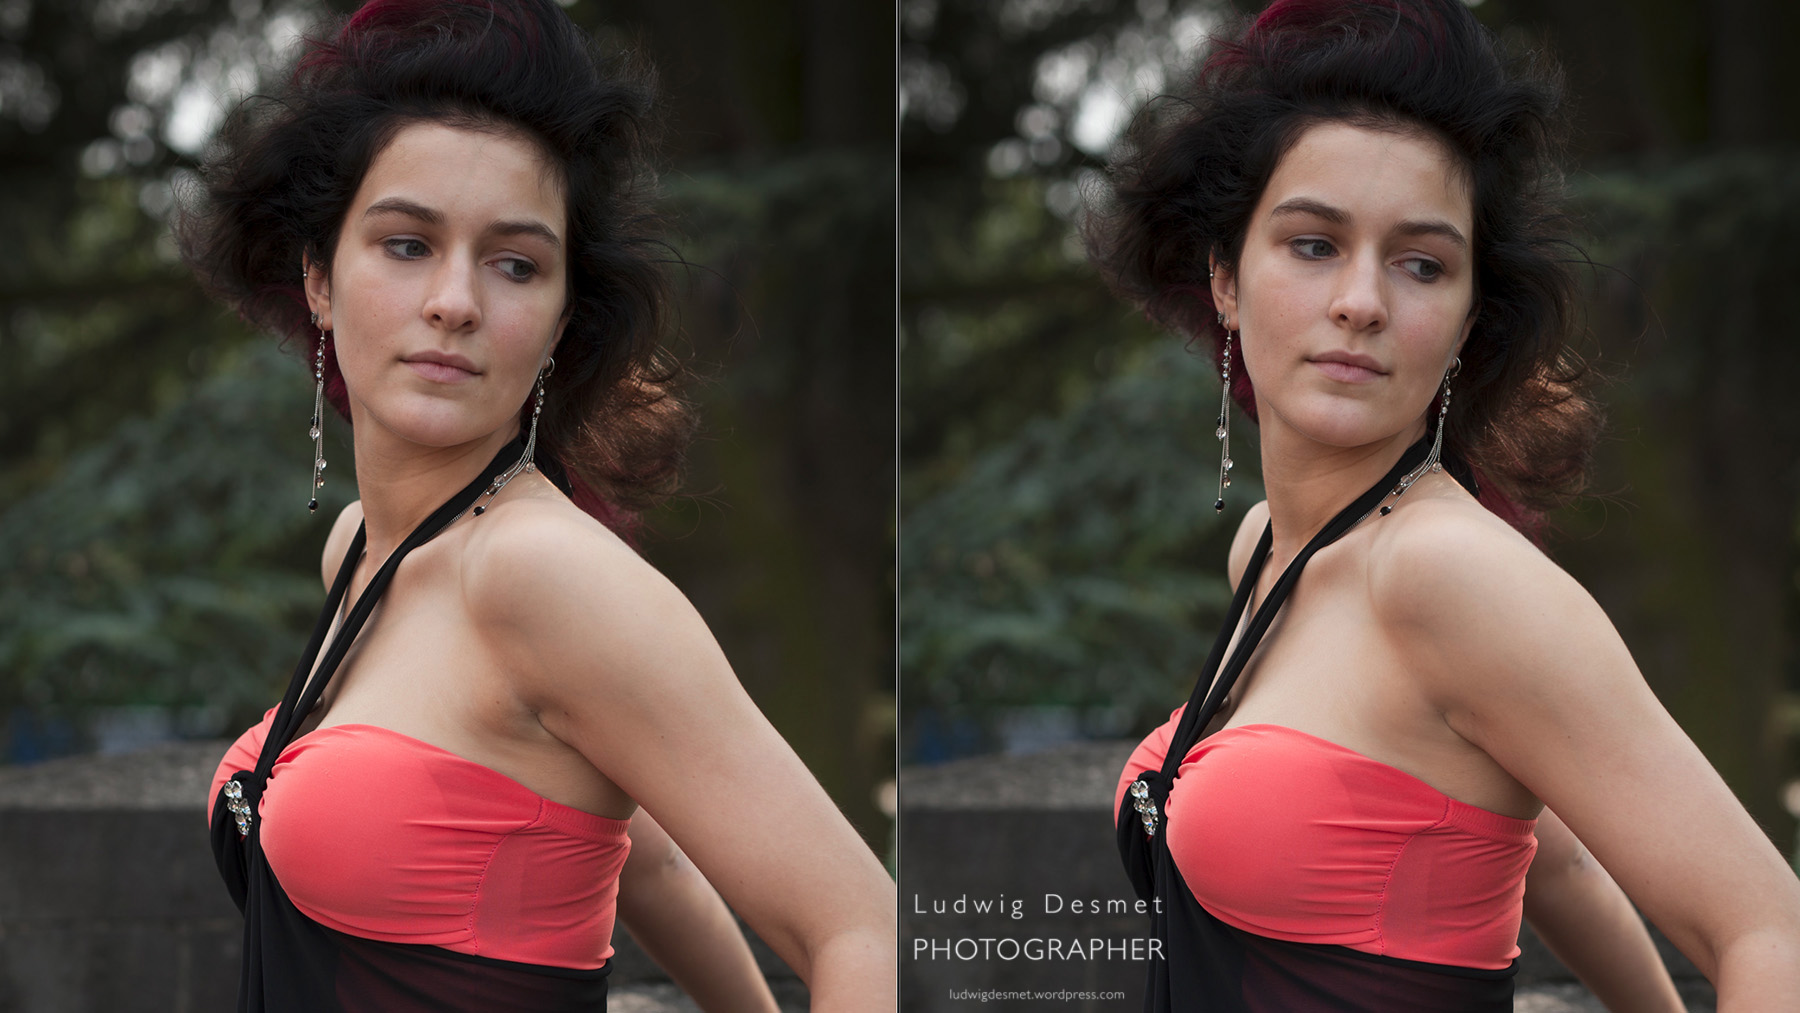
To give a real world example, first image with ‘Adobe Standard’ profile, second with Custom made profile:

LudwigDesmet_AL-0354  LudwigDesmet_AL-0354-3

I think that the shaded area’s are very obviously lighter in the second picture, with the correct camera calibration profile. These are unedited images. For me this lighting situation is very common, high contrast, backlit situations, where you want to make sure that the highlights are not blown out (clipped). As you know I seldom use extra light on a shoot (except for a reflector from time to time. In this way I absolutely need to be able to enhance my shadow area’s to a descent light level. This less dark starting situation is of a lot of help.

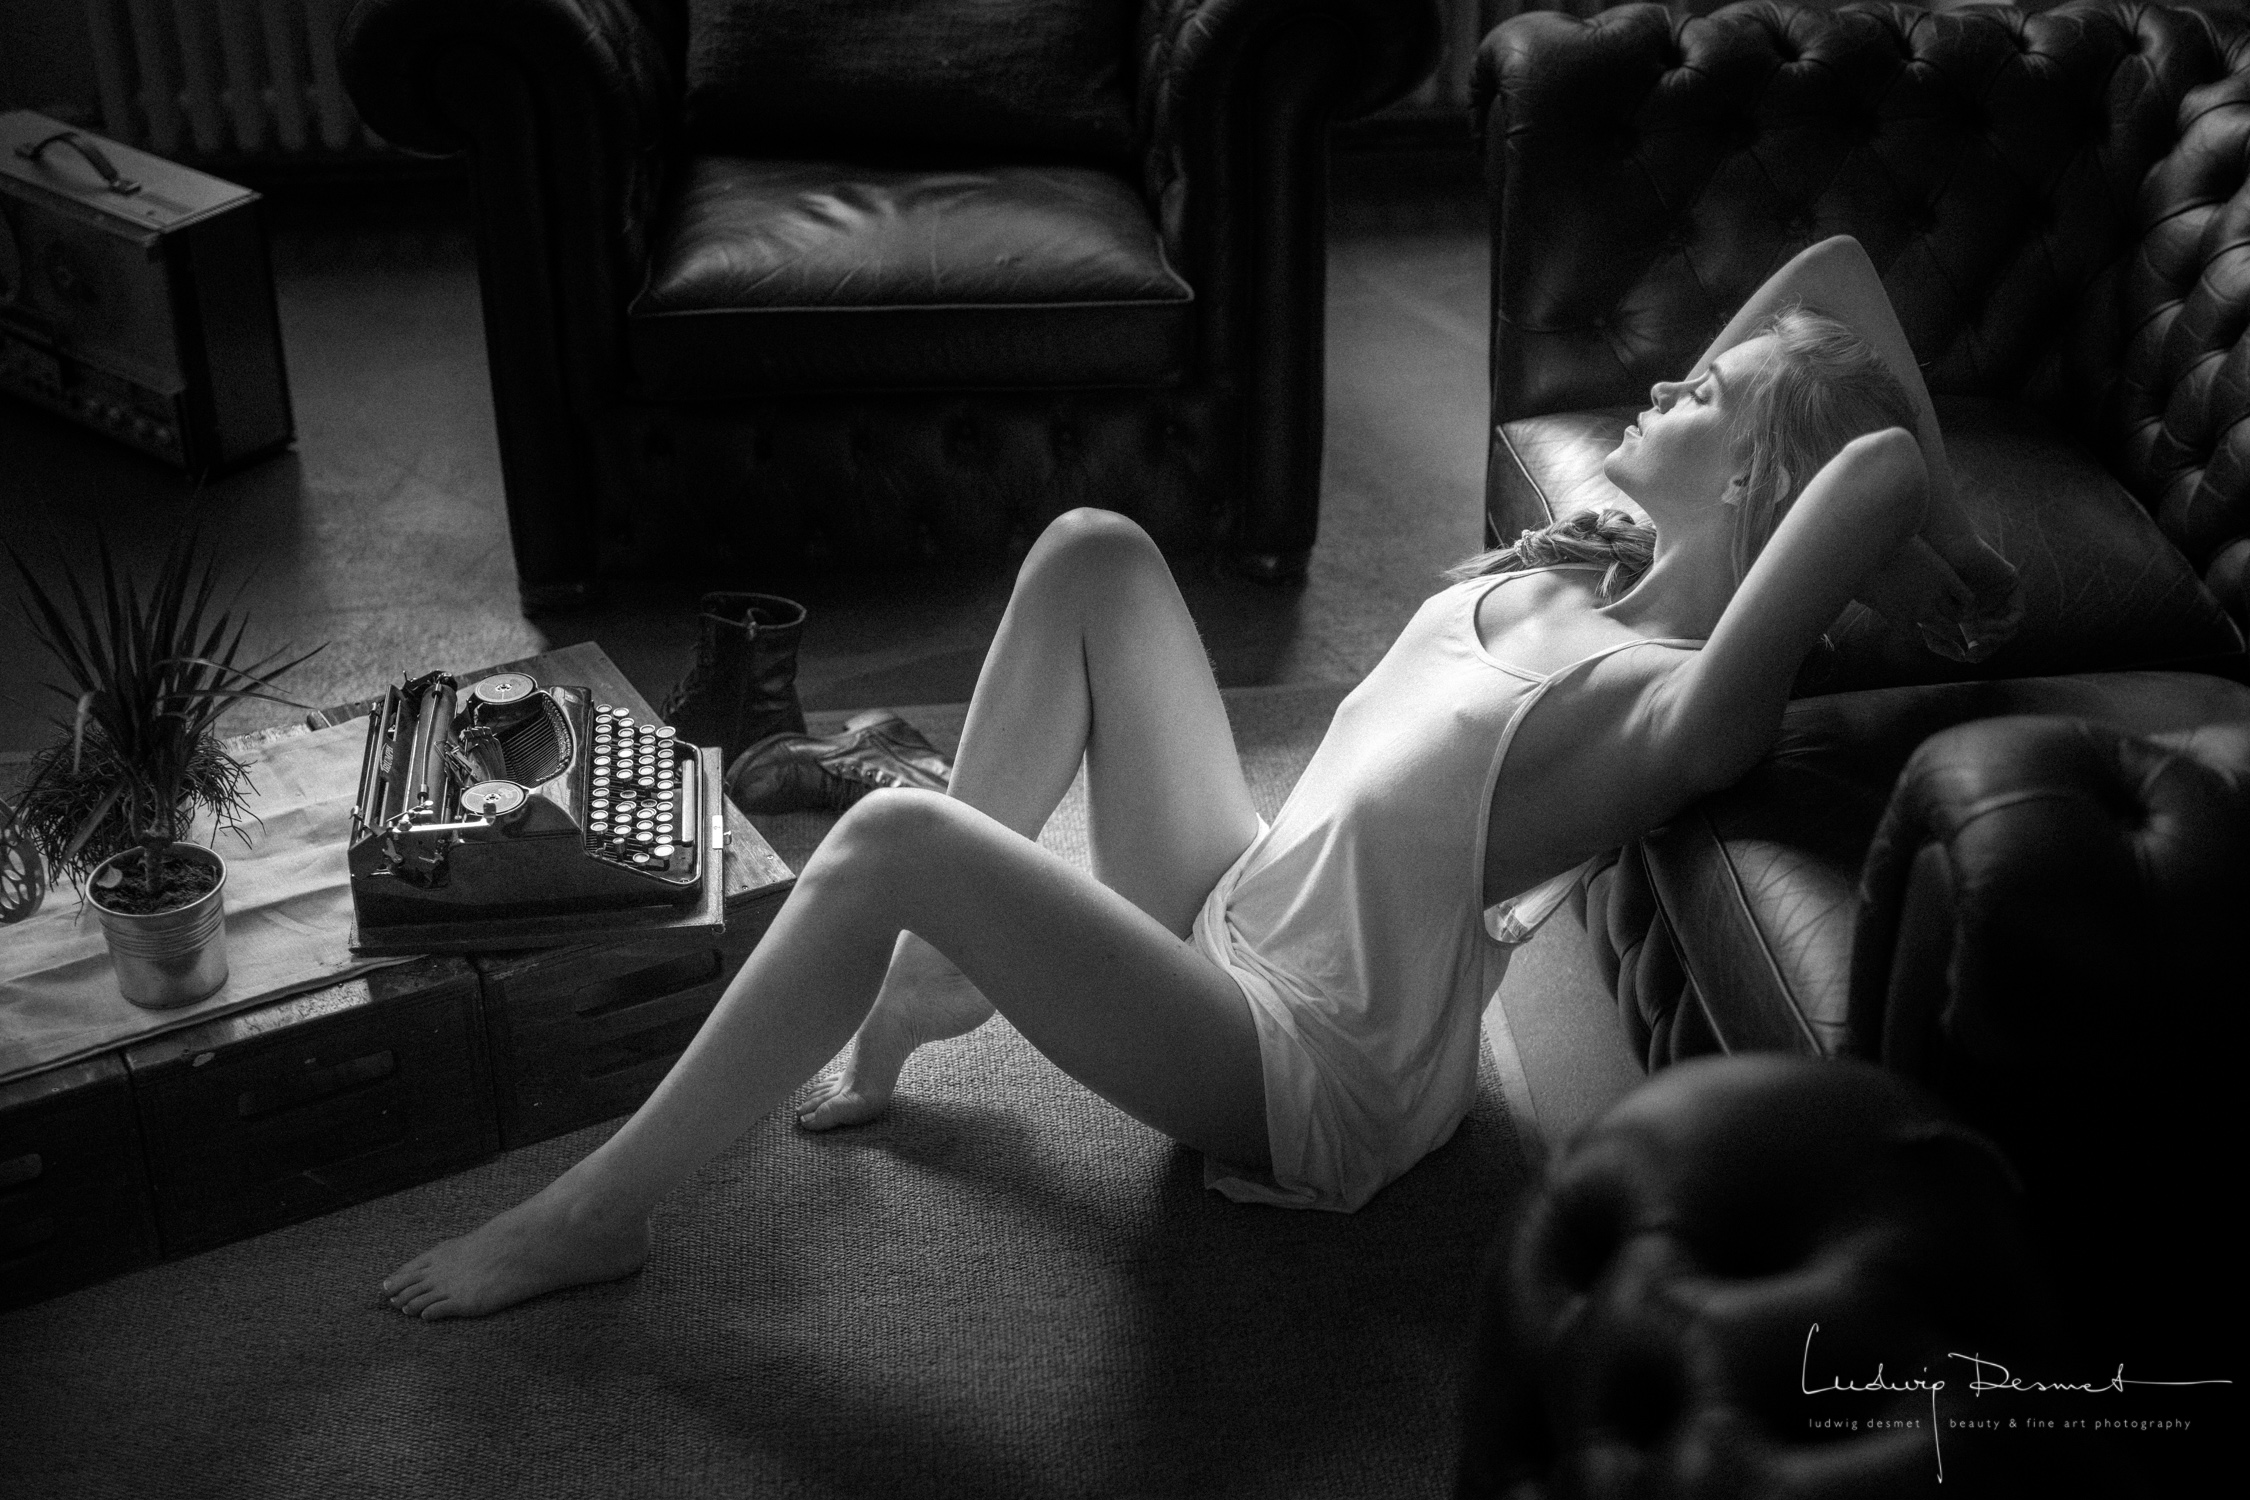
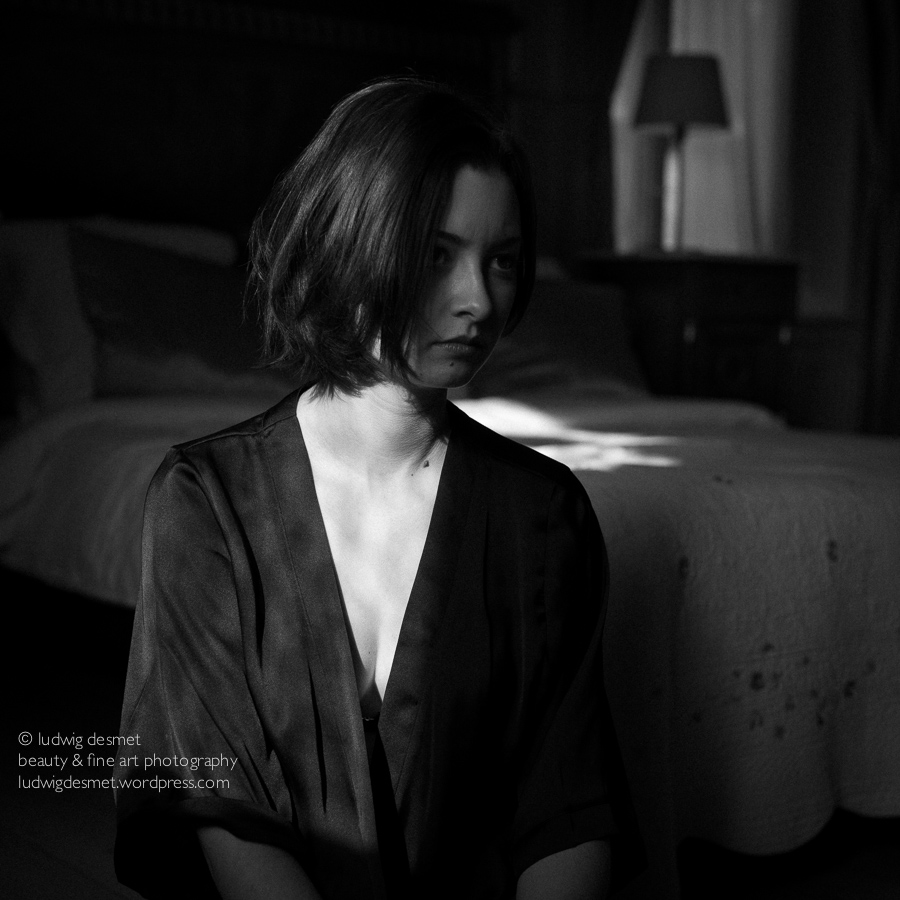
The edit looks like this (same editing on both images) Adobe Standard above, 5Ds profile below. In the first image, the colours are slightly red, but especially the corner shadows completely run black (due to my vignette, I know). Compare with the corners in the second image, where I can keep plenty of detail, with the same amount of vignetting.

LudwigDesmet_AL-0354-2 LudwigDesmet_AL-0354-4

When looking in detail, you’ll see that I keep a lot more detail in the hair, and I have less noise appearing in the second image. (upping the shadows a lot also emphasises image noise)

face detail

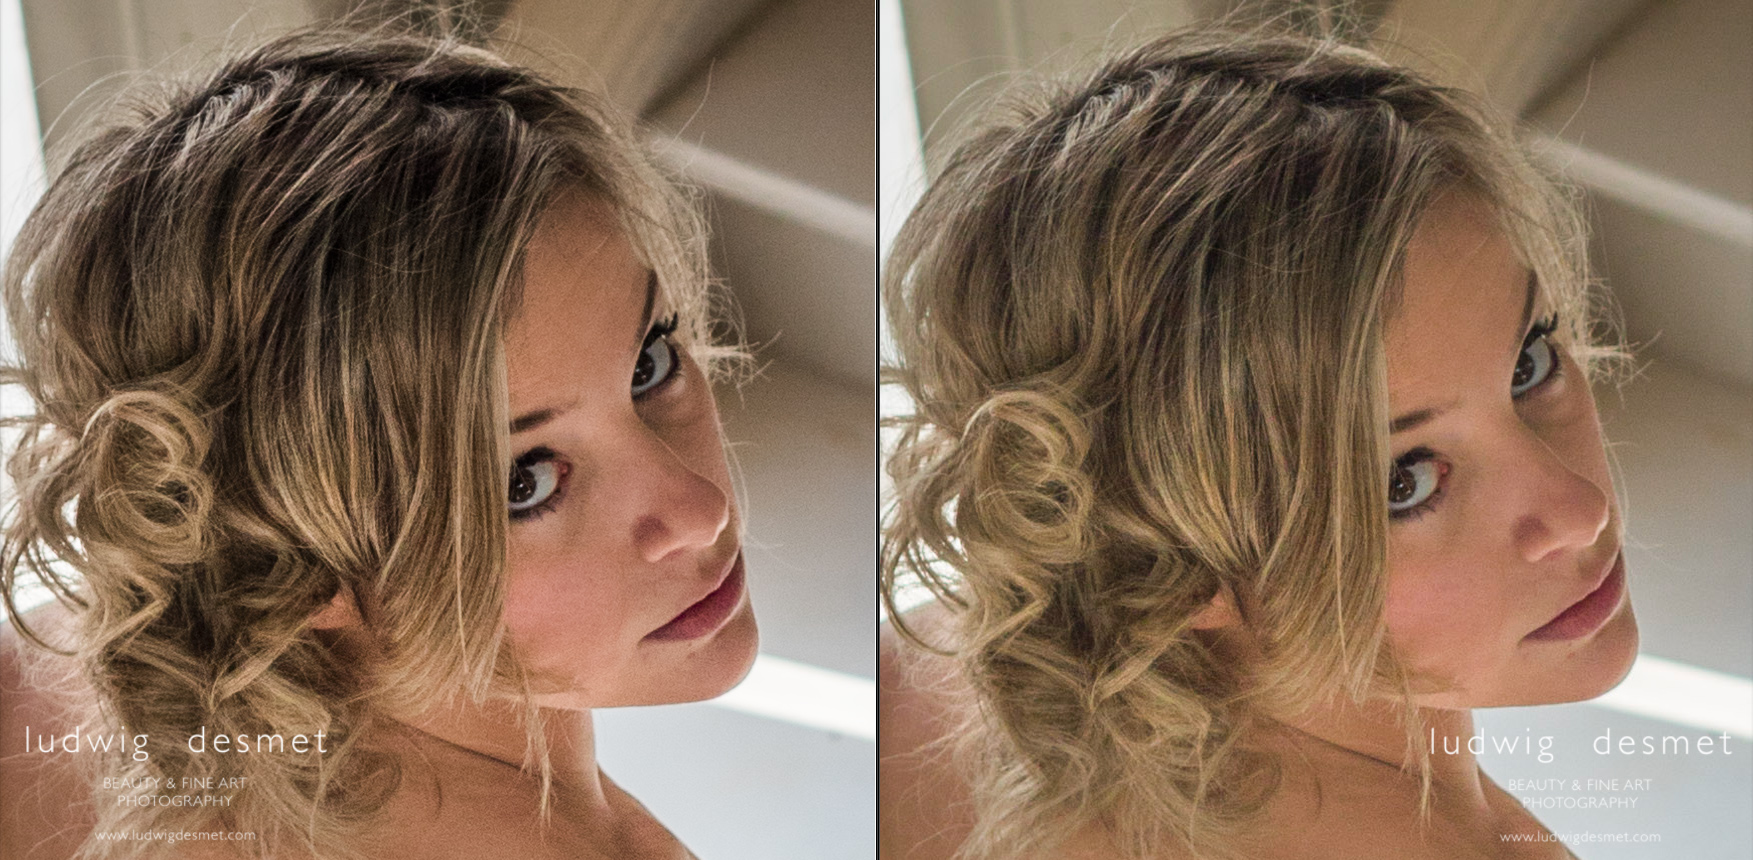
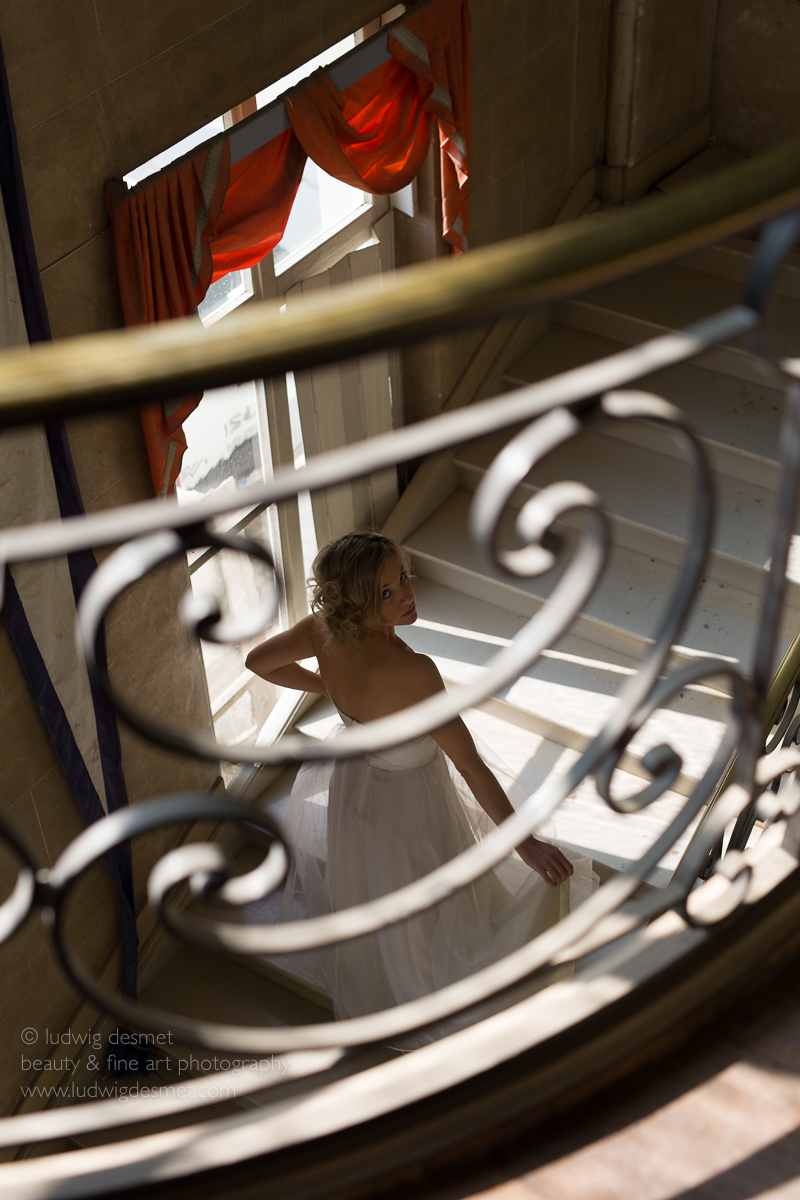
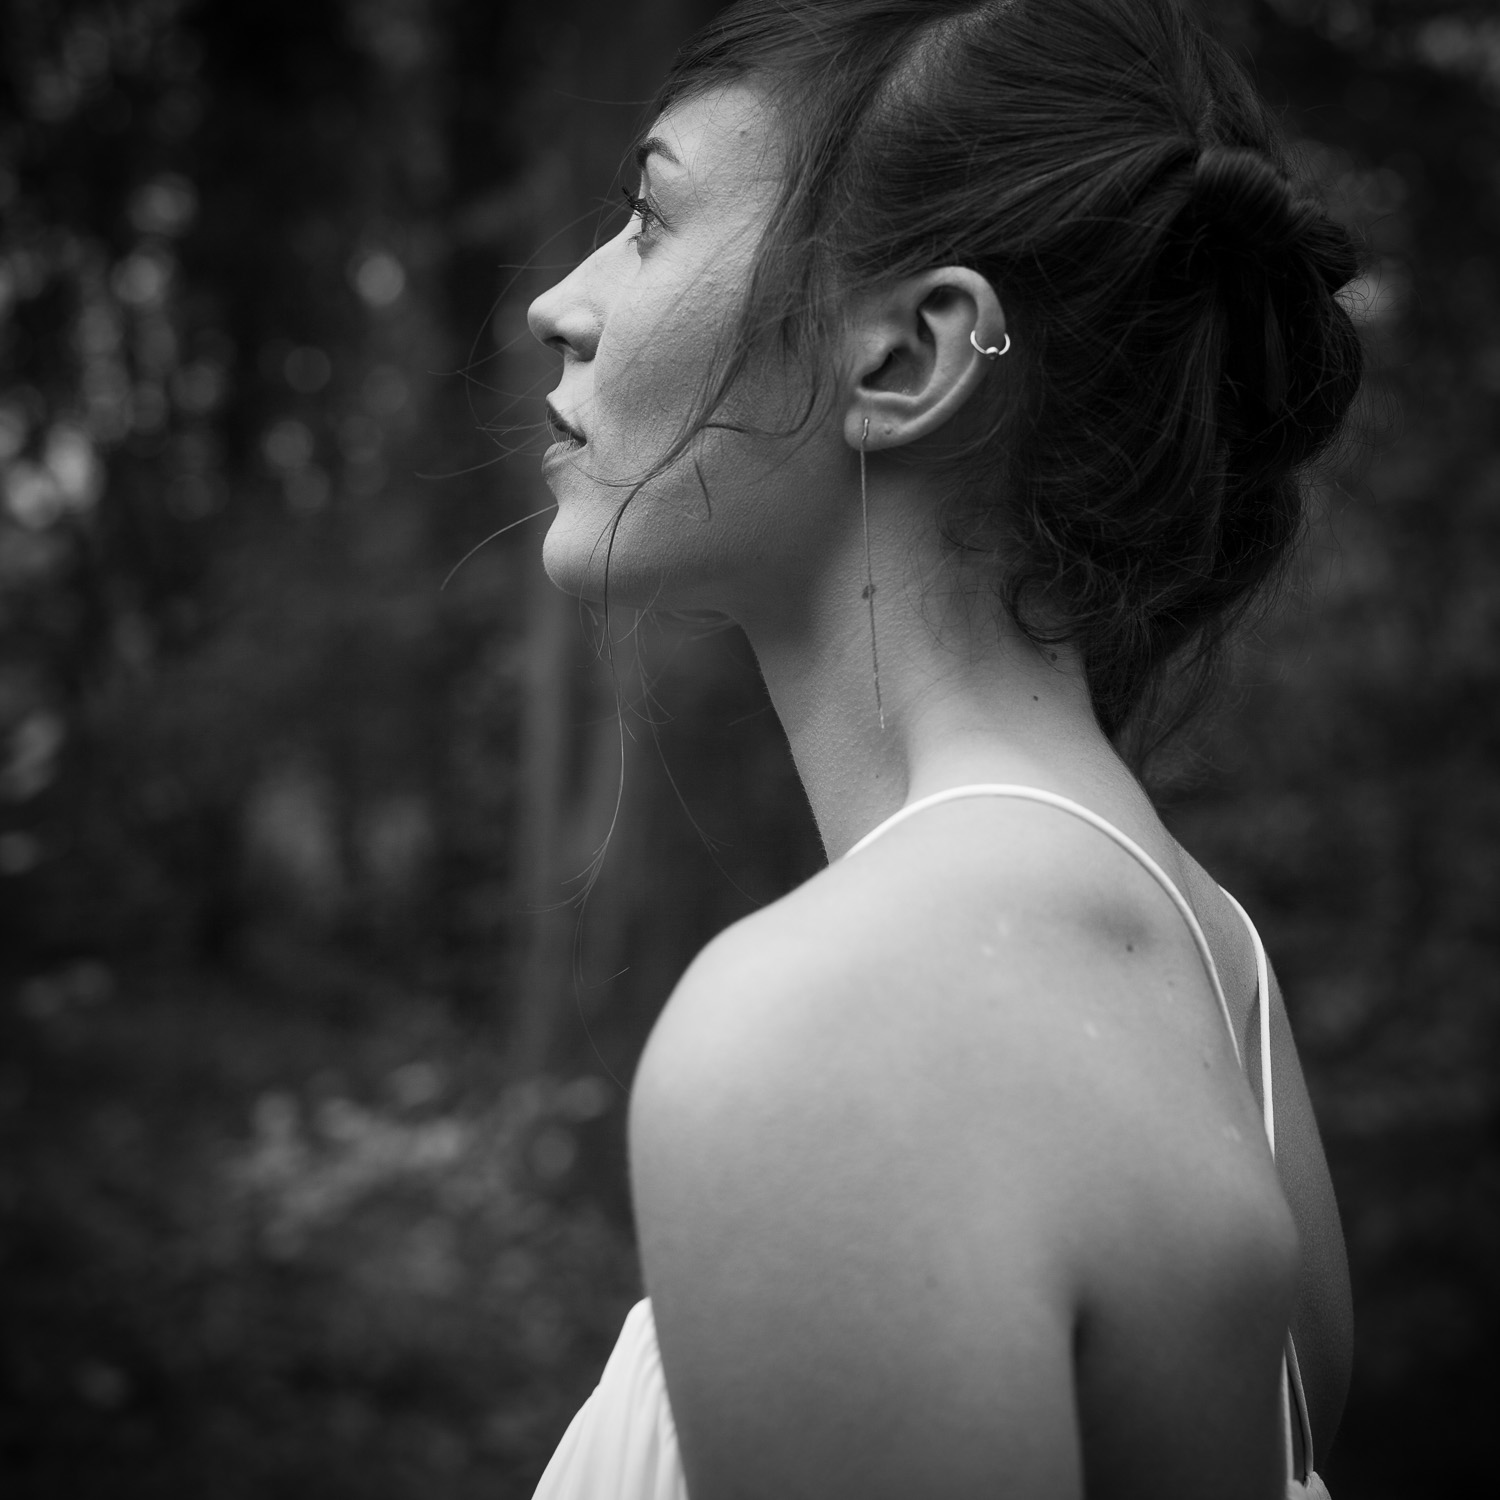
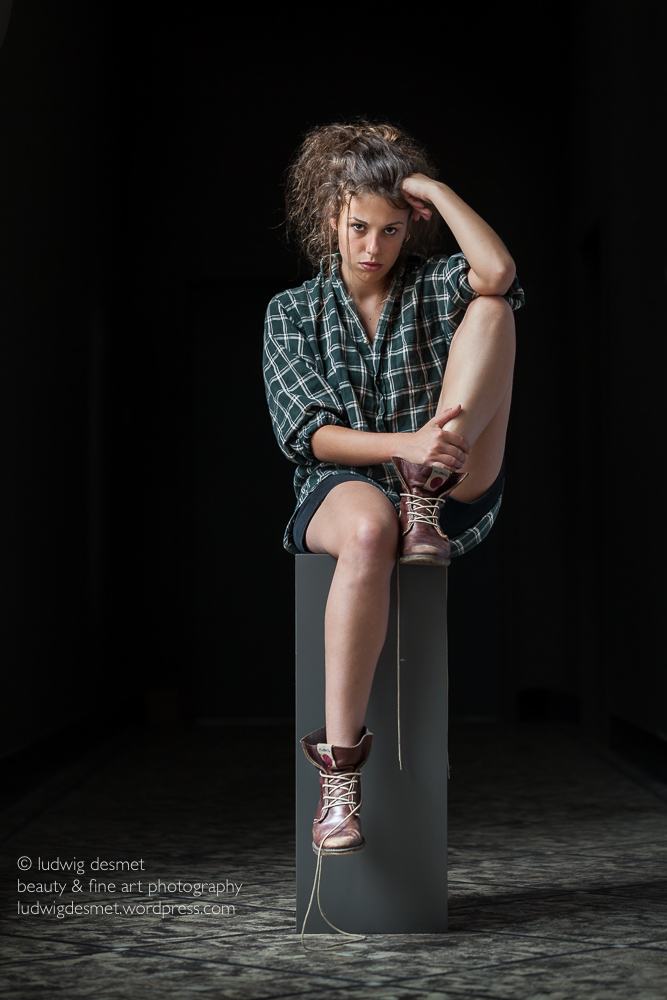
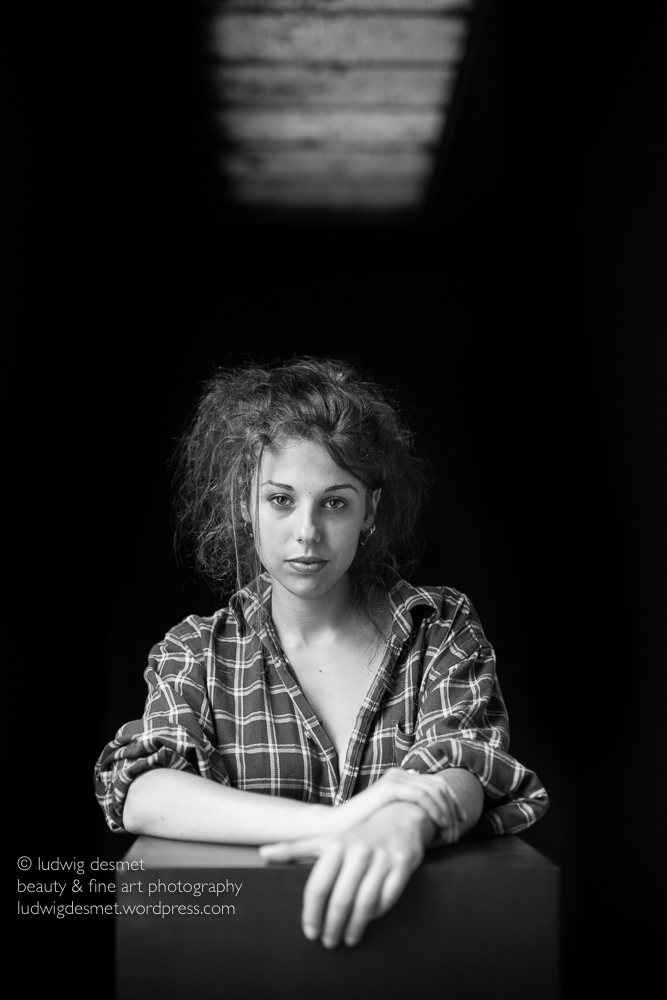
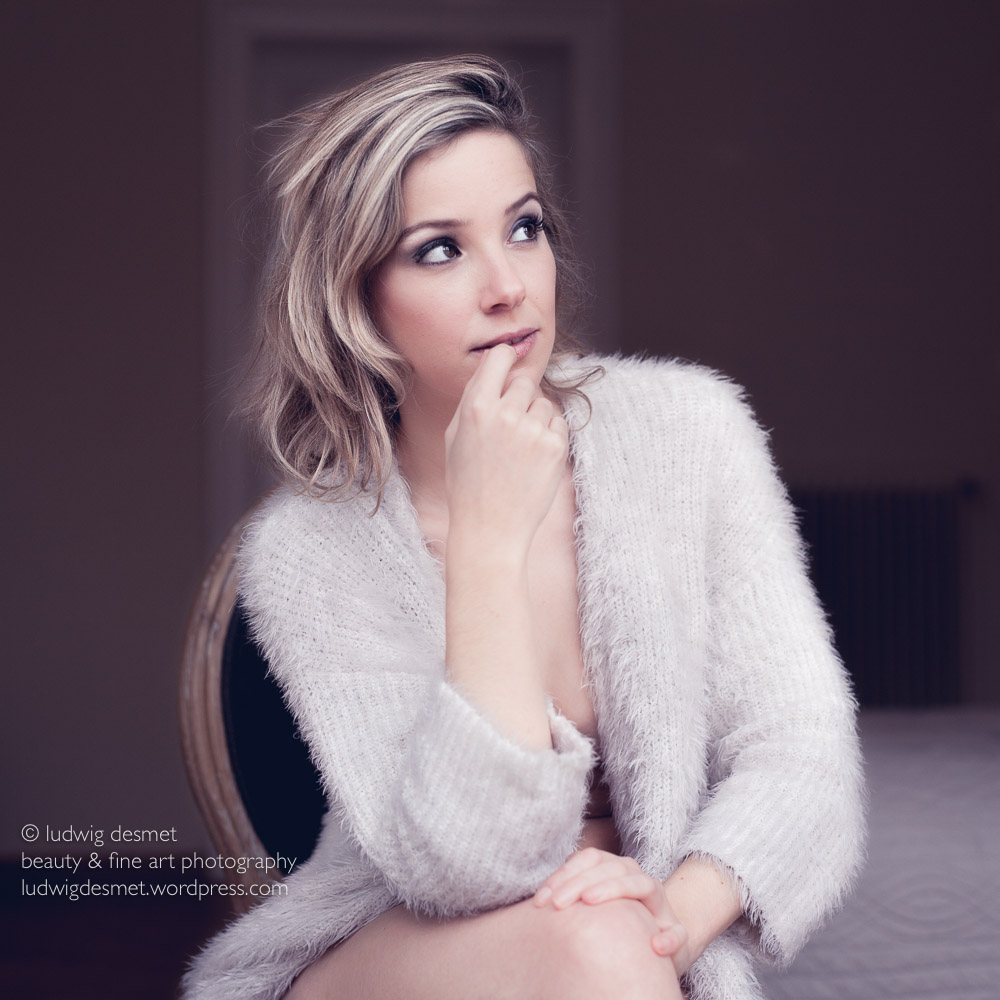
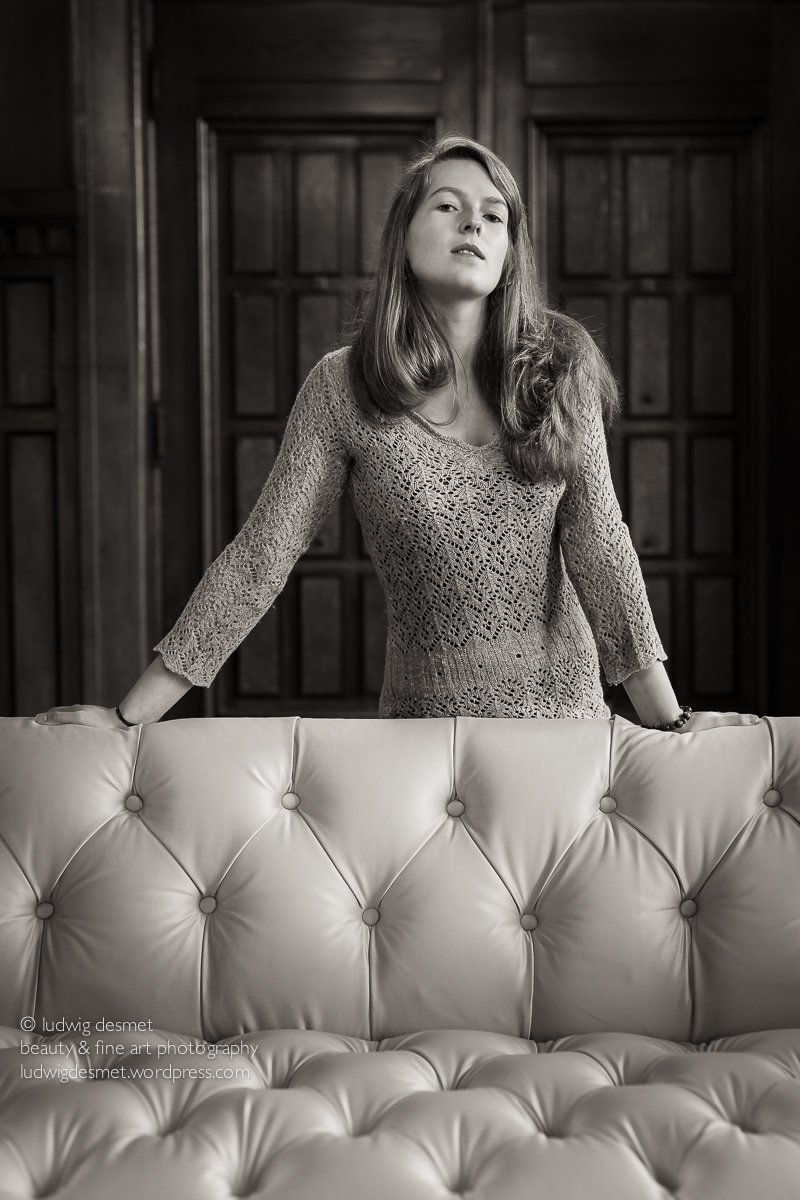
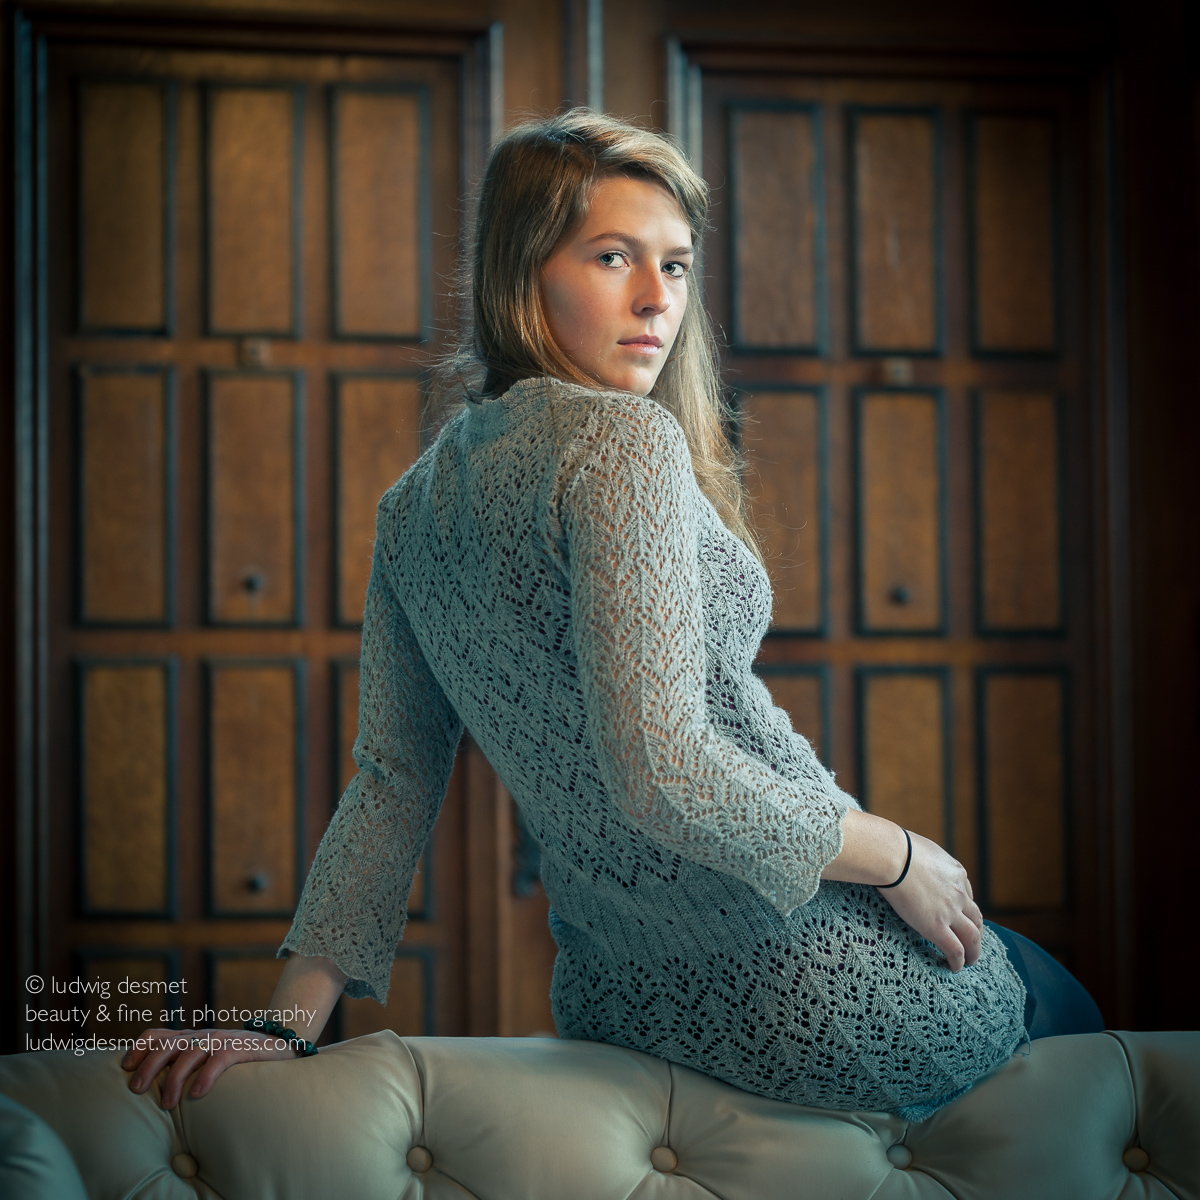
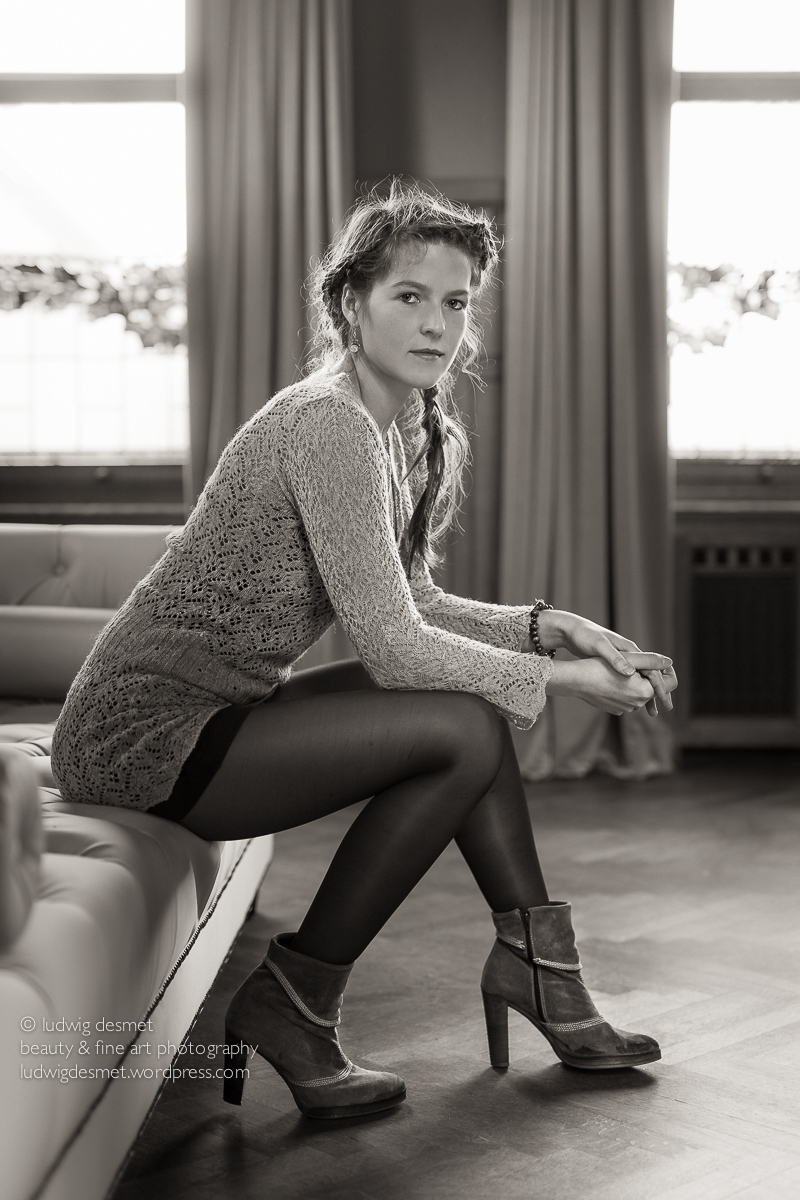
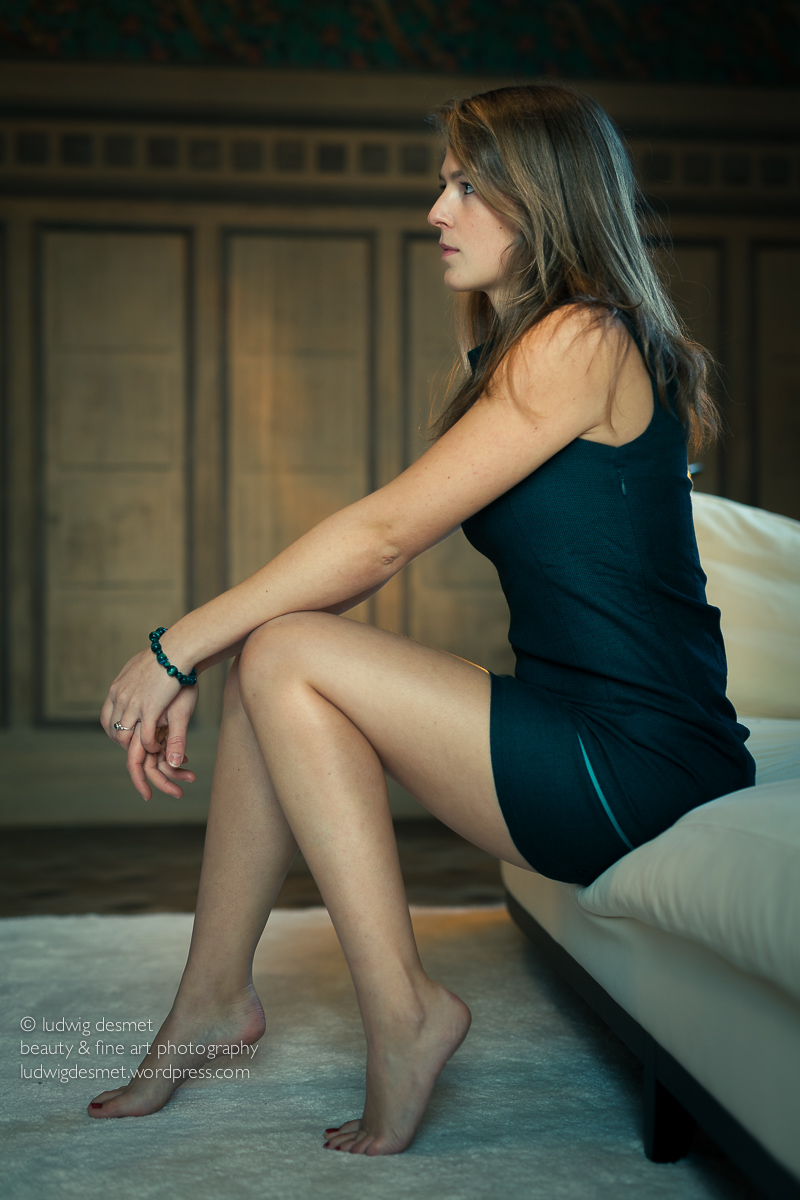
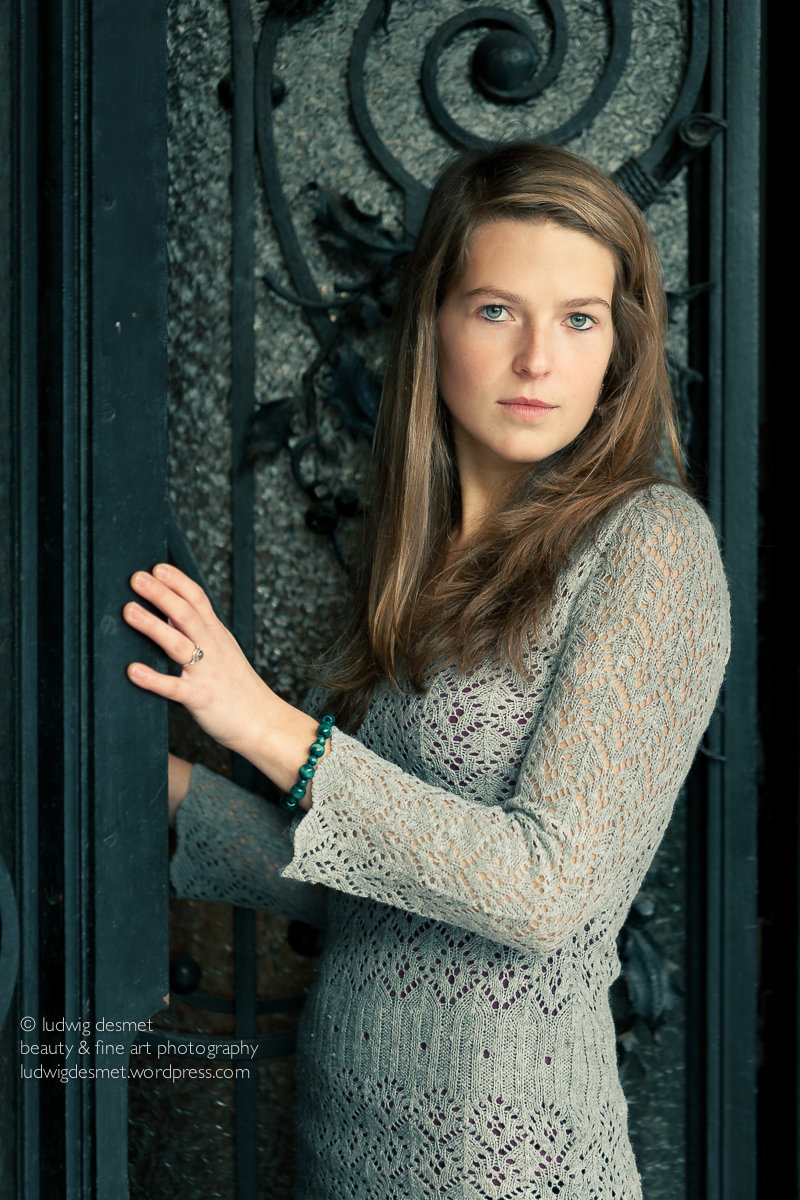
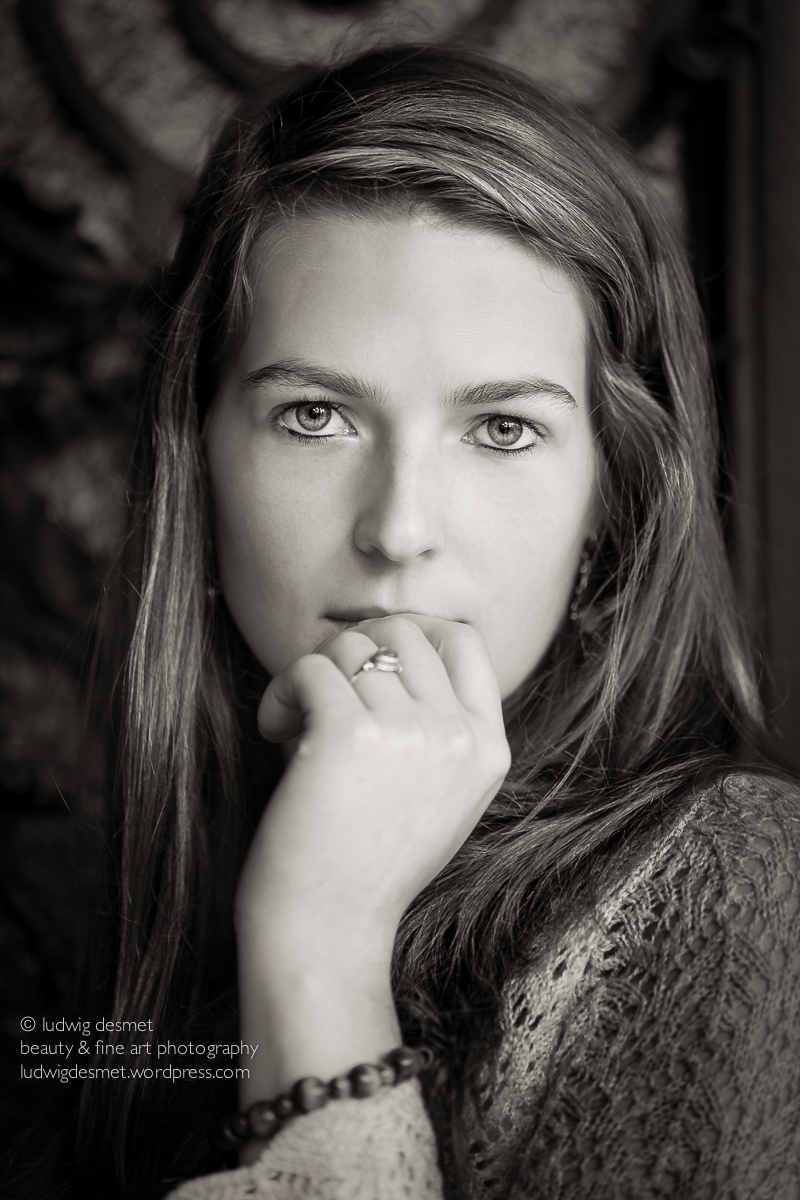
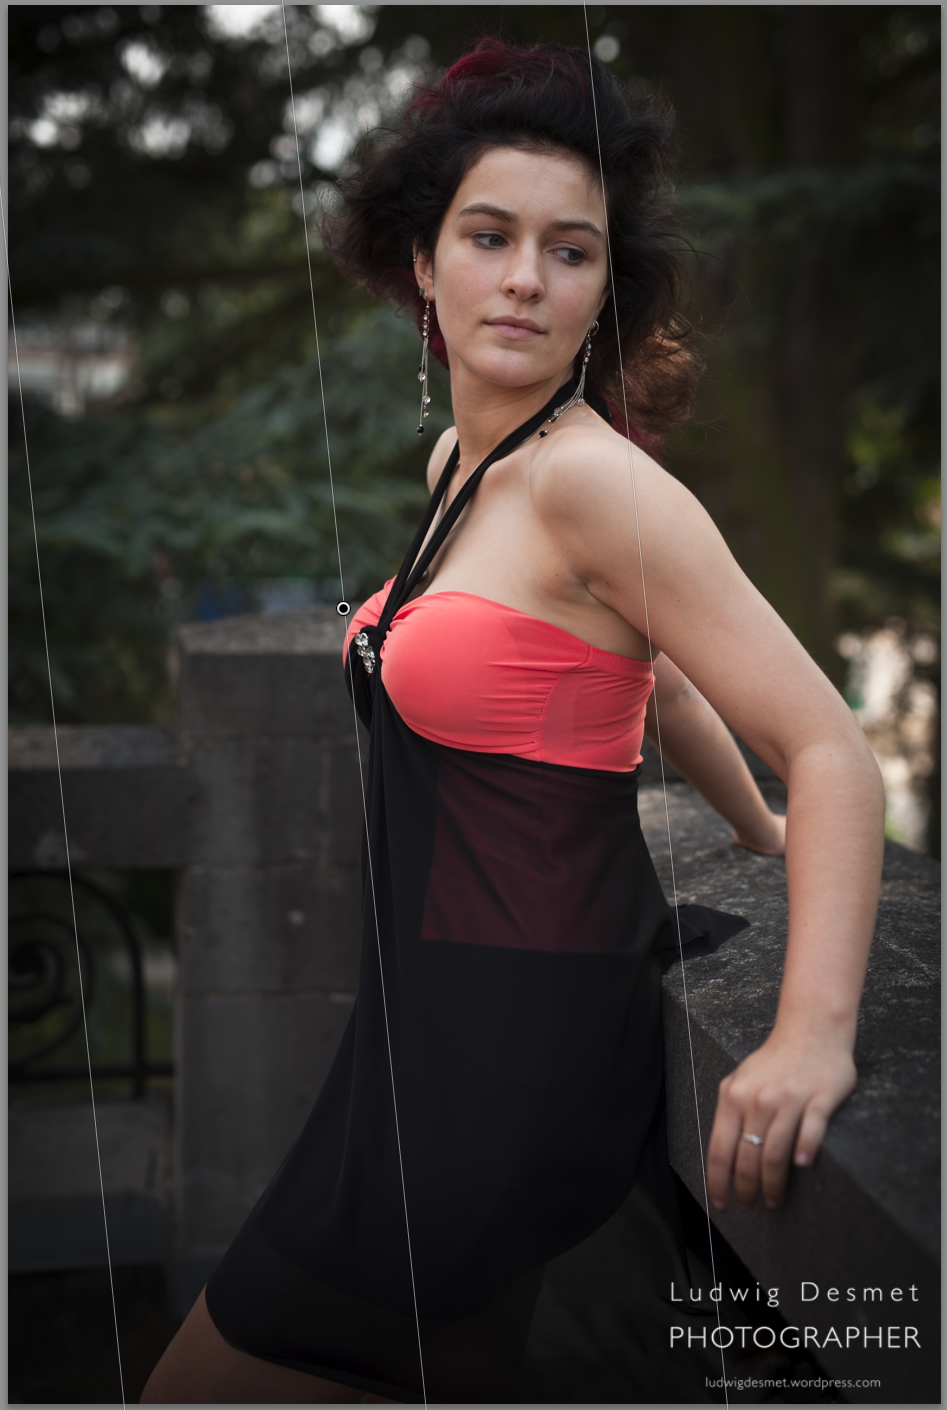
Image: Jenn at Baudries Castle

Hair: Nathalie

Make up: Heidi

I think Jenn has a large amount of ‘Nathalie-Portman-looks’ here 😉

Canon 5Ds with Sigma 50mm f1.4 DG A   –   1/640s   f2.8   ISO 160


see you soon for part two of this explanation, and for a lot more images:

summer time, shooting time


ludwig

Post production explained

landscapes, Lightroom, Personal Pictures, personal tips & tricks

Another before and after short explanation.

A lot of people have liked this image on facebook, and this inspired me to repeat once again the importance of good development of your images.

Hallerbos before and after

What happened in post production? For those familiar to Lightroom, here we go: (to those not familiar to Lightroom – I enhanced the image 😉 )

color temperature slightly warmer, tint unchanged

added a +0,18 stops exposure +40 contrast +97 highlights (to accentuate the sun ray’s/highlights)

HSL panel:

Added +8 in purple Hue settings

Added +35 and +23 in respectively Blue and Purple saturation

Added +25 in Blue luminance

Local adjustments:

Added 2 gradient filters:

1 to darken the tree trunks from top: exposure -0,94 – highlights +63 – shadows +24

1 to darken foreground from bottom: exposure -0,94 – highlights +62

Added 1 radial filter:

position: central, horizontally shaped, where I wanted the sun rays to be accentuated:

settings: exposure +0,99 – highlights +63 – shadows -71 – clarity +33 –  sharpness +20 (inverted mask to work on the central area, not on the outside area)

ludwigdesmet_hallerbos-0573

I sincerely hope this will inspire you to work a little on your images too. You don’t need Lightroom to enhance them, a lot of these things can be done in other RAW development applications too, some coming for free with your digital camera.

see you soon,
ludwig

Be your own Master

beauty, Personal Pictures, personal tips & tricks, Tips and Tricks

In my evening classes photography, I often am confronted with students wrestling to make final selection decisions. Either for class-related photography, or for their own assignments or private photo experiments.

I had an interesting discussion about this last Thursday, with one of my groups. The question that came up was: “Do you have your clients, in my case my models or my corporate clients, take part in the final selection of delivered images?” (I do corporate photography jobs too, see www.renderhouse.eu ).

I do have to admit that the selection process is a difficult task for most photographers, including me. I have made selections for three upcoming exhibits the last couple of weeks, and that still is a time consuming task. I have a quick and efficient selection method for filtering my shoots to a workable number of images, using positive discrimination as a main tool. However, this still leaves a decent number of images that results in a representative number of finished images (Usually about 10 images per shoot-hour when I shoot digitally).

A more difficult task is to further cut down the number of ‘keeper’ images over several shoots, or even more so the very limited number of exposed images in an exhibit, spanning your entire body of work.

The task being already difficult if you do it on your own, becomes even more complex when you put two personalities together, each having their own ideas and preferences when it comes to image selection. A customer often can’t decide on which of two images to keep, not talking about giving him a dozen images from which he has to pick one.

That’s why I have concluded that for me, I am my own master, I decide, and no one else but me. You can never, as a photographer, meet the expectations of every viewer of your work, especially not if you do artistic or autonomous work, incited by yourself. Your decisions should be inspired by what you wanted to make in the first place, by what you want to show after creating your work, not by what ‘your’ or ‘any’ audience wants to see.

“Hey, but you cannot do so for customer related work, where a customer expects you to answer the job requirements, can you?”

For customer related work things are the same I think, except that there you have to meet at some point the client’s expectations. Therefore a very important step in doing client’s work is to listen to your clients needs or expectations before getting to work on a job. You can either withdraw from the job if you feel you will not be able to stay loyal to your own style, or you can do the job, and select the images that you feel happy with. If your customer is familiar to your work, then he knows your style, and if you listened well, things should work out well.

below a non-published image from the series ‘Aude at Bart & Anja’s house’.

happy viewing.

ludwig

Ludwig_Desmet_AVO-0147

Summary video: Workshop – Available light portrait photography.

beauty, Personal Pictures, personal tips & tricks

A short summary about a workshop I did last year.
I finally found the time to make a short clip from the footage that was shot during the workshop.
You’ll see in this video:

A short briefing round, where I explain some different lighting situations
A behind the scene’s montage from the participants at work
Some resulting images from the workshop.

The Video!

Some images:

Gafodi workshop BTSHappy viewing,

Ludwig

ANGRY – Natural light portrait – setup

beauty, people, personal tips & tricks, portrait

luckily this was only roleplay, she was not really angry with me, I would have feared for my life, if not certainly my camera gear. 😉

Ludwig Desmet EC-5

1/20s f2.8 ISO 400 – Canon EF 100mm f2.8 Macro L

setup:

long hallway with big windows on the left side, first part of the hallway, no windows to the right.

Model just behind the last window.

Big styrofoam board to the right side of the model, filling in shadow parts. (120x240cm – about 50×100″)

That’s it, simple as anything, and a styrofoam board costs a couple of euro’s.

I had to darken the background a little at the right side, there was some light spill at the end wall of the hallway.

pinehouse gang 1

after the angry part, we did some more friendly images too.

here I’m off to the left, so the right wall becomes visible and I don’t get completely black in the background.

Ludwig Desmet EC-2

below: 1/50 f1.6 ISO400 – Sigma 50 mm f1.4 DG Art

Frontal again, showing very dimly lit ceiling windows, not giving any effect on the subject.

Ludwig Desmet EC-3

Ludwig Desmet EC-4

thank you for watching.

Ludwig

Posing as therapy

Nude, people, personal tips & tricks

Last Friday I had a model expressing her feelings about her artistic nude shoot as such:

‘Every woman should do this at least once in her life. The images from the first shoot (which was a non nude beauty shoot) have given me enough confidence to do this, and this is such an empowering experience on the level of self-esteem and self consciousness that I would encourage everyone to do it.’ She took a lot of business cards. 😀

Body-language is a very important exteriorising of ones self-awareness, self confidence and self esteem. People with hanging and forward pushing shoulders are mostly the less confident ones, they have tendency to bend over to hide and protect themselves from the outer world. They are having a hard time opening up in a photoshoot. I received another testimonial where a woman said ‘I found it a very fine experience, but at the same time I was very much confronted with my vulnerability, my low self esteem and my lack of confidence. You’ll probably see that in the images. I’m very happy I made this step, but I sure have a long way ahead of me.’

On another occasion I have had my model shout out loud in the open forest ‘I am open to the world, to its resources and its wealth, and I’ll give my talents, my beauty and my smile in return’. And I made some images she’ll never forget. I have given her the task to do that exercise on a regular base. When I sent her the first images she thanked me a lot, and told me she would use them for her daily exercise.

I have strong belief that by changing the body-language, even if it was only one time, making some ever lasting images of it, can change a persons vision on who she (or he) is, and more important, who she can be. In that aspect the role of the photographer becomes so much more than the one taking pictures, being able to handle light, exposure, lenses and camera’s. He has to be some kind of a therapist, being able to express comfort and thrust to his model, being able to understand feelings, emotions and personal barriers. He has to be able to pauze and give space when needed, work fast when the process allows. Learning photography is not a hard thing to do, learning peoples psyche is.

for reasons of privacy I choose not to publish any pictures with this post, except the two nameplates that are upon our front door. They match very well indeed.

thank you for reading, comment and share as much as you like.

if you feel like posing could do you good, please give me a sign. If you feel you need some other kind of therapy, contact Nathalie. 😉

Ludwig

Ludwig Desmet therapy

Jenn – Lightroom developed – Step by step.

beauty, Lightroom, personal tips & tricks

Some of my former students asked me if I could try to find out about a particular developing effect she was after, she sent me some sample images and a bit of an explanation what she needed. I tried to figure out what could be done only with the use of Adobe Lightroom ®, I’m currently using version CC 2014. I looked for an interesting image in one of my earlier shoots and found one from this shoot: A very good morning – Jenn at house Adelaïde NSFW ludwigdesmet_JK-3749 The image was rather dark exposed – blame on me. First things first: up with exposure + 1 stop. As I had seen in the sample images, the blacks were not really black anymore, and the highlights were really pale. I wanted to keep the background as dark as possible, so I changed general settings like this: Exp: +1 Highlights: +100 Shadows: -100 Blacks: -42 ludwigdesmet_JK-3749-3 A little harsh maybe :p lots of contrast, but not really appealing to me. to get a more snappy image, and to start trying to find that ‘washed out’ look, I further changed: Clarity: +25 Saturation: -14 ludwigdesmet_JK-3749-4 Then I added four local adjustment brushes, below are the respective masks 1 to 4: 1: The background: Exposure -0,8 stop, to get back to the original dark background (I could have done it the inverse way, and only have painted the model in stead of upping the exposure 1 stop overall.) 2: Skin to get it warmer and softer: Exposure +0,48, Clarity -70, Temp +7 3: Hair, and below eyebrows, to get more lively hair: Exposure 0,46, clarity 30 4: Pull over arm and leg, because I thought the arm was getting a lot of attention: Exposure -0,67 Jenn_local_brushes This is the resulting image after the local adjustments. ludwigdesmet_JK-3749-10 As all of the images had non black blacks, and a slight blue’ish color cast, I used the tone curve for further adjustment, where I changed to linear curve, I upped the left lower point for RGB, and I separately upped the left lower point for blue. (The left lower point are your blacks, by upping them, you make your blacks very dark grays, by separately upping the blue some more, you ad a blue color cast, especially in the blacks) ludwigdesmet_JK-3749-5 but I wanted some more, so I added a split toning effect in the shadow channel: Hue 244, saturation 15 ludwigdesmet_JK-3749-6 after that, some vignetting, sharpening and a little correction here and there, the final image: ludwigdesmet_JK-3749-9 and a small before and after image for your convenience: Jenn before after If you found this step by step developing instructions interesting, you might also like these posts: Kimberly before and after Developing beauty LR4 thank you for watching, I hope this has been inspiring to you.

ludwig

Model photography – Corinne Vionnet style

Personal Pictures, personal tips & tricks, Tips and Tricks

A former classmate from photography classes is currently still following courses in a different institute, to further expand his photographic horizons.

He came with the question ‘if I could figure out how to make a Corinne Vionnet image’ …

Corinne Vionnet has created a series of works, assembling a massive amount of tourists images (1000) into one single image. The resulting image is some kind of a condensed, time-spanning  assembly of the tourist spot at hand.

I’ve tried to assemble similar style images with a limited number of beauty shots. These are the results.

Vionnet style 02 Vionnet style 01


I got interested in this technique, and I thought that I could make a ‘universal female portrait’, so I assembled 45 different images into one portrait. Image here under. Looks funny, but I liked the originals more.

This made me think about ‘Das Parfum’, the novel by Patrick Süskind, where the Jean Baptiste Grenouille tries to capture the essence of young women in a perfume, (he has to kill the women for his perfume) but instead of creating a perfume of youth, he became a monster.  Not that the below image looks like a monster, but it is not exactly a beauty either. 😀 A lot is due to the different angles in which the original faces are oriented in the image. I need to try with ‘straight facing’ portraits next time.

45 female portraits

I think I should experiment a little more with it, to see where I can get to with portrait work. Anyway, my friend was pleased with the results, and I have discovered something new. 🙂


thank you for reading,


Ludwig


Very important reading if you care about your digital camera sensor.

Interesting Links, Internet tips and tricks, tests

I have recently found out that:

Concert laser shows, and other laser sources can, literally burn your DSLR sensor. The problem has not been very obvious for a long period of time, since we used to take only stills with DSLR’s, exposing the sensor for only a very short period of time. The shorter the exposure, the less chance there is that the laser beam hits the sensor at that very particular moment.

Now that DSLR’s are also capable of filming, the problem is appearing more frequently. While filming with your DSLR, the mirror of your camera is up, and the sensor exposed. Laser beams although often spreading over distance a little bit, are known for their very linear and small beam. This beam hitting the lens, then refocused on the sensor, can ruin your sensor at the very first hit.

there is a lot of documentation on the subject on the internet (search for ‘laser beam killing sensor’) but I think this single movie tells the whole story.

https://www.youtube.com/watch?v=qzyKLoEDb64

Someone filming with a Canon 5D mark II (a 2500$ camera) not aware of the possible damage that might occur. At the end of the song, his sensor is turned completely useless.

Beware if you care.

Ludwig

PS.: Share if you have other friends with digital gear, interested in picking up on a concert from time to time, … Same thing can happen to your video camera, and I suppose to your cellphone camera sensor too.

I scratched my focusing screen – Square crop on Canon 5D II

personal tips & tricks, photo gear

Since photographing with the Rolleiflex camera, I have enjoyed it so much that I wanted a square crop compositing aid on my Canon 5D mark II.

I had read about Katzeye optics on the internet, mailed them, but they were unable to make me a replacement focusing screen for the 5D II.

After searching the internet, an alternative option seemed to be unavailable.

I have been using a special focusing screen replacement for a while (Eg-S, also called super precision focusing screen), that has a better visual reference for the actual depth of field.

This has left me with two no longer used focusing screens (the original ones for my two camera’s), so I thought I’d give it a go.

Brute force and an ‘I don’t care’ mind is the only thing left 😀  so I decided to ‘scratch’ my focusing screen with square crop lines.

What you’ll need:

A focusing screen that is of no importance to you (one you can do absolutely without)

A needle

An iron ruler

A loupe

A fine marker pen

fine motor skills

some nerve.

Some pictures of the process (I’m not responsible for any camera abuse that might result from this blog post)

focusing screen square crop

the following steps will be needed :  (FS=Focusing screen)

1. With the help of the focusing screen replacement tool (delivered with the Canon focusing screen replacements) you will remove the FS.

2. With a fine marker put a small reference dot at 6mm from the edge of the ground surface of the FS, this is not the edge of the FS.

3. With a metal ruler and a sharp needle (any kind of sewing needle will do) just slightly scratch the ground surface of the FS parallel to the edge of the FS.

4. Do this on two sides (left and right)

5. Put back the FS in the camera, with the help of the provided tool.

Tadaaaah, two vertical lines in the ocular view. They give at least an idea of where the square crop will fall.

thank you for reading, remember, I take no responsibility for possible damage to your gear.

ludwig

Clair-Obscur, or playing with light

beauty, people, Tips and Tricks

When I met Pauline at a hotel room in Ghent, the sun was shining brightly. This led to a difficult light situation, with very high contrasts in the room. (Contrast ratio 10/1 sunlit: 1/500s f2.0 ISO100 – shadow: 1/50s f2.0 ISO100) You either have to stay out of direct sunlight, or be very careful working into it. The key here is to make sure that your exposures are good for the sunlit areas, and certainly not overexposed. This can be done by spot metering the lit area’s and fixing your exposure to that metering. This gives you dramatic contrasts, and a perfect light situation for the ‘hide and reveal’ kind of images. The situation became even more tricky later on, as thick clouds began to block the light more often than not. All images with Canon 5D II and Sigma 50 mm f1.4 Art.

Ludwig Desmet-Pauline_Hancelot-2-2

Ludwig Desmet-Pauline_Hancelot-2-3

Ludwig Desmet-Pauline_Hancelot-2-4

Ludwig Desmet-Pauline_Hancelot-2

Ludwig Desmet-Pauline_Hancelot-3619

I loved working with Pauline, she’s full of character, she has confidence in me as a photographer, and she’s willing to play with the camera. Of course her drama lessons add a lot to that.

see you soon for some analog images from this same shoot. I shot two rolls of T-Max 400 film that same afternoon.

Ludwig

Fien at The Mansion – about light.

beauty, Personal Pictures, personal tips & tricks

After our outdoor forest shoot, we had some time left for a quick session ‘at The Mansion’.

The Mansion is still my favorite location for indoor shooting, since it has so many possibilities. Whatever moment of the day, there’s always a room that has nice light, the building is free-standing, which means that there are windows all around, and some rooms have windows on three sides. So besides choosing my main light source, all I have to check is my own position, the position of my model, in respect to the multiple windows I have around me. I can shoot with a window in my back, and still shoot against the light with the window just in front of me.

On the attic, I have rooms with only a small light, on cloud covered days that becomes very similar to what a softbox would do. On sunny days, I have a light spot on the floor, which reacts as an indirect light, and I still get the ‘softbox’ windowlight. On sunny days I rather not shoot in straight sunlight, because of the huge contrast ratios between sun-lit area’s and shadow areas.

Some images to illustrate my explanations:

1. One of the attic rooms, a single window at the right of my model, cloudy day, no direct sunlight, a door opening just left of the image, you actually see the door at the left side. Gives me enough light to create that small rim light on the hair and body, and it adds just that little extra light on the floor, to make the rest of the body shape stand out.

Ludwig Desmet-FienVH-2575

2. The office: A row of windows left as well as right from the model. Moderate light amount. There is an additional window light just behind the model, above the door. I added the extra bit of artificial light, available in the room. (some small bulbs) The artificial light creates a warm color cast, that can be annoying because the natural light is color neutral or blueish, depending on the weather conditions.

Ludwig Desmet-FienVH-2579 Ludwig Desmet-FienVH-3223

Same location, but I changed position.

Now I’m shooting against the light, but also with the light coming from behind me.  The windows are big enough to provide a soft overall light, slightly coming from above, the windows in the back produce a very beautiful contour light all over my model. Note that I position myself in a way that my model is in front of a darker background, otherwise the rim light would get lost. (this was the first picture actually, Fien still has the hairdo from the exterior shoot.)

Ludwig Desmet-FienVH-3148

3. The angels room. Named after a beautiful decoration above the wooden side panels, with angels and flower, …

I have my main window light just behind me, aimed west, this picture was one of the last, so not long before sunset. There’s two more windows on the right, one just behind the model, one a little further away. The window just behind the model was covered with curtains, so only the far right window remains. Again this window helps creating a nice hairlight and ‘sheds a little light’ to the back end of the sofa.

Ludwig Desmet-FienVH-2593

4. The main entrance. Here my model actually stands outside, under the porch covering the entrance to the front door. This is perfect soft light for nice portraits. It is evenly distributed from above and from below, and it prevents hard shadows under the eyebrows. I have no backlight, but the glass in the front door provides a little definition of the hair contours.

Ludwig Desmet-FienVH-3182 Ludwig Desmet-FienVH-3184

5. The stairway. The main light source here is artificial light, coming from above (slightly warm tinted) The rim light is coming from a window behind the model, higher up the wall, spanning from left to right. This gives the nice light on the hair, the side of the head, the cleavage and breast, as well as the wooden pillars. Again mixed light white balance, but to me it is ok.

Ludwig Desmet-FienVH-3218

6. Also taken in the angels room, this time the model is standing where I took picture 3, back to the window, The window is big and high, providing enough light for an overall well lit image. Now we opened the curtains of the opposing window, giving a beautiful fill in light from the left.

Ludwig Desmet-FienVH-3249

To all aspiring model photographers out there, I hope you learnt something from these short explanations.

To all the others, I hope you enjoyed the images.

A big thank you to Fien for her confidence and cooperation. She never posed before, I think she did really well. Above that she’s a charm to work with. A big thank you also to the owners of The Mansion, for giving me continued access to this magnificent building.

see you again soon,

ludwig

Lightroom 5 processing – before and after with Kimberly

beauty, personal tips & tricks, Tips and Tricks, Uncategorized

Hi there, as I promised before, welcome to this informal tutorial on digital development.

Not a tutorial pure sang, but a simple step by step example of a development of one of my images.

Just to make you aware that a good image from your camera can even get better with that little extra attention afterwards.

First a before and after screenshot from the image at hand.

I’ve uploaded them big, for your convenience. Click for full size.

Model: Kimberly D.

Photographer: Myself of course: Ludwig Desmet

LudwigDesmet_Kimberly beforeafter

A little evolutive comparison during development. First image is unmodified, straight from camera. First next step is general exposure and white balance corrections, second, the color balance corrections used for uplighting the model and darkening the greens, third is vignette and a graduated filter, to further darken the environment, thus uplighting the model again. Last step is local retouching and further local developing (darkening, lightening, contrast, clarity, …)

LudwigDesmet Kimberley processing

I currently use Lightroom 5.5, but I think this development can easily be translated to a Lightroom 4 version.

Now for a step by step analysis:

First of all I wanted the overal image to be slightly darker.

This is done with a -0.75 stops correction in exposure. It is always better to lower exposure in post than to have to crank it up. My metering might have been fooled due to the dark dress, the background foliage and dark grey concrete elements in the image, resulting in a slight over exposure. I also corrected white balance, from 4650°K to a slightly warmer 5313° K, no color shift correction needed (-2)

Screen Shot 2014-08-18 at 17.45.42

Because my model also darkened with the overall exposure correction, I played with the color luminance sliders to lighten her up again. These sliders allow for color based luminance (or hue or saturation) corrections, without the need for selecting parts of your image.

By getting up the red/orange/yellow sliders, I could bring the exposure level for the skin/dress back towards the original exposure levels from the un-edited image. I do not want to get all the way back, but just want to have my skin tones come back up again slightly. I have a warmer tone in the skin due to the white balance correction from the first step.

Screen Shot 2014-08-18 at 17.46.09

Next comes a rather blunt vignette effect, -48, Highlights priority, with the highlight protection set at 51. This gives a strong darkening vignette in the corners, but it keeps the highlights present trough the foliage.

Screen Shot 2014-08-18 at 17.52.11

I’ve also added an extra darkening gradient to the left, to further make my model stand out in the image. -0,69 exposure, gradually fading over the centre of the image. Here’s how it has been applied: Running from the left at -0,69, having half the correction on the line with the dot (approx -0,35 stops) to nil at the right line.

LudwigDesmet Kimberly gradient

next come the local corrections, first I remove some small skin imperfections, actually this model had very smooth skin, so no much work needed here, but I also tried to soften the armpit wrinkles a little. I do so with the spot removal tool. Here I chose to soften gradually with a healing correction in several steps.

LudwigDesmet Kimberly Spotremoval

And then for the final touch, I added quite some additional local adjustment brush corrections.

What I did:

Added exposure to the face and hair, eyes (separate brush) and earrings

Added contrast and clarity to the hair and earrings

Added clarity and saturation to the lips

Added highlights, and warmth (local white balance correction) to the sun-lit hairs.

Sculpted a little with make up like techniques (shadows and highlights applied in different facial zones), like darkening the lower cheeks, below the eye brow to the center, just below the chin line, uplighting the upper cheeks, below the eyebrow to the outside, the forehead, chin area, …

I added a little light in the black dress too.

LudwigDesmet_kimberly_localadjust

I hope you’ve learnt something, especially interesting if you do work with Adobe Lightroom of course, but also if you would like to do some development in other applications of course.

And by the way, should you be interested, I do give Lightroom classes in Gent, at KISP.

Hope to see you soon, don’t hesitate leaving a comment.


Ludwig

HDR composited image workflow

architecture, Personal Pictures, personal tips & tricks, Tips and Tricks

Making a panoramic image in Photoshop is pretty simple, in the menu you go to file->automate->Photomerge, there you select your images, press enter and photoshop does it all for you, no hassle. You’ll just need to crop afterwards and your done.

Making a HDR image in Photoshop is pretty simple too, in the menu you go to file-> automate->Merge to HDR Pro, follow some easy steps, choose if you want to work 16 bit or 32 bit, choose wether you want to edit in Adobe Camera Raw or just save a 32 bit file, and further edit in ACR or Lightroom (since version 4)

Now making a panoramic image that has been shot in exposure bracketing, is a little more complicated, although a logic iteration of the above two workflows.

Here’s what needs to be done (Lightroom/Photoshop workflow)

000. Work with your Autofocus off for your exposures, focus once, then leave your focus be, work manually, work on a tripod, with preferably a panoramic head, or, as in this case with a Tilt-Shift lens.

00. Make sure you get sufficient overlap in between images (1/3 of your image is a good average)

0. Make sure you get the same exposure bracketing series in all your images

1. Grab your first bracketing series in Lightroom, right click and Edit in -> Merge to HDR Pro in Photoshop.

2. Photoshop will run trough a series of actions, and will bring up the HDR pro interface.

3. Now you’ll choose 32 bit, remove ghosts if necessary (only available from 3 or more images, and good if you have moving elements in-between images.) and just click OK.

4. Your 32 bit tif file will appear awful in Photoshop, no panic, just click the save button. (not save as, as this might save your image in a different directory than the original one)

5. Back in Lightroom, you should be able to see your image as filename-edit.tif You can edit the image just the way you edit RAW files, except now you have 10 stops exposure range up and down. Work with exposure, highlights, shadows, blacks and whites to get your image correctly edited. It might be a good idea to do lenscorrections in at this stage. (lens deformations and chromatic aberration, no perspective corrections)

6. Do this for all your bracketing series, try to develop the different images the same way. Avoid too many local corrections, as you will not be able to synchronize them because they will need to be applied in a different spot in every different 32 bit image.

7. Now the final step is just to make a panoramic image from all our previously edited images: select all your edited 32 bit files and right click -> edit in -> Merge to Panorama in Photoshop

8. Photoshop will gather all images and nicely align them out, make layer masks according to the images content (actually it searches for places where there’s no geometrical difference in two consecutive layers, to make the transition at that spot. That may lead to awkward layer masks, but the result is generally good.

9. Crop the image to get rid of white edges (photoshop will do transformations to compensate for lens corrections, or to get the perspective in-between images working ok)

flatten and further edit if needed (sharpening, filters, …)

10. Sit back and enjoy your work.

Visual representation of the workflow (click for bigger):

workflow

A small version of the final image.

This is the entrance hall of the Antwerpen Centraal train station:

Ludwigdesmet_HDR_PANO-2

Thank you for reading, you might as well follow my blog now you’re here :p

Ludwig