Landscape photography with a Fujifilm x100T

landscapes, location, photo gear, tests

A couple of weeks ago I was with another group at Côte d’Opale in France, for teaching landscape photography to adults in the KISP.be photography program. I wanted to pack light on gear to be able to focus on helping out my students and still be able to take some pictures myself. This made me decide that for this weekend I would only take my small Fujifilm x100T, and my lightweight Sirui tripod, bought for motorcycle traveling. The camera has a 16Mp APS-c sensor and a fixed focal length lens of 23mm or 35mm equivalent if compared to full frame viewing angle. It has a relatively wide f/2.0 max. aperture, and closes down to f16. I have it equipped with the optional sunshade and an extra hand-grip. The hand grip features the same dovetail grooves for arca-swiss compatible tripods as the camera itself does. So the grip bottomplate becomes the tripod plate.

This post will not focus on pixel-peepers image quality, rather on user experience.

Images down below.

THE GEAR USED.

Fujifilm x100T with MHG-X100 grip and the additional sun shade from Fujifilm. I use a custom strap from an old light-meter if I remember well.

Sirui T005-KX, featured also in this article, where I commented on using it with my DSLR. As you can see the tripod has a two segment center column which I mostly do not use, for extra stability. I have not needed the extra reach on this trip, and by omitting it, the ballhead has greater stability.

PRO limited gear set:

First and most important difference with a complete bag full of landscape gear is of course weight. Taking with me a professional range full frame camera body and a couple of quality lenses + my Berlebach tripod is a physical challenge not to be underestimated. 5kgs of photo gear, 3kgs of tripod, a bag of at least 1.5kgs and some food and drink supplies easily brings 10-12 kgs on the scale. The x100T and the Sirui mini tripod together weigh about 1.5kgs. A light backpack with some water and food supplies and I’m off like a butterfly to the cliffs of Cap-Griz-Nez. So this was for me a huge benefit, I never felt tired physically caused by dragging around gear.

Second benefit, and directly linked to the first one of saved weight, is manoeuvrability on difficult terrain. When dealing with a heavy tripod, with an expensive camera + lens, with a backpack that has the remainder of your gear on the back, you are limited in movements, in places where you can get safely with all your gear, in where you want to drop your bag to get out your filters, or just another lens, … With my lightweight setup I could take camera and tripod in one hand, leaving my other hand free for climbing and rock balancing exercises without limitations.


CONTRA limited gear set:

What I missed the most was the variation I have in focal lengths when travelling fully equipped with my DSLR setup. Although I mostly have fixed focal length lenses (24mm – 17-40mm Zoom – 50mm – 100mm – 135mm), they still allow me great variety in compositions, in bringing out distant landscape details or in compositing out disturbing elements. I can go much wider (17mm vs 35mm is a huge difference in viewing angle) or much narrower if I need to. I never missed a lens longer than 135mm in my landscape work. (This could be solved by adding the wide angle and the telephoto extender lenses you can buy for this camera, but they are rather expensive, and you loose some portability)

Next most missed was the Tilt-Shift lens I traditionally use on landscape trips. I often look for foreground elements in my compositions, to create depth in a wide angle view. The tilt-shift lens gives me the ability to get extreme depth of field in such cases, without the need for closing down the aperture too much. It also allows me to make stitched panoramic images with a horizontal viewing angle comparable to the 17mm lens. If I would need to limit my DSLR setup to one lens for landscape, it would be this lens: Canon TS-E 24mm f3.4 L II. (I’m afraid this cannot be solved with this setup)

Next thing I missed is the ability to do automatic bracketing, at least I couldn’t find it in the menu, I since have looked it up on the internet and it is perfectly possible to do AE bracketing in 3 exposures. Shame on me, I should have read-the-f*******g-manual. So I ended up doing manual bracketing for most of the time. (little tip, always use bracketing, even when not needed. the time needed for bracketing exposures is minimal compared to the time needed to find your composition, setting up your tripod, setting the focus correct, etc. …  different exposures will give you more choice for development afterwards). (Solved issue, the bracketing function is under the ‘drive’ button. I looked trough the menu’s only.)

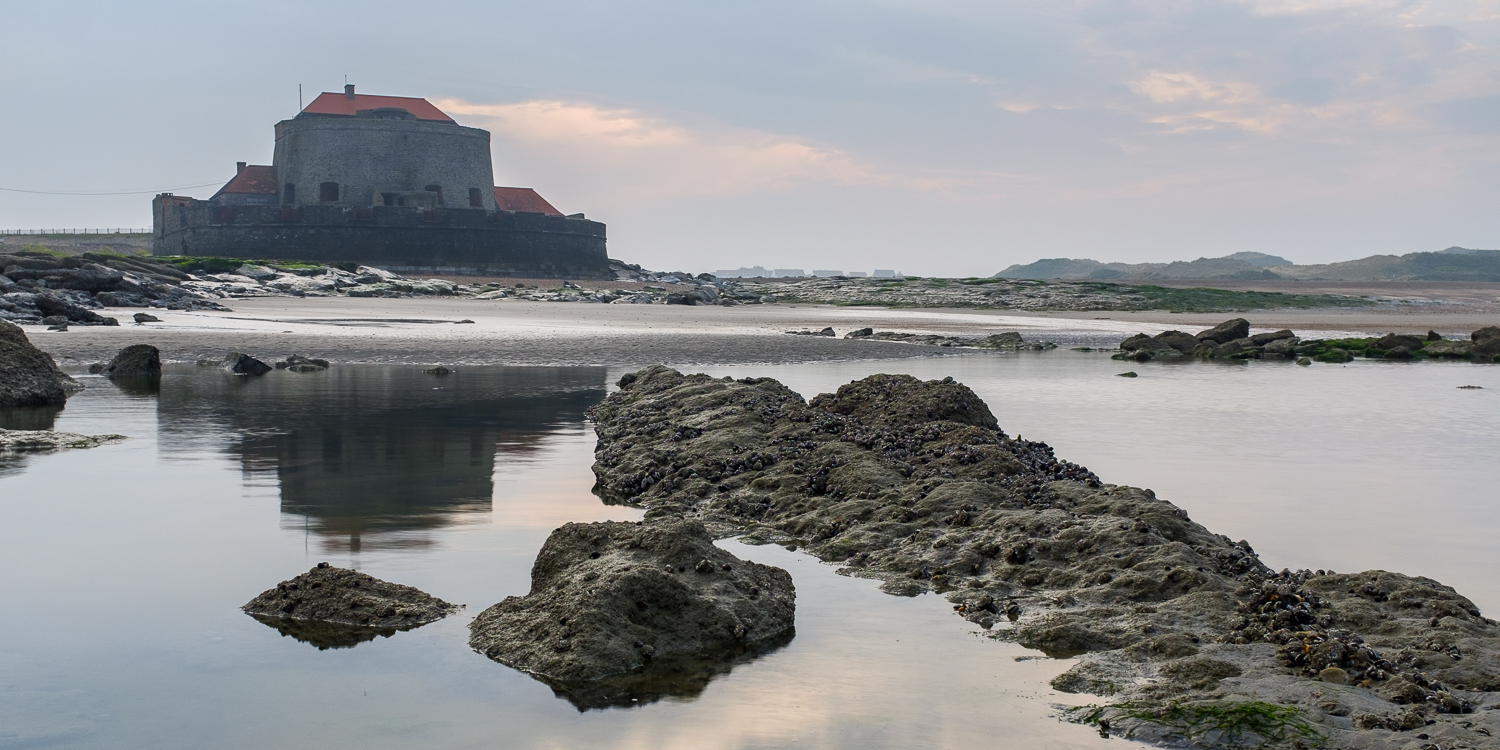
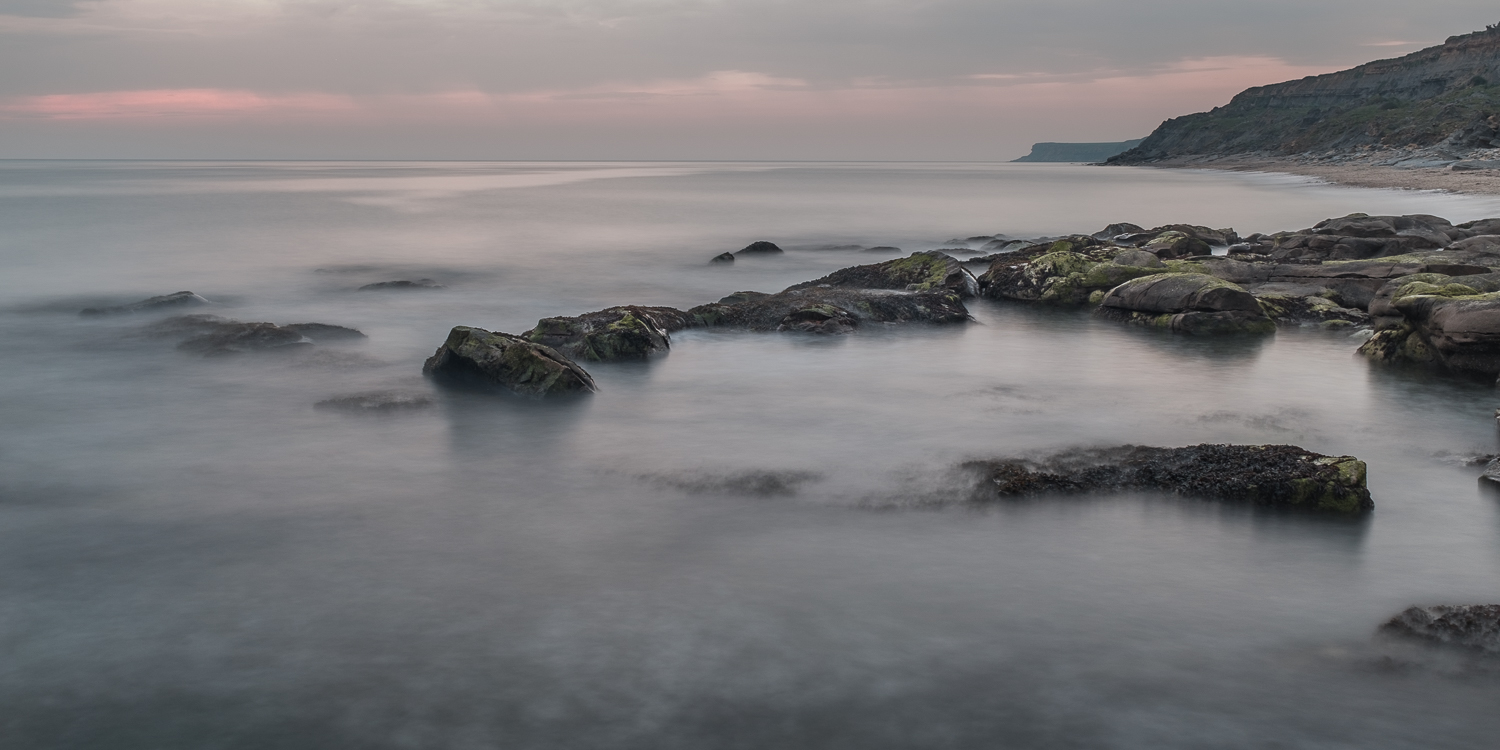
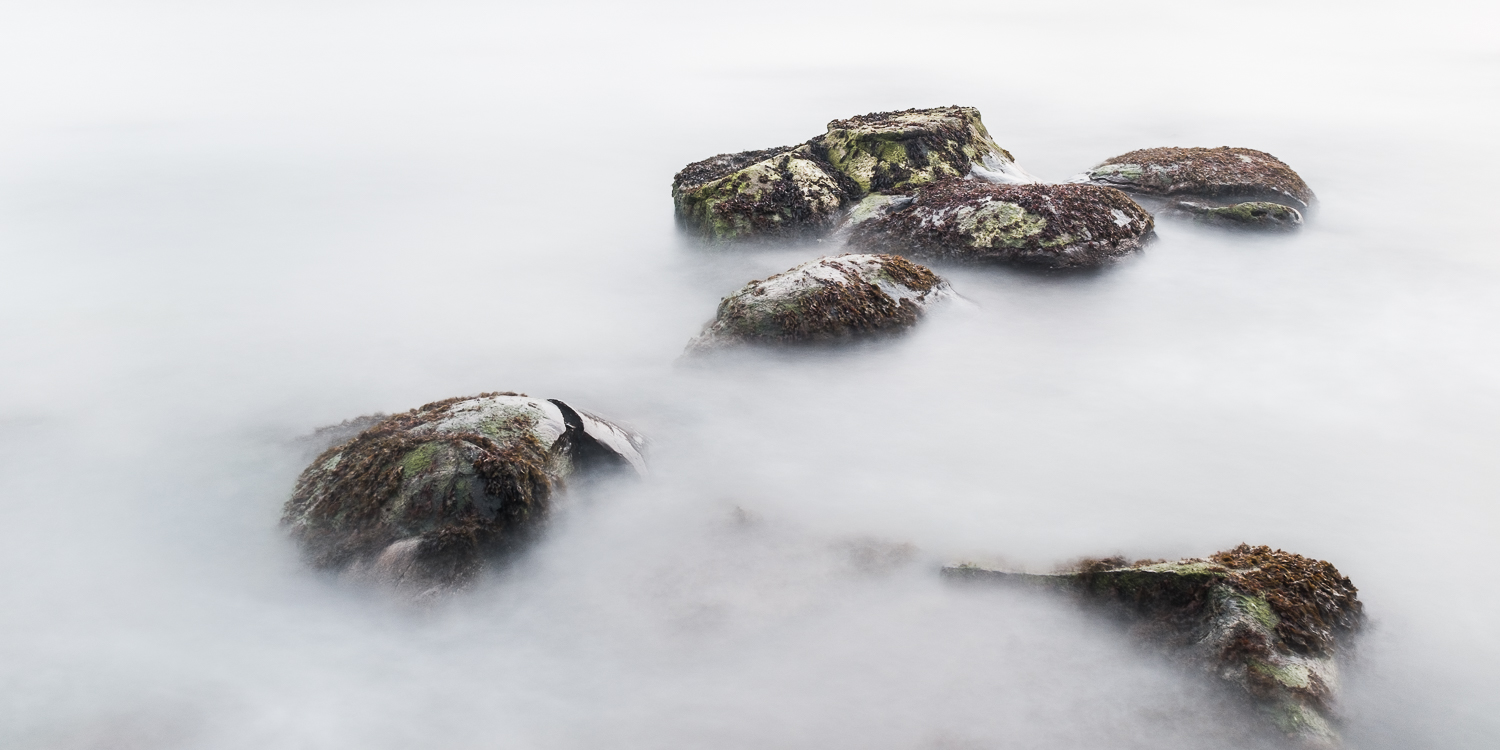
Another thing I missed (because I don’t have it) is the ability to use filters on the Fujifilm x100T. The camera has a built in ND filter (3 stops) but this is not enough for flatting out water surfaces or for streaking cloud movements over a long distance. It does help to lengthen your shutter speeds a little when shooting at dawn or at dusk, but it is not enough in most situations with broad daylight. This could be solved by investing in a filter system for this camera, there are several systems available on the market, like for instance the LEE seven 5 system. (there are two pictures below with the sea flattened out, they are taken late in the evening at a shutter speed of 30 seconds.

that’s about it, the rest was comfort 😉

Oh by the way, there’s a lot of ranting going around about these system camera’s and battery life. I had two batteries, did not finish the first one the first day, which lasted from 6:31:51 am. (first picture) till 22:31:58 pm. (last picture). Of course I did not take a massive amount of images (92) because my main task is teaching, but in landscape photography I never do.

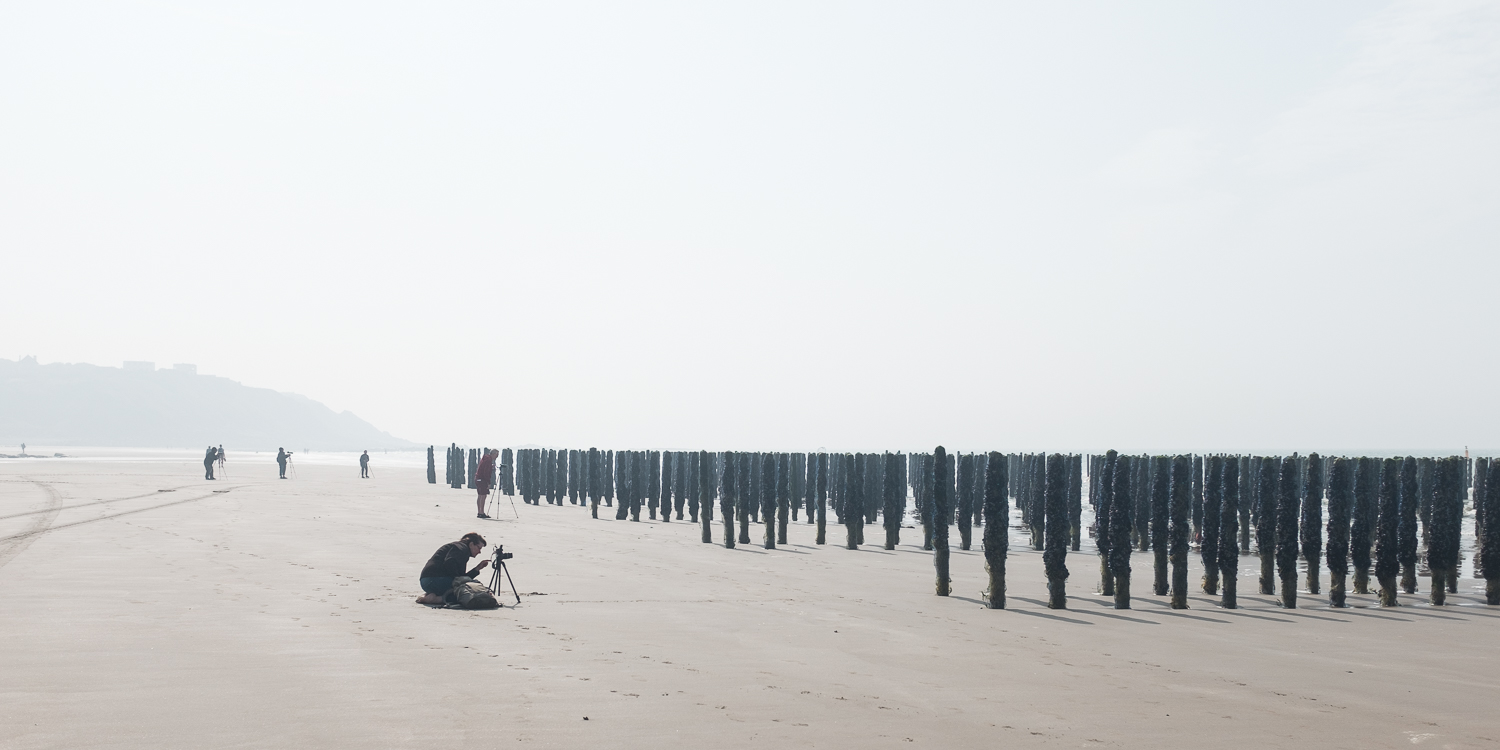
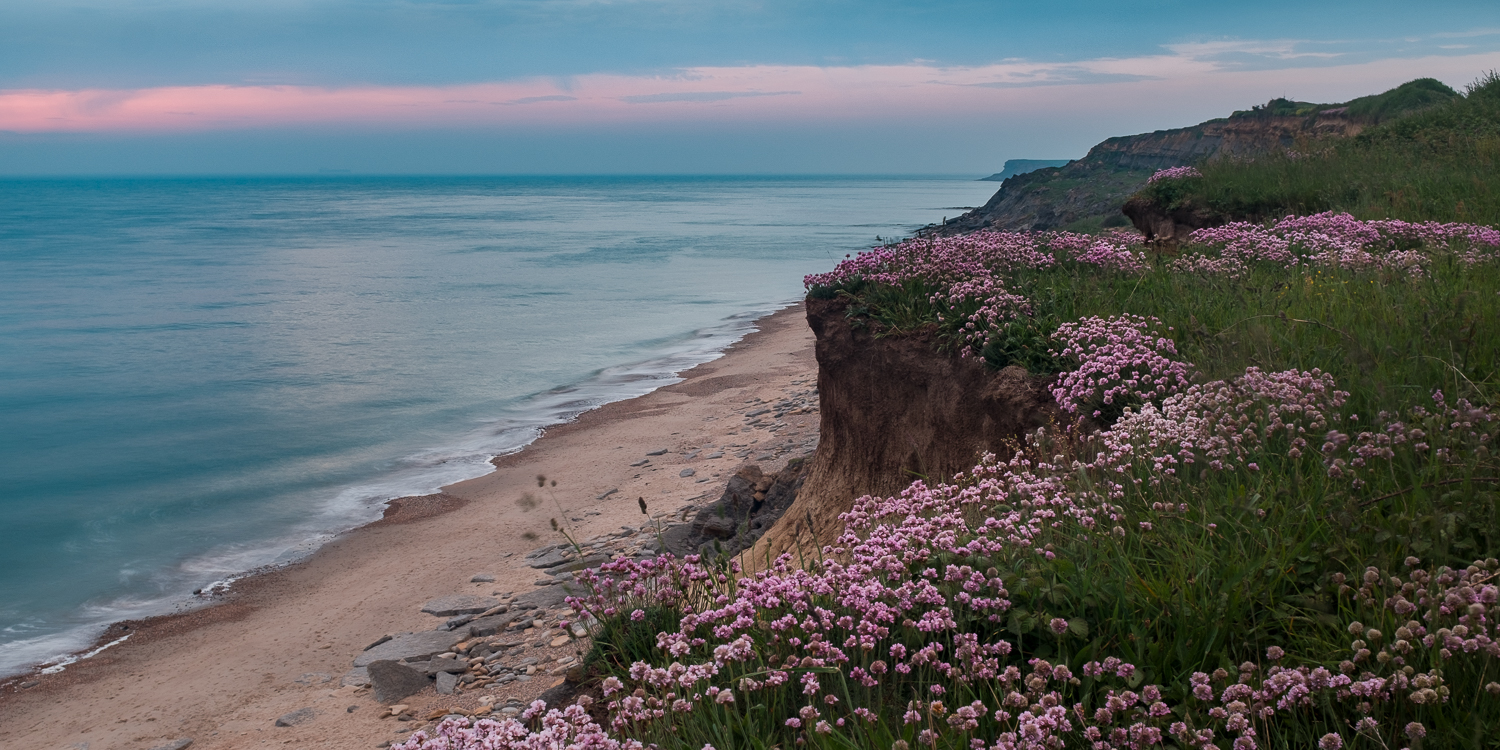
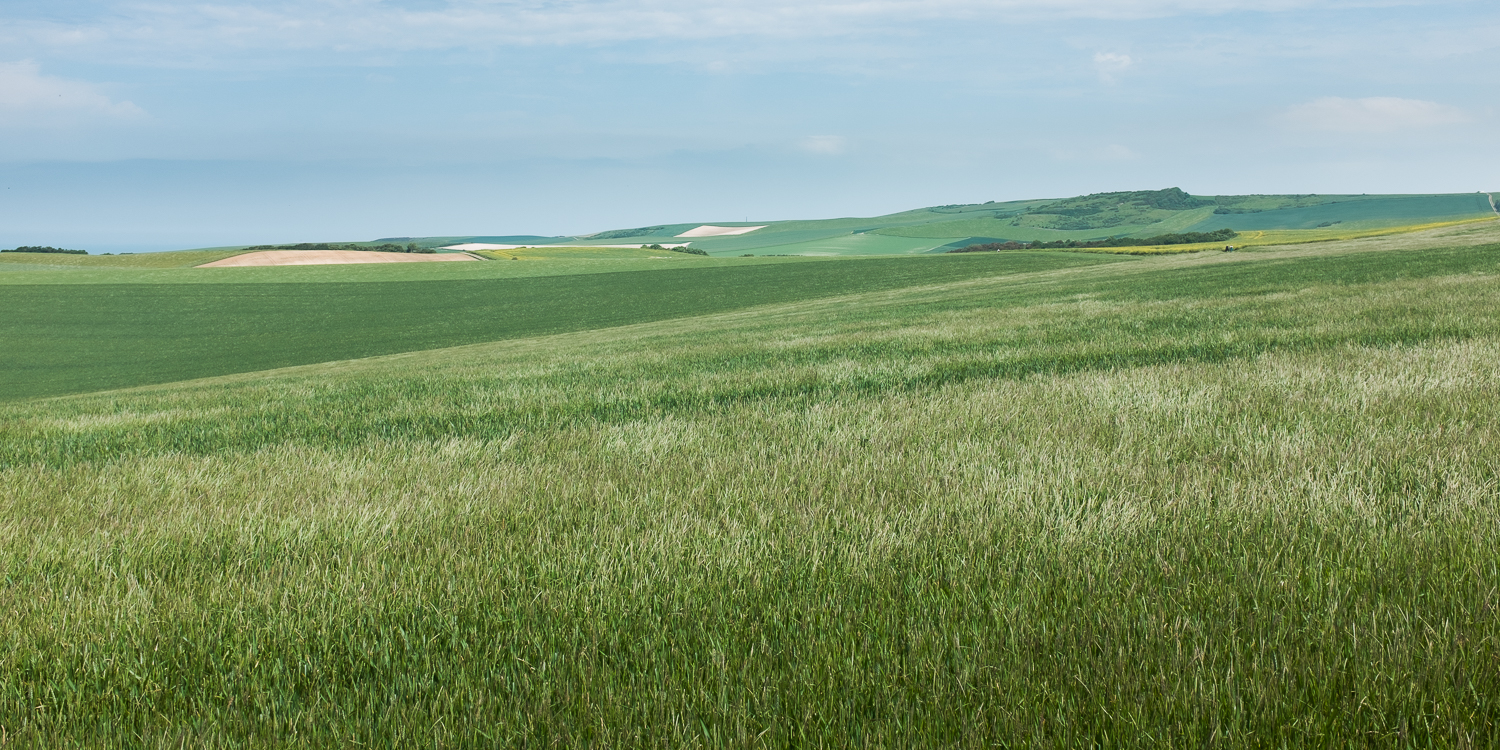
some images of our trip, with the occasional student in the frame.

I cropped all images to the same 2×1 ratio, I kind of like them that way.


Thanks for viewing, if you have any questions about this article, please comment, and on a side-note, after seeing my images of this weekend, I might sell this camera to buy its successor, the x100F, so if you are interested in buying mine, drop me a line.

Ludwig


Very important reading if you care about your digital camera sensor.

Interesting Links, Internet tips and tricks, tests

I have recently found out that:

Concert laser shows, and other laser sources can, literally burn your DSLR sensor. The problem has not been very obvious for a long period of time, since we used to take only stills with DSLR’s, exposing the sensor for only a very short period of time. The shorter the exposure, the less chance there is that the laser beam hits the sensor at that very particular moment.

Now that DSLR’s are also capable of filming, the problem is appearing more frequently. While filming with your DSLR, the mirror of your camera is up, and the sensor exposed. Laser beams although often spreading over distance a little bit, are known for their very linear and small beam. This beam hitting the lens, then refocused on the sensor, can ruin your sensor at the very first hit.

there is a lot of documentation on the subject on the internet (search for ‘laser beam killing sensor’) but I think this single movie tells the whole story.

https://www.youtube.com/watch?v=qzyKLoEDb64

Someone filming with a Canon 5D mark II (a 2500$ camera) not aware of the possible damage that might occur. At the end of the song, his sensor is turned completely useless.

Beware if you care.

Ludwig

PS.: Share if you have other friends with digital gear, interested in picking up on a concert from time to time, … Same thing can happen to your video camera, and I suppose to your cellphone camera sensor too.

Battle of the 50’s Part II – Canon 50 mm f1.4 USM vs. Sigma 50 mm f1.4 DG HSM Art

Personal Pictures, photo gear, tests

A lot of good rumors about the Sigma 50mm Art that was announced for the end of April. I have decided to order one as soon as it was available here in Belgium, and I wanted to do a comparison between this praised newcomer and the 50 mm f1.4 I have been using since about two years. (see battle of the 50’s for a comparison between Canon’s cheap (fantastic plastic) 50 mm f1.8 and the second in line 50mm f1.4 from Canon as well)

So this time a comparison between the Sigma 50mm f1.4 DG HSM Art and the Canon EF 50 mm f1.4 USM.

Both aimed at the full frame market, a rather old design for the Canon, brand new for the Sigma, part of the ‘Art’ series of new lenses from the latter.

In my photography I often have to deal with difficult light situations (I mostly work with natural light only) in dim lit interiors. I so have decided a couple of years ago to mainly go with fixed focal length lenses with big apertures. I currently have a Canon 24 mm f1.4 L II, a 50 mm f 1.4 (Canon and Sigma, although the Canon has already been sold and will be transferred to its new owner as soon as this test is over) a Canon 85 mm f1.8, a Canon 100 mm f2:8 macro (NEW) and a Canon 135 mm f2.0 L. A lot of glass and a lot of weight in my photo bag.

Additional weight for this 50 mm lens from Sigma too, compared to the Canon f1.4 (290 g) the Sigma comes at 815 grammes, meaning a lot more weight to carry. In combination with the Canon 5D mark II I use, this combo weighs about 1700 grams all together. My wife complained about the weight when I had her review the images of my last shoot.

The design of the Sigma lens is definitely more attractive, with is matte finish and sleek all black no colors approach. It comes with a hood and caps, and a square semi-hard lens case. The price here in Belgium is 839 € (Art & Craft pre-order) while the Canon comes at 339 € at the same shop.

All images for this test have been taken in my backyard or home studio, no special things going on here, except for young vegetable sprouts struggling against the spring rains we had lately.

As far as needed, all images are taken with tripod, live view magnification for focussing and with the same 5D II camera. Self timer to prevent touch shake.

The images show the entire scene on top, 100% crops from unedited images (except standard sharpening in LR5) below. The aperture setting is mentioned on every crop. All Jpg’s are saved at 100% quality. Take care, some of these images are big! All these images are for informational purpose only, no legal claims made!

You should really look at the images full size to be able to judge on the results obtained!

Sharpness center and edge:

Left to right: Canon center sharpness, Sigma center sharpness, Canon edge sharpness, Sigma edge sharpness.

Full size on click, 11.9 Mb Jpg file.

Sigma vs Canon 50mmtest-sharpcomp

My observations:

Center sharpness Canon: soft wide open, reaches full sharpness at f2.8, stays sharp till f8.0, a little diffraction softening at f16

Center sharpness Sigma: similar sharpness wide open as the Canon at f2.8, small increments of additional sharpness till f8.0, clearly visible diffraction effects at f16

Edge sharpness Canon: strong image distortions in this part of the image at f1.4 and f1.8, as if the image has had a rotational blur, gradually improving image quality, acceptably sharp at f8.0, soft degradation at f16

Edge sharpness Sigma: similarly sharp at f1.4 as the Canon at f1.8, but no distortions, f4.0 similar to Canon at f8.0 and sharpest at f8.0 and better image detail as the Canon at f8.0. More diffraction degradation at f16 than Canon.

Note the strong vignetting on the Canon f1.4 USM when used wide open. Less visible on the Sigma.

Vignetting is becoming invisible at f4.0 for the Canon, at f2.8 for Sigma.

Minimal focussing distance. Sharpness and magnification:

the minimal focus distance for the Canon is 0.45 m, for the Sigma it is at 0.4 m, so a bigger magnification is possible.

Another set of images, both showing the magnification comparison, and a crop showing sharpness with different apertures.

Sigma vs Canon 50mmtest-minfocus

my observations:

similar as previous test, very weak performance at the image edge for Canon, at least one stop better sharpness for the Sigma in both center and edge.

The Sigma lens has however more problems with purple fringing when used wide open (note the hairs on the plant stem). This reminds me of the ‘quick’n dirty 85mm lens test’ I did a couple of years ago, where similar fringing problems where appearing with the Sigma 85 mm f1.4

Chromatic Aberration and color fringe:

I remember from the previous test that the Canon proved horrible in the shots with the branches agains bright background. Let’s see what the Sigma does in comparison. I had no clear sky as the previous time today, but I kind of see the same things happening here.

Sigma vs Canon 50mmtest-CA center

Sigma vs Canon 50mmtest-CA edge

The Canon f1.4 USM suffers from severe fringing in high contrast areas, when used wide open. (strange that this phenomenon did not show in the plant close up) This is even apparent in live view, making it hard to focus correctly. When stopping down to 2.0, this greatly improves, and then we see similar things in both lenses, the Sigma not noticeably performing better in this aspect, showing purple fringing in front of the focus area, green fringing behind the focus plane.

In both examples in this test however (overcast sky, dull weather) I have noticed very little CA in both lenses, a little bit of cyan-orange at f8.0 in the Canon image close to none in the Sigma. I suppose that in higher contrast situations, that might be worse. (to be confirmed).

Worth noticing in this respect is that the Sigma 50mm Art lens profile is not yet currently available in the standard Lightroom 5.4 upgrade, nor could I find a link to a profile for this lens on the web (may 13, 2014)

Longitudinal CA:

Chromatic aberration that is visible in the unsharp areas in front and behind the sharp area. Not the magenta shift in front of the sharp area, the green shift behind. Both images taken at f2.0. Remarkably higher in the Canon. Note the big difference in sharpness and contrast in the sharp areas between the two of them. Best viewed at 100% of course.

Sigma vs Canon Longitudinal CA

Flare:

Canon to the left, Sigma to the right.

Sigma vs Canon 50mmtest-Flare

My observations: Do I really need to? It’s obvious I guess.

Bokeh:

Canon to the left, Sigma to the right. I think Sigma’s bokeh is softer and smoother. In the Canon unsharpness, there is still some structure and noise. Not 1/1 images but big enough to analyze.

Sigma vs Canon 50mmtest-Bokeh

Thank you for reading, I think I will keep my Sigma, and trade on the Canon.

You are welcome to share this comparative review, I take no responsibilities of any kind 😉

come back again for some real world image samples of this lens in my shoots!

best,

Ludwig

Battle of the 50’s

Personal Pictures, tests

Hi,
last week I bought a new 50mm lens from Canon. I had the 50mm f1.8 II before, but sold it last week, and I bought the 50mm f1.4 USM. Did I make the right decision? Time to find out.
So after my excellent, quick’n dirty test for the 85mm lenses, time to have the 50mm’s compared.
The images are rather big for your convenience, sorry about the download time.

On the left the 50mm f1.8 II selling for 90 Euros, on the right the 50mm f1.4 USM, selling for 299 Euros. (prices Art&Craft – Ghent jan. 2012)

Just before I shipped my old 450D and the nifty fifty (or fantastic plastic) I took some comparison shots with both of them.
All images are taken on tripod, with a Canon 5D II, with Live view magnification for focusing (manual mode). White balance set to 5600 (flash). The images have not been processed, except for my standard processing settings at Lightroom import, so they all present in the same way. All images are saved jpg compressed, quality setting 11, from Photoshop, with sRGB IEC61966-2.1 profile attached, I don’t know what happens to the profile when publishing to WP.
I have chosen my subjects in a way to provide some real-life hard time situations for the lenses. Any comments welcome, suggestions, or if someone, or some big company wants me to do some tests on other lenses, please give me a sign. All images are done in my backyard, no exotic things going on here.

Now for the results, I will post some personal ideas, but you don’t have to agree on them, just my opinion.

Vignetting test


Some heavy vignetting on both of them, in my opinion a bit better for the 1.4 at 1.8. Note the color difference between the two lenses.

Sharpness test Same setup as vignetting pictures, 100% crops, click on the image to view full size.
Center:

Edge:

To me the 1.4 seems sharper on the entire line. I know a lot of tests seem to give opposite results and quote the 1.8 higher than the 1.4. A lot gets lost in the corners due to vignetting, but the center crop looks crisper on the 1.4.

Sharpness test2
Entire scene:

100% crops, click on the image to view full size.
Center:

Edge:

Here too I think the 1.4 is a tad sharper. This can be due to better contrast too. Same in the edge as in the center, although it is hard to see some difference at bigger apertures.

Flare test I forgot to do a test at 1.8 for the 1.4. So both of them are wide open shots.

The 1.4 clearly has more flare here, but also keeps a little more contrast in the center of the image. The cheap 1.8 does very well. I will take a shot at 1.8 with the 1.4 as soon as we get some sun in the morning.

Bokeh test Two different scenes, each time I show background and foreground bokeh. Sorry about the leaf that moved. These crops are at 50%, because in a 100% crop I couldn’t present enough image. You can see the entire shot in the top-righ corner.


To me there’s really very little difference, except that on the 1.4 you have a little softer when wide open, seems normal to me. On the other hand, when you look at the second sample you start seeing one of the biggest problems with the 1.4, purple fringing on the highlight edges.

Chromatic aberration and purple fringing center and edge crops at 100%. Note that the second image for the 1.4 is at f2.2

Entire scene:

Center crops:

Edge crops:

Ouch, that really really hurts! Never seen it soooo bad! Here the cheap nifty fifty clearly wins hands down. I made a little mistake, taking my second shot at 2.2 in stead of 1.8 for the 1.4, and it still is worse than the 1.8.
Also remark that both lenses loose contrast when stopping down too far. The branches are softer at f14 than at f7.1. I didn’t really got the image perfectly sharp with the 1.8 but I think the message is clear enough here. With the 1.4, CA on the edges never completely disappears until f14, and then contrast is gone already.

Personal conclusion
Am I happy with my new purchase, I don’t know yet. Practical use will need to prove.
– – – –
It has some serious problems with the purple fringing and Chromatic aberration, as well as with flare, compared to the nifty fifty.
It’s more expensive than the 50mm 1.8 (which really is a cheap lens for the image quality offered)
+ + + +
The sharpness results please me though, although I had read not so good reviews before, for me it is sharper than my copy of 50mm 1.8, and a little more contrasty.
It has USM autofocus, which is way faster and more accurate than the micro motor in the 1.8
It is more solidly built than the 1.8, which even has a plastic bayonet.
It is 2/3’s of a stop faster.
It is still quite cheap for a fast prime, at less than 300 euros.

Thank you for reading!

Ludwig.